Table of Contents
Advertisement
installation and
servicing
Harrier GTS
Your Ideal installation and servicing guide
GTS 5, GTS 6, GTS 7, GTS 8, GTS 9
300014485-001-C
When replacing any part on this appliance, use only spare parts that you can be
assured conform to the safety and performance specification that we require. Do not
use reconditioned or copy parts that have not been clearly authorised by Ideal Boilers.
Advertisement
Table of Contents

Related Manuals for IDEAL Harrier GTS 5


Summary of Contents for IDEAL Harrier GTS 5
- Page 1 When replacing any part on this appliance, use only spare parts that you can be assured conform to the safety and performance specification that we require. Do not use reconditioned or copy parts that have not been clearly authorised by Ideal Boilers.
-
Page 2: Hydraulic Resistance
Installation and Servicing Instructions or as otherwise Oil rates relate to Gas Oil using a calorific value of 45.56 MJ/kg recommended by Ideal Stelrad Group in writing. If in doubt gross or 42.69 MJ/kg nett. please enquire. -
Page 3: Table Of Contents
GENERAL CONTENTS Harrier GTS Gas and Fuel Oil Assembly..............11-28 PI No. 1312 BR 4783 Destination Countries: GB, IE Boiler Clearances............. 6 Burner Connection............11 Commissioning and Testing........32,33 Electrical Connections........... 30 Electrical Supply............... 5 Flue Installation. -
Page 4: Gas Safety Regulations
Further guidance is provided in IGE/UP/2 as listed above. General requirements. Assembly and Installation Instructions for Ideal Harrier GTS heating boilers should be read in conjunction with the general technical data tables enclosed and any other technical publication supplied with the burner. -
Page 5: Electrical Supply
The system pump MUST be connected to the boiler. treated. Even the water in closed systems will promote corrosion unless treated. For the reason stated, Ideal Stelrad The boiler must NOT be used for direct hot water supply. The Group strongly recommend that when necessary the systems is hot water storage cylinder MUST be of the indirect type. -
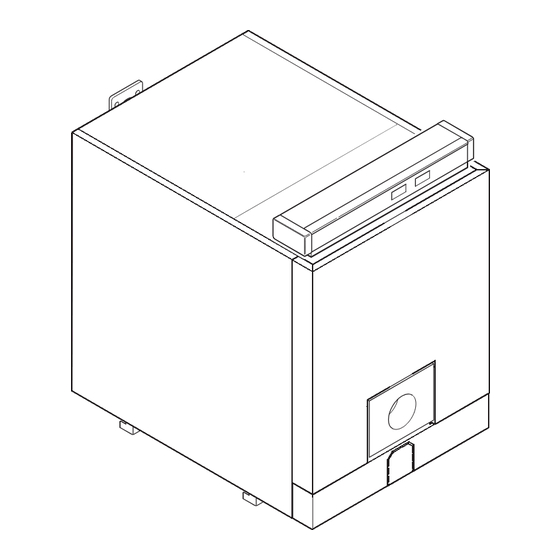
Page 6: Boiler Clearances
GENERAL BOILER DIMENSIONS har9077 Boiler GTS 5 GTS 6 GTS 7 GTS 8 GTS 9 1297 1297 1297 1297 1297 1151 1311 1471 1631 1791 1130 1290 BOILER CLEARANCES The minimum dimensions as indicated must be respected to ensure good access around the boiler. 0 . -
Page 7: Ventilation
GENERAL VENTILATION Position ventilation grilles to avoid the risk of accidental Safe, efficient and trouble-free operation of conventionally obstruction by blockage or flooding. If further guidance on flued gas boilers is vitally dependent on the provision of an ventilation is required then consult BS 6644. adequate supply of fresh air to the room in which the appliance is installed. -
Page 8: System Design
GENERAL OPEN VENTED SYSTEM REQUIREMENTS - minimum static head requirements The Harrier GTS boiler has a minimum static head requirement of Open vent safety pipe 5.0 metres (16.5 feet approx.) depending on the particular 750mm characteristics of the system design (see diagram). The information provided is based on the following assumptions. - Page 9 Heating and/ condensation is required. or hot water controls should be interlocked electrically with the burner, to prevent firing when the system does not demand Please contact Ideal Stelrad Group for further information. heat. Example of Installation Typical Sealed System Example...
-
Page 10: Fluing
INSTALLATION 10 FLUING According to the output, the difference between the temperature of 1000mm min. the flue gas and the ambient temperature can be as low as 160 The installer will have to respect all of the usual precautions (dilution - piping - T for removal of condensation) in order to prevent deterioration of the chimney. -
Page 11: Assembly
INSTALLATION 12 BURNER CONNECTION Burner Door Opening and Fixings Gas Supply The gas supply MUST be sized in accordance with British Gas recommendations. Stud tappings The Local Gas Authority should be contacted, at Burner a stage prior to actual installation, for any advice door or information required. - Page 12 INSTALLATION 14 PREPARING THE BASE FRAME 1. Insert the inner cross members into the slots in the side 2. Assemble the front and rear components into the ends of the components. side components and secure with the 4 bolts. 15 FITTING THE BASE FRAME INSULATION 1.
- Page 13 INSTALLATION 16 POSITIONING THE REAR SECTION 1. Place the rear section in its required position and support with a wooden block. 2. Position the base frame up to the rear section and insert the two lower tie rods. 3. Slide the spacer over the rear end of the threaded tie rod before passing it through the rear section 4.
-
Page 14: Assembly
INSTALLATION 18 FITTING THE THERMOCORD (This may be conducted before Frame 16 with the sections laid 2. Working from point A, insert the thermocord into the groove. flat on the floor) 3. Cut it to the correct length 1. Put a drop of silicone at about every 200mm of the groove. 4. - Page 15 INSTALLATION 20 ASSEMBLING THE INTERMEDIATE SECTIONS CONT'D Proceed likewise for other intermediate sections 20 cm Harrier GTS - Installation & Servicing...
- Page 16 INSTALLATION 21 ASSEMBLING THE FRONT SECTION AND PULLING UP COMPLETE ASSEMBLY 1. Remove the M12 nuts and washers from the front end of the threaded rods and slide backwards. 2. Complete the assembly with the front section. 3. Insert the assembly tool through the nipples and tighten.
- Page 17 INSTALLATION 23 ASSEMBLING THE BURNER AND FLUE CLEANOUT DOORS 1. Position the Burner door in place and insert the hinge pin. 2. Close the burner door and secure evenly with four M12 nuts and washers. 3. Position the flue cleanout door hinge bracket as shown and secure with two M12 nut and washers.
- Page 18 INSTALLATION 24 POSITIONING THE FLUE BAFFLES IN THE UPPER FOUR FLUEWAYS 1. Models GTS 5 and GTS 6. Place 2 flue baffles in each of the four upper flueways. 2. The baffles should be hooked together as shown. 3. Models GTS 7, GTS 8 and GTS 9. Place one flue baffle only in each of the four upper flueways.
- Page 19 INSTALLATION 26 FITTING THE THERMOSTAT SENSOR POCKET AND PLUGGING THE UNUSED TAPPING 1. Apply some thread sealing tape or compound to the sensor pocket, reducing bush and bottom tapping plug. 2. Screw the threaded bush with the sensor pocket into the upper connection and the plug into the lower connection.
- Page 20 INSTALLATION 28 ASSEMBLING THE FLOW, RETURN AND DRAIN COCK 1. Coat the threaded and tapped connections of the sections, pipes and drain cock with thread sealing tape or compound (not supplied). 2. Screw the flow and return pipes and the drain cock into the rear section.
- Page 21 INSTALLATION 29 HYDRAULIC TEST After assembling the boiler body, the installer must carry out a water tightness test at a hydraulic pressure of 1.5 times the design pressure for a period of 30 minutes. The test must be done at room temperature. 1.
- Page 22 INSTALLATION 30 INSTALLING THE INSULATING MATERIAL 1 4 0 1. Models GTS 5, GTS 6 and GTS 7. Place the insulating material over the boiler, ensuring the lugs protrude through the top, wrap down the sides and tuck underneath. 2. Models GTS 8 and GTS 9. After fitting the front insulation similarly place the rear section.
- Page 23 INSTALLATION 31 INSTALLING THE CASING CROSSBAR SUPPORTS 1. Fit four edge clips to the crossbars. 2. Secure the crossbars to the front and rear section lugs using the M12 bolts, washers, shakeproof washers and nuts. (Note the direction of the crossbar to ensure the edge clips fit from the front.) 32 INSTALLING THE MAINS AND SENSOR CABLE TRAYS 1.
- Page 24 INSTALLATION 33 ASSEMBLING THE CASING SIDE PANELS 1. Engage the panel bottom onto the base frame. 2. Raise the panel to its vertical position and lift over the crossbar supports. 3. Secure the top edge to the front crossbar support using M8 bolts and shakeproof washers by screwing into the edge clips.
- Page 25 INSTALLATION 34 ASSEMBLING THE REAR PANEL 1. Place the panel in position 2. Engage the plastic push clips. 3. Secure the panel at each corner with two self tapping screws and shakeproof washers. Note. If a pressure relief valve has already been fitted in the flow connector or if the panel is being replaced on a completed installation, the top centre piece of the panel may be...
-
Page 26: Installing The Control Panel
INSTALLATION 36 INSTALLING THE MAINS AND CONTROL WIRING 1. Route the mains supply in at the rear, along one of the cable trays and up through the opening in the top front panel. 2. Route any remote sensor cables similarly in the other cable tray. 3. - Page 27 INSTALLATION 38 INSTALLING THE SENSORS AND ROUTING THE BURNER CABLE 1. Route the burner cable inside the front edge return of one side of the casing side panels opposite the burner hinges. (RH side shown for clarity) 2. Insert the sensors into the sensor pocket.
- Page 28 INSTALLATION 41 ASSEMBLING THE REAR TOP PANEL 1. Engage the location buttons on the side panel into the keyhole slots in the top panel and slide the panel forwards. 2. Secure the panel at the two top rear corners with two self tapping screws and shakeproof washers.
-
Page 29: Electrical Connections
INSTALLATION 43 CONTROL PANEL (General) Refer to Frame 50 for specific details of panel. Electrical control panel, equipped with temperature control. The boiler thermostats - one controls the maximum boiler operating temperature. The other controls the high/low The control panel carton contains: operation if a 2 stage burner is fitted. -
Page 30: Wiring Diagrams
INSTALLATION 46 CONNECTING OPTIONAL FEATURES Flow Switch / Optional Safety Devices If a flow switch or other safety control is to be included in the system, connect the device(s) in series in the safety circuit, (i.e. between terminal 5 of the connecting strip and burner terminal L1). - Page 31 INSTALLATION 48 BURNER WIRING HARNESS Burner Cable The control panel is supplied with a burner power supply cable, with one 7 and one 4-pin European plugs on one end and a terminal block with male connecting terminals 7-pin plug for Terminal block for 4-pin plug for on the other end.
- Page 32 INSTALLATION 50 COMMISSIONING IMPORTANT. Domestic hot water circuits (if they exist) and Refer to the following instructions and Frame 53 to start up the heating circuits must have been filled and bled, and leak boiler. tightness tests must have been carried out on them, in the instructions delivered with the burner.
-
Page 33: Initial Lighting
INSTALLATION 52 COMMISSIONING AND TESTING A. ELECTRICAL INSTALLATION B. FOR GAS INSTALLATION 1. Checks to ensure electrical safety should be carried 1. The whole of the gas installation, including the meter, out by a competent person. should be inspected and tested for soundness and then purged in accordance with the recommendations of the 2. -
Page 34: Servicing
SERVICING 56 MAINTENANCE WARNING The operations described below shall always be performed with the boiler and the power supply switch off. The boiler front panel has to be removed to access the various devices to be maintained and checked. Slide the front panel up and pull forwards. Cleaning the Casing Material Use a soapy solution and sponge only. -
Page 35: System Maintenance
90% of the nominal, no further action need be taken. If not proceed to 4. Ideal Stelrad Group does not accept any liability resulting from the use of unauthorised parts or the repair and servicing 4. - Page 36 Technical Training The Ideal Boilers Technical Training Centre offers a series of first class training courses for domestic, commercial and industrial heating installers, engineers and system specifiers. For details of courses please ring: ..01482 498 432 Ideal Boilers, P.O. Box 103, National Ave, Kingston upon Hull, HU5 4JN.