Table of Contents
Advertisement
Quick Links
Contents
Before Starting ................................................................................................................. 1
Using the Programming Menu................................................................................ 1
Using Buttons ................................................................................................................ 2
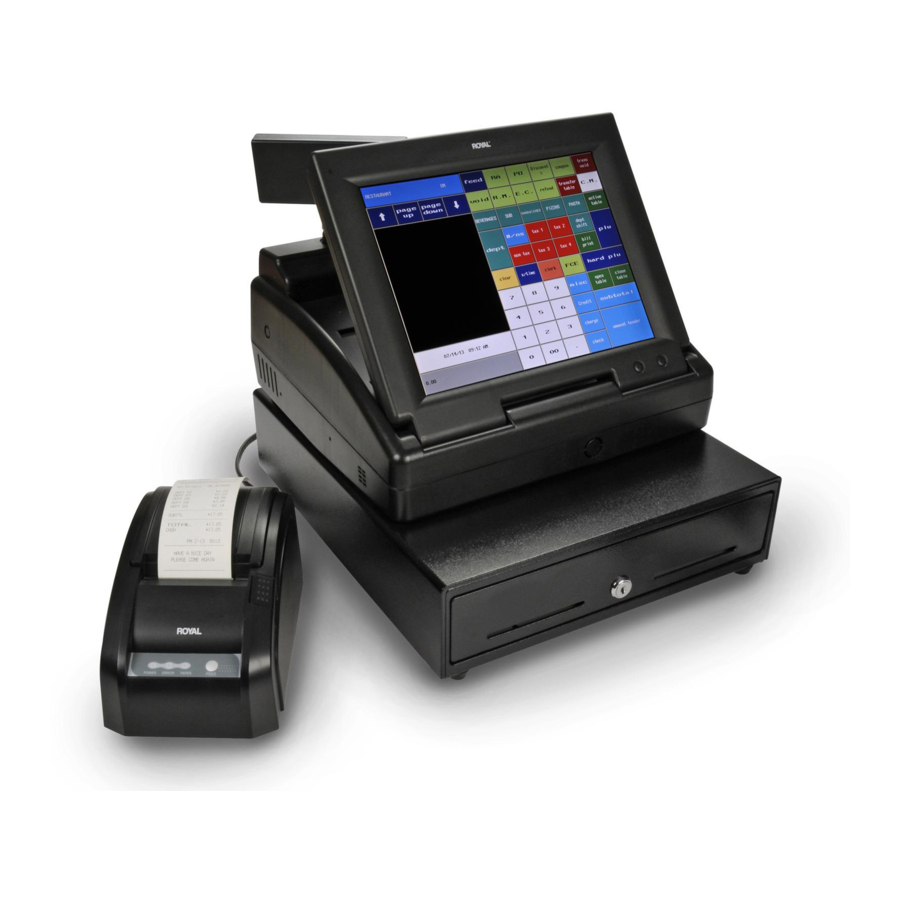
What's in the Box?........................................................................................................... 2
Important Phone Numbers.......................................................................................... 2
Getting Started................................................................................................................. 3
Setting the Language ................................................................................................. 5
Installing the Paper Roll ............................................................................................. 5
Setting the Date And Time ....................................................................................... 6
Programming the Sales Tax...................................................................................... 7
PC-Based Software.......................................................................................................... 8
Turning the Register Off and On..............................................................................10
Using the Mode Key Area...........................................................................................11
About the Displays........................................................................................................11
Lifting and Lowering the Customer Display.....................................................12
Adjusting the Touch Screen ...................................................................................12
Using the Touch Screen ..............................................................................................13
i
Advertisement
Table of Contents

Related Manuals for Royal ts1200mw


Summary of Contents for Royal ts1200mw
-
Page 1: Table Of Contents
Contents 1 Welcome Before Starting ......................... 1 Using the Programming Menu................1 Using Buttons ........................ 2 What’s in the Box?......................2 Important Phone Numbers..................2 2 Getting Started Getting Started......................... 3 Setting the Language ....................5 Installing the Paper Roll ..................... 5 Setting the Date And Time .................. - Page 2 Programming PLUs with the Optional Barcode Reader .......40 Mapping PLUs to Direct PLU Keys ................40 Editing a PLU ........................41 Deleting a PLU ......................42 Printing the Program Confirmation Report ............42 Before Going to Register Mode ................43 Running the Options Dump Report................43 Clearing Errors......................43 TS1200MW User’s Guide...
- Page 3 418 [Credit] Name ......................59 419 Cooking Message Set ..................59 420 Happy Hour Setting ..................59 421 Picture Logo Choice..................59 422 Counter /No Setting..................60 423 PC Communication ...................60 424 ISP Upgrade ......................60 425 Version Information ..................60 426 System Information...................60 TS1200MW User’s Guide...
- Page 4 Ringing up Sales without a PLU Number............62 Ringing up Sales with a PLU Number..............63 Ringing up Sales with a Direct PLU Key..............63 Ringing up Sales with the Optional Royal Barcode Reader......64 Printing Receipts......................64 Receipt on Demand ....................65 Using Tables ........................65 Opening and Closing Tables...................65...
- Page 5 Opening the Cash Drawer When There is no Power ........98 Performing a Partial Reset..................99 Performing a Master Reset..................99 If Nothing Helps ......................99 Error Messages ......................100 12 Examples Transaction Codes...................... 104 Sample Receipt......................105 Adding Tax to a Non-Taxable Department............106 Active Table Pickup ....................106 TS1200MW User’s Guide...
- Page 6 Paid-Out Sale........................ 114 Percentage Discount Sale..................114 PLU Sale.......................... 115 Received-On-Account Sale..................115 Registering a Department Unit Price..............116 Registering a Reference Number/Message............116 Return Sale ........................116 Refunding Cash ......................117 Split Tendering Sale....................117 Transferring Tables..................... 118 TS1200MW User’s Guide...
- Page 7 Voiding an Entire Sale before Finishing the Sale ..........124 Voiding a Sale ......................125 Product Information Specifications and Safety..................126 Safety and Legal Notices ..................127 CAUTIONS AND WARNINGS ................... 127 Software Licensing Agreement................129 Manufacturer’s Limited Warranty................. 130 Memo .......... 132 Index ................... 133 TS1200MW User’s Guide...
-
Page 8: Welcome
C HAPTER Welcome Congratulations on purchasing your new Royal cash register! This register is designed to be easy to use, helping you to focus on running your business. Before Starting Before you start using this manual to set up and customize your cash register, you should know the information in this chapter. -
Page 9: Using Buttons
• 2 sets of keys. 1 set consisting of 2 marked Reg and 2 marked Z Another set of smaller keys to manually lock and unlock the cash drawer. • 1 starter roll of standard thermal paper, Royal Reorder Number 013127 (2¼ inch or 57.5 mm wide) •... -
Page 10: Getting Started
Getting Started This chapter helps you understand what the setup options are to help you customize the setup. Note If you make a mistake while you are programming, press the Clear key. TS1200MW User’s Guide... - Page 11 The cash register initially starts in Restaurant mode. You can change this to Retail mode, if needed. if you change your mind later, changing modes deletes all programming you entered. For more information about programming the mode, see Working Mode on page 56. TS1200MW User’s Guide...
-
Page 12: Setting The Language
You can select the cash register to use English, Spanish, or French. Important Not all versions of the cash register support multiple languages, call Royal at 1-800-243-4002 for more information. Changing the language changes the factory programmed words you and the customer see on the displays. -
Page 13: Setting The Date And Time
3 Select System Configuration Settings. Press Enter. 4 Select Date Adjust. Press Enter. Press the Enter key again. 5 At the prompt, use the Number keys to enter the date. For example, to enter June 30 2007, press 063007. Press Enter. TS1200MW User’s Guide... -
Page 14: Programming The Sales Tax
You can also set the maximum non-taxable amount (the highest amount at which taxes are exempt) or tax limit. This section explains setting simple sales tax in the United States, the default. See Selecting the Tax System on page 72 for other sales tax systems. TS1200MW User’s Guide... -
Page 15: Pc-Based Software
• Additional Cash Registers - When you buy additional cash registers, you can use the back-up-and-restore feature with multiple registers of the same model number. Just program one register, back-up the data to your PC, and then restore or download the data from your PC to the other TS1200MW User’s Guide... - Page 16 Cash Register to a PC on page 94. The RegisterLink software is on a CD. Please install the software from this CD. Then check for updates on the Royal web site (www.royal.com). If a later version of the RegisterLink software is available on the website, download it from the web site and install it on your PC.
-
Page 17: Getting To Know The Cash Register
2 Press the switch towards the back of the cash register to turn it ON. To turn the cash register off 1 Locate the power switch on the right side of the cash register. 2 Press the switch towards the front of the cash register to turn it OFF. TS1200MW User’s Guide... -
Page 18: Using The Mode Key Area
When you move the register or store it, lower the display so it doesn’t get damaged. Your cash register has a 1 line customer display that shows letters and numbers (alphanumeric) The alphanumeric display shows 10 digits for descriptions and sales dollar amounts. TS1200MW User’s Guide... -
Page 19: Lifting And Lowering The Customer Display
Place the legs in a slot. d Try the different slots until you like the angle of the touch screen. 4 Gently press down on the touch screen to make sure it is seated firmly in place. TS1200MW User’s Guide... -
Page 20: Using The Touch Screen
Chapter 3 Getting To Know the Cash Register Using the Touch Screen The restaurant touch screen on your cash register looks similar to the following: The retail touch screen on your cash register looks similar to the following: TS1200MW User’s Guide... - Page 21 Use this key... Enter single entry coupon discounts Feed paper through the printer On Printer Use Received On Account Use one of three preset discounts or add-ons Return Merchandise Use Cash Paid-Out Apply one of four Foreign Currency options TS1200MW User’s Guide...
- Page 22 You see a prompt on the clerk screen to help you If pressed before an item is entered, it overrides the tax on that item. Override the pre-programmed tax rate for an item with a different tax rate TS1200MW User’s Guide...
- Page 23 In Restaurant mode, enter a manual cooking message Open the cash drawer and ring a No-Sale transaction Void a line item, a specific amount, PLU, or C.M. entry Void entire current sales transaction Log on or log off a clerk TS1200MW User’s Guide...
-
Page 24: Using Power Saving Mode
After a specified period of minutes of inactivity, the cash register goes into sleep mode and the clerk display goes dark. The cash register does not actually turn all the way off, it just goes to sleep. To wake up the unit, tap the touch screen. TS1200MW User’s Guide... -
Page 25: Using The Cash Drawer
• You can also use the 777 key to mechanically lock the cash drawer. If you lock the cash drawer this way, you must have the key to open it again. Even the emergency open lever will not open the cash drawer when it is locked with the key. TS1200MW User’s Guide... - Page 26 • To unlock the cash drawer, turn the key to the middle position and remove the key from the lock. 2 To open the cash drawer manually (for example, if the cash register is unplugged), insert the 777 key and turn to the left. The cash drawer opens. TS1200MW User’s Guide...
- Page 27 2 Push the lever in the only direction it will move. The cash drawer opens. If the cash drawer will not open, make sure it is not locked with the 777 Drawer key. TS1200MW User’s Guide...
-
Page 28: Setting Up Your Cash Register - The Basics
After you select a mode, if you change to the other mode, you lose all your sales and programming information. This cash register has 2 modes: Restaurant mode and Retail mode. TS1200MW User’s Guide... - Page 29 Setting Up Your Cash Register for Restaurant Mode on page 44. Retail mode The TS1200MW includes specific features that make it easy to run your retail business, including: • Up to 300 Departments. You can program each Department with a name or description of up to 12-characters.
-
Page 30: Setting Alphanumeric Descriptions
Symbol key. There are 2 pages of available symbols. Important If you enter the wrong character, press the back space key to delete the character. Now you can continue. TS1200MW User’s Guide... -
Page 31: Using Double Wide Characters
5 Lines (12 characters each) To make a character print extra wide, press the double width key before each character as you type in the description. To turn off double width, press the double width key again. TS1200MW User’s Guide... -
Page 32: Setting Header Messages And Footer Messages
Before programming your header or footer message 1 Write out your store name and the header message you want to program. 2 After writing out your message, count the number of characters on each line. TS1200MW User’s Guide... - Page 33 2 Press the Arrow Down key to select 405 -- Text Message. Press Enter. 3 Press the Arrow Down key to select Header Message or Footer Message. Press Enter. 4 Select the line you want to program. 5 Follow the instructions on the screen. TS1200MW User’s Guide...
-
Page 34: Printing Picture Logos On Receipts
NOTE : You also see a choice for RAM LOGO. The RAM LOGO is a downloadable customer logo that you can set. To do so, you need a PC connection and the software tool included with this shipment. If the software was lost or not included, contact Royal. Logos selections are: Logo 1... -
Page 35: Printing Options On Receipts
To see the sales totals for each clerk, a Clerk Sales Report is available in both the X and Z modes. To set use the clerk system: 1 Program the clerk names and passcodes. 2 Activate the clerk system. 3 Set the clerk mode to Compulsory, if needed. TS1200MW User’s Guide... - Page 36 1 Put the MGR key in the Mode key slot and turn it to the PROG position. If prompted, enter the Manager passcode and press Enter. 2 Press the Arrow Down key to select 406 -- Options. Press Enter. TS1200MW User’s Guide...
-
Page 37: Using The Clerk System
After you activate the manager or X passcodes, you must use them every time you enter programming mode or enter the X or Z report modes, depending on which you activated. When you enter a passcode, it appears as asterisks ****** on the clerk display for extra security. TS1200MW User’s Guide... - Page 38 Chapter 4 Setting Up Your Cash Register - the Basics To set manager passcodes (also known as PRG/Z passcodes) 406 -- Options System Configuration Setting Passcode Setting 1 Put the MGR key in the Mode key slot and turn it to the PROG position.
-
Page 39: Setting The Machine Number
You can have as many as 200 departments on your cash register. If you have many departments, you may want to make a list so other people who use the cash register can correctly use the department keys. You can also group the departments, if you want. TS1200MW User’s Guide... - Page 40 Use the Page Up and Page Down keys to move to the next department. Press the Enter key to select the option to change. The next sections explain what you can program for each department. 4 When you are done programming all departments, press the Cancel key. TS1200MW User’s Guide...
-
Page 41: Programming Department Names And Numbers
This feature helps to prevent against large over-rings. If too many digits are entered, the error beep sounds and you are prompted with an error message. The default HDLO is 8 digits (999999.99). Select the HDLO limit you want and press the Cancel key. TS1200MW User’s Guide... -
Page 42: Programming Department Preset Price
Standard Mode enters the price using the normal 2 decimal place setting. Negative Mode allows you to set the price to a negative number. This is useful when you need to assign preset discounts or coupons. Using TS1200MW User’s Guide... -
Page 43: Setting Department Type
1 Put the MGR key in the Mode key slot and turn it to the PROG position. If prompted, enter the Manager passcode and press Enter. 2 Press the Arrow Down key to select 407 -- Others. Press Enter. 3 Press the Arrow Down key to select Age Limit Settings. Press Enter. TS1200MW User’s Guide... -
Page 44: Setting The Kp
The KP is sold separately and is not included with your cash register. Also, not all versions of the cash register support a back up or kitchen printer. Contact Royal at 1-800-243-4002 for more information. Programming the Credit Key You can use up to 2 keys for credit card sales: credit and charge. You can change the name of the key labeled credit to show the name of the specific name, such as Visa®, for that key. -
Page 45: Programming Plu Descriptions
If PLU #2 is not a taxable item, you can link it to a Department key which is programmed for no tax. 6 Optionally, if the inventory function is active, set or edit the inventory on-hand count. Returned merchandise affects inventory levels. For more TS1200MW User’s Guide... -
Page 46: Programming Plus Without A Barcode Reader
3 Press the Arrow Down key to select Add New PLU or Edit PLU. Press Enter. 4 Using the Number keys, enter the PLU number. Press Enter. 5 Follow the instructions on the display 6 To program the next PLU, go to Next Item and press Enter. TS1200MW User’s Guide... -
Page 47: Programming Plus With The Optional Barcode Reader
Programming PLU Descriptions Programming PLUs with the Optional Barcode Reader You can use the optional Royal model PS700 barcode reader to scan items and automatically ring them up. Using the barcode reader saves time and reduces errors caused by people ringing up items incorrectly. The barcode reader must be held about ½... -
Page 48: Editing A Plu
5 Make your changes to the PLU information. Use the Arrow Up key and Arrow Down key to move through the selections. 6 To edit the next PLU, go to Next Item and press Enter. 7 When you are done, press the cancel key. TS1200MW User’s Guide... -
Page 49: Deleting A Plu
All clerks. See Running the Clerk Confirmation Report on page 82. • Options All the parameters for setting the register, including header, footer, tax rates and so on. See Running the Options Dump Report on page 43. TS1200MW User’s Guide... -
Page 50: Before Going To Register Mode
Performing a Partial Reset on page 99. Master Reset As a last resort, you can do a Master Reset. For more information about the Master Reset, see Performing a Master Reset on page 99. Note A Master Rest deletes all settings. TS1200MW User’s Guide... -
Page 51: Setting Up Your Cash Register For Restaurant Mode
The cash register is set to restaurant mode by default. You can manually change this mode at any time. Caution Resetting the cash register to restaurant mode deletes all transaction and programming information. Make sure you print or save any information you want to keep before you continue. TS1200MW User’s Guide... -
Page 52: Setting Cooking Messages
4 Press the Arrow Down key to select the message number you want to change. Press Enter. 5 Using the alphanumeric keys that appear on the screen, type your message. When you are done, press Enter. 6 Repeat to add more messages. TS1200MW User’s Guide... -
Page 53: Happy Hour Settings
In restaurant mode, you have several restaurant-specific report options available to you. X mode • Table Report • Active Table Report Z mode • Table Report For specific information about running reports, see Running Reports on page 81 TS1200MW User’s Guide... -
Page 54: Navigating Your Cash Register Parameters
In those cases, we provide references where you can see more detailed information. To see the programming options, put the MGR key in the Mode key slot and turn it to the PROG position. If prompted, enter the Manager passcode and press Enter. TS1200MW User’s Guide... -
Page 55: Department Settings
Specifies the header messages on the receipt. Footer Message Specifies the footer messages on the receipt. Set to Default Resets the text options to the factory default. For detailed information about receipt messages, see Printing Options on Receipts on page 28. TS1200MW User’s Guide... -
Page 56: Options
Setting Header Messages and Footer Messages on page 25. Print Footer on Receipt Specifies if the Footer prints on the customer receipt. For more information about footer messages, see Setting Header Messages and Footer Messages on page 25. TS1200MW User’s Guide... - Page 57 X and Z reports. Zero Item Skip for Specifies if items in the report with no sales Report information should print. Setting this option to Yes can save a lot of paper when you print reports. TS1200MW User’s Guide...
- Page 58 Print #/NS information Specifies if a no sale receipt prints. TS1200MW User’s Guide...
- Page 59 Picture Logo Print Specifies to print the logo on the receipt. Position of Logo Print Specifies the location of the logo, if printed. For more information, see Printing Picture Logos on Receipts on page 27. TS1200MW User’s Guide...
-
Page 60: System Options Settings
This setting applies to all forms of payment. Reset Receipt # after Z Specifies to reset the Consecutive Transaction number found on each sales receipt and on most reports after running each Z report. TS1200MW User’s Guide... - Page 61 For example, $1.00 multiplied by an 8.75 % tax rate is equal to an amount of 1.0875. This needs to be rounded to 2-decimal places for processing. Select UP, DOWN, or 5/4 (default). TS1200MW User’s Guide...
-
Page 62: System Configuration Settings
4 options: This decimal place... Looks like... zero decimal place 0 = $ X one decimal place 1 = $ X.X two decimal place 2 = $ X.XX (U.S. Standard) three decimal place 3 = $ X.XXX TS1200MW User’s Guide... -
Page 63: Return To Machine To Default Settings
Returns all the Options to factory default settings. It is strongly recommended that you run a Z-report and any other reports first, because resetting to default settings affects these reports. After running the Z-report, return to this option and continue with resetting to factory default settings. TS1200MW User’s Guide... -
Page 64: Options Dump Report
Specifies up to 3 percentage amounts. Specify a name and a percentage to reduce the price of the item or a percentage to increase the price of the item. This amount can be overridden at any time during a transaction. TS1200MW User’s Guide... -
Page 65: Halo Setting
US $1.00 is equal to 8.00 pesos, then enter 8.00 in the FC Rate. • FC Decimal The number of decimals in the foreign currency. • Currency The currency symbol for the foreign currency. Symbol TS1200MW User’s Guide... -
Page 66: Age Limit Setting
Setting Cooking Messages on page 45. Note The cooking message feature is not available on all versions. Contact Royal for more information. 420 Happy Hour Setting Specifies 2 more prices for PLUs and the times of day they are valid for. -
Page 67: Counter /No Setting
For more information, see More Information about the Electronic Journal (EJ) Reports on page 88. 427 RAM Logo Download Downloads a customized store logo. This requires a PC connection and the Logo Software Tool (included with the cash register). TS1200MW User’s Guide... -
Page 68: Ringing Up Sales And Using Training Mode
For example: If 5 gallons of gas are sold at a price of $2.669 per gallon, the actual cost is $13.345. Because fractions of cents are not used, this is rounded up to $13.35 if the method is 5/4 or UP. TS1200MW User’s Guide... -
Page 69: Ringing Up Sales
8 Make any change needed and place the money you are given in the cash drawer. Close the cash drawer. 9 Give the customer the receipt, if the cash register is set to print receipts. 10 You are ready to ring up another sale. TS1200MW User’s Guide... -
Page 70: Ringing Up Sales With A Plu Number
6 Make any change needed and place the money you are given in the cash drawer. Close the cash drawer. 7 Give the customer the receipt, if the cash register is set to print receipts. You are ready to ring up another sale. TS1200MW User’s Guide... -
Page 71: Ringing Up Sales With The Optional Royal Barcode Reader
Printing Receipts Ringing up Sales with the Optional Royal Barcode Reader You can also ring up sales using the optional Royal PS 700 barcode reader. Before you can ring up sales with the barcode reader, the barcode number must be programmed into the cash register with the barcode reader. For more information, see Programming PLUs with the Optional Barcode Reader on page 40. -
Page 72: Receipt On Demand
When the wait person is done adding to the order, s/he can close the table to finalize later. Important Only the wait person that opened the table has access to it, unless it is transferred. TS1200MW User’s Guide... -
Page 73: Transferring Tables
2 If the clerk numbers are set, press the four digit passcode and then press the Clerk key. 3 Press the active table key. 4 Optionally, open a table by entering the table number and pressing the open table key. TS1200MW User’s Guide... -
Page 74: Using Cooking Messages
Further items can be added. You can use the Bill Print function to print out the bill if the Receipt mode is turned Off. To print the bill 1 Put the REG key in the Mode key slot and turn it to the Reg position. TS1200MW User’s Guide... -
Page 75: Closing Out Or Ending Tables
When you are using the cash register in Training mode, transaction numbers and amounts are not counted in the Register totals until you exit Training mode. Transactions in Training mode do not appear in any reports but they are saved in the Electronic Journal. TS1200MW User’s Guide... -
Page 76: Setting The Training Passcode
4 Press the Arrow Down key to select Passcode Setting. Press Enter. 5 Press the Arrow Down key to select Training Mode Pass Code. Press Enter. 6 Using the Number keys, enter a 6 digit passcode. The passcode cannot be zeros. 7 When you are done, press Enter. TS1200MW User’s Guide... -
Page 77: Entering And Exiting Training Mode
• Move the Reg key to another position. • Turn the cash register off. • Using the Number keys, enter 000789. Press the subtotal key. 3 Now you can ring up sales normally. These sales appear on sales reports. TS1200MW User’s Guide... -
Page 78: Programming Complex Tax Rates
USA Tax - Choosing Straight Add-On Rate or Table Tax If you do not know your state's policies regarding collecting sales tax, or you need to obtain your sales tax rate, contact your local government office and ask for your local tax chart. TS1200MW User’s Guide... -
Page 79: Tax Limits
Add-on Tax can be programmed as either: • straight tax, which charges tax based on a flat percentage rate. For example, 7.75% of the price of the item. This form of add-on tax is most common in the United States. TS1200MW User’s Guide... -
Page 80: Programming Straight Add-On Tax In The United States
1 and up to 4 tax rates. With this form of tax collection, you can also set a “tax limit”. To program straight Add-on tax rates for the United States 404 -- Tax Setting TS1200MW User’s Guide... -
Page 81: Programming Table Tax In The United States
• Continue entering price ranges and the amount of tax for each range until you completely enter an entire sequence of repeating regular breakpoints. Press the #/ns key. You return to the Tax selection screen. 7 Repeat for each tax you want to set. TS1200MW User’s Guide... -
Page 82: Calculating Your Tax
To calculate your tax rate 1 Using The Worksheet on page 78, complete Step A with the appropriate amounts from your state's Retail Tax Chart. 2 For the following, see the Example Tax Worksheet, Step B: TS1200MW User’s Guide... - Page 83 33. In this case, make sure you enter at least 4 examples of the regular breakpoint pattern. Using The Worksheet on page 78, determine the Regular breakpoint pattern based on your state's Retail Tax Chart. TS1200MW User’s Guide...
-
Page 84: Example Tax Worksheet
After at least 4 the pattern) examples of the regular breakpoint, press the #/NS key again Use the worksheet on the next page to calculate the irregular breakpoints and regular breakpoints for your local tax. TS1200MW User’s Guide... -
Page 85: The Worksheet
Programming Table Tax in the United States The Worksheet Follow your tax chart and write down your results here. TS1200MW User’s Guide... -
Page 86: Using Canadian Tax Rates
1 Put the MGR key in the Mode key slot and turn it to the PROG position. If prompted, enter the Manager passcode and press Enter. 2 Press the Arrow Down key to select 404 -- Tax Setting. Press Enter. 3 Press the Arrow Down key to select Tax Limit. Press Enter. TS1200MW User’s Guide... -
Page 87: Using Vat Tax Rates
4 Using the number area, enter the tax rate to set using a 5 digit format. Press Enter. 5 Repeat for each tax you want to set. 6 When you are done, press the Cancel key. Printing a Confirmation Report To check your results, see Options Dump Report on page 57. TS1200MW User’s Guide... -
Page 88: Running Reports
When you are printing a report, do not try to change mode key positions or attempt any other task with the cash register. Note Make sure you have a lot of cash register paper installed before you start printing any report. You can stop printing by pressing Cancel. TS1200MW User’s Guide... -
Page 89: Running The Department Confirmation Report
1 Put the MGR key in the Mode key slot and turn it to the PROG position. If prompted, enter the Manager passcode and press Enter. 2 Press the Arrow Down key to select 403 -- Clerk Setting. Press Enter. 3 Press the Arrow Down key to select Print Programmed Clerks. Press Enter. TS1200MW User’s Guide... -
Page 90: Running Management Reports
The available X reports are: • 1 - Daily Full Report Shows all transaction data and sales totals. • 2 - Daily Dept Full Report Shows quantity and dollar amount of each department number rung up today. TS1200MW User’s Guide... - Page 91 Shows/prints the information in the Electronic Journal. • 202 - EJ Report by Date Shows the information in the Electronic Journal, by specified date range. • 210 - Individual PLU Report Shows quantity and dollar amount of a specific PLU. TS1200MW User’s Guide...
-
Page 92: About Z Reports
• PTD reports (Periodic to Date) — Commonly known as a weekly or monthly readings. PTD reports show transaction totals either on a weekly or monthly basis (not both) and resets all transaction totals to zero except the Running Grand Total. TS1200MW User’s Guide... - Page 93 Clears the running grand total • 223 - Second Z Sales Report Prints (only) a duplicate copy of all Daily Full reports printed since the last second report was accessed. This function must be activated before you can use it. TS1200MW User’s Guide...
-
Page 94: Running Reports
• voids (E.C., VOID, Trans void). Minus percentage discount (DISCOUNT), voids (VOID/CORR) and returns (R.M.) are all deducted from the department totals and the plus percentage (ADD ON) is added to the department totals, depending on the parameter settings. TS1200MW User’s Guide... -
Page 95: More Information About The Electronic Journal (Ej) Reports
This includes all sales transactions, and using the #/NS key for no-sale rings to open the cash drawer. TS1200MW User’s Guide... - Page 96 1 Put the MGR key in the Mode key slot and turn it to the X position. If prompted, enter the Manager passcode and press Enter. 2 Press the Arrow Down key to select the report you want. Press Enter. TS1200MW User’s Guide...
- Page 97 You also see the EJ information. If the number used is close to the total number of 10,000, print the EJ report to avoid losing important information. For information about EJ errors, see Electronic Journal Memory Errors on page 97. TS1200MW User’s Guide...
-
Page 98: Maintenance And Options
Fahrenheit or above 104 degrees Fahrenheit), allow the temperature inside the machine enough time to reach room temperature before turning it on. • If you need electronic service, take the cash register to a Royal authorized service center. For more information, see Manufacturer’s Limited Warranty on page 130. -
Page 99: Cleaning The Touch Screen
3 Grab the small handle on the right of the print head. Flip the little handle towards the front of the printer. 4 Feed the end of the paper into the slit under the print head. TS1200MW User’s Guide... -
Page 100: About The Serial Port
A 6 foot null modem cable is included in the box with the cash register to use with a PC. If it is lost or damaged, contact Royal for a replacement. The pin description for all ports on the cash register is shown below. -
Page 101: Connecting The Cash Register To A Pc
4 On the cash register, press the Arrow Down key to select 407 -- Others. Press Enter. 5 Press the Arrow Down key to select 423 -- PC Communication. Press Enter. 6 Go to the RegisterLink software on the PC and follow the directions in RegisterLink. TS1200MW User’s Guide... -
Page 102: About The Battery
The battery maintains the information in the cash register, such as programming and transaction data, for at least 60 days if the cash register is unplugged. You cannot run the cash register on the backup battery. Only a factory trained service technician can replace the battery. TS1200MW User’s Guide... -
Page 103: Troubleshooting
• After the paper problem is solved, press the return key. If an error message still appears, unplug the cash register, wait 10 seconds, and plug it back in. TS1200MW User’s Guide... -
Page 104: No Receipt Printing
For more information about correctly installing the paper, see Installing a Replacement Paper Roll on page 92. Bond paper will not work in this cash register. If needed, contact the Royal Customer Support hotline at 1-800-272-6229 for additional help. -
Page 105: The Cash Register Does Not Work At All
• As a last resort, perform a Master Reset. See Performing a Master Reset on page 99. 2 If needed, contact the Royal Customer Support hotline at 1-800-272-6229 for additional help. Opening the Cash Drawer When There is no Power If there is no power and you need to open the cash drawer, follow these instructions. -
Page 106: Performing A Partial Reset
5 Using the stylus and following the onscreen instructions, press the 2 points to reinitialize the screen. 6 Reprogram the cash register. If Nothing Helps If a problem still persists, call our Customer Service Support Line toll-free at 1-800-272-6229. TS1200MW User’s Guide... -
Page 107: Error Messages
Then change the key position to another mode as needed. E111 Invalid Table Indicates that a table number Reenter the table number using Number was entered that is not in the numbers from 1 – 50. range of 1 – 50. TS1200MW User’s Guide... - Page 108 Receipt Printer transaction, when turning the with method of payment, such as power switch back on, this cash, check, charge, and so on. message prints on the receipt. Then change key position to another mode as needed. TS1200MW User’s Guide...
-
Page 109: Examples
The following examples are in this chapter. • Transaction Codes • Adding Tax to a Non-Taxable Department • Active Table Pickup • Bill Print • Cash Sale With Tendering Change • Cash Sale Without Tendering Change • Charge Sale • Credit/Charge Refund TS1200MW User’s Guide... - Page 110 • Voiding Cooking Messages • Voiding a Coupon Sale • Voiding a Department Preset Price • Voiding a Department Preset with a Coupon Discount • Voiding a Department Preset with a Percentage Discount • Voiding a Percentage Sale TS1200MW User’s Guide...
-
Page 111: Transaction Codes
PAID OUT Received on Account Received on Account Refund REFUND Subtotal (Excludes Tax) Tax 1 Rate Applied to a Sale Tax1/T1 Tax 2 Rate Applied to a Sale Tax2/T2 Tax 3 Rate Applied to a Sale Tax3/T3 TS1200MW User’s Guide... -
Page 112: Sample Receipt
Change Computation Change for the customer Total # of items Clerk number, Date and time machine number Footer Message and transaction Standard Character number 24/line Double-wide character 12/line The rest of this chapter shows you example transactions. TS1200MW User’s Guide... -
Page 113: Adding Tax To A Non-Taxable Department
Example 4: Ring up a $1.00 item in Department 1 and compute change from $5.00 cash tendered. To ring up a sale with tendering change 1 Using the Number keys, press 100, and then press 2 Press TS1200MW User’s Guide... -
Page 114: Cash Sale Without Tendering Change
Compulsory Declaration to On. Credit/Charge Refund Example 7: Refund $1.00 in Department 1 and credit the return to charge. To ring a charge refund 1 Using the Number keys, press 100, and then press 2 Press TS1200MW User’s Guide... -
Page 115: Check Sale
Example 9: Ring up an item for $15.99 for Department 1 and then select the cooking message “01 Rare” . To use a programmed cooking message 1 Using the Number keys, press 1599, and then press 2 Press 3 Using the Number keys, press 01 and then press TS1200MW User’s Guide... -
Page 116: Using Manual Messages
1 Using the Number keys, press 100, and then press 2 Using the Number keys, press 200, and then press 3 Press Note You do not have to enter an amount before pressing either of the credit keys unless you set the Compulsory Declaration to On. TS1200MW User’s Guide... -
Page 117: Dept Shift Button And Departments Above 40
Example 15: Assume the Department 1 key is programmed as a taxable department. Ring up a $1.00 item in Department 1 without charging tax. To ring an item without charging tax 1 Press . The header updates to show the selection. TS1200MW User’s Guide... -
Page 118: Exempting Tax On The Entire Sale
1 Using the Number keys press 500, and press 2 Press 3 Using the pop-up box, select Pesos. The subtotal amount in the transaction box changes to 50.00. 4 Using the number keys press 10000, and press TS1200MW User’s Guide... -
Page 119: Gallonage Sales Transaction
To multiply a department unit price 1 Using the Number keys, press 3, and then press 2 Press 3 Press Note You can ring up to 35 restaurant or 38 retail department presets by using the direct department keys. TS1200MW User’s Guide... -
Page 120: Multiplication Of A Direct (Hard) Plu
To multiply an item by a fraction 1 Using the Number keys, press 1.25, and then press 2 Using the Number keys, press 100, and then press Note You can use from .001 to 999.999 when ringing up the quantity of an item. TS1200MW User’s Guide... -
Page 121: No-Sale Function (Opening The Cash Drawer)
Example 27: Apply a 10% discount on a $1.00 sale in Department 1 using both a preset discount or by manually entering the discount. To ring a percentage discount sale using a preset discount 1 Using the Number keys press 100, and then press 2 Press TS1200MW User’s Guide... -
Page 122: Plu Sale
You can receive-on-account using cash, check, or misc. To receive monies on account 1 Using the Number keys, press 5000, and then press 2 Select the method of payment (cash, check, or misc) to finalize. TS1200MW User’s Guide... -
Page 123: Registering A Department Unit Price
Example 32: Return a $1.00 item in Department 1 and return a $1.50 item three times in Department 1. If the Inventory function is turned on, the inventory levels for any returned PLUs are automatically adjusted. To ring a return sale 1 Press TS1200MW User’s Guide... -
Page 124: Refunding Cash
3 Using the Number keys, press 500,and then press 4 Press Note When using the Split Tendering function, you can finalize the sale with any separate form of payment. Substitute the desired key in Step 4 in the example above. TS1200MW User’s Guide... -
Page 125: Transferring Tables
To use the Void key 1 Using the Number keys, press 100, and then press 2 Press 3 Using the Number keys, press 100, and then press 4 Using the Number keys, press 1000, and then press 5 Press TS1200MW User’s Guide... -
Page 126: Voiding Cooking Messages
Chapter 12 Examples Voiding Cooking Messages Example 37: Void the message Well from a transaction containing the PLU number 13 “Hamburger” , as well as removing the hamburger. Note After a cooking message is entered using the [# /ns] key, it cannot be easily removed. -
Page 127: Voiding A Department Preset Price
To void a department preset with a coupon discount 1 Press 2 In the Number keys area, press 20, and then press 3 Press 4 In the Number keys area, press 20, and then press 5 Press 6 Press and then press 7 Press TS1200MW User’s Guide... -
Page 128: Voiding A Department Preset With A Percentage Discount
If you need to void a previously entered discount, you must do so before entering another item. If not, then you must void the entire transaction and re-enter it. To void a percentage discount sale 1 Press 2 Press TS1200MW User’s Guide... -
Page 129: Voiding A Multiplication Of A Department Preset Price
Voiding a Department Multiplication Sale Example 44: Void a $1.00 item in Department 1 three times. To void a department multiplication sale 1 Press 2 Using the Number keys, press 3 and then press 3 Press 4 Press TS1200MW User’s Guide... -
Page 130: Voiding A Plu Sale
If not, then you must void the entire transaction and re-enter it. To void a PLU sale with a coupon discount 1 Press 2 Using the Number keys, press 1, press and then press 3 Press TS1200MW User’s Guide... -
Page 131: Voiding A Plu Sale With A Percentage Discount
To void an entire sale 1 Using the Number keys, press 100, and then press 2 Using the Number keys, press 200, and then press 3 Using the Number keys, press 300, and then press 4 Press TS1200MW User’s Guide... -
Page 132: Voiding A Sale
Example 50: Void a $1.00 item in Department 1. Note Use this method to also void a coupon or discount sale. To void a sale that is already completed 1 Press 2 Using the Number keys, press 100, and then press 3 Press TS1200MW User’s Guide... -
Page 133: Product Information
57mm alphanumeric thermal printer. Ink Source Thermal printer - no ribbon or ink needed Paper Supply 2¼ inch or 57.5 mm wide standard thermal paper (Royal Reorder # 013127) Memory Battery Roughly 2 months after power interruption Protection Technology CMOS RAM Electrical 115V~ 60Hz, 0.40A... -
Page 134: Safety And Legal Notices
AC plug from the power outlet. Continued use creates the danger of fire and electric shock. Contact a Royal service representative. • Do not place containers of liquids near the cash register and do not allow any foreign matter to get into it. - Page 135 • Attempting to repair the cash register yourself is extremely dangerous. Contact a Royal service representative. Never try to take the cash register apart or modify it in any way. Contact a Royal service representative for all repair and maintenance.
-
Page 136: Software Licensing Agreement
Royal or the owner of the Software. Nothing in this license constitutes a waiver of any rights Royal or the owners of the Software may have under any applicable copyright law or any other United States federal or state law. -
Page 137: Manufacturer's Limited Warranty
Easton, NJ 18042 USA warrants that your NEW Royal Electronic Cash Register or Time Clock (“Product”) is free of defects of workmanship and materials. If there is a defect or malfunction of this Product, Royal will repair the Product free of charge as follows: PARTS:New or comparable rebuilt parts in exchange for defective parts for ONE YEAR from the date of purchase. - Page 138 Service Center. Royal and/or the Service Center cannot be held responsible for any loss or damage that occurs while in transit. For Authorized Service Centers within your local area, call 1-888-272-6229 Or you can call the Royal Corporate Service Center directly at 1-800-243-4002 for shipping instructions and additional information.
-
Page 139: Memo
Memo TS1200MW User’s Guide... -
Page 140: Index
95 C-I-D report 85, 88 receipt printer 93 before going to register mode 43 cleaning the touch screen 92 connecting, kitchen printer 93 bill, printing 67 clearing errors 43 contacting Royal 2 clearing errors, about 43 TS1200MW User’s Guide... - Page 141 (void) key 118 gallonage sales transaction, voiding a coupon sale 119 editing PLUs 41 example 112 voiding a department EJ reports, running 88 getting help 2 multiplication sale 122 groups, setting 35 voiding a department preset price TS1200MW User’s Guide...
- Page 142 27 Paper end error 96 tax rates 72 RAM 27 partial rest, performing 99 tax status 35 lost passcode 31 parts, ordering 132 programming, cooking messages passcodes clerk, setting 28 Proposition 65 warning 129 TS1200MW User’s Guide...
- Page 143 24 error-correct (void) key, example ringing up direct PLU keys 63 tables closing 68 Mode key area 11 sales 62 touch screen 13 ending 68 sales, barcode reader 64 training mode 68 finishing 68 Royal, contacting 2 TS1200MW User’s Guide...
- Page 144 X passcodes, setting 30 example 123 X readings, about 83 PLU sale with a minus department preset with a coupon percentage discount example discount example 120 sale example 125 Z readings, about 85 TS1200MW User’s Guide...
- Page 145 Another feature for this file in U-Disk is can be sharing the data between TS1200MW and RegisterLink tool. For detail, please refer the RegisterLink tool manual. Export the report data to U-Disk ...
-
Page 146: Data Saving
Inserting the U-Disk You can insert the U-Disk into the USB socket both in machine. Removing the U-Disk Pull up the U-Disk gently. Note Make sure to release it slowly when inserting or removing the U-Disk Never touch or remove the U-Disk while it is operating, otherwise the data ... - Page 147 3 Press the [Save To USB] key, then it will write the data to the USB It will display “Printing Complete! Any key Continue!” after writing over. Other reports save to USB can refer to Daily Full report Key Point The sales reports all are saved in [DATA_RPT] folder with “CSV”...
-
Page 148: Data Loading
Data Loading In case of the ECR memory is corrupted, user can recover the backup data from U-Disk. The programming data can be backup and recover as below: Department data Clerk Header&Footer message System Options ... - Page 149 To load the programming data in U-Disk to Cash Register PROG 407 -- Others 431 -- Data Backup&Recover USB flash Data Recover 1 Select [407 -- Others] and Press Enter key 2 Press page down to find [431 – Data Backup&Recover] 3 Select [431 –...
- Page 151 USB virtual communication port User can use this USB virtual communication with PC (RegisterLink). The USB virtual communication port is located on left side of the register: Before using, you must install the USB-Serial driver, detailed operation as below: Install the USB driver on PC Please download the USB driver file from below address: http://www.pbmpos.com/download/Drivers/USB driver.zip 1 Unzip the file after download...
- Page 152 Modify port number on PC If the port number of the USB-SERIAL CH341A(COMx) greater than 4, you must modify the port number of the USB-SERIAL CH341A(COMx) insure you can use the register-link PC software. Right-click my computer and select the Manage: You will enter the Computer Manager interface:...
- Page 153 Select Device Manager, you will enter Device Manager interface: Select the Port (COM and LPT) on the Device Manager interface:...
- Page 154 Select the USB-SERIAL CH341A(COMx) and Right-click the USB-SERIAL CH341A(COMx), select the Properties:...
- Page 155 Open the USB-SERIAL CH341A setting interface and Select the Port setting: Select the Advanced:...
- Page 156 Find the COM port number and Select the port number for the USB-SERAIL CH341A(COMx), the number must be less than or equal to 4: Then press OK, if the PC pop-up the below information, you should press Yes:...
- Page 157 10 After pressing yes will pop-up the below warning, you should press Yes: 11 Then press OK: 12 After selecting press OK the port number of the USB-SERIAL CH341A(COMx) will change to your selecting:...
-
Page 158: Communication With Pc
Select the USB with PC on TS1200 PROG 407 – Others 424 – PC Communication Port: serial port1/USB with PC. Please select the USB with PC. Communication: select this step and press [enter] key, the ECR will wait for communication with registerlink tool.