Advertisement
HP Designjet 510 printer series
EN
Assembly and Set-Up Instructions
Imprimantes HP Designjet série 510
FR
Instructions d'assemblage et
d'installation
Stampanti HP Designjet 510 series
IT
Montaggio e configurazione
Drucker der Serie HP Designjet 510
DE
Aufbau- und Einrichtungsanleitung
Impresoras HP Designjet serie 510
ES
Instrucciones de montaje y
configuración
Impressoras HP Designjet 510 series
PT
Instruções de montagem e
configuração
HP DesignJet 510
RU
Инструкции по установке и
монтажу
© 2010 Hewlett-Packard Company
Inkjet Commercial Division
Camí de Can Graells 1-21 · 08174
Sant Cugat del Vallès
Barcelona · Spain
All rights reserved
Printed in XXX
1
Check the Contents of the Package / Vérification du contenu du carton / Veri-
ficare il contenuto della confezione / Überprüfen des Lieferumfangs / Comprobar
el contenido del paquete / Verificar o conteúdo da embalagem / Проверка
содержимого упаковки
Check the items shown and notify your supplier if any are missing. Don't open the items until you are prompted to do so on
this Poster. The packaging varies between models; there may be additional items in the box. These Assembly and Set-Up
EN
Instructions, and the 'Day-to-day' package containing the Using your printer documentation CD, are supplied in the box.
Vérifiez qu'aucun élément ne manque. Avertissez votre distributeur le cas échéant. N'ouvrez pas les éléments avant les
étapes vous y invitant sur ce poster. Les emballages varient selon les modèles ; des éléments supplémentaires peuvent être
FR
inclus. Ces instructions d'assemblage et de configuration ainsi que le package "quotidien" contenant le CD-ROM de docu-
mentation Utilisation de l'imprimante sont fournis dans la boîte.
Controllare gli articoli indicati e segnalare al rivenditore eventuali mancanze. Non aprire i componenti finché non viene
indicato in questo Poster. L'imballaggio varia a seconda dei modelli; la scatola può contenere elementi aggiuntivi. Le
IT
istruzioni di montaggio e di impostazioni e il pacchetto di manutenzione giornaliera (Day-to-day) contenente il CD della
documentazione relativa all'utilizzo della stampante sono contenuti nella confezione.
Überprüfen Sie, ob Ihnen die oben dargestellten Teile vorliegen. Falls ein Teil fehlt, wenden Sie sich an Ihren Lieferanten.
Öffnen Sie erst dann die einzelnen Verpackungen bzw. Teile, wenn Sie hierzu in diesem Poster ausdrücklich dazu aufgefor-
dert
DE
werden. Jedes Modell ist unterschiedlich verpackt. Im Karton können noch mehr Teile als hier abgebildet enthalten sein.
Diese Aufbau- und Einrichtungsanweisungen sowie das Paket für die tägliche Arbeit mit der Druckerdokumentations-CD
liegen dem Drucker bei.
Compruebe los elementos mostrados a continuación y avise a su proveedor si falta alguno. No abra los elementos hasta
que se le indique en el Póster. El paquete varía según los modelos; puede haber elementos adicionales en la caja. La caja
ES
contiene estas instrucciones de montaje y configuración, así como el paquete de operaciones "diarias", que incluye el CD
de la documentación sobre el uso de la impresora.
Verifique os itens mostrados e notifique seu fornecedor se qualquer um estiver faltando. Não abra os itens que seja avi-
sado para fazê-lo neste Pôster. A embalagem varia entre os modelos; pode haver outros itens na caixa. La caja contiene
PT
estas instrucciones de montaje y configuración, así como el paquete de operaciones "diarias", que incluye el CD de la
documentación sobre el uso de la impresora.
Убедитесь в наличии всех изображенных на рисунке компонентов. Если какой-либо компонент отсутствует, обратитесь
к поставщику. Не распаковывайте компоненты до тех пор, пока это не потребуется в данных Инструкциях. В
зависимости от модели принтера в упаковке могут находиться дополнительные компоненты. Инструкции по сборке и
RU
настройке, а также комплект инструкций, содержащий компакт-диск с документацией по использованию принтера,
поставляются в коробке устройства.
Contents of This Poster
EN
1. Check Contents of the Package
6. Locate the Front-Panel Overlay and Pocket Guide
7. Switch On, Choose Language
9. Replace Set-Up Printheads with Active Printheads
1 1. Understand Printer Connections
Set-up software.
13.
The information on this poster applies to the following
HP products:
• HP Designjet 510 Series
• Stand and Paper Bin available as accessory.
If you are installing an accessory, such as a stand, after
the main installation has been completed, use the instruc-
tions that came with the accessory. If you are installing
it at the same time as the main installation, read the
appropriate stages of this Poster.
For accessory cards, see "Understand Printer Connec-
tions" and the documentation that comes with these
accessories.
Read these instructions carefully...
and complete each stage before you start the next.
What You Will Need to Do the Job
• Because some of the components of the printer are
bulky, you will need 2 or 3 people to lift them. See the
descriptions that follow for details-a symbol like this is
used:
x2
• You are recommended to have a floor area of approxi-
mately 6 square metres for unpacking and assembling
your printer.
• The time required to unpack, assemble and set up the
hardware is about 30 to 90 minutes, depending on the
model and components (e.g. the stand).
FR
Sommaire
1. Vérification du contenu du carton
2. Déballage des principaux éléments
3. Assemblage du socle
4. Installation du socle sur l'imprimante
5. Installation du bac récepteur
6. Mise en place du cache du panneau avant et du
Guide de poche
7. Mise sous tension et sélection d'une langue
8. Insertion des cartouches d'encre
9. Remplacement des têtes d'impression de
configuration par des têtes d'impression actives
10. Chargement de papier en rouleau
1 1. Méthodes de connexion de l'imprimante
12. Installation et connexion d'une carte réseau
Les informations contenues sur ce poster sont valables
pour les produits HP suivants :
• Imprimantes HP Designjet 510.
• Support et corbeille disponibles en accessoires.
Advertisement

Related Manuals for HP Designjet 510 series


Summary of Contents for HP Designjet 510 series
-
Page 1: Table Of Contents
8. Insert Ink Cartridges d’installation 9. Replace Set-Up Printheads with Active Printheads 10. Load a Roll of Paper Stampanti HP Designjet 510 series 1 1. Understand Printer Connections 12. Install and Connect a LAN Card Montaggio e configurazione Set-up software. - Page 2 9. Sostituire le testine di installazione con testine attive Lesen Sie diese Anweisungen aufmerksam durch... ware es de alrededor de 30 a 90 minutos, en función • принтеры серии HP DesignJet 510 10. Caricare un rotolo di carta und führen Sie jeden einzelnen Schritt vollständig d urch, del modelo y de los componentes (p.
-
Page 3: Unpack The Main Components
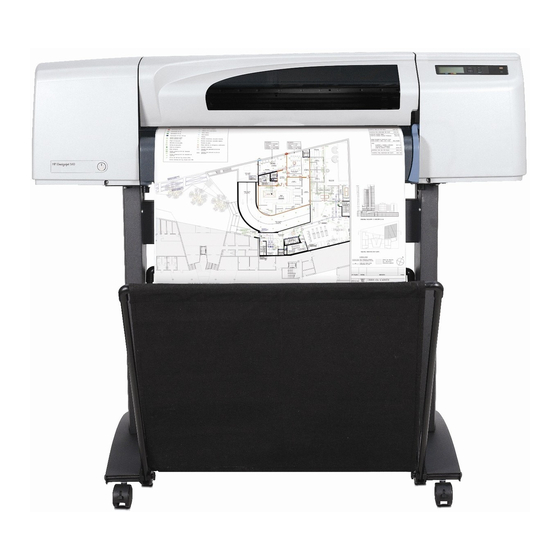
Unpack the Main Components / Déballage des principaux éléments / Disimbal- lare i componenti principali / Auspacken der Hauptkomponenten / Desempaquetar los componentes principales / Desembalar os componentes principais / Распаковка основных компонентов The E+/A0+ size printer with stand and paperbin as The D/A1-size printer with no stand or paper bin as standard. -
Page 4: Assemble The Stand
Assemble the Stand Assemblage du socle Montare il For assembly of the accessory stand, use the poster supplied with it Pour l’assemblage du socle d’accessoires, utilisez le poster fourni supporto Zusammenbauen der Aufstellvorrichtung Per il montaggio del piedistallo accessorio, utilizzare il poster fornito Verwenden Sie das mitgelieferte Poster, um die Zubehör-Aufstellvorrichtung Montar el soporte Montar o suporte... -
Page 5: Attach The Stand To The Printer
Attach the Stand to the printer / Installation du socle sur l’imprimante / Installation du socle sur l’imprimante / Montare il supporto sulla stampante / Anbringen der Aufstellvorrichtung am Drucker / Conectar el soporte a la impresora / Prender o suporte à impressora / Монтаж ножек принтера 180°... - Page 6 Secure the stand with the four screws that have large flat Ensure all four brakes are applied, as shown. Tilt and lift the printer (1): WARNING: 2–3 people for the Tilt and lift the printer (2): Tilt the printer through 90-degrees heads.
-
Page 7: Assemble The Paper Bin
Assemble the paper Bin / Retirez les bandes adhésives se trouvant Remove the plastic covering and foam end caps. Remove the tapes from the window and the spindle. Remove Remove the tapes from the spindle at the back of the printer. Lay out the components of the basket. - Page 8 Montare il cestino della carta / Zusammenbauen der Papierablage / Montar la bandeja de papel / Montar a bandeja de papel / Установка приемной корзины Fit the basket supports to the stand legs, one to each leg. Fit the two short tubes to the printer’s feet, one on the front Attach the basket’s front tube to the two short tubes on each Rest the basket’s rear tube on the supports that you have just of each foot.
- Page 9 Introductory information / Informations Switch On and Choose a Language / Mise sous tension et sélection d’une langue / Accendere e sceg- d’introduction / Informazioni preliminari / Ein- liere una lingua / Einschalten und Auswählen der Anzeigesprache / Encender y seleccionar un idioma / führende Informationen / Información preliminar Ligar e escolher um idioma / Включение...
-
Page 10: Insert Ink Cartridges
Insert Ink Cartridges / Insertion des cartouches d’encre / Inserire le cartucce / Einsetzen der Tintenpat- ronen / Insertar los cartuchos de tinta / Inserir cartuchos de tinta / Установка картриджей Switch on if the printer doesn’t automatically come on: The p Select a language: After up to a minute, the printer’s front- On/Off switch is located on the front left of the printer. - Page 11 Replace Set-Up Printheads with Active Printheads / Remplacement des têtes d’impression de configuration par des têtes d’impression actives / Sostituire le testine di installazione con testine attive / Ersetzen der Setup-Druckköpfe durch aktive Druckköpfe The set-up printheads are provided to protect the ink system while the printer is being transported from the factory, and to fill up the ink tubes inside the printer when it is first initialized.
- Page 12 Rilasciare il fermo sul coperchio delle testine. Potrebbe Sollevare il coperchio delle testine; in questo modo si potrà glia blu. Nota: HP Designjet 500 mono ha soltanto Regolando la forza tirare verso l’alto la maniglia blu finché essere necessario tenere scostato questo fermo durante le accedere alle testine di installazione.
- Page 13 Remove the tape from the new printheads. Insert a new normal printhead ensuring that the colored When you have replaced all the set-up printheads with Close the latch on the printhead cover. The latch may feel label on the printhead corresponds to that on the printhead normal printheads, pull the printhead cover down over the rather stiff, but don’t worry as it needs some pressure to Décollez la bande adhésive apposée sur les têtes...
-
Page 14: Load A Roll Of Paper
Load a Roll of Paper / Chargement de papier en rouleau / Caricare un rotolo di carta / Laden einer Rolle Papier / Cargar un rollo de papel / Carregar um rolo de papel / Загрузка рулонной бумаги The printer will now use a certain amount of paper for checking and calibration. - Page 15 10:3 10:4 10:5 10:6 The spindle has a stop at each end to keep the roll in position. Slide the new roll of paper on to the spindle. Make sure the Put the removable stop on to the upper end of the With the blue-colored roll stop on the right (as seen from The stop that is colored blue can be removed to mount a new orientation of the paper is loaded exactly as shown.
- Page 16 10:7 A front-panel message prompts you to load paper to align 10:10 the printheads. Press the Enter key.Then, as above left, select Load roll (or Load sheet, if you prefer–see the Pocket Guide for Follow the prompts (see steps 1 1 to 13). Try to avoid loading instructions) and press Enter.
- Page 17 10:1 1 10:12 10:13 10:14 Leaning over the printer, feed the paper through towards At the front of the printer, align the paper against the blue Lower the blue paper-load lever. The printer checks the If there is an excess of loose paper wrap it back onto the the front.
- Page 18 Printhead Alignment and Color Calibration are different install it—see Stage 12. Also install now any HP-GL/2 Accessory card and any additional memory for your Accessory card. processes and should both be done when required. They are briefly described in the Pocket Guide and more fully in the See the instructions packaged with these items for full information on how to install them.
-
Page 19: Install And Connect A Lan Card
Before installing a card, switch off the printer and unplug it Prese per collegare la stampante a un computer o a una rete. server di stampa HP JetDirect, nello scomparto in alto a from the mains electricity supply. Il diagramma sulla destra mostra le prese (o “porte”) che è... - Page 20 12:2 Carefully remove the plastic cover from the left-hand back of the printer by unclipping it. This cover gives access to the two slots for an Accessory card and a LAN card. 12:3 12:5 12:4 a. Press in the thumb-tab on the side furthest from the edge Remove the cover completely.
-
Page 21: Installation Du Logiciel
12:7 Carefully replace the plastic cover by clipping it back into place: a. Put the two hinge clips on the side that has the edge cable-hole 12:8 You have now finished the hardware assembly into their slots. Network Printer: To obtain the information you’ll need when you install b. - Page 22 Insert the HP Start Up Kit DVD into your computer. Insérez le DVD du Kit de démarrage HP dans votre Inserire il DVD HP Start-Up Kit nella relativa unità del ordinateur. Legen Sie die DVD mit dem HP Start-up Kit in das computer. For Windows: Laufwerk des Computers ein.
- Page 23 * Se o DVD não iniciar automaticamente, abra o ícone DVD em sua área de trabalho. Для ОС Macintosh: * Abra el icono de Mac OS X HP Designjet Installer y * Abra o ícone Instalador da HP Designjet para Mac siga las instrucciones en pantalla.
- Page 24 Nothing herein should be construed as constituting an additional warranty. HP shall not be liable for techni- cal or editorial errors or omissions contained herein. Trademarks Microsoft ®;...