Napoleon High Country NZ6000 Installation And Operating Instructions Manual
Solid fuel burning zero clearance fireplace
Hide thumbs
Also See for High Country NZ6000:
Advertisement
Advertisement

Related Manuals for Napoleon High Country NZ6000


Summary of Contents for Napoleon High Country NZ6000
- Page 1 W415-0442 / C / 09.01.03 W415-0594 / A / 02.15.07...
- Page 2 WARNINGS & SAFETY PRECAUTIONS W415-0594 / A / 02.15.07...
-
Page 3: Operating Instructions
TABLE of CONTENTS PG 2-6 INTRODUCTION Warnings and safety precautions Warranty General Instructions General Information Care of Glass & Plated Parts HI-EFFICIENCY HEATING 7-14 INSTALLATION / FRAMING Location & Clearance Framing Outside Combustion Air Mantel Clearance Hearth Extension Faceplate, Uppergrill, Keystone & Door 14-18 CHIMNEY INSTALLATION Adding Chimney Sections... - Page 4 NAPOLEON products are manufactured under the strict Standard of the World Recognized NAPOLEON products are designed with superior components and materials, assembled by trained craftsmen who take great pride in their work. The complete fireplace is thoroughly inspected by a qualified technician before packaging to ensure that you, the customer, receives the quality product that you expect from NAPOLEON.
- Page 5 1. Combustion and dilution air is brought into the unit through the fresh air intake collars located on the top rear of the unit. 2. The combustion air is brought into the firebox through many small holes in the airwash located at the top and sides of the opening.
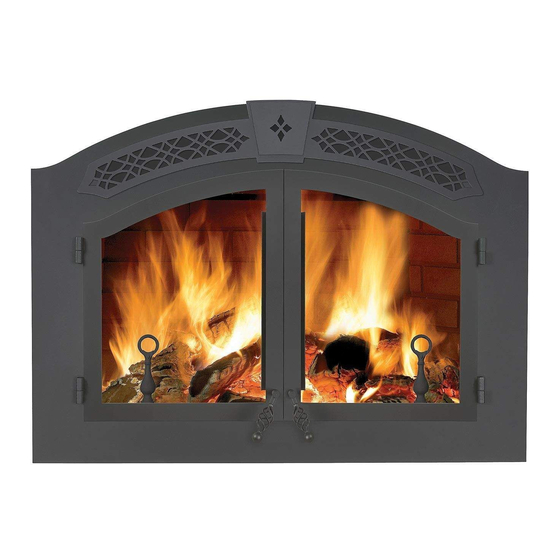
- Page 6 GENERAL INFORMATION FEATURES • Maximum log length of 32" • Large firebox capacity - 4.8 cu ft. • Long burn time - up to 14 hours. • Large glass doors for maximum visibility • Firebrick lining for firebox protection • Optional 320 CFM blower for convection heat •...
- Page 7 HI-EFFICIENCY HEATING A HOT AIR GRAVITY VENT SYSTEM (NZ221) used to distribute heat to an adjoining room (located either above, or beside the room containing the fireplace) by way of vents. Air flow through this vent must be experimented with and the dampers of the grill adjusted manually to suit your requirements.
- Page 8 Do not build shelves or cupboards into the area above the fireplace. Note: In order to avoid the possibility of exposed insulation or vapour barrier coming in contact with the fireplace body, it is recommended that the walls of the fireplace enclosure be “finished”...
- Page 9 WHEN USING A SOLID PACK CHIMNEY The fireplace face and enclosure ceiling must be framed using 2x4 metal studs. The minimum enclosure ceiling height is 7 feet. N o n - c o m b u s t i b l e materials (cement board and metal studs) must be used.
- Page 10 The Napoleon Model NZ6000 takes outside air directly into the fireplace through openings in the left and right hand sides. Decide on the most convenient lo- cation for the fresh air inlet ducts and hoods which may be installed above or below floor level.
- Page 11 An acceptable 61½" x 20" non-combustible (ie: brick, stone or ceramic tile) hearth extension must be installed. Hearth must extend 20" in front of the faceplate when it is not elevated (see local building codes). Hearth must extend a minimum of 6" to both sides of the unit (61 ½").
- Page 12 HEARTH EXAMPLES ELEVATED HEARTH RAISED HEARTH ELEVATED / RAISED HEARTH W415-0594 / A / 02.15.07...
- Page 13 FACE PLATE, UPPER GRILL, KEYSTONE & DOOR INSTALLATION Remove the facing template held in place with the 12 screws shown. Dis- card the screws and template. Mount the keystone and upper grill to the face- plate, as shown, using the 4 nuts supplied.
- Page 14 This fireplace was tested to CAN /ULC S610 Standard for Factory Built Fireplaces, and to UL 127 Factory Built Fireplaces. This Factory Built Fireplace is certified to burn Fire Wood. The Factory Built Fireplace model: NZ6000 has met test criteria for Zero Clearance Installation to Combustible Surfaces.
- Page 15 STRAIGHT UP No Off-Set. Minimum overall chim- ney height is 15 feet. * The first flue offset closest to the top of the unit must be a minimum distance of 12 inches from the top of the fireplace. 1. Move the fireplace into position. Try to center the ex- haust flue of the fireplace, midpoint between two joists to prevent having to cut them.
- Page 16 OFFSET CHIMNEY INSTALLATION The first flue offset closest to the top of the unit must be a minimum distance of 12" from the top of the fireplace. Attach an elbow to the chimney section, angled toward the offset. Secure with 3 - #8X1/2" sheet metal screws. To achieve the minimum offset, attach and secure a second elbow.
- Page 17 Ensure there are no leaks. In no case is the masonry enclosure to be supported by the NZ6000 fireplace. Allow a 1" (one inch) air cavity for expansion. TO A MASONRY CHIMNEY a stainless steel liner...
-
Page 18: Air Cooled Chimney Installation
AIR COOLED CHIMNEY INSTALLATION 1. Remove the knock out. 2. Cut away the insulation to gain access to the ring. 3. Remove the ring secured by four screws. 4. Slide the starter collar through the insulation wrap and affix using the four screws removed in step 3. 5. - Page 19 SECONDARY AIR TUBE REMOVAL / INSTALLATION OPTIONAL NZ64 BLOWER KIT INSTALLATION Route a 120 Volt, 60Hz electrical supply (not supplied) from the electrical box on the side of the unit to the electrical box on the blower housing. FIREBRICK AND BAFFLE INSTALLATION The unit comes complete with a safety switch and a ther- mally activated switch.
- Page 20 This unit is supplied with a pressure switch and This unit is supplied with a pressure switch and This unit is supplied with a pressure switch and This unit is supplied with a pressure switch and This unit is supplied with a pressure switch and a thermally activated switch.
- Page 21 4. Electrical Connection a) Remove the junction box covers on the unit and the blower. b) Removing the junction box cover on the unit exposes 4 black, labeled wires: Two wires labelled "by-pass" - go to by-pass (summer) switch (not supplied - overides the thermally activated switch enabling the user to run the blower without heat).
- Page 22 NZ64 BLOWER REPLACEMENT 1. Remove the grill and filter by removing the 2 securing screws. 2. Remove the nut securing the blower bracket to the hous- ing. 3. Lift the handles to pull the blower and bracket off of the stud.
- Page 23 OPERATING INSTRUCTIONS Expansion / contraction noises during heating up and cool- ing down cycles are normal and to be be expected. OPERATING SOUNDS AND SMELLS A slight humming sound may be heard depending on the location of the blower. This sound may be minimized by turning down the blower.
- Page 24 2. Cover with dry kindling. 3.Open the draft control fully by moving the lever to the right (HIGH setting). 4. Light the paper and leave the door slightly ajar (one to two inches) until all kindling is burning. W415-0594 / A / 02.15.07 5.
- Page 25 As soon as the door is closed, you will observe a change in the flame pattern. The flames will get smaller and lazier because less oxygen is getting into the combustion cham- ber. The flames, however, are more efficient. The flames will remain lazy but become larger again as soon as the firebricks have been heated thoroughly and the chimney becomes heated and provides a good draft.
- Page 26 RE-LOADING THE FIREPLACE When refueling open the door slowly to prevent smoke spillage. Use a pair of long fireplace gloves when feeding the fire. Keep a small steel shovel nearby to use as a poker and to remove ashes. Do not store wood within 4 feet (1m) of the fireplace.
- Page 27 • Create a large fire to heat up the fireplace before adjusting to a slower burn. • To create a large, quick burning fire, use small pieces of wood. • For a lower, but extended burn, stack larger pieces of wood close together. •...
- Page 28 CREOSOTE FORMATION AND REMOVAL When wood is burned slowly, it produces tar and other organic vapours which combine with expelled moisture to form creosote. These vapours condense in the relatively cooler chimney flue of a slow burning fire and when ig- nited, make an extremely hot fire.
- Page 29 Contact your dealer for questions concerning prices and policies on replacement parts. Normally all parts can be ordered through your Napoleon dealer or distributor. When ordering replacement parts always give the follow- ing information: FOR WARRANTY WARRANTY WARRANTY WARRANTY REPL WARRANTY REPL REPL...
- Page 30 W415-0594 / A / 02.15.07...
- Page 31 TROUBLE SHOOTING GUIDE EFORE ATTEMPTING TO TROUBLESHOOT PURGE YOUR UNIT AND INITIALLY LIGHT THE PILOT AND THE MAIN BURNER WITH THE GLASS DOOR OPEN SYMPTOM PROBLEM Smoke enters the Cold air blockage. room during start- Close the doors. Kindling does not Cold air blockage.
- Page 32 RATING PLATE W415-0594 / A / 02.15.07...