Table of Contents
Advertisement
Advertisement
Table of Contents

Related Manuals for Denon PMA-2020AE


Summary of Contents for Denon PMA-2020AE
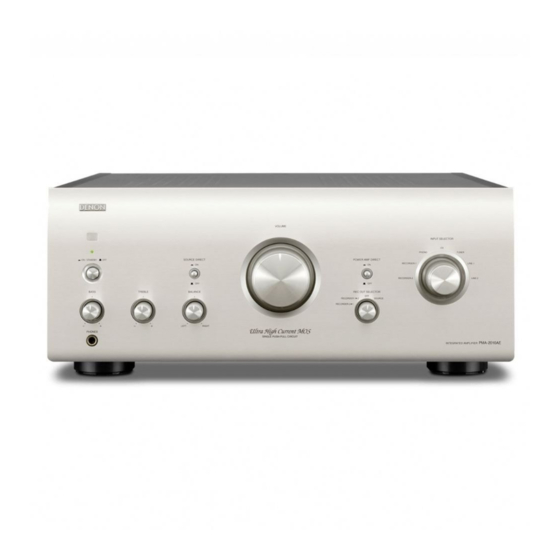
- Page 1 PMA-2020AE INTEGRATED AMPLIFIER Owner’s Manual...
-
Page 2: Safety Precautions
Directive 2009/125/EC for Energy-related Products (ErP). Follow all instructions. CAUTION: Do not use this apparatus near water. DENON EUROPE Clean only with dry cloth. TO REDUCE THE RISK OF ELECTRIC SHOCK, DO NOT REMOVE Division of D&M Germany GmbH Do not block any ventilation openings. - Page 3 n CAUTIONS ON INSTALLATION NOTES ON USE WARNINGS • Avoid high temperatures. Allow for sufficient heat dispersion when installed in a rack. • Handle the power cord carefully. Hold the plug when unplugging the cord. • Keep the unit free from moisture, water, and dust. • Unplug the power cord when not using the unit for long periods of time.
-
Page 4: Table Of Contents
Getting started Thank you for purchasing this DENON product. To ensure proper operation, please read this owner’s manual carefully before using the product. After reading them, be sure to keep them for future reference. Contents Accessories Operations ················································································8 Getting started ··············································································1... -
Page 5: Features
Features Cautions on handling • Before turning the power on Advanced UHC-MOS Single Push-pull Circuit Power Amp Direct Check once again that all connections are correct and that there are A Power Amp Direct input that can also be used for a standalone The new generation UHC-MOS FET is employed for the power no problems with the connection cables. -
Page 6: Preparations
Preparations Preparations Here, we explain the connections and set up methods for this unit. F Cables used for connections vpage 4 F Connecting the speakers vpage 4 F Connecting players vpage 6 F Connecting a recorder vpage 7 F Connecting the power cord vpage 7... -
Page 7: Connections
Connections Connections for all compatible audio signal format is described in Cables used for connections Connecting the speakers this operating instructions. Please select the types of connections corresponding to the equipment you are connecting. Select the cables according to the equipment being connected. Connecting the speakers cables NOTE Audio cable (sold separately) -
Page 8: Protection Circuit
If the protection circuit is activated even though there are no problems with the ventilation around the unit or in connections, the unit may be damaged. Turn off the power and then contact a DENON service center. -
Page 9: Connecting Players
Connecting the speakers Connecting players Bi-wiring connection If humming or other noise is generated when the ground wire is connected, disconnect it. • When bi-wiring with bi-wireable speakers, connect the mid and high range terminals to SYSTEM (A) (or SYSTEM (B)), the low range terminals to SYSTEM (B) (or SYSTEM (A)). Power Turntable • This enables playback with minimal interference between the high-range speaker unit... -
Page 10: Connecting A Recorder
Connecting a recorder Connecting the power cord Wait until all connections have been completed before connecting the power cord. CD recorder / CD recorder / Tape deck 1 Tape deck 2 AUDIO AUDIO AUDIO IN AUDIO IN To household power outlet AUDIO OUT (AC 230 V, 50/60 Hz) -
Page 11: Operations
Operations Operations Here, we explain functions and operations that let you make better use of this unit. F Before use vpage 9 F Starting playback vpage 9 F Starting recording vpage 10 F Setting the Auto Standby mode vpage 10... -
Page 12: Operations
Operations Before use Starting playback Turn the VOLUME on the main unit all the way down. INPUT SELECT to select the You can also use the following operation to select an input source. source to be played. n Select the input source using the main unit • The input indicator on the main unit for SOURCE DIRECT on the main unit to “... -
Page 13: Starting Recording
Starting recording Setting the Auto Standby mode INPUT SELECT With the Auto Standby ON, this unit will automatically enter the Press standby mode after about 30 continuous minutes of stop mode with no operation. • The default setting is “On”. AMPLIFIER X Press and hold for at Set the recorder to the record mode. -
Page 14: Information
Information Information Here, we list various information related to this unit. Please refer to this information as needed. F Part names and functions vpage 12 F Troubleshooting vpage 16 F Specifications vpage 17... -
Page 15: Part Names And Functions
Part names and functions For buttons not explained here, see the page indicated in parentheses ( ). Front panel Power indicator ········································································· (9) BASS control knob ···································································· (9) NOTE Indicates the status of the unit’s as follows: TREBLE control knob ································································ (9) SOURCE • Functions are only available when the... -
Page 16: Rear Panel
Rear panel Input connectors (INPUTS) ··················································· (6, 7) AC inlet (AC IN) ·········································································· (7) NOTE Power amplifier direct connectors REMOTE CONTROL jacks • This terminal is not a safety ground. (POWER AMP DIRECT) ······························································ (6) Extension jack for future use. • The SIGNAL GND terminal of this unit is not a safety ground Connectors for directly inputting signals to the power amplifier. -
Page 17: Remote Control Unit
MODE SELECT button TITLE/ARTIST button • The included remote control unit can be used to TIME button operate DENON CD players. • When using it, also refer to the operating Playback operation buttons instructions of the other devices. • Reverse-skip/ Forward-skip button (8, 9) • Some products may not be operable. -
Page 18: Explanation Terms
Remote control unit Explanation terms Inserting the batteries Operating range of the remote control unit Point the remote control unit at the remote sensor when operating it. Bi-wiring connection q Remove the rear lid in the w Load the two batteries properly This method of connecting a speaker by using two speaker cables direction of the arrow and as indicated by the marks in the... -
Page 19: Troubleshooting
– When playing a • The needle pressure • Adjust to a proper needle – power, the power please contact the DENON record, the sound is incorrect. pressure. display flashes service adviser. distorted. • There is dirt on the tip of the • Check the tip of the needle. -
Page 20: Specifications
Index Specifications Adjust the tone ····················································· 9 Remote control unit ··········································· 14 n Power amplifier section Auto Standby mode ··········································· 10 2-channel driving (CD → SP OUT) Rated Output Power: 80 W + 80 W (8 Ω, 20 Hz – 20 kHz, T.H.D. 0.07 %) 160 W + 160 W (4 Ω, DIN, 1 kHz, T.H.D. - Page 21 Dimensions Unit : mm 434.0 61.0 45.0 344.0 45.0 Weight : 24.4 kg...
- Page 22 D&M Holdings Inc. 3520 10200 00AD...