Table of Contents
Advertisement
Available languages
Available languages
Quick Links
Advertisement
Chapters
Table of Contents

Related Manuals for Belkin F1D086UEA


Summary of Contents for Belkin F1D086UEA
-
Page 1: User Manual
USB CAT5 KVM Extender User Manual F1D086Uea... -
Page 2: Table Of Contents
Table of Contents 1. Introduction ................1 Package Contents ..............1 2. Overview ................2 Feature Overview ..............2 Equipment Requirements ............3 System Requirements ............4 Unit Display Diagrams ............5 Specifications ..............7 3. Installation ................8 Pre-Configuration ..............8 Connecting the Transmitter to the Computer or KVM Switch ... -
Page 3: Introduction
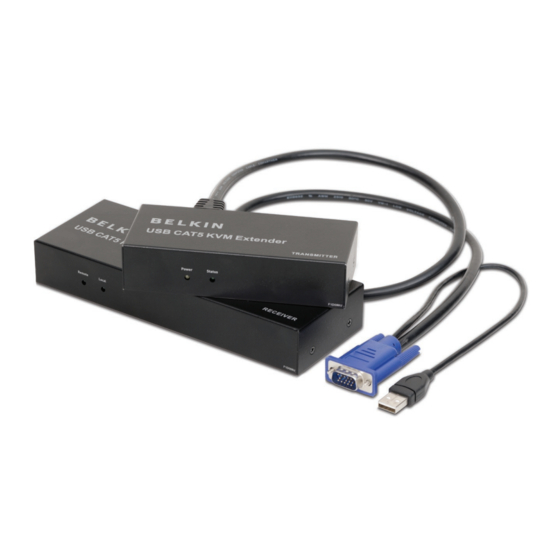
CAT5 Extender, in addition to expert troubleshooting advice—in the unlikely event of a problem. We appreciate your business and are confident that you will soon see for yourself why over 1 million Belkin OmniView products are in use worldwide. Package Contents USB CAT5 Extender... -
Page 4: Overview
Overview Feature Overview CAT5 Technology Integrated CAT5 technology enables you to connect your KVM switch to your servers up to 500 feet (150m) away using standard CAT5 cabling. CAT5 cabling reduces cable bulk and simplifies cable management. Video Resolution The CAT5 Extender supports video resolutions of up to 1920x1440 @ 75Hz on local computer and up to 1280x1024@75Hz on remote. -
Page 5: Equipment Requirements
Cables Connecting the CAT5 Extender to a computer or KVM switch requires the included KVM cable kit and a standard CAT5 patch cable. Belkin highly recommends you use Belkin Category 5e, FastCAT ™ or Category 6 Patch Cables for your CAT5 Extender to help ensure the superior performance of your video. -
Page 6: System Requirements
Overview System Requirements OS Platforms The USB CAT5 Extender is compatible with CPUs running on, but not limited to, the following OS platforms: • Windows ® XP, Vista™, or Server 2003 • Microsoft DOS 5.x and above ® • Red Hat ®... -
Page 7: Unit Display Diagrams
Overview Unit Display Diagrams Receiver Unit • Remote LED • Local LED Console Local CPU Remote CPU 5V/ 2.5A • Local CPU Console Connectors • Local Computer (Requires additional cable to connect) • RJ45 CAT5 Port for Remote Computer Connection •... -
Page 8: Transmitter Unit
Overview Transmitter Unit • Power LED • Status LED • Monitor VGA Cable • Keyboard/Mouse USB Cable Console RJ45 • Local-Console Connection • RJ45 CAT5 Port for Remote Computer Connection EN-6... -
Page 9: Specifications
Overview Specifications Part No.: F1D086Uea Enclosure: Metal enclosure Receiver Power: 5V, 600mA power adapter with center-pin negative polarity Transmitter Power: 5V, 220mA (from attached computer or KVM switch via keyboard port) Max. Video Remote Resolution: Up to 1280x1024 @ 75Hz (depends on cable length) Max. -
Page 10: Installation
VGA signals transmit best at shorter cable lengths. At longer cable lengths, the probability of video degradation increases. For this reason, Belkin recommends that the length of the CAT5 patch cable between the Transmitter and Receiver units does not exceed 500 feet (150m). -
Page 11: Connecting The Transmitter To The Computer Or Kvm Switch
Installation Step 1 Connecting the Transmitter to the Computer or KVM Switch 1.1 Disconnect all computers from the electrical power supply. 1.2 Using the Transmitter unit, connect the built-in VGA and USB cables to the monitor and USB ports on your computer or to the console ports on your KVM switch. -
Page 12: Connecting The Remote Console To The Receiver
Receiver unit. Receiver 3.3 To use the Receiver as a 2-port KVM switch between local and remote computers, connect your local computer to the Receiver using the Universal KVM USB Cable Kit, Belkin part number F1D9006-XX (not included). Receiver EN-10... -
Page 13: Connecting The Transmitter To The Receiver
Installation Step 4 Connecting the Transmitter to the Receiver Using a CAT5 cable, connect one end into the RJ45 port on the Transmitter unit. Connect the other end to the RJ45 port on the Receiver unit. (Refer to diagram below.) Console Local CPU Remote CPU 5V/ 2.5A... -
Page 14: Using The Cat5 Extender
Using the CAT5 Extender Once the CAT5 Extender is installed, the video will display at both the local and remote consoles. However, only one console can have control of the mouse and keyboard input at one time. The control is determined automatically. -
Page 15: Led Operation
Using the CAT5 Extender LED Operation The orange Power LED indicates if the Transmitter and Receiver units are powered on. The green Status LED indicates which console has control. If the Status LED on the Transmitter is flashing, the remote console (or Receiver) has control. -
Page 16: Information
What is not covered by this warranty? All above warranties are null and void if the Belkin product is not provided to Belkin for inspection upon Belkin’s request at the sole expense of the purchaser, or if Belkin determines that the Belkin product has been improperly installed, altered in any way, or tampered with. - Page 17 Belkin product and how to proceed with your claim. Belkin reserves the right to review the damaged Belkin product. All costs of shipping the Belkin product to Belkin for inspection shall be borne solely by the purchaser. If Belkin determines, in...
- Page 18 +34 902 02 00 34 fax +46 (0) 8 5229 1874 fax © 2007 Belkin International, Inc. All rights reserved. All trade names are registered trademarks of respective manufacturers listed. Windows, Microsoft, and Windows Vista are either registered trademarks or trademarks of Microsoft Corporation in the United States and/or other countries.
- Page 19 Extension CAT5 KVM USB Manuel de l’utilisateur F1D086Uea...
- Page 20 Table des matières Introduction ................1 Contenu de l’emballage ............1 Présentation ................. 2 Caractéristiques ..............2 Matériel requis ..............3 Configuration requise ............4 Illustrations de l’appareil ............5 Spécifications ..............7 Installation ................8 Préconfiguration ..............8 Branchement de l’émetteur à l’ordinateur ou au switch KVM ... 9 Branchement de la console locale à...
-
Page 21: Introduction
Introduction Félicitations et merci d’avoir fait l’achat de l’Extension CAT5 KVM USB Belkin (l’Extension CAT5). L’Extension CAT5 permet de commander un ordinateur ou un switch KVM situé jusqu’à 150 mètres de la console. Idéal pour les serveurs isolés, les parcs de serveurs étendus, les systèmes sécurisés et les bancs d’essais, là... -
Page 22: Présentation
Présentation Présentation des fonctions Technologie CAT5 Technologie CAT5 intégrée pour le branchement de votre switch KVM jusqu’à 150 mètres de distance, au moyen d’un câblage CAT5 standard. Le câblage CAT5 réduit l’encombrement dû aux câbles et en facilite la gestion. Résolution vidéo L’Extension CAT5 prend en charge des résolutions vidéo jusqu’à... -
Page 23: Matériel Requis
A3L980bXX-YYY Remarque : Utilisez des câbles CAT6 solides pour une qualité vidéo optimale sur de longues distances. Câbles réseau UTP Belkin : A3L791bXX-YYY (CAT5e) A3L850bXX-YYY (FastCAT5e) A3L980bXX-YYY (CAT6) (-XX indique la longueur en pieds) (-YYY indique la couleur) Pour connecter le récepteur CAT5 à... -
Page 24: Configuration Requise
Présentation Configuration requise Systèmes d’exploitation L’Extension CAT5 USB est compatible avec des unités centrales sous les plate-formes suivantes (liste non exhaustive) : • Windows ® XP, Vista™ ou Serveur 2003 • Microsoft DOS 5.x et versions ultérieures ® • Red Hat ®... -
Page 25: Illustrations De L'appareil
Présentation Illustrations de l’appareil Récepteur • Voyant distant • Voyant local Console Local CPU Remote CPU 5V/ 2.5A • Connecteurs aux consoles CPU locales • Ordinateur local (Câble additionnel requis pour la connexion) • Port RJ45 CAT5 pour la connexion de l’ordinateur distant •... - Page 26 Présentation Émetteur • Voyant d’alimentation • Voyant d’état • Câble de moniteur VGA • Câble USB pour clavier/souris Console RJ45 • Connexion à la console locale • Port RJ45 CAT5 pour la connexion de l’ordinateur distant FR-6...
-
Page 27: Spécifications
Présentation Spécifications Référence : F1D086Uea Coque : Métal Alimentation du récepteur : Adaptateur de courant 5 V / 600 mA avec polarité positive sur la broche centrale Alimentation de l’émetteur : 5 V, 220 mA (tiré de l’ordinateur ou switch KVM, via le port clavier) Résolution vidéo distante maximale :... -
Page 28: Installation
La transmission des signaux VGA est meilleure sur une longueur de câble plus courte. Sur de plus importantes longueurs, les probabilités de dégradation vidéo augmentent. Ainsi, Belkin vous recommande de ne pas utiliser un câblage CAT5 de plus de 150 mètres, entre l’émetteur et le récepteur. -
Page 29: Branchement De L'émetteur À L'ordinateur Ou Au Switch Kvm
Installation Étape 1 Branchement de l’émetteur à l’ordinateur ou au switch KVM 1.1 Débranchez tous les ordinateurs de la prise de courant. 1.2 Au moyen de l’émetteur, branchez les câbles VGA et USB intégrés aux ports moniteur, clavier et souris USB de votre ordinateur ou aux ports de console de votre switch KVM. -
Page 30: Branchement De La Console Distante Au Récepteur
Récepteur 3.3 Pour utiliser le récepteur en tant que switch KVM 2 ports entre ordinateurs locaux et distants, branchez votre ordinateur local au récepteur à l’aide du Kit de câbles KVM USB universel Belkin référence n° F1D9006-XX (non fourni). Récepteur... -
Page 31: Branchement De L'émetteur Au Récepteur
Installation Étape 4 Branchement de l’émetteur au récepteur Au moyen d’un câble CAT5, branchez une extrémité au port RJ45 de l’émetteur. Branchez l’autre extrémité au port RJ45 du récepteur. (Reportez- vous à l’illustration ci-dessous.) Console Local CPU Remote CPU 5V/ 2.5A Console RJ45 Étape 5... - Page 32 Utilisation de l’Extension CAT5 Après l’installation de l’Extension CAT5, le signal vidéo apparaît sur la console locale et la console distante. Toutefois, une seule console peut contrôler les signaux de la souris et du clavier. Le contrôle est déterminé automatiquement. Pour obtenir le contrôle, la console active doit être inactive pendant 2 secondes.
-
Page 33: Utilisation De L'extension Cat5
Utilisation de l’Extension CAT5 Voyants Le voyant d’alimentation orange indique si l’émetteur et le récepteur sont alimentés. Le voyant d’état vert indique la console qui a le contrôle des signaux. Si le voyant d’état sur l’émetteur clignote, la console distante (ou le récepteur) a le contrôle. -
Page 34: Information
(sans intervention dans les frais d’expédition du produit). Limites de la couverture offerte par la garantie Toutes les garanties précitées sont nulles et non avenues si le produit Belkin n’est pas retourné à Belkin, à la demande expresse de celui-ci, l’acheteur étant responsable de l’acquittement des frais d’expédition, ou si Belkin détermine que le produit Belkin a été... - Page 35 Belkin se réserve le droit d’examiner le produit Belkin endommagé. Tous les frais d’expédition du produit Belkin à l’adresse de Belkin en vue de son inspection seront entièrement à la charge de l’acheteur. Si Belkin détermine, à son entière discrétion, qu’il serait impossible d’expédier l’équipement endommagé...
- Page 36 +34 902 02 00 34 fax +46 (0) 8 5229 1874 fax © 2007 Belkin International, Inc. Tous droits réservés. Toutes les raisons commerciales sont des marques déposées de leurs fabricants respectifs. Microsoft, Windows et Windows Vista sont des marques déposées ou des marques de commerce de Microsoft Corporation aux États-Unis et/ou dans d’autres pays.
- Page 37 USB CAT5 KVM-Erweiterung Benutzerhandbuch F1D086Uea...
- Page 38 Inhaltsverzeichnis Einleitung ................1 Verpackungsinhalt ..............1 Übersicht ................2 Merkmale ................2 Erforderliches Zubehör ............3 Systemvoraussetzungen ............4 Bestandteile ................. 5 Technische Daten ..............7 Installation ................8 Vorbereitung des Geräts ............8 Anschluss des Senders an Computer oder KVM-Switch ..9 Anschluss der lokalen Konsole an den Sender ......
-
Page 39: Einleitung
Installation und den Einsatz der neuen CAT5-Erweiterung und zur Problemlösung benötigen—sollte es einmal zu Problemen kommen. Wir hoffen, Sie zu unseren zufriedenen Stammkunden zählen zu können. In kurzer Zeit werden Sie selbst sehen, warum weltweit über 1 Million Belkin OmniView-Produkte pro Jahr zum Einsatz kommen. Verpackungsinhalt... -
Page 40: Übersicht
Übersicht Merkmale CAT5 Technologie Die integrierte CAT5-Technologie ermöglicht Ihnen bei der Verwendung von Standard-CAT5-Verkabelung in einer Entfernung von bis zu 150 m den Anschluss Ihres KVM-Switches an Ihre Server. Mit CAT5-Verkabelung vermeiden Sie durch effiziente Kabelführung Kabelgewirr. Bildschirmauflösung Die CAT5-Erweiterung unterstützt Bildschirmauflösungen von bis zu 1920 x 1440 / 75 Hz auf dem lokalen Computer und bis zu 1280 x 1024 / 75 Hz auf dem fernbedienten Gerät. -
Page 41: Erforderliches Zubehör
Übersicht Erforderliches Zubehör Kabel Zum Anschluss der CAT5-Erweiterung an einen Computer oder KVM-Switch benötigen Sie die enthaltene KVM-Kabelgarnitur und ein Standard-CAT5- Patchkabel. Belkin empfiehlt die Verwendung von CAT5e, FastCAT ™ 5e oder CAT6-Patchkabeln von Belkin für Ihre CAT5-Erweiterung, damit die beste Bildqualität erzielt werden... -
Page 42: Systemvoraussetzungen
Übersicht Systemvoraussetzungen Betriebssysteme Die USB CAT5-Erweiterung ist kompatibel mit CPUs, die mit folgenden Betriebssystemen betrieben werden, ist aber nicht auf diese beschränkt: • Windows ® XP, Vista™ oder Server 2003 • Microsoft DOS 5.x und höher ® • Red Hat ®... -
Page 43: Bestandteile
Übersicht Bestandteile Empfängermodul • Anzeige des Remote-Geräts • Anzeige des lokalen Geräts Console Local CPU Remote CPU 5V/ 2.5A • Anschlüsse für lokale CPU- Konsole • Lokaler Computer (zusätzliches Kabel für den Anschluss erforderlich) • RJ45 CAT5-Anschluss für Verbindung mit Remote-Computer •... - Page 44 Übersicht Sendermodul • Betriebsanzeige • Statusanzeige • Bildschirm-VGA-Kabel • Tastatur-/Maus-USB-Kabel Console RJ45 • Anschlüsse für lokale Konsole • RJ45 CAT5-Anschluss für Verbindung mit Remote-Computer DE-6...
-
Page 45: Technische Daten
Übersicht Technische Daten Artikelnr.: F1D086Uea Gehäuse: Metallgehäuse Stromversorgung Empfänger: Netzteil (5V, 600 mA); Mittelkontakt negativ Stromversorgung Sender: 5 V, 220 mA (über angeschlossenen Computer oder KVM-Switch [Tastaturschnittstelle] Max. Bildschirmauflösung: Von bis zu 1280 x 1024 / 75 Hz (abhängig von Kabellänge) Max. -
Page 46: Installation
Installation Vorbereitung des Geräts Bitte beachten Sie bei der Aufstellung der CAT5-Erweiterung Folgendes: • Länge der Kabel von Tastatur, Bildschirm und Maus • Standort von Computer oder KVM-Switch • Länge der Kabel, die Sie zum Anschließen der Sender- und Empfängermodule verwenden Zulässige Kabellängen Die Übertragung von VGA-Signalen erfolgt bei kurzen Kabeln am besten. -
Page 47: Anschluss Des Senders An Computer Oder Kvm-Switch
Installation Schritt 1 Anschluss des Senders an Computer oder KVM-Switch 1.1 Trennen Sie alle Computer vom Stromnetz. 1.2 Schließen Sie die integrierten VGA- und USB-Kabel des Sendermoduls an den Bildschirm und an die USB-Schnittstellen Ihres Computers oder an die Konsolenschnittstellen Ihres KVM- Switches an. -
Page 48: Anschluss Der Remote-Konsole An Den Empfänger
3.2 Schließen Sie Tastatur und Maus an die USB- Konsolenschnittstellen des Empfängermoduls an. Empfänger 3.3 Wenn Sie den Empfänger als 2-Port KVM-Switch zwischen lokalen und entfernten Computern verwenden wollen, schließen Sie diesen mit dem Universal KVM-USB-Kabelkit, Belkin Artikelnummer F1D9006-XX (nicht enthalten), an Ihren lokalen Computer an. Empfänger DE-10... -
Page 49: Anschluss Des Senders An Den Empfänger
Installation Schritt 4 Anschluss des Senders an den Empfänger Schließen Sie ein Ende eines CAT5-Kabels an den RJ45-Anschluss des Sendermoduls an. Schließen Sie das andere Ende an den RJ45-Anschluss des Empfängermoduls an. (Siehe Abbildung unten.) Console Local CPU Remote CPU 5V/ 2.5A Console RJ45 Schritt 5... -
Page 50: Verwenden Der Cat5-Erweiterung
Verwenden der CAT5-Erweiterung Wenn die CAT5-Erweiterung installiert ist, erfolgt die Bildübertragung über die lokale und die Remote-Konsole. Die Steuerung der Maus- und Tastatureingabe kann jedoch immer nur über jeweils eine Konsole erfolgen. Dies wird automatisch festgelegt. Vor der Steuerungsübernahme muss die aktive Konsole zwei Sekunden lang inaktiv sein. -
Page 51: Led-Anzeigen
Verwenden der CAT5-Erweiterung LED-Anzeigen An der orangen Betriebsanzeige ist zu sehen, ob Sender- und Empfängermodule eingeschaltet sind. An der grünen Statusanzeige ist zu sehen, über welche Konsole die Steuerung erfolgt. Wenn die Statusanzeige auf dem Sender blinkt, erfolgt die Steuerung über die Remote-Konsole (oder den Empfänger). -
Page 52: Informationen
Informationen Erklärung der Konformität mit den FCC-Bestimmungen zur elektromagnetischen Verträglichkeit Wir, Belkin International, Inc., 501 West Walnut Street, Compton, CA 90220, USA, erklären hiermit alleinverantwortlich, dass der Artikel F1D086U auf den sich diese Erklärung bezieht, in Einklang mit Teil 15 der FCC-Bestimmungen steht. Der Betrieb unterliegt den beiden folgenden Bedingungen: (1) Dieses Gerät darf schädigende Störungen nicht verursachen,... - Page 53 Um Unterstützung von Belkin zu bekommen, gehen Sie nach folgenden Schritten vor: 1. Wenden Sie sich schriftlich an Belkin International, Inc., 501 W. Walnut St., Compton CA 90220, Attn: Customer Service oder wenden Sie sich innerhalb von 15 Tagen nach dem Vorfall telefonisch unter (800)-223-5546 an Belkin.
- Page 54 +34 902 02 00 34 Fax +46 (0) 8 5229 1874 Fax © 2007 Belkin International, Inc. Alle Rechte vorbehalten. Alle Produktnamen sind eingetragene Marken der angegebenen Hersteller. Windows, Microsoft und Windows Vista sind in den Vereinigten Staaten und in anderen Ländern eingetragene Marken bzw. Marken der Microsoft Corporation.
- Page 55 USB CAT5 KVM-extender Handleiding F1D086Uea...
- Page 56 Inhoud Inleiding ................1 Inhoud van de verpakking ............1 Overzicht ................2 Productkenmerken ............... 2 Vereiste apparatuur .............. 3 Systeemvereisten ............... 4 De KVM-extender in beeld ............ 5 Technische gegevens ............7 Installatie ................8 Voor-configuratie ..............8 De zender op de computer of KVM-switch aansluiten ..... 9 De lokale console op de zender aansluiten .......
-
Page 57: Inleiding
Inleiding Gefeliciteerd en hartelijk dank voor het kopen van de USB CAT5 KVM-extender (de CAT5-extender) van Belkin. Met deze CAT5-extender kunt u een computer of KVM-switch tot op 150 m afstand bedienen. Het is de ideale oplossing voor geïsoleerde serverruimten, grote servercentrales, beveiligde systemen en testopstellingen waarin de computer of KVM-switch voor u onbereikbaar is. -
Page 58: Overzicht
Overzicht Productkenmerken CAT5-technologie Dankzij de geïntegreerde CAT5-technologie kunt u met standaard CAT5- kabels een KVM-switch tot op 150 m afstand met uw servers verbinden. CAT5-kabels verminderen het aantal benodigde kabels en zijn eenvoudig aan te sluiten. Videoresolutie De CAT5-extender ondersteunt videoresoluties van wel 1920x1440 bij 75 Hz op uw lokale computer en wel 1280x1024 bij 75 Hz op een computer op afstand. -
Page 59: Vereiste Apparatuur
CAT5- extender Category 5e, FastCAT ™ of Category 6 patchkabels van Belkin te gebruiken. Deze kabels zijn van de hoogst mogelijke kwaliteit en zorgen A3L791bXX-YYY voor een optimale data- en video- A3L850bXX-YYY overdracht. -
Page 60: Systeemvereisten
Overzicht Systeemvereisten Besturingssysteemplatformen De USB CAT5-extender is compatibel met CPU’s die ondermeer op de volgende besturingssysteemplatformen draaien: • Windows ® XP, Vista™ en Server 2003 • Microsoft DOS 5.x en hoger. ® • Red Hat ® Linux ® 8.x en hoger. •... -
Page 61: De Kvm-Extender In Beeld
Overzicht De KVM-extender in beeld De ontvanger • Status-LED voor apparatuur op afstand • Status-LED voor lokale apparatuur Console Local CPU Remote CPU 5V/ 2.5A • Aansluitingen voor lokale CPU/ console • Lokale computer (extra kabel vereist voor aansluiting) • RJ45 CAT5-poort voor aansluiting van computer op afstand •... - Page 62 Overzicht De zender • Voedings-LED • Status-LED • VGA-monitorkabel • USB-toetsenbord/ muiskabel Console RJ45 • Aansluitingen voor lokale console • RJ45 CAT5-poort voor aansluiting van computer op afstand NL-6...
-
Page 63: Technische Gegevens
Overzicht Technische gegevens Artikelnr.: F1D086Uea Behuizing: Metalen behuizing Voeding ontvanger: 5 V, 600 mA voedingsadapter met negatieve polariteit op middenpool Voeding zender: 5 V, 220 mA (van aangesloten computer of KVM-switch via toetsenbordpoort) Max. videoresolutie op afstand: Tot 1280x1024 bij 75 Hz (afhankelijk van kabellengte) Max. -
Page 64: Installatie
VGA-signalen worden het best over relatief korte kabels verstuurd. Hoe langer de kabel, des te groter de kans op aantasting van het videosignaal. Daarom adviseert Belkin de lengte van de CAT5-patchkabel tussen de zender en de ontvanger te beperken tot maximaal 150 m. -
Page 65: De Zender Op De Computer Of Kvm-Switch Aansluiten
Installatie Stap 1 De zender op de computer of KVM-switch aansluiten 1.1 Ontkoppel de netvoedingskabels van alle computers. 1.2 Sluit de ingebouwde VGA- en PS/2-kabels van de zender aan op de monitor- en USB-poorten van de computer of de consolepoorten van de KVM-switch. -
Page 66: De Console Op Afstand Op De Ontvanger Aansluiten
3.3 Om de ontvanger als een 2-poorts KVM-switch te kunnen gebruiken tussen de lokale computer en de computer op afstand, sluit u uw lokale computer aan op de ontvanger met behulp van de universele USB KVM-kabelset van Belkin met artikelnummer F1D9006-XX (niet meegeleverd). Ontvanger... -
Page 67: De Zender Op De Ontvanger Aansluiten
Installatie Stap 4 De zender op de ontvanger aansluiten Sluit het ene uiteinde van een CAT5-kabel aan op de RJ45-poort van de zender. Sluit het andere uiteinde aan op de RJ45-poort van de ontvanger. (Zie onderstaande afbeelding.) Console Local CPU Remote CPU 5V/ 2.5A Console RJ45... -
Page 68: De Cat5-Extender Gebruiken
De CAT5-extender gebruiken Nadat u de CAT5-extender hebt geïnstalleerd, kunt u zowel op de lokale console als de console op afstand beeld weergeven. Slechts één console kan echter op een bepaald moment de controle over muis- en toetsenbordinvoer hebben. Welke console de controle heeft, wordt automatisch bepaald. -
Page 69: Betekenis Van De Status-Led's
De CAT5-extender gebruiken Betekenis van de status-LED’s De oranje status-LED geeft aan of de zender en de ontvanger zijn ingeschakeld. De groene status-LED geeft aan welke console actief is. Als de status-LED op de zender knippert, dan is de console (of ontvanger) op afstand actief. Betekenis Voeding Aan = USB-voeding aanwezig... -
Page 70: Informatie
Belkin biedt twee jaar garantie op dit Belkin-product. Hoe worden problemen opgelost? Productgarantie. Belkin zal het product dat een defect vertoont naar eigen keus kosteloos (met uitzondering van verzendkosten) repareren of vervangen. Wat valt buiten deze garantie? Alle hierin versterkte garanties zijn niet van toepassing als het Belkin-product op verzoek van Belkin International, Inc. - Page 71 De kosten voor verzending van het Belkin-product naar Belkin komen volledig voor rekening van de koper. Als Belkin naar eigen bevinding tot de conclusie komt dat het onpraktisch is de beschadigde apparatuur naar Belkin te verzenden, kan Belkin naar eigen goeddunken een deskundige reparatie-inrichting aanwijzen en deze opdragen de betreffende apparatuur te inspecteren en de reparatiekosten ervan te begroten.
- Page 72 +34 902 02 00 34 fax +46 (0) 8 5229 1874 fax © 2007 Belkin International, Inc. Alle rechten voorbehouden. Alle handelsnamen zijn gedeponeerde handelsmerken van de betreffende rechthebbenden. Microsoft, Windows en Windows Vista zijn in de Verenigde Staten en/of andere landen gedeponeerde handelsmerken of handelsmerken van Microsoft Corporation.
- Page 73 Módulo de extensión KVM USB CAT5 Manual del usuario F1D086Uea...
- Page 74 Índice de contenidos Introducción ................1 Contenido del paquete ............. 1 Generalidades ............... 2 Esquema general de características ........2 Requisitos del equipo ............3 Requisitos del sistema ............4 Diagramas de los indicadores de la unidad ......5 Especificaciones ..............7 Instalación ................
-
Page 75: Introducción
Introducción Enhorabuena y gracias por adquirir el módulo de extensión KVM USB CAT5 de Belkin (el módulo de extensión CAT5). El módulo de extensión CAT5 le permite controlar su ordenador o su conmutador KVM a una distancia de hasta 150 metros. Es ideal para salas de servidores aisladas, granjas de servidores, sistemas de seguridad o bancos de prueba, donde el usuario no pueda acceder al ordenador o conmutador KVM. -
Page 76: Generalidades
Generalidades Características generales Tecnología CAT5 La tecnología CAT5 integrada le permite conectar el conmutador KVM a sus servidores, ubicados a una distancia de hasta 150 metros, mediante el cableado CAT5 estándar. Los cables CAT5 reducen el volumen de cableado y simplifican la colocación de los cables. Resolución de vídeo El módulo de extensión es compatible con resoluciones de vídeo de hasta 1920x1440 @ 75Hz en el ordenador local y hasta 1280x1024@75Hz en el... -
Page 77: Requisitos Del Equipo
óptima de datos y vídeo. A3L980bXX-YYY Nota: Utilice los cables CAT6 macizos para obtener la mejor calidad de vídeo a distancias superiores. Cables de red UTP de Belkin: A3L791bXX-YYY (CAT5e) A3L850bXX-YYY (FastCAT5e) A3L980bXX-YYY (CAT6) (-XX indica la longitud en pies) (-YYY indica el color) La conexión del receptor CAT5 a un... -
Page 78: Requisitos Del Sistema
Generalidades Requisitos del sistema Sistemas operativos El módulo de extensión CAT5 USB es compatible con las CPU en funcionamiento, aunque no de modo exclusivo, con los siguientes sistemas operativos: • Windows ® XP, Vista™, or Server 2003 • Microsoft DOS 5.x y superior ®... -
Page 79: Diagramas De Los Indicadores De La Unidad
Generalidades Diagramas de los indicadores de la unidad Unidad de receptor • LED remoto • LED local Console Local CPU Remote CPU 5V/ 2.5A • Conectores de consola local CPU • Ordenador local (Requiere un cable adicional) • Puerto RJ45 CAT5 para la conexión del ordenador remoto •... - Page 80 Generalidades Unidad de transmisor • LED de alimentación • LED de estado • Cable VGA para monitor • Cable USB para teclado/ratón Console RJ45 • Conexión de consola local • Puerto RJ45 CAT5 para la conexión del ordenador remoto ES-6...
-
Page 81: Especificaciones
Generalidades Especificaciones Nº de artículo: F1D086Uea Carcasa: carcasa de metal Alimentación del receptor: Adaptador de alimentación 5 V, 600 mA con clavija central de polaridad negativa Alimentación del transmisor: 5 V, 220 mA (desde el ordenador o conmutador KVM al que está... -
Page 82: Instalación
Las señales VGA se transmiten mejor cuando la longitud de los cables es menor. Cuanto mayor es la longitud del cable, mayor es la probabilidad de que la calidad de la imagen resulte afectada. Por esta razón, Belkin recomienda que la longitud del cable de red CAT5 que conecta las unidades del transmisor y el receptor no supere los 150 metros. -
Page 83: Conexión Del Transmisor Al Ordenador O Conmutador Kvm
Instalación Paso 1 Conexión del transmisor al ordenador o conmutador KVM 1.1 Desconecte la alimentación de todos los ordenadores. 1.2 Utilizando la unidad del transmisor, conecte los cables USB y VGA integrados a los puertos USB del ordenador o a los puertos de consola de su conmutador KVM. -
Page 84: Conexión De La Consola Remota Al Receptor
3.3 Para utilizar el receptor como un conmutador KVM de dos puertos entre el ordenador local y el remoto, conecte el local al receptor mediante el kit de cables KVM USB universal, número de artículo de Belkin F1D9006-XX (no incluido). Receptor ES-10... -
Page 85: Conexión Del Transmisor Al Receptor
Instalación Paso 4 Conexión del transmisor al receptor Utilizando un cable CAT5, conecte un extremo en el puerto RJ45 de la unidad del transmisor. Conecte el otro extremo en el puerto RJ45 de la unidad del receptor. (Consulte el siguiente diagrama). Console Local CPU Remote CPU 5V/ 2.5A... -
Page 86: Utilización Del Módulo De Extensión Cat5
Utilización del módulo de extensión CAT5 Una vez que se haya instalado el módulo de extensión CAT5, aparecerá la imagen en las pantallas de las consolas remota y local. Sin embargo, solo una consola puede controlar las entradas del teclado y el ratón al mismo tiempo. -
Page 87: Funcionamiento Del Led
Utilización del módulo de extensión CAT5 Funcionamiento de los LED La luz LED de alimentación naranja indica si las unidades del transmisor y el receptor están encendidas. El LED verde de estado indica qué consola tiene el control. Si el LED de estado del transmisor es intermitente, la consola remota (o el receptor) tiene el control. -
Page 88: Información
La cobertura de la presente garantía. Belkin International, Inc. (“Belkin”) otorga una garantía al comprador original según la cual el producto Belkin no tendrá defectos en cuanto a diseño, montaje, materiales o mano de obra. Cuál es el período de cobertura. - Page 89 Cuándo compró el producto. d. El recibo de compra original. 2. El servicio de atención al cliente de Belkin le informará sobre cómo enviar la factura y el producto Belkin y sobre cómo proceder con su reclamación. Belkin se reserva el derecho de revisar el producto Belkin dañado. Todos los gastos de envío del producto Belkin a Belkin para su inspección correrán a cargo del comprador exclusivamente.
- Page 90 +34 902 02 00 34 fax +46 (0) 8 5229 1874 fax © 2007 Belkin International, Inc. Todos los derechos reservados. Todos los nombres comerciales son marcas registradas de los respectivos fabricantes mencionados. Windows, Microsoft y Windows Vista son marcas registradas o marcas comerciales de Microsoft Corporation registradas en Estados Unidos y otros países.
- Page 91 Extender KVM USB CAT5 Manuale d’uso F1D086Uea...
- Page 92 Indice Introduzione ................1 Contenuto della confezione ............1 Descrizione generale ............2 Descrizione generale delle caratteristiche ....... 2 Requisiti dell’apparecchiatura ..........3 Requisiti di sistema .............. 4 Diagrammi di visualizzazione dell’unità ........5 Specifiche ................7 Installazione ................. 8 Configurazione preliminare ............
-
Page 93: Introduzione
CAT5, così come i consigli degli esperti su come risolvere eventuali problemi. La vostra attività ci sta a cuore e siamo certi che anche voi scoprirete perché oltre 1 milione di prodotti OmniView Belkin sono già utilizzati in tutto il mondo. Contenuto della confezione Trasmettitore Extender KVM... -
Page 94: Descrizione Generale
Descrizione generale Descrizione generale delle caratteristiche Tecnologia CAT5 La tecnologia CAT5 integrata permette di collegare lo switch KVM a server da una distanza massima di 150 metri utilizzando i normali cavi CAT5. I cavi CAT5 riducono il numero di cavi da utilizzare semplificandone la gestione. -
Page 95: Requisiti Dell'apparecchiatura
Per ottenere il massimo delle prestazioni dal vostro video, con l’Extender CAT5, Belkin ™ consiglia di utilizzare cavi Belkin di Categoria 5e, FastCAT5e, oppure cavi patch di Categoria 6. Questi cavi di altissima qualità, garantiscono eccellenti prestazioni nella trasmissione dei dati A3L791bXX-YYY audio e video. -
Page 96: Requisiti Di Sistema
Descrizione generale Requisiti di sistema Piattaforme OS L’Extender CAT5 USB è compatibile con le CPU collegate, tra le altre, alle seguenti piattaforme OS: • Windows ® XP, Vista ™ o Server 2003 • Microsoft DOS 5.x e successive ® • Red Hat ®... -
Page 97: Diagrammi Di Visualizzazione Dell'unità
Descrizione generale Diagrammi di visualizzazione dell’unità Unità ricevitore • LED remoto • LED locale Console Local CPU Remote CPU 5V/ 2.5A • Connettori locali CPU per la console • Computer locale (Richiede cavo addizionale) • Porta RJ45 CAT5 per connessione al computer remoto •... - Page 98 Descrizione generale Unità trasmettitore • LED di alimentazione • LED di stato • Cavo VGA per Monitor • Cavo USB per mouse/tastiera Console RJ45 • Connessione locale per console • Porta RJ45 CAT5 per connessione al computer remoto IT-6...
-
Page 99: Specifiche
Descrizione generale Specifiche Cod. prod.: F1D086Uea Alloggiamento: Alloggiamento in metallo Alimentazione ricevitore: Alimentatore da 5 V, 600 mA con polarità negativa al contatto centrale Alimentazione trasmettitore: 5 V, 220 mA (dal computer o switch KVM collegato tramite la porta della tastiera) -
Page 100: Installazione
I segnali VGA si trasmettono meglio con cavi più corti. Utilizzando cavi lunghi, le probabilità di deterioramento della qualità video aumentano. Per questo motivo, Belkin consiglia che la lunghezza del cavo patch CAT5 tra le unità trasmettitore e ricevitore non superi i 150 metri. -
Page 101: Collegamento Del Trasmettitore Al Computer O Switch Kvm
Installazione Fase 1 Collegamento del trasmettitore al computer o switch KVM 1.1 Scollegare tutti i computer dall’alimentazione elettrica. 1.2 Utilizzando l’unità trasmettitore, collegare i cavi VGA e USB incorporati alle porte monitor, tastiera e mouse del computer o alle porte della console dello switch KVM (vedere lo schema riportato di seguito). -
Page 102: Collegamento Della Console Remota Al Ricevitore
Ricevitore 3.3 Per usare il ricevitore come switch KVM a due porte tra computer locali e remoti, collegare il computer locale al ricevitore usando il kit di cavi universali USB per KVM Belkin. Codice prodotto F1D9006-XX (non incluso). Ricevitore IT-10... -
Page 103: Collegamento Del Trasmettitore Al Ricevitore
Installazione Fase 4 Collegamento del trasmettitore al ricevitore Utilizzando un cavo CAT5, collegare un’estremità alla porta RJ45 dell’unità trasmettitore e l’altra estremità alla porta RJ45 dell’unità ricevitore (vedere lo schema riportato di seguito). Console Local CPU Remote CPU 5V/ 2.5A Console RJ45 Fase 5 Accensione dei sistemi... -
Page 104: Utilizzo Dell'extender Cat5
Utilizzo dell’Extender CAT5 Una volta installato l’Extender CAT5, le immagini video saranno visualizzate su entrambe le console, locale e remota. Tuttavia, soltanto una console alla volta può controllare l’ingresso del mouse e della tastiera. Il controllo è stabilito automaticamente. Per acquisire il controllo, la console attiva deve rimanere inattiva per due secondi. -
Page 105: Funzionamento Dei Led
Utilizzo dell’Extender CAT5 Funzionamento dei LED Il LED di alimentazione arancione indica se le unità trasmettitore e ricevitore sono accese. Il LED di controllo verde indica la console che detiene il controllo. Se il LED di controllo sul trasmettitore lampeggia, la console remota (o ricevitore) ha il controllo. -
Page 106: Informazioni
(escluse le spese di trasporto). Condizioni non coperte dalla garanzia. Tutte le garanzie di cui sopra saranno rese nulle qualora il prodotto Belkin non fosse fornito a Belkin per essere sottoposto alle necessarie verifiche dietro espressa richiesta di Belkin e a spese del cliente, oppure nel caso in cui la Belkin International dovesse stabilire che il prodotto non è... - Page 107 Data di acquisto del prodotto. d. Copia della ricevuta originale. 2. Il rappresentante del Servizio Clienti Belkin vi spiegherà come inviare la ricevuta e il prodotto Belkin e come procedere al reclamo. Belkin si riserva il diritto di riesaminare il prodotto Belkin danneggiato. Tutte le spese di spedizione per il prodotto Belkin restituito alla Belkin sono a carico dell’acquirente.
- Page 108 +34 902 02 00 34 fax +46 (0) 8 5229 1874 fax © 2007 Belkin International, Inc. Tutti i diritti riservati. Tutti i nomi commerciali sono marchi registrati dei rispettivi produttori indicati. Microsoft, Windows e Windows Vista sono marchi commerciali o marchi registrati della Microsoft Corporation negli stati Uniti e/o in altri Paesi.