Table of Contents
Advertisement
Quick Links
Advertisement
Table of Contents

Related Manuals for Belkin CAT5


Summary of Contents for Belkin CAT5
- Page 1 OmniView ® CAT5 Extender User Manual F1D084...
-
Page 3: Table Of Contents
Connecting the Remote Console to the Receiver ....10 Connecting the Transmitter to the Receiver ......11 Powering up the Systems ............11 4. Using the CAT5 Extender ............12 LED Operation ................ 12 Adjusting the Picture ..............13 Troubleshooting Tips ..............13... -
Page 4: Introduction
Introduction Congratulations and thank you for purchasing the Belkin OmniView CAT5 Extender. The CAT5 Extender allows you to control your computer or KVM switch from up to 300 feet (91m) away. It is perfect for isolated server rooms, large server farms, secure systems, or test benches where the computer or KVM switch may be inaccessible to the user. -
Page 5: Overview
Feature Overview CAT5 Technology Integrated CAT5 technology enables you to connect your KVM switch to your servers up to 300 feet (91m) away using standard CAT5 cabling. CAT5 cabling reduces cable bulk and simplifies cable management. Video Resolution The CAT5 Extender supports video resolutions of up to 1600x1200@75Hz. -
Page 6: Equipment Requirements
Overview Equipment Requirements Cables Connecting the CAT5 Extender to a computer or KVM switch requires the included KVM cable kit and a standard CAT5 patch cable. Belkin highly recommends you use Belkin Category 5e, FastCAT 5e, or ™ Category 6 Patch Cables for your CAT5 Extender to help ensure the superior performance of your video. -
Page 7: System Requirements
Overview System Requirements OS Platforms The CAT5 Extender is compatible with CPUs running on, but not limited to, the following OS platforms: • Windows ® ® , 95, 98, 2000, Me, XP, Server 2003 • Microsoft DOS 5.x and above ®... -
Page 8: Unit Display Diagrams
Overview Unit Display Diagrams Receiver Unit Power LED Control LED Power Jack Picture-Adjust Dial ������� ���� ���� ��� RJ45 CAT5 Port Remote-Console Ports... -
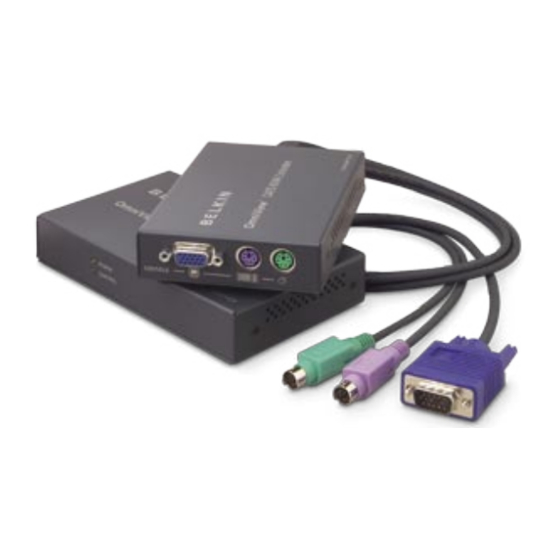
Page 9: Transmitter Unit
Overview Transmitter Unit Keyboard PS/2 Cable Mouse PS/2 Cable Monitor VGA Cable Local-Console Ports Power LED Control LED ���� RJ45 CAT5 Port... -
Page 10: Specifications
Console Keyboard Input: MiniDIN6 (PS/2) Console Mouse Input: MiniDIN6 (PS/2) Console Monitor Ports: HDDB15 female (VGA) CAT5 Extension Ports: RJ45 Operating Temp: 32° to 104° F (0° to 40° C) Storage Temp: -4° to 140° F (-20° to 60° C) -
Page 11: Installation
VGA signals transmit best at shorter cable lengths. At longer cable lengths, the probability of video degradation increases. For this reason, Belkin recommends that the length of the CAT5 patch cable between the Transmitter and Receiver units does not exceed 300 feet (91m). -
Page 12: Connecting The Transmitter To The Computer Or Kvm Switch
Installation Step 1 Connecting the Transmitter to the Computer or KVM Switch 1.1 Disconnect all computers from the electrical power supply. 1.2 Using the Transmitter unit, connect the built-in VGA and PS/2 cables to the monitor, keyboard, and mouse ports on your computer or to the console ports on your KVM switch. -
Page 13: Connecting The Remote Console To The Receiver
Installation Step 3 Connecting the Remote Console to the Receiver 3.1 From your remote console, connect your monitor to the VGA console port on the Receiver unit. 3.2 Connect your keyboard and mouse to the PS/2 console ports on the Receiver unit. Receiver... -
Page 14: Connecting The Transmitter To The Receiver
Installation Step 4 Connecting the Transmitter to the Receiver Using a CAT5 cable, connect one end into the RJ45 port on the Transmitter unit. Connect the other end to the RJ45 port on the Receiver unit. (Refer to diagram below.) �������... -
Page 15: Using The Cat5 Extender
Using the CAT5 Extender Once the CAT5 Extender is installed, the video will display at both the local and remote consoles. However, only one console can have control of the mouse and keyboard input at one time. The control is determined automatically. -
Page 16: Adjusting The Picture
• Avoid using a specialized mouse. Mice with scrolling wheels are supported. • Avoid using a specialized keyboard (e.g., a keyboard with special shortcut keys). • The CAT5 Extender is not compatible with serial mouse ports or KVM switches using serial mice at the console. -
Page 17: Information
Belkin Corporation warrants the Belkin product for two years. What will we do to correct problems? Product Warranty. Belkin will repair or replace, at its option, any defective product free of charge (except for shipping charges for the product). What is not covered by this warranty? All above warranties are null and void if the Belkin product is not provided to Belkin Corporation for inspection upon Belkin’s request at the sole expense of the purchaser, or if Belkin Corporation... - Page 18 Belkin product to Belkin Corporation for inspection shall be borne solely by the purchaser. If Belkin determines, in its sole discretion, that it is impractical to ship the damaged equipment to Belkin Corporation, Belkin may designate, in its sole discretion, an equipment repair facility to inspect and estimate the cost to repair such equipment.
- Page 20 +44 (0) 1933 35 2000 +44 (0) 1933 31 2000 fax © 2006 Belkin Corporation. All rights reserved. All trade names are registered trademarks of respective manufacturers listed. Windows, NT, and Microsoft, are either registered trademarks or trademarks of Microsoft Corporation in the United States and/or other countries.