Table of Contents
Advertisement
Kurzweil Headquarters
Kurzweil Headquarters
9FL, 102-BLDG, I'PARK, jeoungja-Dong, Buandang-Gu, Seongnam-Si,
9FL, 102-BLDG, I'PARK, jeoungja-Dong, Buandang-Gu, Seongnam-Si,
Gyeonggi-Do, Korea 463-859
Gyeonggi-Do, Korea 463-859
Tel : 001-82-31-786-7900
Tel : 001-82-31-786-7900
Fax : 001-82-31-785-2703
Fax : 001-82-31-785-2703
YCNA(Young Chang North America)
YCNA(Young Chang North America)
19060 S Dominguez Hills, Dr Rancho Dominguez, CA 90220, U.S.A
19060 S Dominguez Hills, Dr Rancho Dominguez, CA 90220, U.S.A
Tel : 1-310-637-2000
Tel : 1-310-637-2000
Fax : 1-310-637-2025
Fax : 1-310-637-2025
Web : www.kurzweilmusicsystems.com
Web : www.kurzweilmusicsystems.com
2008. 9. 12 Rev.B
Advertisement
Table of Contents

Related Manuals for Kurzweil Mark-Pro 3i


Summary of Contents for Kurzweil Mark-Pro 3i
- Page 1 Kurzweil Headquarters Kurzweil Headquarters 9FL, 102-BLDG, I'PARK, jeoungja-Dong, Buandang-Gu, Seongnam-Si, 9FL, 102-BLDG, I'PARK, jeoungja-Dong, Buandang-Gu, Seongnam-Si, Gyeonggi-Do, Korea 463-859 Gyeonggi-Do, Korea 463-859 Tel : 001-82-31-786-7900 Tel : 001-82-31-786-7900 Fax : 001-82-31-785-2703 Fax : 001-82-31-785-2703 YCNA(Young Chang North America) YCNA(Young Chang North America) 19060 S Dominguez Hills, Dr Rancho Dominguez, CA 90220, U.S.A...
-
Page 4: Radio And Television Interference
WARNING : Changes or modifications to this instrument not expressly Reorient or relocate the receiving antenna. approved by KURZWEIL could void your authority to operate the instrument. Increase the separation between the instrument and the receiver. Connect the instrument into an outlet on a circuit other than the one to which IMPORTANT : When connecting this product to accessories and/or other the receiver is connected. -
Page 5: Important Safety Instructions
IMPORTANT SAFETY INSTRUCTIONS 1. Read these instructions. 2. Keep these instructions. 3. Heed all warnings. 4. Follow all instructions. 5. Do not use this apparatus near water. 6. Clean only with dry cloth. 7. Do not block any of the ventilation openings. Install in accordance with the manufacturer’s instructions. 8. -
Page 6: The Front Panel
The Front Panel 1. Volume and Equalizer Control master volume and EQ - treble and bass 2. Rhythm region Select a rhythm for auto accompaniment 3. Rhythm Control region Control current rhythm. The Front Panel... - Page 7 4. L C D d i s p l a y a n d A d j u s t v a l u e View current settings Adjust value by using the [+/Yes], [-/No] button or the jog shuttle 5.
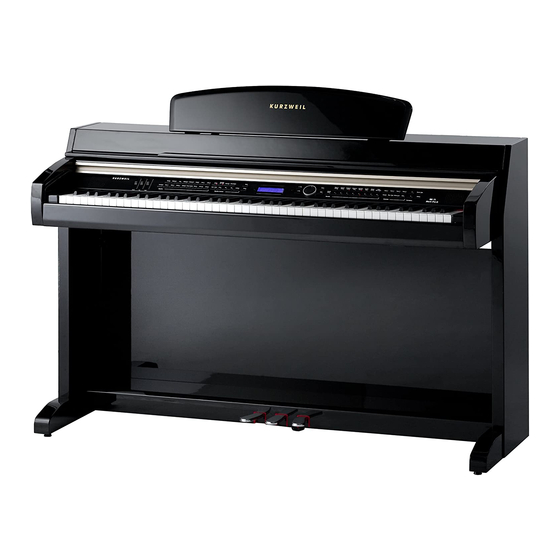
- Page 8 Introduction Welcome to the world of the KURZWEIL Mark Pro 3i Digital Piano. The Mark Pro 3i gives you easy access to KURZWEIL's high-quality sound technology. Authentic digital representations of musical instrument sounds are the starting points. The Mark Pro 3i reproduces the finest details of the original sounds; you'll even hear differences in tone as you play from bass to treble, and from soft and loud, just as in the original instruments..
-
Page 9: Setting Up The Instrument
Setting up the instrument Check that all of the following items are present. Item Item ① Keyboard 1 EA ⑦ Screws for Headphone Hanger 4 EA ② Side Panel (Left) 1 EA ⑧ Screws for Side Panel and Keyborad 4 EA ③... -
Page 10: Side Panel And Pedal Box Assembly
Side Panel and Pedal Box Assembly 1. Attach pedal box ④ to the left side panel ② and fasten the screw ⑨. 2. Attach the right side panel ③ in the same manner. 3. Take out the pedal cable from inside of the pedal box ④. - Page 11 Installing the Keyboard onto the Stand 1. Place the keyboard on the stand so that the wood pegs on the top of the side panel fit into the holes on the bottom surface of the keyboard. 2. Attach the side panels to the keyboard with the metal brackets. Use the bolt ⑧ for the front and the rear hole.
-
Page 12: Setting The Volume
Turning on the instrument (Power) The Mark Pro 3i operates on AC power. A power cord is included with the instrument to connect it to an AC Outlet. Before connecting the power cord, be sure that the power switch, located under the left-hand end of the keyboard, is off. -
Page 13: The Keyboard
Keyboard and Pedals The Keyboard The keyboard of the Mark Pro 3i consists of 88 weighted keys with an action designed to simulate the feel of an acoustic piano. Just as with an acoustic piano, the harder you press the keys of the Mark Pro 3i (more precisely, the faster you strike them), the louder and brighter the resulting sound is. -
Page 14: Headphone Jacks
Headphone Jacks and Rear Panel Headphone Jacks Using headphones allows private practice. Plugging in a pair of headphones turns off the speakers. You can also insert a "dummy" stereo headphone adapter. This is useful if you want to mute the internal speaker system while using a more powerful external amplification system connected to the Audio Out Jack. -
Page 15: Listen To The Demo Songs
Listen to the Demo Songs The Mark Pro 3i contains a number of built-in demonstrations to acquaint you with the sound and capabilities it possesses. To access these demonstrations, press the [Demo/Edu] button, which is located near the right end of the front panel controls. The 1, 2, 3 buttons in Sounds section blink to show that the Mark Pro 3i is in the demonstration mode. - Page 16 To listen to educational songs All the songs in this mode have both demo and the education function There are total 106 songs in Beyer and 30 songs in Czerny. You can select one of three play the left-hand part only, the right-hand part only and both hands in this mode.
-
Page 17: Sound Select
Sound Select You can select a program in the Sound Select region. Bank and Category The Mark Pro 3i has a total of 512 Programs. To make navigating and sound selection quick and efficient, the Mark Pro 3i uses a system of organized Banks and Categories. - Page 18 Select a Bank The LCD display will show you the currently selected bank. In addition, the Bank button LED light will display different colors in conjunction with the screen read out, as a separate indicator of the currently selected bank. The display of each bank At each power up, the Mark Pro 3i defaults to the Primary bank.
- Page 19 Sound Select Procedure To select any given sound involves 3 steps. 1. Select a bank 2. Select the desired instrument type by pressing one of the 8Category buttons. Each category button can select between 2 categories as printed above each button. The LED light within the button indicates which category you have currently selected.
- Page 20 Drum Sound Maps Sound Select...
- Page 21 Select a Setup While you can play just one sound at a time within a program, a Setup consists of two or more programs. Setup mode shines most during live performance. You can combine up to four distinct sounds in a single setup to suit your need for band or solo performance situations. The Mark Pro 3i has 16 setups.
-
Page 22: Layering Sounds
Layering Sounds For even more variety and richness of sound, you can layer two sounds across the keyboard - that is, each key of the keyboard will play two different sounds at the same time. To select the two sounds that you wish to layer, select one program then press the [Layer] button. -
Page 23: Activate Left Split
An example of layering Two favorite sounds used in layered combinations are Piano and Pads. Other combinations such as Piano and Strings, Guitar and Strings, and Voices and Pads also provide rich layered sounds. Here is an example of layering Piano and Strings: 1. - Page 24 Changing a program and adjusting volume balance You can change each program in split mode. The program used for the right-hand part is the program selected just before entering the left split mode. If you want to change the program used for the right-hand part, press the [Split] button again to get out of the left split mode.
-
Page 25: Effect Setting
Effect setting When you change programs the effects will automatically change to best match the new program. You can also select the effect globally. When you do this, all programs are affected by the change. See 33, 34 pages for the global effect settings and 53 page for the effect list. Effect A Type (Effect) Effects add a heightened sense of sonic realism to programs. -
Page 26: Adjusting Tempo
Metronome Metronome The metronome can be used as a stand-alone metronome that is convenient for practicing. When the [Metronome] button is pressed, the light goes on and the metronome starts. Press it again to turn it off. The display of metronome As you see, the upper line shows you current beat and the lower line is current tempo. -
Page 27: Rhythm And Auto Accompaniment
Rhythm and Auto Accompaniment The Mark Pro 3i has 32 rhythm patterns covering many different musical genres. It also provides an auto accompaniment function based on chords played with the left hand. section There are 16 rhythm select buttons in the Rhythm on the front panel. - Page 28 Rhythm Control You can control a rhythm by using the buttons in Rhythm Control region. The upper buttons are used for auto-accompaniment and the lower ones are used for rhythm. The upper buttons of the Rhythm Control The [EzPlay] button Program and tempo are set to optimized settings based on the selected rhythm.
-
Page 29: Auto Accompaniment
The lower buttons of the Rhythm Control The [Start/Stop] button Press this button to start playing the selected rhythm. If you press this button once again while playing a rhythm, it will stop. If the [Alt.] button is activated, the rhythm will start playing a variation. The [Intro] button This is used as an introduction for the beginning of a song. - Page 30 Simple finger detection If the [Chord Mode] button is on, you can use simple finger detection as shown below: For a major chord, press the root key only. For a minor chord, simultaneously press the root key and a white key to its right. For a seventh chord, simultaneously press the minor chord keys and a white key to its right.
-
Page 31: Select Song
Recorder This is the 4 procedures for recording Select song For recording, first of all, select a song. Press the [Song] button and the song number displayed. You can select one song out of 3 songs by using the [+/Yes] or [-/No] button. Each song can be as long as 10,000 notes. -
Page 32: Start To Record
Select the recording track and set the metronome If you press the [Record] button, 4 Track buttons will blink. Then press one of these Track buttons to enter record stand-by mode with activating the metronome and illuminating the [Metronome] button. At this time, if you hold the [Metronome] button, the display will shows you the current beat and tempo settings. -
Page 33: Additional Recording
Additional Recording Supposed that you want to record track no 2, after you’re finished recording track 1 : Select a program for the new track. Press the [Record] button to get into record stand-by mode. Press the [Track 2] button to select track no.2. When you are ready to record, press the [Play/Stop] button or a pedal or key to start record. -
Page 34: Global Settings
Global Settings Global parameters affect the behavior of the entire instrument. Global Press the [Global] button to change the behavior of the entire instrument of the Mark Pro 3i. When you press the [Global] button, the display will show the last selected Global parameter. In this mode, you can select each global parameters using the [+/Yes] and [-/No] buttons and change the values of parameters with the Jog Shuttle wheel. - Page 35 Sound Tune - Hertz 1 Hz is equal to one cycle per second. The default Hertz value for A4 is 440Hz. You can adjust this value from 427.47 to 452.89Hz. Key Touch Map This parameter determines how sensitively the keyboard responds to your playing. By default, a value of 002 is the standard, unaltered level of keyboard sensitivity.
- Page 36 Please refer to page 17 for more information. You can select either General MIDI style layout (GM) or Kurzweil style layout (Normal) of these instruments on the keyboard by turning the jog shuttle wheel. The default setting is Normal.
-
Page 37: Factory Reset
Effect B On/Off You can turn Effect B (Reverb) on or off using this parameter. The default value is On. If this parameter is set to Off, the Effect B will not affect any program. See page 53 for the effect reference. Effect B Type This parameter determines a type of the Effect B (Reverb). -
Page 38: Usb Midi Connection
MIDI "MIDI" stands for "Musical Instrument Digital Interface." It is an international standard that allows electronic musical instruments to communicate with each other, using a simple cable connection. It ensures that the Mark Pro 3i will remain compatible with the instruments of today and tomorrow. USB MIDI Connection There is a USB port on the rear panel of the Mark Pro 3i. -
Page 39: Midi Connection
MIDI Connection On the rear panel are two MIDI ports: MIDI In receives MIDI messages from other equipment. MIDI Out sends MIDI messages to other equipment. MIDI cables provide the connection between the MIDI ports of one piece of equipment and those of another. -
Page 40: Midi Channel
MIDI Channel For MIDI to control several instruments, each playing a different part at the same time, it relies on different channels. MIDI channels are like TV channels: an instrument has to be "tuned" to the correct one or it won't receive what is being transmitted. There are 16 channels available, and each one can transmit any number of notes to any number of instruments, over the same MIDI cable MIDI Messages The MIDI messages that the Mark Pro 3i transmits and recognizes fall into several categories, as... - Page 41 Volume: CC #7,39 The Mark Pro 3i recognizes Volume messages, which control the overall volume of the sound on the MIDI channel on which they are sent. Controller 7 can be used by itself, or if a finer degree of control is desired, controller 39 can be used in conjunction with it. Pan: CC #10,42 The Mark Pro 3i recognizes Pan messages, which control the location of the sound in the stereo field on the MIDI channel on which they are sent.
-
Page 42: Specifications
Specifications Physical Height 90 cm Depth 50 cm Length 142 cm Weight 68 Kg Audio 80-Watt Amplification 2 x 40 Watts RMS Per Channel 4 Speakers 2 x 6.5 inch, 2 x 2.5 inch Audio Outputs Impedance : 100Ω source Level : nominal 1.0V RMS Audio Inputs Impedance : 10K Load... -
Page 43: Demo Song List
Demo Song List Demo Song List... -
Page 44: Program List
Program list Primary Bank (Bank 0) The upper button – Piano 1 / Strings Category : Piano 1, LED : Red Category : Strings, LED : Green The lower button Program The lower button Program 000 Stereo Grand 064 Lyrical Strings 001 Classic Grand 065 Slow Strings 002 Dynamic Grand... - Page 45 The upper button – E.Piano 2 / Pads Category : E.Piano 2, LED : Red Category : Pads, LED : Green The lower button Program The lower button Program 024 My Best Wurly 088 Rez Aah Pad 025 Big Red Wurly 089 Crypt 026 Brkfst In Korea 090 Meteor Strings...
- Page 46 The upper button – Organ / Drums Category : Organ, LED : Red Category : Drums, LED : Green The lower button Program The lower button Program 048 The Reverend's 112 Studio Drums 1+2 049 Ballad Of 3 Bars 113 Studio Drums 3+4 050 Prog Rocker's B 114 Ambient Rock Kit 051 All Out Full On...
- Page 47 The upper button – Piano 2 / Voices Category : Piano 2, LED : Red Category : Voices, LED : Green The lower button Program The lower button Program 008 Basement Upright 072 Bright Voices 009 Chiano 073 Crystal Voices 010 Way Back Piano 074 Vox &...
- Page 48 The upper button – Pop keys / Guitar Category : Pop keys, LED : Red Category : Guitar, LED : Green The lower button Program The lower button Program 032 Janet’s Comp 096 Titanium Guitar 033 Mild Sheen 097 Latin Lover 034 Scrape Glass 098 Roto 12 String 035 Air Society...
- Page 49 The upper button – Brass / Percussion Category : Brass, LED : Red Category : Percussion, LED : Green The lower button Program The lower button Program 056 Goosed Riff Sect 120 Marimba 057 Fatso Sax 121 Milky Way Vibes 058 Big&Beefy Saxes 122 Percussionist 059 Goosed Unison...
- Page 50 The upper button – E.Piano 1 / Synths Category : E.Piano 1, LED : Red Category : Synths, LED : Green The lower button Program The lower button Program 016 Chamber Strings 080 Choir from Above 017 Baroque Strings 081 DivineInterventn 018 Intense Strings 082 Chapel Organ 019 Staccato Strings...
- Page 51 The upper button – Clavier / Bass Category : Clavier, LED : Red Category : Bass, LED : Green The lower button Program The lower button Program 040 Solo Bassoon vib 104 Dynamic Timpani 041 Ens BassoonOboe 105 Temple Blocks 042 Solo Dbl Reeds 106 Stereo Tam-tam 043 Soft Trumpet...
- Page 52 GM Bank (Bank 4) The upper button – Piano 1 / Strings Category : Piano 1, LED : Red Category : Strings, LED : Green The lower button Program The lower button Program 000 Grand Piano 064 Soprano Sax 001 Bright Grand 065 Alto Sax 002 Electric Grand 066 Tenor Sax...
- Page 53 The upper button – E.Piano 2 / Pads Category : E.Piano 2, LED : Red Category : Pads, LED : Green The lower button Program The lower button Program 024 Nylon Guitar 088 Fantasia 025 Steel String Gtr 089 Warm Pad 026 Jazz Guitar 090 Polysynth 027 Clean Elec Guitar...
- Page 54 The upper button – Organ / Drums Category : Organ, LED : Red Category : Drums, LED : Green The lower button Program The lower button Program 048 Ensemble Strings 112 Tinkle Bell 049 GM Slow Strings 113 Agogo 050 Synth Strings 1 114 Steel Drums 051 Synth Strings 2 115 Wood Block...
-
Page 55: Setup List
Setups and Rhythms Setup List Category : Piano 1 / Strings Category : Piano 2 / Voices The lower button Setup The lower button Setup 01 Passing Dream 09 Jaztic 02 Sund down 10 Heavenly 03 Fire Bird 11 Piano Trio 04 Kyrie 12 One Man Trio 05 Idle Trip... -
Page 56: Effect List
Effect List Effect List... - Page 57 MIDI Impelementaton Chart Model: Mark Pro 3i Manufacturer: Kurzweil Date:2008.8.24 Version 1.0 Function Transmitted Recognized Remarks Default Basic Channel Changed 1 - 16 Default Multi* Multi* Mode Messages Modes 1 Altered 0–127 0–127 key range Note Number True Voice 1–128 1–128...
- Page 58 Note...