
Related Manuals for Vaillant ECOTEC PLUS VU 80


Summary of Contents for Vaillant ECOTEC PLUS VU 80
-
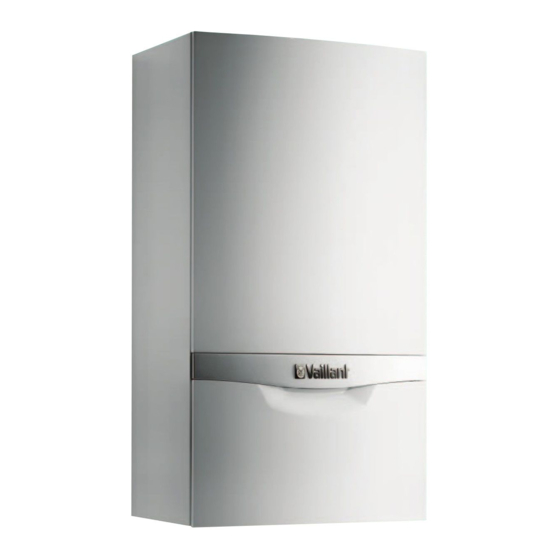
Page 1: Ecotec Plus
Installation and maintenance instructions For the competent person Installation and maintenance instructions ecoTEC plus VU 80, 100, 120 kW GB, IE... -
Page 2: Table Of Contents
13.5 Carrying out maintenance work ........ 50 Gas installation ..............17 Troubleshooting ............55 Preparing for installation ..........17 14.1 Contacting Vaillant customer service ...... 55 Connecting the gas line ..........17 14.2 Performing diagnostics ..........55 14.3 Using the function menu ..........61 Hydraulic installation .......... -
Page 3: Notes On The Documentation
> The article number of the unit can be found on the iden- tification plate. Identification plate The identification plate of the Vaillant ecoTEC plus is attached to the bottom of the boiler at the factory. The article number of the gas-fired wall-hung boiler can be found in the serial number. -
Page 4: Type Overview
Notes on the documentation Type overview Designated country Unit type Approval Nominal heat output (designation in accord- Gas group ecoTEC plus category range [kW] ance with ISO 3166) Natural gas H - G20 - 2 kPa (20 mbar) GB (Great Britain) 806 (VU GB 806/5-5) Propane - G31 - 3.7 kPa (37 mbar) 16 - 80 2H3P... -
Page 5: Safety
– observance of accompanying operating, installation and The warnings are classified in accordance with the severity servicing instructions for the Vaillant product, as well as of the possible danger using the following warning signs all other components of the system and signal words: –... -
Page 6: Basic Safety Information
> To interlock the fan and unit, install the Vaillant acces- front casing open. > Operate the boiler for start-up and in continuous mode sory multi-functional module 2 from 7. -
Page 7: General Requirements
Safety Using the correct gas type – BS 6644 Specification for the installation of gas fired Using the wrong gas type may cause a fault shutdown on hot water boilers with rated inputs between 70 kW (net) the boiler. Furthermore, ignition and combustion noise may and 1.8 MW (net) (2nd and 3rd family gases). - Page 8 Safety 2.4.2 Installation site 2.4.3 Gas supply The installation site of the boiler should allow proper con- An existing gas meter should be checked to ensure that it is nection of the flue pipe to the boiler. In addition, there capable of passing the rate of gas supply required.
- Page 9 > When using additives, follow the manufacturer's instruc- Permissible water hardness tions without exception. Vaillant accepts no liability for the compatibility of any addi- Caution. tive or its effectiveness in the rest of the heating installa- Heating water that is extremely calcifer- tion.
- Page 10 Safety 80 kW 100/120 kW 80 kW: A 100/120 kW: B 1000 1500 2000 2500 3000 3500 4000 4500 5000 5500 6000 x [l] 2.1 Water preparation depending on water hardness and system volume Key: x System volume [l] y Water hardness [mol/m (1 mol/m corresponds to 100 mg/l CaCO A Water treatment required...
-
Page 11: Unit And Functional Description
Unit and functional description Unit and functional description Construction and function 3.2 Functional elements (VU GB 1006/5 - 5 and VU GB 1206/5 - 5) Connection for the flue pipe 2 Fan 3.1 Functional elements (VU GB 806/5 - 5) 3 Gas valve 4 Supply air collector 5 Flue gas pressure cartridge Connection for the flue pipe 6 Return sensor 2 Fan... -
Page 12: Installation
Scope of delivery Important: In regard to the regulations of 1992 concerning the manual The Vaillant ecoTEC plus is delivered pre-assembled in a handling of loads, the unit exceeds the weight which can be packaging unit. lifted by a single person. - Page 13 Installation > Wear appropriate cut-resistant and non-slip gloves to Transporting the box from the delivery point to the installation site – first or higher floor, cellar protect yourself against sharp edges and maintain a safe It is recommended that two people lift the unit together. and secure grip while handling the unpackaged unit.
- Page 14 Installation Positioning the unit for final installation – Positioning the unit for final installation – with restricted installation restricted installation position under the roof. > If the unit weighs more than 25 kg, it should always be > If the unit weighs more than 25 kg, it should always be transported by two persons, where possible.
-
Page 15: Dimension Drawing And Connection Dimensions
Installation Dimension drawing and connection dimensions Wall breakthrough for flue pipe 2 Flue pipe connection 3 Hanging bracket 4 Heating flow 5 Condensate siphon connection 6 Gas connection 7 Heating return Requirements for the installation site 4.4.1 Required minimum clearances/installation clearances 4.2 Recommended minimum clearances/installation clearances A 350 mm (flue pipe diameter 110/160 mm) -
Page 16: Wall-Mounting The Boiler
Installation Wall-mounting the boiler Removing/fitting the front casing Danger! Risk of death if the load-bearing capacity of the fixing elements used is insuffi- cient! If the fixing elements or wall do not have sufficient load-bearing capacity, the boiler can come loose and fall down. This may also cause leaks in the gas line, which is potentially fatal. -
Page 17: Gas Installation
Gas installation Gas installation Caution. Risk of material damage caused by the incorrect gas type. The work described in this section must only be carried out Using the wrong gas type may cause a fault by a competent person. shutdown on the boiler. Furthermore, igni- tion and combustion noise may occur in the Preparing for installation boiler. -
Page 18: Hydraulic Installation
> Make sure that the drain is visible. service valves. Any condensate that occurs must only be fed in under con- The Vaillant ecoTEC boiler should be connected using a sideration of the local regulations regarding neutralisation. Vaillant pump group with modulating pumps (available as an accessory). -
Page 19: Connecting The Heating Flow And Heating Return
Hydraulic installation Connecting the heating flow and heating Hydraulic connection return For connection to the system a hydraulic header has to be used. In difficult cases a plate to plate heat exchanger is recommended. In all instances the system water should be Caution. -
Page 20: Connecting The Condensate Drain Pipework
Hydraulic installation Max. pressure Power loss (mbar) < 120 kW in conjunction with the hydraulic cascade < 240 kW < 360 kW < 480 kW < 600 kW < 720 kW 6.2 System separation pressure loss min. Connecting the condensate drain pipework Danger! Risk of death from escaping flue gases! An empty or insufficiently filled condensate... -
Page 21: Connecting The Discharge Pipe To The Expansion Relief Valve On The Heating Installation
Hydraulic installation Connecting the discharge pipe to the expansion relief valve on the heating installation The expansion relief valve for the heating installation can be connected to the pump group (left-hand side) > Install the drain line for the expansion relief valve so that it is not damaged when removing and fitting the lower part of the condensate siphon. -
Page 22: Flue Gas Installation
Risk of personal injury and material dam- age due to unapproved flue pipes. Vaillant boilers are certified only with genu- ine Vaillant flue pipes. The use of other accessories may cause personal injury and material damage as well as operating faults. - Page 23 Flue gas installation 7.2 Opening of the flue pipe Minimum The flue through the roof should not be located within the Installation site dimen- shaded area. sions Is is recommended that the terminal should not be located Horizontal flue gas pipes below 2 m in any occupied space.
-
Page 24: Electrical Installation
8 Electrical installation Electrical installation Opening/closing the electronics box > Remove the front casing of the boiler (¬ section. 4.6). The work described in this section must only be carried out by a competent person. Preparing for installation Danger! Risk of death from electric shock! Touching live connections may cause seri- ous personal injury. - Page 25 Electrical installation Caution. Risk of damage caused by incorrect installation. Mains voltage at the incorrect plug termi- nals on the ProE system may destroy the 230V~ 230V~ electronics. > Only connect the mains connection cable to the terminals marked for the purpose. >...
-
Page 26: Connecting The Controller
Electrical installation 8.4.2 Connecting controllers to the electronic system Caution. Risk of damage caused by incorrect installation. Connecting wires that have been stripped too far may cause short circuits and dam- age the electronics if a strand accidentally comes loose. >... -
Page 27: Connecting Additional Units
VR 40 - Connecting the "2 from 7" multi- functional module You can connect two additional components to the ecoTEC plus using the Vaillant multi-functional module "2 from 7" ( Accessories). You can switch the following components: – Circulation pump –... -
Page 28: Connection Wiring Diagram
Electrical installation Connection wiring diagram Display Pump PWM signal connection Gas valve Water pressure sensor white Cylinder sensor (optional) Cylinder contact white “C1-C2“ Flow sensor blue Flow sensor Water Flue gas Safety Safety cut-out cut-out Remote control circulation pump External sensor Flow sensor (optional) DCF connection Earth... -
Page 29: Establishing Operational Readiness
Establishing operational readiness Press the right-hand selection button twice to read off the digital filling pressure value. The Vaillant ecoTEC plus boiler is fitted with a digital infor- mation and analysis system (DIA). If additional settings are Preparing the heating water... -
Page 30: Preventing Low Water Pressure
Establishing operational readiness > Check that both service valves on the boiler are open. 9.3.3 Flush the heating installation for the first > Slowly open the stop valve on the filling line so that the time ("cold") water flows into the heating system. If the water pressure in the heating system is The complete heating system must be flushed at too low, the display view switches between fault... -
Page 31: Filling The Condensate Siphon
If the unit should be operated with liquid gas (propane), do not start up the unit. Instead, contact Vaillant Customer Service. They will convert the unit and then start it up. The same applies for the conversion from liquid gas (pro- pane) to natural gas. - Page 32 Establishing operational readiness 806/5-5 9.3 Flue gas and air analysis points Key: Flue gas analysis point 2 Air analysis point 1006/5-5 > Use the air analysis point (2) to check for flue gas recir- 1206/5-5 culation. > Use the flue gas measuring instrument. >...
-
Page 33: Operation
"Enter code" and the value "00" appear in the display. > Select the value 17 (code) using the minus button fault, please notify the gas supply company or the Vaillant Service Solutions Team, and proceed as follows: or the plus button >... -
Page 34: Overview Of The Menu Structure
Operation 10.2 Overview of the menu structure Menu Information Reset burner off time Installer level Back Select Enter code Installer level F.00 Fault list F.75 Interruption Test programs Fault Flow sensor Appliance config. Pump water shortage Back Back Select Installer level Test programs P.00 Purging... - Page 35 Operation Appliance config. Comfort mode Target flow temp. Comfort on DHW temperature Comfort mode Cancel Back Select Appliance config. D.026 D.026 DHW temperature Auxiliary relay Auxiliary relay Comfort mode Auxiliary relay Circulation pump External pump Back Select Back Cancel Appliance config. D.027 D.027 Comfort mode...
-
Page 36: Start-Up
> Press the right-hand selection button to confirm the selected language. The language change must be confirmed a second time in Initial start-up is performed by a Vaillant cus- order to avoid an unintentional change. tomer service engineer or by a competent per- son approved by Vaillant. -
Page 37: Appliance Configuration And Diagnostics Menu
11.2.4 Heating partial load 11.4 Using test programmes The heating partial load of the Vaillant ecoTEC plus boiler is In addition to the installation assistant, you can also call up factory set to "auto". This means that the boiler independ- other test programmes for start-up. -
Page 38: Checking The Function Of The Boiler
Start-up 11.5 Checking the function of the boiler 11.5.2 Checking the heating mode > After completing the installation and the gas ratio set- > Switch on the boiler. > Make sure that there is a heat requirement. ting, perform a complete function check of the boiler >... -
Page 39: Adapting The Unit To The Heating Installation
Adapting the unit to the heating installation Adapting the unit to the heating installation The installation assistant is started when the boiler is switched on for the first time (¬ section 11.2). If you have already filled the heating installation and termi- nated the installation assistant, but wish to set the most important system parameters again, you can also call up the "Appliance configuration"... - Page 40 Adapting the unit to the heating installation Factory Your own Code Parameters Adjustable values setting setting D.000 Heating partial load Adjustable heating partial load in kW Auto auto: Unit automatically adjusts max. partial load to current system demand) D.001 Overrun time of internal heating pump for 2–60 min 5 min heating mode...
- Page 41 Setting the heating partial load 12.1.4 Setting the return flow temperature control The heating partial load of the Vaillant ecoTEC plus boiler is If the boiler is connected to an underfloor heating system, factory set to "auto". This means that the unit independ-...
- Page 42 Adapting the unit to the heating installation Set maximum burner anti-cycling time [min] (target) Flow [°C] 10.0 15.0 20.0 25.0 30.0 35.0 40.0 45.0 50.0 55.0 60.0 14.0 18.5 23.0 27.5 32.0 36.5 41.0 45.0 50.0 54.5 12.5 16.5 20.5 25.0 29.0 33.0...
-
Page 43: Handing The Boiler Over To The Operator
It is strongly recommended that a maintenance contract be taken out to ensure regular maintenance. You can obtain more information from Vaillant Service Solutions (+44 (0) 870 6060 777). > In the commissioning checklist, enter the operating pres- sure of the central heating, the heat supply (in kW) and the temperature difference between the flow and return. -
Page 44: Inspection And Maintenance
Inspection and maintenance Inspection and maintenance measuring instruments in accordance with BS 7967, part 1 to 4. > The correct fuel type must be set on the flue gas meas- 13.1 Inspection and maintenance intervals uring instrument. We recommend completing an inspection and maintenance Danger! contract with a correspondingly qualified operator or Negligent inspection and maintenance... - Page 45 > Disconnect the boiler from the power supply by part of the CE declaration of conformity. If you do not use certified Vaillant genuine spare parts, this voids the CE con- – removing the mains plug or formity of the unit. We therefore strongly recommend that –...
- Page 46 Inspection and maintenance > If all these points meet the requirements, continue in 13.1.3 Checking the CO content accordance with ¬ section 13.2. > If one of the flue gas values is above the permissible The CO content must be checked/set in the following cases: value in ¬ table 13.1, continue in accordance with the –...
- Page 47 Inspection and maintenance If the flue gas value has to be set, proceed as follows. The adjusting screw (1) for the air index setting is located under a sealing sticker. > Break through the sealing sticker. > Set the CO content (value with front casing removed) by turning the screw (1).
-
Page 48: Inspection And Maintenance Work
Inspection and maintenance 13.2 Inspection and maintenance work The following table shows the inspection and maintenance work that must be carried out at specific intervals. Inspection Service (must be (regularly, at No. Work performed least every every year) 2 years) Isolate the boiler from the power mains. -
Page 49: Using The Function Menu
Inspection and maintenance 13.2.1 Filling the boiler and the heating Test pro- Display Action grammes installation T.01 Check internal You can switch the internal pump on pump and off. A description of how to fill the boiler and heating installa- T.03 Check fan You can switch the fan on and off. -
Page 50: Removing/Fitting The Upper Casing
Inspection and maintenance > Switch the boiler off with the on/off button. 13.3.2 Carrying out electronics self-tests > Isolate the boiler from the power mains. > Close the gas isolator cock on the boiler. Menu ¬ Installer level ¬ Test programmes ¬ Electronics >... - Page 51 Inspection and maintenance 806/5-5 13.6 Separate the gas pipework (VU GB 1006/5 - 5 and VU GB 1206/5 - 5) > Undo the four screws on the flange connection (3) to the gas valve. > Move the gas pipe (4) to the side. Danger! Risk of poisoning and fire caused by escaping gas! The gas pipe can be damaged.
- Page 52 Inspection and maintenance > Remove the plug from the upper safety cut-out (8). If you have removed the condensate siphon, reinstall it > Undo the screws (6) on the burner door. below the boiler after cleaning (¬ section 13.5.5) so that > Remove the complete gas-air mixture unit (5) from the the heat exchanger is ready for operation again.
- Page 53 Inspection and maintenance 13.10 Replacing electrodes > Remove the electrodes (1) from the burner plate from above. > Insert the new electrodes with new seals. Tightening 13.11 Cleaning the condensate siphon torque: 2.8 Nm > Remove the siphon's lower section (2) by unscrewing it Caution.
- Page 54 Inspection and maintenance > Connect the plug (10) to the gas valve. > Connect the gas pipe (4) with a new seal to the gas valve. Torque (for the VU GB 806/5-5 only): 2 Nm Torque (for the VU GB 1006/5-5 and VU GB 1206/5-5 only): 2.8 Nm >...
-
Page 55: Troubleshooting
14.1 Contacting Vaillant customer service > If you contact your Vaillant Customer Service or Vaillant Service partner, then please provide, where possible, – the fault code that is displayed (F.xx), – the unit status (S xx) that is displayed in the "Live monitor"... - Page 56 Troubleshooting 14.2.2 Overview of status codes 14.2.3 Service messages If the "open-end spanner" maintenance symbol appears Display Meaning in the display, there is a service message. The maintenance Heating mode symbol appears if you have set a maintenance interval, for S 00 Heating, no heat demand example, (¬ section 12.1.6) and it has elapsed.
- Page 57 Troubleshooting 14.2.4 Calling up diagnostics levels Menu ¬ Installer level ¬ Diagnostics menu You can use the diagnostics menu to inspect parameters and modify certain parameters. An overview of all diagnos- tics codes can be found in ¬ table 12.1. 14.2.5 Overview of diagnostics codes at installer level Display Meaning Display value/adjustable value...
- Page 58 0 = Relay with disable facility (default setting) 1 = PWM with disable facility D.047 Outside temperature Actual value in °C (with weather-controlled Vaillant controller) D.050 Offset for minimum speed Adjustment range in rpm: 0 to 3000 (factory set nominal value) D.051...
- Page 59 (¬ Operating instructions). > If you are unable to remedy the fault and the fault reoc- curs despite several fault clearance attempts, contact Vaillant Customer Service. 14.2.7 Querying the fault memory Menu ¬ Installer level ¬ Fault list The boiler has a fault memory.
- Page 60 Troubleshooting 14.2.9 Overview of fault codes Code Meaning Cause F.00 Flow temperature sensor interruption NTC plug not plugged in or has come loose, multiple plug on the PCB not plugged in correctly, interruption in cable harness, NTC defective F.01 Return temperature sensor interruption NTC plug not plugged in or has come loose, multiple plug on the PCB not plugged in correctly, interruption in cable harness, NTC defective F.10...
-
Page 61: Using The Function Menu
Troubleshooting Code Meaning Cause F.73 Water pressure sensor signal in the wrong range Interruption/short circuit of water pressure sensor, interruption/short (too low) circuit to GND in supply line to water pressure sensor or water pres- sure sensor defective F.74 Water pressure sensor signal outside correct range Line to water pressure sensor has short-circuited at 5 V/24 V (too high) or internal fault in water pressure sensor... -
Page 62: Replacing Components
The work described in this section must only be carried out by a competent person. > Only use genuine Vaillant spare parts for repairs . You can find information about available Vaillant genuine spare parts from the contact address provided on the reverse of this document. -
Page 63: Replacing The Gas Valve
Replacing components > Slide the side section to the rear. > Fit the new gas valve in the same position on the fan as > Secure the side section using two screws in the front before. Use new seals for this. >... -
Page 64: Replacing Insulating Mats
Replacing components > On the VU GB 806/5-5 only: Use the three nuts to secure the burner and the bracket for the insulation pro- tection plate. Tightening torque: 4 Nm > On the VU GB 1006/5-5 and VU GB 1206/5-5 only: First, use two nuts to secure the burner. -
Page 65: Replacing The Pcb And/Or The Display
Replacing components 15.8.1 Replacing either the display or the PCB > Replace the PCB or display according to the assembly and installation instructions supplied. If you are replacing only one component, the set parame- ters are transferred automatically. By switching on the boiler, the new component takes over the previously set parameters from the unreplaced component. -
Page 66: Decommissioning
Decommissioning Decommissioning 16.3 Disposing of the boiler The Vaillant ecoTEC plus boiler consists primarily of materi- als that can be recycled. 16.1 Temporarily shutting down the boiler The boiler and its accessories must not be disposed of with household waste. -
Page 67: Technical Data
Technical data 18 Technical data ecoTEC plus ecoTEC plus ecoTEC plus ecoTEC plus Unit VU GB 806/5-5 VU GB 1006/5-5 VU GB 1206/5-5 Nominal heat output range P at 80/60 °C 14.9 - 74.7 18.7 - 93.3 22.4 - 112 Nominal heat output range P at 60/40 °C 16 - 80 20 - 100... -
Page 68: Glossary
Digital information and analysis system (DIA) maintenance or repair. The Vaillant ecoTEC plus boiler is fitted with a digital infor- mation and analysis system (DIA). If additional settings are required, which have not been configured using the installa- tion assistant, you can view and modify further parameters using the DIA. -
Page 69: Appendix
Appendix 20 Appendix Commissioning checklist ecoTEC plus installation and maintenance instructions 0020134823_01... - Page 72 Index Index Accessories................27, 42 Expansion relief valve ..............10 Adjusting the air ratio ............... 46 Auxiliary relay................37 Fan ..................49, 60, 63 Fault codes ................... 59 Burner ............... 48, 49, 52, 56, 63 Fault memory ................59 Burner anti-cycling time ............. 41, 68 Filling Condensate siphon ..............
- Page 73 Index Mains connection ................ 24 Technical data ................67 Multi-functional module ............. 37 Troubleshooting ................55 Type of gas ..................4 Type overview ................4 Overview Diagnostics codes ............. 39, 57, 58 Fault codes ................ 60, 61 Water pressure .............. 30, 43, 56 Inspection and maintenance work ........
- Page 76 Supplier Manufacturer...