Table of Contents
Advertisement
Quick Links
Advertisement
Table of Contents

Related Manuals for Motorola MC35 EDA


Summary of Contents for Motorola MC35 EDA
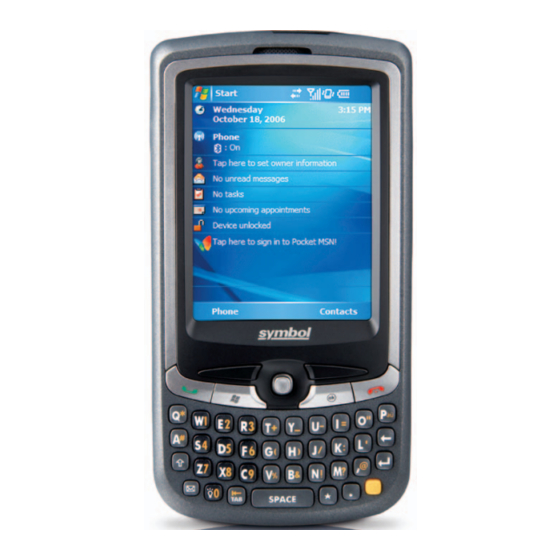
- Page 1 MC35 EDA User Guide...
- Page 3 User Guide MC35 Enterprise Digital Assistant...
- Page 4 The software is provided strictly on an "as is" basis. All software, including firmware, furnished to the user is on a licensed basis. Motorola grants to the user a non-transferable and non- exclusive license to use each software or firmware program delivered hereunder (licensed program).
- Page 5 W e l c o m e Welcome Thank you for making MC35 your choice for your mobile computing and communication needs. Your new sleek MC35 is a fully integrated EDA-mobile phone device. It combines the power of high-performance EDA applications for organizing personal and work-related information with the connectivity function of a mobile phone.
- Page 6 W e l c o m e...
-
Page 7: Table Of Contents
Contents Welcome 1 First Things First Package contents............1 Preparing to use your MC35 . - Page 8 GPRS connection ..........49 WiFi connection .
- Page 9 8 Using MC35 Companion Programs Phone management programs ......... . 145 SIM Manager.
-
Page 11: First Things First
First Things First • Package contents • Preparing to use your MC35 Package contents Your MC35 comes packed in a cardboard box. Carefully unpack the box and remove the contents. If any of the following items are missing or damaged, contact your dealer immediately. -
Page 12: Charging The Mc35
1 Fi r s t T hi ng s F i rs t Preparing to use your MC35 To install the battery pack: Align the tabs on the battery pack with the grooves on the rear side of the device, and then insert the battery pack in place. -
Page 13: Installing Microsoft Activesync
Plug the AC adapter cable into the mini USB connector on bottom of the device. Connect the AC adapter cable into an electrical outlet. The LED indicator on the right side of the touch screen lights up orange to signify that AC connection is made. -
Page 14: Starting The Mc35
1 Fi r s t T hi ng s F i rs t Preparing to use your MC35 To install Microsoft ActiveSync on your computer: Close all open programs, including those that run at startup, and disable any virus-scanning software. Download the ActiveSync setup software from the Microsoft ActiveSync Download page at http://www.microsoft.com. - Page 15 To create an ActiveSync partnership: Connect the USB sync cable into the connector on the bottom of your device, then plug the USB sync cable into a USB port on your computer. The Synchronization Setup Wizard automatically starts on your computer screen. NOTE: If the wizard does not automatically appear, launch ActiveSync on your computer by clicking on its icon from Start >...
- Page 16 1 Fi r s t T hi ng s F i rs t Preparing to use your MC35 Click Finish to close the wizard and start the initial synchronization. During the synchronization process, the ActiveSync window appears on your computer, while the Data connectivity icon bar.
-
Page 17: System Tour
System Tour • Features summary • System tour • Hardware interface • Command interface Features summary Listed below are the MC35 key features and specifications. Performance ® • Intel PXA270 processor with speed of up to 416 MHz • Integrated Intel XScale •... -
Page 18: Hardware Connectivity
2 Syste m T o ur Features summary • Wireless connectivity • IrDA standard Infrared (IR) sensor for short-range file exchange • Bluetooth for personal area network (PAN) connection • High-speed GPRS for mobile Internet access via GSM network • Optional WiFi (IEEE 802.11b/g) hardware for wireless local area network (WLAN) connection Hardware connectivity... -
Page 19: Accessories
• User-friendly navigation features • Joystick for one-hand operation • Volume button for system volume control • Push To Talk button for voice recordings and PTT calls. This button is only available for PTT when PTT service is provided by your carrier. Contact your mobile phone service provider about feature availability. -
Page 20: Hardware Tour
2 Syste m T o ur Hardware tour Hardware tour This section is a descriptive tour of the MC35 hardware interface. Component LCD touch screen GSM status/ notification LED Volume up/down button (system volume only) Camera/Bar Code switch Reset button Earphone jack Connector Microphone... - Page 21 Component Description Main battery Removable and rechargeable battery pack. System speaker Listen to multimedia files here. When the speakerphone is active, sounds are emitted here. Camera lens Take pictures or captures bar code data. (optional) Camera flash Provides illumination when taking pictures in low (optional) light conditions.
-
Page 22: Hardware Interface
2 Syste m T o ur Hardware interface Component Camera button Battery release latch Hardware interface This section explains basic hardware procedures and describes the MC35 keypad and function buttons. Using the touch screen backlight key Under some lighting conditions, viewing information on the LCD touch screen may be difficult. - Page 23 Slide the SD/MMC card into the slot and push in until it locks into place. The card is secure when it is not protruding from the base. Insert the rubber cover back into place. To remove a storage card: Hold your device securely, then lift the rubber cover from the SD/MMC expansion slot Push against the top of the card, as if you were pushing it further into the slot, letting the card spring out.
-
Page 24: Soft Buttons And Keypad
2 Syste m T o ur Hardware interface Soft buttons and keypad The MC35 keypad has alphanumeric keys that produce the 26-character alphabet (A-Z, both lowercase and uppercase), numbers (0-9), and assorted special characters. The keypad is color-coded to indicate when the modifier key is pressed to produce a particular character or action. - Page 25 Component Description End button • • • • Orange key Use this key to enable the secondary keypad characters/functions. • • • Star key Press this key to display the on-screen keyboard. Backlight/0 key • • • Messaging Press this key to launch the Messaging program. See “Messaging”...
- Page 26 2 Syste m T o ur Hardware interface Secondary keypad input mode Brightness Note: The following keys only have one action: Backspace, Shift, Enter, Messaging, Tab, Space, and Star. Keystroke combination Default input Shift or CAPS + Key Brightness Brightness Orange + Key “...
-
Page 27: Command Interface
Command interface This section explains the MC35 command interface. Today screen When you turn on your device for the first time each day (or after a preset period of inactivity), you'll see the Today screen. This screen provides an at-a glance view of the day’s important reminders and status. -
Page 28: Start Menu
2 Syste m T o ur Command interface On the Appearance tab, tap the “Use this picture as background” check box. Tap Browse to select a picture from the pictures stored in your device. Tap ok. Start menu The Start menu displays a list of active programs, as well as options to view the Programs, Settings, and Help screens. - Page 29 Icon Description Battery power completely depleted Notification that one or more instant messages were received Notification that one or more e-mail/text messages were received Pending alarm Data call in progress Synchronization error • No data connection. Tap to activate the device’s Phone, WiFi, Bluetooth, or cellular data wireless connection (GPRS).
-
Page 30: Command Bar
2 Syste m T o ur Command interface Command bar Use the command bar at the bottom of the screen to perform tasks in programs. The command bar includes menu names, buttons, and the Input Selector button • To create a new item in the current program, tap New. •... -
Page 31: Entering Information
Entering Information • Using the MC35 keypad • Using the Input Selector • Writing on the screen • Drawing on the screen • Creating a recording • Using My Text • Using ActiveSync • Using wireless communication Using the MC35 keypad The MC35 keypad has alphanumeric keys that produce the 26-character alphabet (A-Z, both lowercase and uppercase), numbers (0-9), and assorted special characters. -
Page 32: Keyboard
3 Ent ering In fo rm atio n Using the Input Selector To define the Word Completion settings: > Settings On the Personal tab, tap Input On the Word Completion tab, define the word suggestion settings. Tap ok. Keyboard The soft keyboard allows you to “type” information just like in a regular keyboard by tapping the on-screen keys. -
Page 33: Block Recognizer
Block Recognizer With Block Recognizer, you use a single stroke to write letters, numbers, symbols, and punctuation, which are then converted into typed text. To use Block Recognizer: Tap the Input Selector arrow, then select Block Recognizer. Write characters, numbers, and symbols in the designated writing area. •... -
Page 34: Transcriber
3 Ent ering In fo rm atio n Using the Input Selector Write characters, numbers, and symbols in the designated writing area. • Enter capital letters by writing in the ABC (left) area of the box. • Enter lower case letters by writing in the abc (middle) area of the box. •... -
Page 35: Star Key
To punctuate in Transcriber: Tap the keyboard icon Tap the punctuation mark you need. TIP: For specific instructions on using the Transcriber, tap the question mark on the toolbar. Star Key Use the Star Key option to enter special symbols not available on the regular soft keyboard, such as ¿... - Page 36 3 Ent ering In fo rm atio n Writing on the screen To select and edit written text: If you want to edit or format written text, you must select it first. Tap and hold the stylus next to the text you want to select until the insertion point appears.
-
Page 37: Drawing On The Screen
Perform one of the following: • Tap the word you want to use. • Tap the writing at the top of the menu to return to the original writing. Conversion reminders • Hyphenated and foreign words that use special characters such as accents and some punctuation cannot be converted. -
Page 38: Recording A Message
3 Ent ering In fo rm atio n Recording a message Recording a message In any program where you can write or draw on the screen, you can also quickly capture thoughts, reminders, and phone numbers by recording a message. •... -
Page 39: Using My Text
To set a voice recording as ringtone: • Tap and hold a voice recording in Notes, then select Set As Ringtone on the pop-up menu. Using My Text When using Messaging or MSN Messenger, use My Text to quickly insert preset messages into the text entry area. -
Page 40: Using Activesync
3 Ent ering In fo rm atio n Using ActiveSync Using ActiveSync Use Microsoft ActiveSync to synchronize information between your MC35 and your computer and/or a server so you always have the most up-to-date information wherever you are. Use ActiveSync to: •... - Page 41 NOTE: To synchronize remotely with your computer, it must be turned on. To set up a USB ActiveSync connection: Perform the steps below on your computer. Open ActiveSync Click File > Connection Settings. Select the “Allow USB connections“ option. Click OK. Perform the steps below on your device.
- Page 42 3 Ent ering In fo rm atio n Using ActiveSync Align the IR port are unobstructed and within close range. > Programs Tap Menu > Connect via IR. Synchronization is automatically initiated. Wait for synchronization to complete before you move your device. To set up a Bluetooth ActiveSync connection: Before setting up a Bluetooth ActiveSync connection, configure the Bluetooth function of your device.
- Page 43 On the COM Ports tab, click Add. Select the “Incoming (device initiates the connection)” option, then click OK. Note the number of the COM port that was added. The COM port number must be no higher than 20. Click OK. Open ActiveSync Click File >...
-
Page 44: Synchronizing With A Server
3 Ent ering In fo rm atio n Using ActiveSync Perform the steps below on your device. > Programs Tap Menu > Connect via Bluetooth. Synchronization is automatically initiated. The PC to USB status icon appears on the lower right corner of the Today screen. If an Authentication is required, the Enter Passcode screen appears, type an alphanumeric passkey (PIN code), then tap Next;... - Page 45 Tap Menu > Add Server Source. In the “Server address” box, enter the name of the Microsoft Exchange server to which you want to connect. Select the “This server requires an encrypted (SSL) connection” option if it is applicable to your corporate network. Tap Next.
-
Page 46: Using Activesync To Copy Files
3 Ent ering In fo rm atio n Using ActiveSync To stop synchronizing with a server: You can stop synchronizing an information type with a server, and instead synchronize it with your computer. > Programs Tap Menu > Options. Deselect the check box opposite the types of Information that you no longer want to synchronize with the server. -
Page 47: Activesync Errors
NOTE: When you are in roaming mode, you can synchronize manually to reduce roaming charges, or you can use the mobile schedule you’ve set. NOTE: When your device is connected to your computer via the USB sync cable, synchronization occurs automatically—changes made on the computer or device is duplicated immediately. -
Page 48: Using Wireless Communication
3 Ent ering In fo rm atio n Using wireless communication Using wireless communication You can use any of the wireless communication options listed below to download information to your MC35. For more information on using these options, See “5 Wireless Communications”... -
Page 49: Managing Information
Managing Information • Opening programs • Using Search • Using File Explorer Opening programs Your MC35 supports a variety of EDA and wireless communication programs to help you manage both personal and work-related information. To open a program: • Tap a program name from the You can select which programs are displayed on the program to the Start menu program using Settings”... -
Page 50: Program List
4 Man ag i ng In fo rm atio n Opening programs Program list The following table contains a list of programs installed on your device. NOTE: To get detailed information on using any of the applications listed in this section, open the program, tap Icon Program... - Page 51 Icon Program Usage Windows Media Play stored or streaming digital audio and video Player Mobile files. Phone-related programs Phone Send and receive local and international calls and text messages. SIM Manager View the contents of your SIM card and transfer it to your contacts list.
-
Page 52: Using Search
4 Man ag i ng In fo rm atio n Using Search Using Search The Search function helps you locate a particular file quickly. > Programs Enter the file name of the file you’re searching, then select a data type. Tap Search. -
Page 53: Wireless Communications
Wireless Communications • Wireless communication features • Managing wireless connections • Getting connected Wireless communication features You can use your MC35 to exchange information with other mobile devices and connect to your computer, a network, or the Internet. You have the following connection options: •... -
Page 54: Infrared Connection
5 Wire less Co mmu nicat i on s Wireless communication features Infrared connection Using infrared, you can enable short-range file exchange between your MC35 and another IR-enabled device. Exchanging files using IR connection Ensure that the IR function on both your MC35 and on other device you want to exchange files with are enabled. -
Page 55: Bluetooth Connection
To receive files via IR connection: Align the IR port of your device with that of the IR-enabled device so that they are unobstructed and within a close range. Have the owner of the other IR-enabled device send the file to you. On the Receiving Data callout, tap Yes. - Page 56 5 Wire less Co mmu nicat i on s Wireless communication features On the Mode tab, select all the check boxes. Tap ok. NOTE: Deactivate the Bluetooth feature when you do not plan to use it for an extended time. Creating a Bluetooth partnership You need to create a partnership with another Bluetooth-enabled device to be able to exchange information with it.
- Page 57 Your device searches for Bluetooth-enabled devices on your personal area network (PAN) and displays them in the device list. Tap the name of the device in the list, then tap Next. If you want to use a passcode, type an alphanumeric passkey, then tap Next; enter the same passkey on the other device.
- Page 58 5 Wire less Co mmu nicat i on s Wireless communication features On the Bluetooth screen, tap the COM Ports tab, then perform one of the following: • To connect to a device, tap New Outgoing Port. • To allow other devices to connect to the MC35, tap New Incoming Port.
-
Page 59: Gprs Connection
To receive files via Bluetooth: Have the owner of the other Bluetooth-enable device send the file to you. On the Bluetooth callout, tap Yes. GPRS connection General Packet Radio Service (GPRS) is a packet-switched technology that allows transmission of data between mobile phones and the Internet over a GSM network. It supports an “always on”... -
Page 60: Wifi Connection
5 Wire less Co mmu nicat i on s Wireless communication features Connecting to the GPRS network NOTE: When downloading large files through GPRS data connection, incoming phone calls are not received. Phone calls are directed to voicemail. A GPRS connection is required to connect to a GPRS network. To create a GPRS connection, the GPRS features on your GSM account must be enabled and activated on your SIM card. - Page 61 Select Enable Wi-Fi Card. To activate WiFi using the Settings option: > Settings On the Connections tab, tap WiFi Card Setting Select Enable WiFi Card, then select a running mode. Tap ok. 5 W i r el e s s C omm un ic a ti o ns Wireless communication features...
- Page 62 5 Wire less Co mmu nicat i on s Wireless communication features Your device will automatically detect the WLAN access points available in your area and display them on the notification prompt. Select the network you want to connect to. Tap ok.
- Page 63 On the Wireless tab, perform one of the following: • If your preferred network is not listed, tap Add New. See “To add a wireless network “ on page 54 for more information. • Tap an available wireless network. Previously configured networks are already listed.
- Page 64 5 Wire less Co mmu nicat i on s Wireless communication features To connect to a wireless network: > Settings On the Connections tab, tap WiFi On the Wireless tab, tap an available wireless network. On the command bar, tap Connect. If a wireless network is detected, a similar screen appears, tap Connect on the command bar.
- Page 65 Tap Next. In the Authentication drop-down list, select the authentication method. In the Data Encryption drop-down list, select an encryption method. Tap “The key is automatically provided” check box or enter the network key. NOTE: Obtain network security settings from the network administrator. Tap Next.
-
Page 66: Managing Wireless Connections
5 Wire less Co mmu nicat i on s Managing wireless connections Managing wireless connections Using Wireless Manager The Wireless Manager provides easy management to the wireless features on your device. This program complements your device’s integrated wireless card enabling you to turn the wireless features on and off and allows for centralized management of the WiFi, Bluetooth, and Phone settings. - Page 67 To activate Bluetooth via the Wireless Manager: On the Today screen, tap Wireless Manager Tap to launch the Wireless Manager. On the Wireless Manager screen, tap Bluetooth. Tap Done. To activate WiFi connection via the Wireless Manager: On the Today screen, tap Wireless Manager Tap WiFi >...
- Page 68 5 Wire less Co mmu nicat i on s Managing wireless connections Tap Menu > Disconnect Cellular Data. Configuring the multiple wireless settings Using Wireless Manager, you can set Phone, Bluetooth, and WiFi settings. To configure the Phone settings: On the Wireless Manager screen, tap Menu. Select Phone Settings.
-
Page 69: Getting Connected
Getting connected After configuring your device’s wireless settings you can now define the network settings you’ll be using to access the Internet, connect to your office network, and view intranet URLs. For help information on performing the following procedures, tap Help screen you’re having difficulty with. -
Page 70: Connecting To Your Office Network
5 Wire less Co mmu nicat i on s Getting connected Flight Mode Flight Mode allows you to turn off all the active wireless connections for safe use on an airplane. To turn off wireless connections: Press and hold the End Select Yes when the Turn On Flight Mode notification appears. -
Page 71: Viewing Intranet Urls
Repeat steps 1 and 2, then on the Tasks tab, tap Set up my proxy server under My Work Network. On the Modem or VPN tab, tap and hold a connection name, then select Connect from the pop-up menu. Viewing intranet URLs If you’ll be connecting to intranet sites that have periods in their URLs (e.g. - Page 72 5 Wire less Co mmu nicat i on s Getting connected To set up an e-mail account: For an explanation on any of the setup screens, tap > Messaging Tap Menu > Tools > New Account. Select the e-mail type from the drop-down list, then tap Next. If you have selected an Outlook E-mail account, messages on the Microsoft Outlook Inbox folder on your computer will synchronize to your device’s Outlook E-mail Inbox during the next time you perform an ActiveSync synchronization.
-
Page 73: Using The Windows Mobile Programs
Using the Windows Mobile Programs • Microsoft Outlook Mobile programs • Microsoft Office Mobile programs • Windows Media Player 10 Mobile for Pocket PC • Internet Explorer Mobile • Pocket MSN Microsoft Outlook Mobile programs Microsoft Outlook Mobile includes Calendar, Contacts, Inbox, Notes, Tasks, and Messaging. -
Page 74: Scheduling An Appointment
6 Usin g t he Wind ow s M obile Prog rams Microsoft Outlook Mobile programs Scheduling an appointment If you are in Day or Week view, tap the desired date and time for the appointment. Tap Menu > New Appointment. Tap to select a date. -
Page 75: Using The Calendar Summary Screen
6 U s ing th e Wind ow s Mo bile Prog ra ms Beaming an appointment You can send an appointment to another IR- or Bluetooth-enabled device by beaming it. If you intend to send the appointment: • Via IR: Ensure that the two devices have IR turned on, then align the IR port of your device with that of the other device so that they are unobstructed and within close range. -
Page 76: Contacts
6 Usin g t he Wind ow s M obile Prog rams Microsoft Outlook Mobile programs • To save storage space on your device, synchronize appointments within a convenient date range. Perform the following: Connect your device to your computer. In ActiveSync on your computer, if the details pane is not open, click Show Details. -
Page 77: Using The Contacts Summary Screen
6 U s ing th e Wind ow s Mo bile Prog ra ms After completing the contact details, tap ok. To find a contact: There are several ways to find a contact. • Using the MC35 keypad, press the starting letter of the contact name •... -
Page 78: Sending A Message To A Contact
6 Usin g t he Wind ow s M obile Prog rams Microsoft Outlook Mobile programs • Using the contact list abbreviation Tap the letter in the right column next to the contact you want to call. The contact’s summary screen appears. Tap which number to call or send e-mail/text messages. -
Page 79: Synchronizing Contacts
6 U s ing th e Wind ow s Mo bile Prog ra ms Tap Send E-mail or Send Text Message. - or - Move the joystick up or down to select either Send option, then press the joystick to enable it. -
Page 80: Tasks
6 Usin g t he Wind ow s M obile Prog rams Microsoft Outlook Mobile programs Tasks Use Tasks to keep track of what you have to do and prioritize them based on their importance and urgency. To open Tasks: •... -
Page 81: Using The Tasks Summary Screen
6 U s ing th e Wind ow s Mo bile Prog ra ms • Sort tasks based on their completion status, priority level, subject, start date, or due date. Tap Menu > Sort By, then select a sort criteria. Beaming a task item You can send a task item to another IR- or Bluetooth-enabled device either from the task list or from a task summary screen. -
Page 82: Notes
6 Usin g t he Wind ow s M obile Prog rams Microsoft Outlook Mobile programs Notes Quickly capture thoughts, reminders, ideas, drawings, and phone numbers with Notes. You can create a written note or a recording. You can also include a recording in a note. If a note is open when you create the recording, it is included in the note as an icon. -
Page 83: Synchronizing Notes
6 U s ing th e Wind ow s Mo bile Prog ra ms • Rename notes to identify them in a more meaningful manner. Select the appropriate command from the pop-up menu or tap Menu. • Sort notes based on name, date, size, or type to make searching easier. Tap the Sort By pick list on the upper right corner of the note list, then select a sort criteria. -
Page 84: Messaging
6 Usin g t he Wind ow s M obile Prog rams Microsoft Outlook Mobile programs Messaging Use Messaging to manage and organize both your e-mail and text (SMS) messages. See ”Setting an e-mail server connection” on page 61 for more information on how to set up an e-mail server connection. - Page 85 6 U s ing th e Wind ow s Mo bile Prog ra ms When you receive a message, tap it to open. Unread messages are displayed in bold text. Creating an e-mail/text message Whether you want to send an e-mail or text message, you do so by changing the Account option.
-
Page 86: Creating A Message Signature
6 Usin g t he Wind ow s M obile Prog rams Microsoft Outlook Mobile programs Tap Send when you've finished the message. If you are working offline, the message is moved to the Outbox folder and sent the next time you’re online. To keep sent items: By default, sent e-mail messages are not saved on your device to help conserve memory. -
Page 87: Managing Messages And Folders
6 U s ing th e Wind ow s Mo bile Prog ra ms Select the “Use signature with this account” option. You can use the signature for new messages only, or you can select the “Use signature when replying and forwarding” option to append it to all outgoing messages. -
Page 88: Microsoft Office Mobile Programs
6 Usin g t he Wind ow s M obile Prog rams Microsoft Office Mobile programs • If you want to include email attachments, select the “Include file attachments” option. To limit the size of synchronized attachments, select the “Only if smaller than”... - Page 89 6 U s ing th e Wind ow s Mo bile Prog ra ms To open Word Mobile: • > Programs > Word Mobile The Word Mobile document list displays. Using the Word Mobile document list The Word Mobile document list is the default screen when you open Word Mobile. Every time you tap ok in an open document, this list displays.
- Page 90 6 Usin g t he Wind ow s M obile Prog rams Microsoft Office Mobile programs Tap Menu > File > Save As to customize the save settings. Tap to view the toolbar, change Zoom options, and enable text wrapping. Tips for working in Word Mobile •...
-
Page 91: Excel Mobile
6 U s ing th e Wind ow s Mo bile Prog ra ms Synchronizing Word documents You can synchronize Word documents created on your computer with your device. Note the following reminders when selecting this option. • Word Mobile does not support synchronization of password-protected files. You must first remove the password protection in Word on your computer if you want to view the document on the device. -
Page 92: Tips For Working In Excel Mobile
6 Usin g t he Wind ow s M obile Prog rams Microsoft Office Mobile programs Using the Excel Mobile workbook list The Excel Mobile workbook list is the default screen when you open Excel Mobile. Every time you tap ok in an open workbook, this list displays. •... -
Page 93: Powerpoint Mobile
6 U s ing th e Wind ow s Mo bile Prog ra ms • Show and hide screen elements. • Tap View, then tap the elements you want to show or hide. • You might want to freeze the top and left-most panes in a worksheet to keep row and column labels visible as you scroll through a sheet. - Page 94 6 Usin g t he Wind ow s M obile Prog rams Microsoft Office Mobile programs Tap the slide show you want to view. Tap the current slide to advance to the next slide. To stop a slide show presentation: In a PowerPoint Mobile presentation, tap and hold , then tap End Show.
- Page 95 6 U s ing th e Wind ow s Mo bile Prog ra ms To change the slide show presentation: In a PowerPoint Mobile presentation, tap and hold Tap the Orientation tab, then select the orientation. To navigate between slides: In a PowerPoint Mobile presentation, tap and hold the Go to Slide.
-
Page 96: Windows Media Player
NOTE: To facilitate faster copying of audio files to your device, it is recommended that you configure Windows Media Player 10 on your computer to automatically determine the quality level settings applicable to your MC35 EDA. See the Windows Media Player Help on your computer for more information. -
Page 97: The Library
6 U s ing th e Wind ow s Mo bile Prog ra ms The library The library contains links to your playlists and audio or video files. You can sort content by criteria such as artist name, album title or genre. By default, Windows Media Player 10 Mobile automatically searches your device for compatible digital media files and adds them to the My Device library. - Page 98 6 Usin g t he Wind ow s M obile Prog rams Windows Media Player To add items to the Now Playing playlist: On the Library screen, tap Menu > Library. Select a library in the Library pick list (for example a storage card). TIP: If the Player does not detect new files that you copied to your device, you can manually update the library by tapping Menu >...
- Page 99 6 U s ing th e Wind ow s Mo bile Prog ra ms To edit the Now Playing playlist: On the Player screen, tap Now Playing. - or - Tap Menu > Library > Now Playing, then the playlist you want to edit. Perform any of the following: •...
- Page 100 6 Usin g t he Wind ow s M obile Prog rams Windows Media Player Viewing track properties You can check the file properties of a track for your reference. You can do this either in a playlist screen or in the Player screen. To view track properties from a playlist: On the Library screen, tap My Playlists.
-
Page 101: File Playback
6 U s ing th e Wind ow s Mo bile Prog ra ms File Playback The Player supports playback of the following file formats: • Windows Media - Including .asf, .asx, .wax, .wm, .wma, .wmv, .wmx, and .wvx files. •... -
Page 102: Customizing The Player
6 Usin g t he Wind ow s M obile Prog rams Windows Media Player Tap ok. Screen shifts to the Player screen. Playback controls The user interface of the Windows Media Player Mobile Playback screen lets you easily manage all aspects of the track playback. The screenshot below shows the functions of the Playback control buttons, as well as all available menus. - Page 103 6 U s ing th e Wind ow s Mo bile Prog ra ms Tap the Previous or Next button to locate a skin. Tap ok. The Player switches to skin mode. Changing your audio and video settings You can change the audio and video settings of the Player to suit your listening preferences.
- Page 104 6 Usin g t he Wind ow s M obile Prog rams Windows Media Player Tap the Video tab, then perform the following: • In the “Play video in full screen” list, select a screen size for video playback. • Select the “Scale to fit in window”...
- Page 105 6 U s ing th e Wind ow s Mo bile Prog ra ms Changing the startup screen You can define the startup screen when you start the Windows Media Player Mobile. To change the startup screen: On the Playback screen, tap Menu > Options > Library tab. Perform one of the following: •...
-
Page 106: Internet Explorer Mobile
6 Usin g t he Wind ow s M obile Prog rams Internet Explorer Mobile Licenses and Protected files Some digital media content from the Internet, CD tracks, and videos have associated licenses that protect them from being unlawfully distributed or shared. Licenses are managed and created using digital rights management (DRM), which is the technology for securing content and managing the rights for its access. -
Page 107: Mobile Favorites
6 U s ing th e Wind ow s Mo bile Prog ra ms Viewing the History list • Tap Menu > History. To change the number of days of links stored in the History list and clear the History list: On the Internet Explorer Mobile main screen, tap Menu >... - Page 108 6 Usin g t he Wind ow s M obile Prog rams Internet Explorer Mobile To add a favorite link: While on the page you want to add, tap and hold on the page. Tap Add to Favorites from the pop-up menu. Make the changes you want on the Name and Address boxes.
-
Page 109: Pocket Msn
6 U s ing th e Wind ow s Mo bile Prog ra ms To download a mobile favorite: Right-click the mobile favorite, then click Properties. On the Download tab, specify the number of links deep you want to download. To conserve device memory, go only one level deep. - Page 110 6 Usin g t he Wind ow s M obile Prog rams Pocket MSN To sign in to Pocket MSN: Signing in to Pocket MSN helps to maintain a secure access to your MSN Hotmail and MSN Messenger accounts. > Today Tap here to sign in to Pocket MSN.
-
Page 111: Msn Hotmail
6 U s ing th e Wind ow s Mo bile Prog ra ms MSN Hotmail MSN Hotmail on your device lets you access your Hotmail Inbox. NOTE: Make sure you create a connection to the internet before using MSN Hotmail. To view your Hotmail Inbox: >... - Page 112 6 Usin g t he Wind ow s M obile Prog rams Pocket MSN To keep your Hotmail Inbox up-to-date: > Programs Tap Options > Hotmail. Tap the “Download new e-mail automatically” check box. Tap ok. To create an e-mail message: On the Hotmail Inbox screen, tap New.
-
Page 113: Msn Messenger
6 U s ing th e Wind ow s Mo bile Prog ra ms MSN Messenger MSN Messenger on your device is an instant messaging program that lets you: • See who is online • Send and receive instant messages •... - Page 114 6 Usin g t he Wind ow s M obile Prog rams Pocket MSN Tap MSN Mobile Home. Tap Sign In. Tap Get a new Windows live ID.
- Page 115 6 U s ing th e Wind ow s Mo bile Prog ra ms Select your carrier. Enter your mobile phone number for confirmation. Your sign-in name and password are established the first time you sign into Pocket MSN. Tap OK. To sign in to your account: Tap anywhere on the MSN Messenger screen.
- Page 116 6 Usin g t he Wind ow s M obile Prog rams Pocket MSN Tap Sign In. If you already use MSN Messenger on your computer, your contacts will show up on your device without being added again. NOTE: To sign in after connecting to a wireless network, tap Menu > Options > Messenger, then follow the directions on the screen.
- Page 117 6 U s ing th e Wind ow s Mo bile Prog ra ms Tips when chatting with contacts • To invite another contact to a multi-user chat, tap Menu > Chat, then tap the contact you want to invite. •...
- Page 118 6 Usin g t he Wind ow s M obile Prog rams Pocket MSN...
-
Page 119: Using Phone
Using Phone The phone function of your MC35 EDA boasts of standard cell phone features—such as mailbox and text messages—as well as several handy call features including Speed Dial, Caller ID, Conference Call, Call Forwarding, Call Waiting, Voice Mail and Text messages, Fixed Dialing, Call Barring, Call History, speakerphone, note taking, voice mail, and emergency number setting. - Page 120 7 Usin g P hon e Phone setup Insert the SIM card into the SIM card holder. Note the proper position of the SIM card—the card connector (i.e., gold area) should be facing downward with the beveled corner fitting the lower-left corner of the recess area.
-
Page 121: Entering Your Pin
Entering your PIN After installing the SIM card you’ll be able to activate your mobile service connection. In most cases, SIM cards are preset with a PIN (Personal Identity Number), provided by your mobile service provider. To enter your PIN: >... -
Page 122: Dialer Screen
7 Usin g P hon e Dialer screen Dialer screen To launch the Dialer screen, tap Soft keypad for inputting. Tap to view the Contacts list. Dialer buttons The list below shows the actions of the Dialer screen buttons. Icon >... -
Page 123: Phone Status Icons
Phone status icons The list below shows the Phone-related status icons. Icon Name Network search No network Phone off In network service Signal status Active call Speakerphone Missed call Unread message Phone operation Turning the phone function on and off If you have turned the phone function off, removed and then reinstalled the SIM card, the connection to your mobile service provider’s network is not automatically enabled. - Page 124 7 Usin g P hon e Phone operation To turn on the phone function: Launch the Wireless Manager application: • On the Today screen, tap Wireless Manager Tap to launch the Wireless Manager. -or- • On the Today screen, tap the signal icon of the screen, then from the Phone callout, tap Wireless Manager.
-
Page 125: Erasing Number Input
On the Wireless Manager screen, tap Phone to turn on phone function. The signal icon changes indicating the MC35 is searching for a mobile connection. This may take a few seconds. The signal icon once a mobile connection is established. To turn off the phone function: Launch the Wireless Manager application. -
Page 126: Answering A Call
7 Usin g P hon e Phone operation Answering a call • On the Call Notification callout, tap Answer or press the Send Rejecting a call • On the Call Notification callout, tap Ignore or press the End Depending on your mobile service subscription, either a busy tone is sent out, or the call is forwarded to your voice mailbox. -
Page 127: Muting A Call
Muting a call During a call you can mute the microphone so that the person with whom you are speaking cannot hear you, but you can still hear him or her. This is useful if, for example, you do not want the other person to hear a conversation or background noise on your side of the call. - Page 128 7 Usin g P hon e Phone operation To make a call using Microsoft Contacts: There are several ways to make a call in Contacts. In this section, only the method using the hardware buttons is described. See "Calling a contact" on page 67 for instructions on other methods.
- Page 129 • Alternatively, if you don’t remember the position of a number in the Speed Dial list follow the steps below: Tap Speed Dial On the Speed Dial screen, press the joystick to go through the list to find the number you want to call. Once the number is selected, you can either press the joystick or the Send button to initiate the call.
- Page 130 7 Usin g P hon e Phone operation To make a call using SIM Manager: SIM Manager is a program you can use to view and manage the contents of your SIM card. > Settings On the System tab, tap SIM Manager Wait for the SIM card contents to load.
-
Page 131: Phone Features
If you want to use a passcode, enter the alphanumeric passcode for the Bluetooth- enabled hands-free device, then tap Next. You can find the passcode in the manufacturer’s documentation for your hands-free device. Tap Finish. Select the check box for the Hands Free service, and tap Finish. To make an International call: For making a call to an overseas number that is not stored either in your SIM card or on your device, follow the steps below. -
Page 132: Call Notification And Identification
7 Usin g P hon e Phone features Call notification and identification The Call Notification feature lets you know if another person is trying to call you when you are talking on the phone. When this happens the following callout appears. The Caller Identification feature matches the incoming call number with those stored in Contacts so you know who is calling you. -
Page 133: Conference Call
Conference call With the Conference Call feature you can create a conversation line between several callers. You can either, put a call on hold, then dial another number and wait for it to be picked up; or accept an incoming call when you already have one in progress. To set up a conference call: •... - Page 134 7 Usin g P hon e Phone features The new recording appears as an embedded icon. Tap ok. To view a call note: You can view call notes either from the Call History screen or from the Notes program. • On the Call History screen: Tap Call History Select a log item marked with this icon.
-
Page 135: Text Messaging Service
• On the Notes screen: Tap the call note from the list. A call note’s label corresponds to the name or phone number of the related contact. Call note Text messaging service Just like a regular mobile phone, you can send and receive text messages using your device. - Page 136 7 Usin g P hon e Phone features The Caller Identification feature matches incoming text message numbers with those stored in Contacts so you know who is sending you a message. Furthermore, the “New Text Message” callout gives you the option to call the sender or save, dismiss, or delete the message.
- Page 137 NOTE: If the phone function is turned off and you tried to call the sender, send a reply, or forward the message, you will be prompted to turn the phone function on. To create a text message: On the Dialer screen, tap Menu > View Contact. The contact’s information displays.
-
Page 138: Voice Mail
7 Usin g P hon e Phone features The auto-correct feature automatically fixes common spelling errors as you type so your messages are more accurate. The character counter lets you see and control the size of the message as you compose. -
Page 139: Contacts Integration
• Tap the New Text Message Notification icon voice mail, then tap Menu > Call sender from the “New Text message” callout. Contacts integration Your device’s phone function is integrated with other applications making it easy for you to share contacts—phone numbers—between programs. Listed below are the places where contacts can be stored on your device: •... - Page 140 7 Usin g P hon e Phone features To export a contact to Speed Dial: Perform one of the following: • Tap and hold a contact to display the pop-up menu, then tap Add to Speed Dial. • Tap a contact to select it, then tap Menu > Add to Speed Dial. In the next screen add the contact details.
-
Page 141: Call History
On the Contact screen add additional contact details. Tap ok or press the joystick. The call details in the Call History for the transferred number will change to display the contact name specified. Call History All calls made on your device are recorded in Call History. It provides the time and duration of all incoming, outgoing, and missed calls, and a summary of total calls. - Page 142 7 Usin g P hon e Phone features To change the Call History view: You can limit the number of entries that appear on the Call History list according to specific criteria, such as All Calls, Missed, Outgoing, Incoming, or By Caller. On the Dialer screen, tap Call History Tap Menu >...
- Page 143 Call details Call History allows you to check the date and time a call was made, as well as the duration. To view call details: • Find the call you are interested in, then tap it once. Call history limit To minimize the memory space occupied by the Call History items, you can set a limit for the number of entries retained after a specific period of time.
-
Page 144: Phone Profiles
7 Usin g P hon e Phone profiles On the Call Timers screen, tap the ”Delete call history items older than” pick list, then, tap a time period option. Tap ok. To delete individual Call History entries: • Tap and hold the entry you want to delete, then from the pop-up menu, select Delete. - Page 145 To create a new phone profile: > Settings On the System tab, tap Phone Profiles Tap New > Yes. Define the phone profile settings. Tap ok. To change a phone profile setting: Tap a profile setting that you want to change. Tap Menu >...
-
Page 146: Phone Preferences
7 Usin g P hon e Phone preferences Tap OK > Yes. To delete a phone profile: Tap a profile setting. Tap Menu > Delete. Tap Yes > OK. Phone preferences You can configure most features of the phone function to suit your preferences. You do this by accessing the Phone option under Settings. - Page 147 To listen to a ring tone: • Select the ring tone file you want to play, then tap the Play button. To stop ring tone playback, tap the Stop button. To customize the ring tone options: To have a more personalized batch of ring tones to choose from, you can download additional sound files to your device.
-
Page 148: Services Tab
7 Usin g P hon e Phone preferences Tap a contact in the contact list (or select it using the joystick), a summary screen displays. This is referred to as a contact card. Tap Menu > Edit. On the Ring tone list, select a voice recording. Tap ok. -
Page 149: Call Forwarding
• Block outgoing calls • All calls - to prevent any calls from being made from your device • International - to block outgoing international calls • International except to home country - to block all outgoing international calls other than those being made to the set home country •... -
Page 150: Call Waiting
7 Usin g P hon e Phone preferences • • • • To disable call forwarding, deselect all the check boxes. 4. Tap ok. Call waiting This service allows you to receive another call during an active call. To enable or disable call waiting: On the services list, tap Call Waiting. -
Page 151: Fixed Dialing
Voice mail and text messages By default your device will automatically detect and set the voice mail and text messages access numbers provided by your mobile service provider. You can view these numbers for your reference. To view voice mail and text messages numbers: On the services list, tap Voice Mail and Text Messages. -
Page 152: Network Tab
7 Usin g P hon e Phone preferences To edit entries: On the services list, tap Fixed Dialing. Tap the Get Settings button (retrieving settings may take a few minutes). Select the number pattern, then tap Menu. Tap Edit, then enter PIN2 and tap Done. Enter the new number, name, and position, then tap Done. -
Page 153: Band Tab
To include a listed network as a preferred network, tap the check box opposite it. To set the priority level, tap a preferred network, then tap the Move Up or Move Down buttons. Tap ok. Band tab MC35 operates on the GSM 850/900/1800/1900 bands. Use the Band tab to select a GSM band for your device to operate on. - Page 154 7 Usin g P hon e Phone preferences...
-
Page 155: Using Mc35 Companion Programs
Using MC35 Companion Programs • Phone management programs • Wireless communication programs • Media-related programs • Product download-related programs Phone management programs These programs help you manage the contents of your SIM card. • Use SIM Manager to manage contacts stored in your SIM card •... - Page 156 8 Us i n g M C3 5 C om pa ni on Pr o gr am s Phone management programs To copy a SIM contact to your device: > Settings On the System tab, tap SIM Manager Wait for the SIM card contents to load. This may take a few seconds. Tap and hold a SIM contact, then select Save To Contacts.
-
Page 157: Sim Toolkit
8 U s ing MC 35 C omp an ion Prog ra ms To export SIM text messages to the Inbox folder: • On the SIM Manager screen, tap Menu > Tools > Export All Messages to Inbox. To create a new SIM contact: On the SIM Manager screen, tap New. -
Page 158: Wireless Communication Programs
8 Us i n g M C3 5 C om pa ni on Pr o gr am s Wireless communication programs Wireless communication programs • Internet Sharing • Push to Talk • GPRS Setting • Terminal Services Client • Express GPS Connect Internet Sharing Internet Sharing enables your computer to use the device as a modem for connecting to the Internet. -
Page 159: Push To Talk
8 U s ing MC 35 C omp an ion Prog ra ms Push to Talk NOTE: Push to Talk application is not available on all configurations. Push to Talk (PTT) is a walkie-talkie style service that provides simple communication with one person or with a group of people having compatible devices. - Page 160 8 Us i n g M C3 5 C om pa ni on Pr o gr am s Wireless communication programs Using PTT To initialize your PTT service: Begin initializing your PTT service by performing one of the following: • Press the Push to Talk button on your device.
- Page 161 8 U s ing MC 35 C omp an ion Prog ra ms To create an individual PTT contact: Perform one of the following: • On the PTT Menu screen, tap PTT Contacts > Menu > Add Contact. • On the PTT Menu screen, tap Add Contact. Enter the name and mobile number of your contact.
- Page 162 8 Us i n g M C3 5 C om pa ni on Pr o gr am s Wireless communication programs Tap ok. The newly added contact, Jim Skinner, appears in the list next to the Invitation in progress icon To edit a PTT contact: Perform one of the following: •...
- Page 163 8 U s ing MC 35 C omp an ion Prog ra ms To create a PTT group: Perform one of the following: • On the PTT Menu screen, tap PTT Contacts > Menu > Add Group. • On the PTT Menu screen, tap Add Group. Enter a name for the new group and tap ok.
-
Page 164: Ptt Calls
8 Us i n g M C3 5 C om pa ni on Pr o gr am s Wireless communication programs PTT Contacts status icons The list below shows the status icons that appear next to the individuals in PTT Contacts. Icon Name Invitation in... - Page 165 8 U s ing MC 35 C omp an ion Prog ra ms To view PTT Call History: Perform one of the following: • Press and hold the Push to Talk button. • During an incoming call, tap Menu > PTT Call History. •...
- Page 166 8 Us i n g M C3 5 C om pa ni on Pr o gr am s Wireless communication programs Configuring the PTT Settings You can configure most features of the PTT to suit your preferences. You do this by accessing the Set Your Name, Auto Accept Off, or PTT is On commands in the PTT menu.
-
Page 167: Gprs Setting
8 U s ing MC 35 C omp an ion Prog ra ms To turn PTT off: On the PTT Menu screen, tap Auto Accept Off. Tap Yes. To turn it on, tap PTT is On on the PTT Menu screen. GPRS Setting NOTE: GPRS Settings application is not available on all configurations. -
Page 168: Terminal Services Client
8 Us i n g M C3 5 C om pa ni on Pr o gr am s Wireless communication programs In the Telephone Company list, select the APN of your mobile phone service provider. If required by your provider to change the connection name, modem type, APN name, tap View. - Page 169 8 U s ing MC 35 C omp an ion Prog ra ms To connect to a server you have previously connected to, tap a server in the Recent Servers list. To connect to a new server, enter the server’s name in the Server field. Select the “Limit size of desktop to fit on the screen”...
-
Page 170: Express Gps Connect
Use Express GPS Connect for the first time The first time you use your MC35 EDA, make sure your Express GPS Connect satellite data is current. For your first location fix, it is best to be outdoors under an open sky, with no tall buildings or other obstructions close by. - Page 171 8 U s ing MC 35 C omp an ion Prog ra ms How to improve GPS performance Your MC35 computes your position faster and more accurately, provided the following are adhered to: • Always operate with current Express GPS Connect data. •...
- Page 172 8 Us i n g M C3 5 C om pa ni on Pr o gr am s Wireless communication programs To download the Express GPS Connect data file using Settings: > Settings On the Connections tab, tap Express GPS Connect Tap Download Now.
- Page 173 8 U s ing MC 35 C omp an ion Prog ra ms Configuring the Express GPS Connect You can set preference settings on how to use Express GPS Connect. You can perform the following configuration options in Express GPS Connect: •...
-
Page 174: Media-Related Programs
8 Us i n g M C3 5 C om pa ni on Pr o gr am s Media-related programs On the Express GPS Connect screen, tap the About tab. Tap Advanced > Factory Reset. This removes all of the Express GPS Connect internal operating information and restores the factory default settings. - Page 175 8 U s ing MC 35 C omp an ion Prog ra ms To open Pictures & Videos: • > Programs > Pictures & Videos Tap to launch the Camera application. Pictures & Videos opens to a thumbnail view of all image files stored on the My Pictures folder on your device and/or on a storage card attached to your device.
-
Page 176: Organizing Photos And Videos
8 Us i n g M C3 5 C om pa ni on Pr o gr am s Media-related programs Organizing photos and videos You can use Pictures & Videos to organize and search for images stored on your MC35 or on a SD/MMC card. -
Page 177: Full Screen Mode
8 U s ing MC 35 C omp an ion Prog ra ms Perform any of the following: • Tap Cut to move image file to the Storage Card folder. • Tap Copy to create a duplicate image file. This is useful when you want to edit an image but still want to retain an original copy of the image. - Page 178 8 Us i n g M C3 5 C om pa ni on Pr o gr am s Media-related programs To crop part of an image: You have the option to specify a portion of an image and then save that portion as a new JPEG file.
- Page 179 8 U s ing MC 35 C omp an ion Prog ra ms Tap the Magnify button to enable the zoom selection tools. The full screen image zooms in and a red selection border automatically appears on the image inside the zoom selection panel. Perform any of the following: •...
-
Page 180: Slide Show Mode
8 Us i n g M C3 5 C om pa ni on Pr o gr am s Media-related programs Slide show mode You can view images in a slide show much like viewing a PowerPoint presentation in your computer. Images are adjusted to fit the entire display area and are shown in a five seconds interval (default). - Page 181 8 U s ing MC 35 C omp an ion Prog ra ms Customizing Pictures & Videos Using the Options command you can set preference settings on how to use Pictures & Videos. To customize Pictures & Videos: On either thumbnail or full screen mode, tap Menu > Options. On the General tab, set the following options: •...
- Page 182 8 Us i n g M C3 5 C om pa ni on Pr o gr am s Media-related programs On the Camera tab, set the following options: • In the Save files to list, select to save image files to onboard memory or built-in storage.
-
Page 183: Camera
8 U s ing MC 35 C omp an ion Prog ra ms Camera With the Camera application you can take pictures and shoot videos, and modify settings with Camera while you are on mobile. The images and video clips are automatically saved in the Pictures &... - Page 184 8 Us i n g M C3 5 C om pa ni on Pr o gr am s Media-related programs • Open Pictures & Videos, then tap Camera on the command bar. Tap Menu > Video. To switch back to camera mode, tap Menu > Still. Camera capture mode The MC35 offers two types of camera capture mode: •...
- Page 185 8 U s ing MC 35 C omp an ion Prog ra ms To take photos using burst mode: Burst mode is a way to take a series of quick pictures. Launch the Camera application. Tap Menu > Mode > Burst. Press the Camera button to take the picture.
- Page 186 8 Us i n g M C3 5 C om pa ni on Pr o gr am s Media-related programs Tap Menu > Quality. To select picture compression: You can set the compression level for the pictures you take. Note that selecting a high quality picture increases the size of the file significantly.
- Page 187 8 U s ing MC 35 C omp an ion Prog ra ms Press the Camera button to capture the bar code data. The device beeps when the bar code data is captured. Tap the x button to exit the CamWedge Test screen. Exit the CamWedge application.
-
Page 188: Camwedge
8 Us i n g M C3 5 C om pa ni on Pr o gr am s Media-related programs CamWedge CamWedge enables bar code data capture with the MC35. To open CamWedge: • > Programs > CamWedge icon appears on the lower right corner of the Today screen. Bar code data capture is enabled by default when CamWedge is launched. - Page 189 8 U s ing MC 35 C omp an ion Prog ra ms To specify the bar code prefix/suffix options: On the CamWedge menu, select Barcode > Prefix/Suffix. Set the following options: • Tap the “Allow escapes in prefix/suffix” check box to enable escape sequences to be embedded in prefix and suffix strings.
-
Page 190: Test Window
8 Us i n g M C3 5 C om pa ni on Pr o gr am s Media-related programs To configure the options for capturing bar codes: On the CamWedge menu, select Barcode > Options. Tap the “Flashlight” check box to enable the flashlight when capturing bar code data. -
Page 191: Product Download-Related Programs
Log Window The Log window displays a scrolling list of the actions performed. This does not include the captured data. The Log window is typically used to confirm the actions of the user. To open the Log window: • On the CamWedge menu, select Log. A menu bar with all of the CamWedge functions is available within the window. -
Page 192: Airbeam Package Builder
8 Us i n g M C3 5 C om pa ni on Pr o gr am s Product download-related programs AirBEAM Package Builder In a typical distributed AirBEAM system, software to be transferred is organized into packages. In general, an AirBEAM package is simply a set of files that are assigned attributes both as an entire package and as individual component files. - Page 193 8 U s ing MC 35 C omp an ion Prog ra ms To configure AirBEAM Smart Client: > Programs > AirBEAM Tap File > Configure. The Configuration screen has seven tabs that you can modify - Packages(1), Packages(2), Server, Misc(1), Misc(2), Misc(3), and Misc(4). NOTE: No inadvertent trailing spaces should be entered on the seven tabs.
- Page 194 8 Us i n g M C3 5 C om pa ni on Pr o gr am s Product download-related programs Tap Packages(2) tab, then set the following options: • In the Package 5 field, enter the package name of the fifth of eight packages.
- Page 195 8 U s ing MC 35 C omp an ion Prog ra ms • In the Password field, enter the FTP password that corresponds to the FTP user specified in the User field. The specified password is used during the login phase of the package synchronization process.
- Page 196 8 Us i n g M C3 5 C om pa ni on Pr o gr am s Product download-related programs Tap Misc(2) tab, then set the following options: • In the Auto-retry field, specify whether the AirBEAM Smart Client automatically retries if there is a failure during the synchronization process.
- Page 197 8 U s ing MC 35 C omp an ion Prog ra ms Tap Misc(3) tab, then set the following options: • Tap the “Use DHCP server” check box to specify whether the AirBEAM Smart Client uses the DHCP response option 66 to specify the IP address of the FTP/TFTP server.
-
Page 198: Synchronizing With The Server
8 Us i n g M C3 5 C om pa ni on Pr o gr am s Product download-related programs • In the Sched Mode drop-down list, specify whether (and how) the scheduled mode is enabled. If enabled, schedule mode causes the AirBEAM synchronization process to occur periodically. - Page 199 8 U s ing MC 35 C omp an ion Prog ra ms Manual Synchronization Configure the AirBEAM Smart Client. See “Configuring the AirBEAM Smart Client” on page 182 for more information. From the main AirBEAM CE screen, tap File, then Synchronize. Once connected, the AirBEAM Synchronize screen appears.
-
Page 200: Rapid Deployment Client
8 Us i n g M C3 5 C om pa ni on Pr o gr am s Product download-related programs Rapid Deployment Client The Rapid Deployment (RD) Client facilitates software downloads to an MC35 from a Mobility Services Platform (MSP) Console’s FTP server. The MSP Console is a web-based interface to the wireless infrastructure monitoring and management tools provided by the MSP Lite or MSP Enterprise server. - Page 201 8 U s ing MC 35 C omp an ion Prog ra ms Capturing RD Bar Codes When the MC35 captures and successfully decodes a single or multiple RD bar codes, the data encoded in the bar code can: • Reset the MC35’s connection profile.
-
Page 202: Download Agent
8 Us i n g M C3 5 C om pa ni on Pr o gr am s Product download-related programs Download Agent The Download Agent facilitates software downloads and updates from the Internet to the MC35 EDA. This program also provides information about the software download status from the Internet. To open Download Agent: •... -
Page 203: Customizing Your Mc35
Customizing your MC35 • Adjusting system preferences • Program management Adjusting system preferences You can adjust the settings of your device to suit the way you work. Adjusting certain settings, such as backlight, auto power off timer, system volume, and processor speed, from the factory default settings may decrease your standby time. - Page 204 9 Cu stom izing you r MC 35 Adjusting system preferences Buttons Assign the Send/End button on the stereo headset/single earbud headset to commonly- used programs. You can also adjust the on-screen scrolling speed here. Input Select an input method, options for word completion and other related settings. Lock Set a password to prevent unauthorized access to your device.
-
Page 205: Msn Options
Menus Customize what appears on the MSN Options Set up the password and login settings in the MSN services. It also provides instant access to the MSN Hotmail’s Inbox, MSN Messenger’s Contact list, and options for customizing your Pocket MSN experience. 9 C us t o m i z i n g y o u r M C3 5 Adjusting system preferences menu. -
Page 206: Owner Information
9 Cu stom izing you r MC 35 Adjusting system preferences Owner Information Enter personal information and customize text display when device is turned on. Phone Set up the phone function of your device. See “Phone preferences” on page 136 for more information. -
Page 207: Sounds & Notification
9 C us t o m i z i n g y o u r M C3 5 Adjusting system preferences Sounds & Notification Set the volume level for system sounds and select the types of action you want to hear sounds for. -
Page 208: System Tab
9 Cu stom izing you r MC 35 Adjusting system preferences System tab About Displays your device’s version and copyright information; includes an option to define a device ID. Brightness Define settings for the display brightness and backlight control. -
Page 209: Error Reporting
9 C us t o m i z i n g y o u r M C3 5 Adjusting system preferences Certificates View and manage the public key certificates available on your device. Clock & Alarms Change the time or set alarms. Error reporting Enable or disable error reporting. - Page 210 9 Cu stom izing you r MC 35 Adjusting system preferences Adjust the GPS settings. Memory Adjust allocation of storage and main memory. Phone Profiles View and edit the Phone function’s preset profiles for different operations mode.
-
Page 211: Regional Settings
9 C us t o m i z i n g y o u r M C3 5 Adjusting system preferences Power View power level for both the main and backup battery. To minimize power consumption, you can define settings for the auto-off function and the processor’s operation speed. Regional Settings Set default number and time display formats and other related options. -
Page 212: Remove Programs
9 Cu stom izing you r MC 35 Adjusting system preferences Remove Programs Remove programs from storage memory. Screen Set the viewing orientation and text size setting. You can also recalibrate screen and enable the ClearType feature. SIM Manager Manage all contacts stored on your SIM card. -
Page 213: Connections Tab
9 C us t o m i z i n g y o u r M C3 5 Adjusting system preferences System Information Displays your device’s hardware and software information. Connections tab Beam Define settings for the beam function. - Page 214 9 Cu stom izing you r MC 35 Adjusting system preferences Bluetooth Use this option to configure the device’s Bluetooth settings. Connections Adjust settings for connecting to your ISP or to a local network. Express GPS Connect Enable and customize settings for the GPS connection utility.
-
Page 215: Usb To Pc
9 C us t o m i z i n g y o u r M C3 5 Adjusting system preferences USB to PC Enable or disable the enhanced network connectivity. WiFi/Network Cards Setup wireless network connection or customize settings for your device’s network adapter. -
Page 216: Program Management
9 Cu stom izing you r MC 35 Program management Wireless Manager Enable or disable the device's wireless radios and customize WiFi, Bluetooth, and Phone settings. Program management Adding programs to your device Programs bundled with your device at the factory are stored in ROM (read-only memory). You cannot remove these programs, and you'll never accidentally lose ROM contents. -
Page 217: Adding A Program To The Start Menu
Double-click the *.exe file. • If the file is an installer, the installation wizard will begin. Follow the directions on the screen. Once the software has been installed on your computer, the installer will automatically transfer the software to your device. •... -
Page 218: Removing Programs
9 Cu stom izing you r MC 35 Program management To add a Start menu program using ActiveSync on your computer: In the ActiveSync on your computer, click Explore to explore your device’s files and locate the program. Right-click the program, and then click Create Shortcut. Move the shortcut to the Start Menu folder in the Windows folder. -
Page 219: User Support
Symbol Global Interactive Center, you may need to return your equipment for servicing and you will be given specific directions. Motorola is not responsible for any damages incurred during shipment if the approved shipping container is not used. Shipping the units improperly can possibly void the warranty. -
Page 220: Protecting Your Mc35
10 U s er Su pp ort Protecting your MC35 Protecting your MC35 Your device is not just a financial investment but a wealthy source of personal information. It is then imperative that you protect your device from unauthorized access, as well as data loss. -
Page 221: Creating Backup Files
Locking the device You have the option to create a lock password that will be required to access your device after a set period of inactivity. To assign a lock password: > Settings On the Personal tab, tap Lock On the Password tab, perform the following: Select the “Prompt if device unused for”... - Page 222 10 U s er Su pp ort Protecting your MC35 Tap Menu > Edit > Copy. Tap the My Device icon (tap the folder list, labeled My Documents by default, and then My Device to see a list of all folders on your device), then select Storage Card.
-
Page 223: Troubleshooting
Easy answers and solutions are provided for each one. Battery problem Memory on your MC35 EDA is shared between storage memory and program memory. Storage memory is used to store the information you create and programs you install. -
Page 224: Password Problem
10 U s er Su pp ort Troubleshooting • A call is received by your device. • A preset alarm event is activated. • Turns off sounds you don’t need. Your device emits sounds in response to a number of events, such as warnings, reminders, and screen taps or hardware button actions. -
Page 225: Screen Problems
Finding space in program memory • Stop programs you are not currently using. In most cases, programs automatically stop to free needed memory. However, in some situations, such as when confirmation dialog boxes are waiting for a user response, the program may not be able to automatically stop. To check the state of your active programs: >... - Page 226 10 U s er Su pp ort Troubleshooting IR connection problem Failure to beam information If you’re having difficulty transferring information via IR, try the following: • Transfer only one file or no more than 25 contact cards at a time. •...
-
Page 227: Recalibrating The Screen
• You may need to change your device name if you are trying to connect to a network and cannot because another Pocket PC Phone with the same name is already connected. To change your device’s name: (a) Tap > Settings (b) On the System tab, tap About (c) On the Device ID tab, enter a new name on the Device name field. -
Page 228: Resetting Your Mc35
10 U s er Su pp ort Troubleshooting Resetting your MC35 You may have to perform a reset if the device freezes (i.e., device no longer responds to the buttons on the screen). To perform a soft reset: A soft reset allows your device to get a fresh start, similar to rebooting a computer. This restarts your device and adjusts memory allocation. -
Page 229: Battery Pack Information
Battery pack information CAUTION: DANGER OF EXPLOSION IF BATTERY IS INCORRECTLY REPLACED. REPLACE ONLY WITH THE SAME OR EQUIVALENT TYPE RECOMMENDED BY THE MANUFACTURER. DISPOSE OF USED BATTERIES ACCORDING TO THE MANUFACTURER’S INSTRUCTIONS. This device is equipped with a removable and rechargeable Lithium polymer battery . When a replacement is needed, please request the dealer from whom your device was purchased to assist you. - Page 230 10 U s er Su pp ort Troubleshooting...
-
Page 231: Index
Index activate profile 134 ActiveSync 30 install 3 requirements 3 synchronize Calendar 65 synchronize Contacts 69 synchronize Tasks 71, 73 synchronize with server 34 add program 206 AirBEAM 181 Client 182 configuration Misc(1) tab 185 Misc(2) tab 186 Misc(3) tab 187 Misc(4) tab 187 Packages(1) tab 183 Packages(2) tab 184... - Page 232 Download Agent 192 draw on the screen 27 e-mail service 62 enter data 21 using block recognizer 23 using input panel 21 using keypad 21 enter PIN 111 Excel Mobile 81 create 82 Express GPS Connect 160 configure 163 flight mode turn off 60 turn on 60 GPRS connection 49...
- Page 233 set up 103 sign in 105 MSN Mobile Home 99 Sign in 100 PowerPoint Mobile 83 open a slide show 83 slide show playback options 85 product download-related program 181 AirBEAM Smart 181 Download Agent 192 Rapid Deployment Client 190 turn off 157 turn on 157 PTT Call History...
- Page 236 Motorola One Symbol Plaza Holtsville, New York 11742-1300 http://www.symbol.com 72E-98506-01 Revision A - March 2007...