Table of Contents
Advertisement
En
Pe
GC GS
Before connecting, operating or adjusting this product, please read the instructions
completely.
Please keep this manual for future reference.
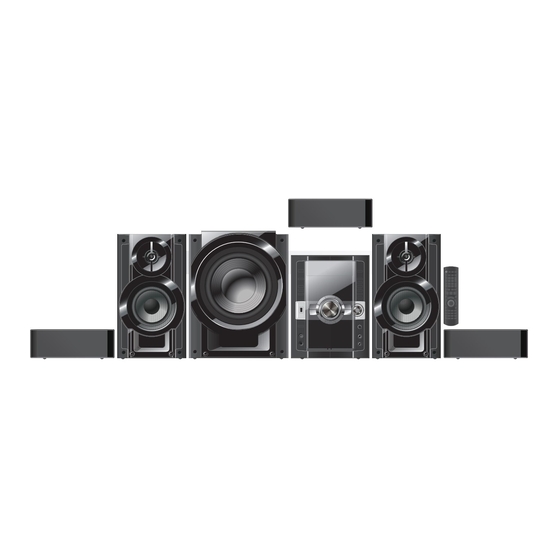
Your unit may not look exactly the same as illustrated.
Region number
The player plays DVD-Video marked with labels containing the region number "2"
or "ALL".
Example:
2
Operations in these instructions are described using the remote control, but you can do the
operations on the main unit if the controls are the same.
Unless otherwise indicated, illustrations in these operating instructions are for the Middle
East and South Africa.
Ar
Operating Instructions
DVD Stereo System
Model No.
2
3
ALL
5
SC-VK870
RQTV0320-1G
H0408AB1058
Advertisement
Table of Contents

Related Manuals for Panasonic SC-VK870


Summary of Contents for Panasonic SC-VK870
-
Page 1: Operating Instructions
Operating Instructions DVD Stereo System SC-VK870 Model No. Before connecting, operating or adjusting this product, please read the instructions completely. Please keep this manual for future reference. Your unit may not look exactly the same as illustrated. Region number The player plays DVD-Video marked with labels containing the region number “2”... -
Page 2: Table Of Contents
Using the USB playback function ........31 Discs Information ............12 Changing the main unit and remote control mode ..32 Tips for making data discs ........13 Operating a Panasonic television ........32 About the DivX VOD content ........13 REFERENCE DISC OPERATIONS Troubleshooting guide .......... -
Page 3: Caution For Ac Mains Lead
Caution for AC Mains Lead For Saudi Arabia and Kuwait WARNING: DO NOT CONNECT EITHER WIRE TO THE (“GS” area code model only) EARTH TERMINAL WHICH IS MARKED WITH THE LETTER E, BY THE EARTH SYMBOL [Ó] OR COLOURED GREEN OR For your safety, please read the following text carefully. -
Page 4: Simple Setup
Simple setup Placement of speakers Place the front, center, and surround speakers at approximately the same distance from the seating position. Front speakers Speakers are designed identically so that no left or right Center speaker channel orientation is necessary. Center speaker ( S B - P C 8 7 0 ) Do not place the center speaker directly on the television as ( S B - P F 8 7 0 ) -
Page 5: Connecting The Speakers
Connecting the speakers Connect the speakers to the main unit with the terminals of the same colour. Speaker Terminal/connector colour White Front speaker (L) Front speaker (R) White Blue Surround speaker (L) Surround speaker (R) Blue Green ... -
Page 6: Television, Antenna And Ac Mains Lead Connections
Simple setup (continued) Television, antenna and AC mains lead connections Connect the AC mains lead after all other connections are complete. Conserving power The unit consumes power (approx. 0.4 W) even when it is turned off with [^] (main unit: [8]). To save power when the unit is not to be used for a long time, unplug it from the household AC power socket. - Page 7 Antenna connections AM loop antenna Black • Stand the antenna White up on its base. • Place the anntena where reception is best. Click! Optional antenna connections Use outdoor antenna if radio reception is poor. Note • Disconnect the outdoor antenna when the unit is not in use. •...
-
Page 8: Demo Function
Simple setup (continued) DEMO function The unit can display a demonstration of its functions when “DEMO ON”. Press and hold [–DEMO]. The display changes each time the button is held down. DEMO ON DEMO OFF While in standby mode, select “DEMO OFF” to reduce power consumption. -
Page 9: Setting The Time
Press [CLOCK/TIMER] to select “CLOCK”. Every time you press the button: CLOCK zPLAY zREC Previous display Note Reset the clock regularly to maintain accuracy. Tray/disc handling procedure Adhere to the following to avoid problems. Removing the power plug Press [8] to turn off the unit and remove the power plug only after all the displays have disappeared. Tray caution Inserting a disc OPEN/... -
Page 10: Control Reference Guide
Control reference guide Remote control Change the television’s video input Television power on/off (32) mode (32) Turn the unit on/off (8, 30) Adjusting the television volume (32) Clock and timer setting (9, 30) Sleep timer, Auto off operation setting (30) PLAY/REC timer on/off (30) Change the television channel (32) Adjust the volume of the main unit... -
Page 11: Main Unit
Main unit AC supply indicator (AC IN) This indicator lights when the unit is connected to Remote control signal sensor the AC mains supply. Disc trays (9, 14) Standby/on switch (8) [;, OPEN/CLOSE] (9, 14) Press to switch the unit from on to standby mode [;, EXCHANGE] (14) or vice versa. -
Page 12: Discs Information
Recorded using a format different from DVD-Video Format, therefore, some functions cannot be used. 5 MPEG4 data recorded with the Panasonic SD multi cameras or DVD video recorders [conforming to SD VIDEO specifications 6 (ASF standard)/MPEG4 (Simple Profile) video system/G.726 audio system]. -
Page 13: Tips For Making Data Discs
Keep the number specifications (ASF standard)/MPEG4 (Simple Profile) video of sessions to a minimum to avoid this. system/G.726 audio system] recorded with Panasonic SD Naming folders and files Example: multi cameras or DVD video recorders with this unit. -
Page 14: Discs - Basic Play
Discs — Basic play 1 q - 5 q (On the main unit) Close the disc tray. Turn on the unit. Place disc. Label must face upward. OPEN/ CLOSE DVD-VR Start play. Open the disc tray. Remove the disc Disc tray OPEN/ from its cartridge CLOSE... - Page 15 Enter numbers Return to previous screen (while stopped) DVD-V DVD-VR VCD CD Example: to select 12: Disc menus [≧10] [1] [2] with Playback control (PBC) DVD-V Shows a disc top menu. Press [g] and then press the numeric buttons to cancel the PBC functions.
-
Page 16: Simple Control
Simple control To select the desired display mode Muting the volume (main unit) To mute the sound. Every time you press the button: • To cancel, press the button again or adjust the volume. Normal Peak hold Reflection • Muting is canceled when you switch the unit to standby. Normal Indicates strength of the sound in each tonal range. -
Page 17: Program And Random Play
Discs — Convenient functions (continued) Program and Random play Press [PLAY MODE] while stopped. Program Random Program and random playback screens appear sequentially. Off (Normal play) To exit program or random play mode Press [PLAY MODE] several times while stopped. ... -
Page 18: Discs - Using Navigation Menus
Discs — Using navigation menus Select the picture in thumbnails menu Playing data discs JPEG While pictures are being displayed, press [TOP MENU] to display the thumbnails. DVD-VR • Select “DATA” in “OTHERS” menu ( page 23) to To select a picture in a group play WMA, MP3, JPEG, MPEG4 or DivX. -
Page 19: Discs - Using On-Screen Menus
Discs — Using on-screen menus Show the on-screen menu. Select the item. Make the settings. Press to exit. Select Select Select On-Screen Menu 1 (Disc/Play) On-Screen Menu 2 (Video) Confirm On-Screen Menu 3 (Audio) Confirm On-Screen Menu 4 (Karaoke) Exit Items shown differ depending on the type of disc as well as the recording format. -
Page 20: On-Screen Menu 2 (Video)
Discs — Using on-screen menus (continued) On-Screen Menu 1 (Disc/Play) (continued) Displays the photograph date JPEG DATE DISPLAY DATE (during pause) JPEG To rotate the still picture ROTATION On-Screen Menu 2 (Video) To select the picture quality for movie viewing NORMAL: Normal images. -
Page 21: On-Screen Menu 3 (Audio)
To make the dialogue in movies easier to hear (Dolby Digital, DTS, 3-channel or over, with the dialogue recorded in the centre DVD-V DIALOGUE ENHANCER channel) DivX (Dolby Digital, 3-channel or over, with the dialogue recorded in the centre channel) To select the sound quality RE-MASTER •... -
Page 22: Discs - Changing The Player Settings
Discs — Changing the player settings Display Select the Select the Make the settings. Press to exit. the Setup menu. item. menu. Select Select Select Select Confirm Confirm Confirm • The settings remain intact even if you switch the unit to standby. •... -
Page 23: Audio" Menu
Discs — Changing the player settings (continued) “VIDEO” menu (continued) STILL MODE AUTO FIELD : The picture is not blurred, but picture quality is lower. Specify the type of picture shown when 5 FRAME : Overall quality is high, but the picture may appear blurred. paused. -
Page 24: Changing The Delay Time
Discs — Changing the player settings (continued) Changing the delay time (Speaker settings) For optimum listening with 5.1 channel sound, all the speakers, except for the subwoofer, should be the same distance from the seating position. If you have to place the center or surround speakers closer to the seating position, adjust the delay time to make up for the difference. -
Page 25: The Radio
The radio Cassette tapes — Play and Recording Manual tuning Play You can use the deck for tape playback. Press [FM/AM] to select “FM” or “AM”. Use normal position tapes. Press [t] or [y] (main unit: [2/REW/u] or High position and metal position tapes can be played, but the [1/FF/i]) to select the frequency of the desired unit will not be able to identify the characteristics of these tapes. -
Page 26: Recording
Cassette tapes — Play and Recording (continued) TAPE Stop recording Recording If the tape finishes before the disc The disc continues playing. Press [g] (main unit: [- g STOP]) Use normal position tapes. to stop it. High position and metal position tapes can be used, but the unit will not be able to record or erase them correctly. -
Page 27: Enjoying Karaoke
Enjoying karaoke Press and hold [–KARAOKE] to display the Karaoke mode on-screen menu. To select “ON”, press [OK] followed by [e,r] and [OK] to confirm. Press [e,r,w, q] to select the item and [OK] to confirm. Press [e,r] to make the settings and [OK] to confirm. •... -
Page 28: Sound Field And Sound Quality
Sound field and sound quality • The following sound effects may not be available or have no effect depending on the type of source, or when headphones are used. • You may experience a reduction in sound quality when these sound field systems are used with some sources. If this occurs, turn the sound field system off. -
Page 29: Adjusting The Subwoofer
Adjusting the subwoofer Adjusting the speaker level You can adjust the surround sound levels. Press and hold [–SUBWOOFER] (main unit: press [SUBWOOFER]). Preparation Current setting appears on the display. 1. Press [+ VOL –] to adjust the volume to normal listening While current setting is displayed level. -
Page 30: Using The Timers/Auto-Off Function
Using the timers/Auto-off function You can set the timer to come on at a certain time to wake you up (play timer) or to record a radio station or from the external source (record timer). The play and record timers cannot be used together. -
Page 31: Using Other Equipment
It may not be possible to play all the files due to the condition 1 on how they were created. Using an external unit For Panasonic D-Snap/DIGA 2 Note You can connect to an analogue player with a built-in phone Maximum number of folders equalizer. -
Page 32: Changing The Main Unit And Remote Control Mode
Using other equipment (continued) Changing the main unit and remote Operating a Panasonic television control mode The remote control and main unit are factory-set to “REMOTE Aim the remote control at the television for the following 1” mode. Turning the television on/off If your remote control affects other equipment during operation, you can switch to operate in “REMOTE 2”... -
Page 33: Troubleshooting Guide
Troubleshooting guide Before requesting service, make the following checks. If you are in doubt about some of the check points, or if the remedies indicated in the chart do not solve the problem, consult your dealer for instructions. Page Power No power. - Page 34 Troubleshooting guide (continued) Page A-B repeat Point B is automatically • The end of an item becomes point B when it is reached. set. Page Sound No sound. • Check the connections. • Turn the volume up. – •...
- Page 35 Page USB The USB drive or it’s • The USB drive format or it’s contents is/are not compatible with the system. contents cannot be read. • The USB host function of this product may not work with some USB devices. –...
-
Page 36: Safety Precautions
Safety precautions Placement CAUTION! • DO NOT INSTALL OR PLACE THIS UNIT IN A Set the unit up on an even surface away from direct BOOKCASE, BUILT-IN CABINET OR IN ANOTHER sunlight, high temperatures, high humidity, and excessive CONFINED SPACE. ENSURE THE UNIT IS WELL vibration. -
Page 37: Glossary
Glossary Decoder Progressive/Interlace A decoder restores the coded audio signals on DVDs to normal. The PAL video signal standard has 576 interlaced (i) scan lines, This is called decoding. whereas progressive scanning, called 576p, uses twice the number of scan lines. For the NTSC standard, these are called DivX 480i and 480p respectively. -
Page 38: Specifications
(Sub sampling is 4:0:0, 4:2:0, 4:2:2 or 4:4:4). Extremely long USB port power 500 mA (Max) and narrow pictures may not be displayed. MPEG4 data recorded with the Panasonic SD multi cameras 5 CASSETTE DECK SECTION or DVD video recorders... - Page 39 “DTS” and “DTS Digital Surround” are registered trademarks of DTS, Inc. Rating with low-cut filter equipped amplifier 8 Note 1. Specifications are subject to change without notice. 2. Total harmonic distortion is measured by the digital spectrum analyzer. Matsushita Electric Industrial Co., Ltd. Web Site: http://panasonic.net...