Table of Contents
Advertisement
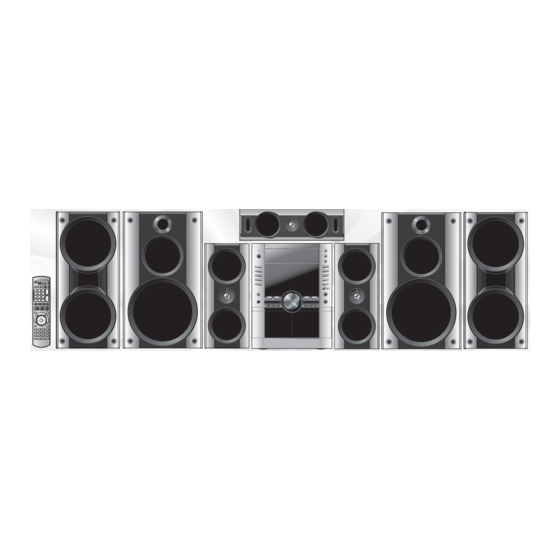
Operating Instructions
DVD Stereo System
Model No.
SC-VK950 is used in the illustrations unless otherwise
indicated.
Before connecting, operating or adjusting this product,
please read these instructions completely.
Please keep this manual for future reference.
Region number
The region number of this player is "2".
The player plays DVD-Video marked with labels
containing "2" or "ALL".
Example:
GC
GS
En
SC-VK950
SC-VK950
SC-VK850
SC-VK750
Table of contents
Accessories ......................................................................... 3
Safety precautions .............................................................. 3
Tray/disc handling procedure ............................................ 4
The remote control ............................................................. 4
STEP 2 Connecting a television, the antennas and the
AC power supply cord .........................................8
STEP 3 QUICK SETUP ....................................................10
STEP 4 Setting the time ..................................................10
DEMO function .................................................................10
Disc information ................................................................ 11
Discs - Basic play ........................................................... 12
Discs - Convenient functions ........................................ 14
Discs - Using navigation menus ................................... 15
Discs - Using On-screen menus ................................... 18
Discs - Changing the player's settings ........................ 21
The radio ............................................................................ 23
Cassette tapes - Play and Recording ........................... 24
Enjoying karaoke .............................................................. 26
Sound field and sound quality ......................................... 28
The play/record timer/Sleep timer/Auto-off function/
Dimming the display/Muting the volume/Sound range
display ............................................................................ 30
Using other equipment ..................................................... 31
Glossary ............................................................................. 32
About DivX VOD content / Language code list .............. 33
Troubleshooting guide ..................................................... 34
Maintenance ...................................................................... 36
Specifications .................................................................... 37
Main unit ...........................................................................39
Remote control .................................................................40
RQTV0148-2G
H0506VT2076
Advertisement
Table of Contents

Related Manuals for Panasonic SC-VK950


Summary of Contents for Panasonic SC-VK950
-
Page 1: Table Of Contents
Discs — Using On-screen menus ........18 Discs — Changing the player’s settings ......21 The radio ................23 SC-VK950 is used in the illustrations unless otherwise Cassette tapes — Play and Recording ......24 indicated. Enjoying karaoke .............. 26 Sound field and sound quality ......... - Page 2 Dear customer : indicates features applicable to SC-VK950 only VK950 Thank you for purchasing this product. : SC-VK850 only VK850 For optimum performance and safety, please read these : SC-VK750 only VK750 instructions carefully. System SC-VK950 SC-VK850 SC-VK750 Main unit...
-
Page 3: Accessories
Accessories Safety precautions Placement Please check and identify the supplied accessories. Set the unit up on an even surface away from direct sunlight, high temperature, high humidity, and excessive vibration. These conditions can damage the cabinet and other components, 1 Remote control [ ➡ page 4] thereby shortening the unit’s service life. -
Page 4: Tray/Disc Handling Procedure
Tray/disc handling procedure Adhere to the following to avoid problems. Removing the power plug • Press [^] to turn off the unit and remove the power plug only after all the displays have disappeared. Tray caution Inserting a disc OPEN/CLOSE OPEN/CLOSE AC IN AC IN... -
Page 5: Simple Setup
Cables and equipment are sold separately unless Simple setup otherwise indicated. Positioning and connecting the speakers STEP Positioning Place the front, center, and surround speakers at approximately the same distance from the Center speaker seating position. Front speakers Speakers are designed identically so that no left ( S B - P C 7 5 0 ) ( S B - P C 9 5 0 / ( S B - V K 9 5 0 /... - Page 6 Connecting Note • Never short-circuit positive Gray (+) Black (–) (+) and negative (–) Blue (–) speaker wires. Red (+) Incorrect connection can Connect so cord colors match the terminal colors. damage the speakers. VK950 Connecting center and surround speakers Gray Blue Blue (–)
- Page 7 VK750 Connecting center and surround speakers Gray Blue Blue (–) Surround speaker (left) VIDEO Gray (+) COMPONENT VIDEO OUT Surround speaker (right) S VIDEO Center speaker FM ANT AM ANT 75 Ω LOOP S. WOOFER Connecting front speakers LINE LINE Black VOLT ADJ Black (–)
-
Page 8: Ac Power Supply Cord
Connecting a television, the antennas and the AC STEP power supply cord FM indoor antenna Use outdoor antennas if radio reception is poor. Fix the other end of the Note antenna where reception Supplied Disconnect the outdoor antenna when the unit is not is best. - Page 9 Conserving power The unit consumes a small amount of power (approx. 0.9 W) even when it is turned off with [^]. To save power when the unit is not to be used for a long time, unplug it from the household AC socket. You will need to reset some memory items after plugging in the unit.
-
Page 10: Step 3 Quick Setup
QUICK SETUP STEP Turn on the television and select the appropriate video input on the television to suit the connection for the unit. CLOCK/ TIMER u, i, Press and hold to 2/REW, FF/1 Power ON. Select “DVD/CD”. show the QUICK DVD/CD q SETUP screen. -
Page 11: Disc Information
Recorded with devices using Version 1.1 of the Video Recording Format (a unified video DVD-VR recording standard), such as DVD video recorders, DVD video cameras and personal computers. • Recorded with Panasonic SD multi cameras or DVD video recorders using the DCF JPEG (Design rule for Camera File system) Standard Version 1.0. •... -
Page 12: Discs - Basic Play
Discs — Basic play Disc trays ;, OPEN/CLOSE OPEN/CLOSE AC IN Numbered MULTI CHANGE ;, MULTI CHANGE buttons SINGLE CHANGE ;, SINGLE CHANGE SURROUND ENHANCER VOLUME, +, – SUPER SURROUND 1 q to 5 q DISC SUPER SOUND EQ t, y, SOUND EQ u, i, SLOW/SEARCH... -
Page 13: Using The Remote Control
Using the remote control Select Volume adjustment Selecting a disc Confirm The stopped play position is • Disc information screen is displayed. memorized when “RESUME” is displayed. Stop • Press [DVD/CD q] to resume (while stopped) DVD-V play. DVD-VR VCD •... -
Page 14: Discs - Convenient Functions
Discs — Convenient functions ➡ Page 40 for the position of the remote control buttons. All CDs play Random play DVD-V CD WMA MP3 JPEG MPEG4 DivX CD WMA MP3 While stopped This function allows you to play all loaded CDs in order and skips DVD, JPEG, MPEG4 and DivX discs. -
Page 15: Discs - Using Navigation Menus
Discs — Using navigation menus ➡ Page 40 for the position of the remote control buttons. Playing data discs Using the submenu Press [FUNCTIONS] while the navigation menu WMA MP3 JPEG MPEG4 DivX is displayed • You can play JPEG, MPEG4 and DivX video content on DVD-RAM or play HighMAT discs without using the HighMAT Actual items depend on the disc. -
Page 16: Playing Highmat Discs
Discs — Using navigation menus ➡ Page 40 for the position of the remote control buttons. Playing DVD-VR discs Playing HighMAT discs DVD-VR WMA MP3 JPEG • Titles appear only if the titles are recorded on the disc. A menu appears when you select the disc. •... - Page 17 Panasonic SD multi cameras or DVD video recorders with licensed by MPEG LA to provide MPEG-4 Video. No this unit.
-
Page 18: Discs - Using On-Screen Menus
DivX • Press and hold [e, r] to alter faster. that contain subtitle on/off information (Subtitle on/off Time Search information cannot be recorded using Panasonic To start from a specific time. DVD Recorders.) DVD-V DVD-VR VCD CD MPEG4 DivX •... - Page 19 ➡ Page 40 for the position of the remote control buttons. Play Menu Picture Menu Repeat Picture Mode (➡ Repeat play, page 14) DVD-V DVD-VR VCD JPEG MPEG4 DivX (depends on disc) A-B Repeat Normal Except still picture on JPEG DVD-VR MPEG4 DivX Cinema1: Mellows images and enhances detail in dark...
- Page 20 Discs — Using On-screen menus Manual Zoom Audio Menu (For motion picture part) DVD-VR Dolby Pro Logic II (➡ Dolby Pro Logic II, page 28) DVD-V VCD MPEG4 DivX DVD-V DVD-VR To zoom in and out manually Movie: Movie software, recorded in Dolby Surround. Press [e, r].
-
Page 21: Discs - Changing The Player's Settings
Discs — Changing the player’s settings ➡ Page 40 for the position of the remote control buttons. Select Select Select Confirm Confirm Go right Press and hold to Select the menu Select the item. Make the settings. Press to exit. show the setup menu. - Page 22 Discs — Changing the player’s settings Picture/Video Output • Automatic • PAL Change the video signal format to be output for JPEG, MPEG4 • NTSC/PAL60: Output will depend on “NTSC Disc Output setting” and DivX video if picture output is not smooth during playback. (➡...
-
Page 23: The Radio
Convenient functions ➡ Page 40 for the position of the remote control buttons. The play/record timer You can set the timer to come on at a certain time to wake you • To check the settings Press [CLOCK/TIMER] while the unit is on to select “zPLAY” or up (play timer) or to record a radio station or from the external “zREC”. -
Page 24: Display
Using other equipment • Peripheral cables and equipment are sold separately unless Dimming the display otherwise indicated. Using an external unit Use this when you are going to sleep or any other time you Before connection would prefer to dim the display panel. •... -
Page 25: Glossary
Using other equipment Using a subwoofer Operating a television VK750 Face the remote control at the television for the following Connect an active subwoofer (not included). operations. Back of the Turning the television on/off main unit Audio cable To the subwoofer’s Switching the television’s S.WOOFER... -
Page 26: About Divx Vod Content / Language Code List
About DivX VOD content DivX Video-on-Demand (VOD) content is encrypted for copyright protection. In order to play DivX VOD content on this unit, you first need to register the unit. Follow the online instructions for purchasing DivX VOD content to enter the unit’s registration code and register the unit. For more information about DivX VOD, visit www.divx.com/vod. -
Page 27: Troubleshooting Guide
Troubleshooting guide Before requesting service, make the following checks. If you are in doubt about some of the check points, or if the remedies indicated in the chart do not solve the problem, consult your dealer for instructions. Reference pages are shown in parentheses ( ). Power No power. - Page 28 Markers • You cannot add markers with DVD-RAM or DVD-R/RW (DVD-VR) discs. Cannot add markers. • You cannot add markers if the disc’s elapsed play time doesn’t appear on the unit’s display. • The unit reads and displays the markers added with a DVD video recorder. You can clear There are already markers.
-
Page 29: Maintenance
Troubleshooting guide Unit displays Although the unit is in standby • Turn off the demo function. (If you set the clock, the demo function turns off automatically.) mode, the display lights up (10) and changes continuously. • You inserted a disc which the unit cannot play; insert one that can. (11) “NO PLAY”... -
Page 30: Specifications
550 W MPEG-1 Layer 3, MPEG-2 Layer 3 PMPO output power 5500 W MPEG4 data recorded with the Panasonic SD multi cameras or DVD video recorders FM/AM TUNER, TERMINALS SECTION Conforming to SD VIDEO specifications (ASF standard) / MPEG4 (Simple Profile) video system / G.726 audio system... - Page 31 Specifications Surround speakers SB-PS950 VK850 Subwoofer SB-WVK850 VK950 Type Type 2 way, 3 speaker system (Bass reflex) 1 way, 2 speaker system (Bass reflex) Impedance 3 Ω Impedance 3 Ω Speaker unit(s) Speaker unit(s) 1. Full range 8 cm Cone type 1.
-
Page 32: Control Guide Main Unit
Control guide: main unit AC IN (AC supply indicator) This indicator lights when the unit is connected to the AC mains supply. 8 (Standby/on switch) Press to switch the unit from on to standby mode or vice versa. In standby mode, the unit is still consuming Disc trays (➡... - Page 33 SOUND (➡ 28) SUBWOOFER, FL DISPLAY (➡ 13) VK950 VK850 S.WOOFER (➡ 29) VK750 C.FOCUS (➡ 28) V. MUTE, ECHO (➡ 27) MUTING (➡ 31) AUDIO (➡ 26) CH SELECT, -TEST (➡ 29) Matsushita Electric Industrial Co., Ltd. Web Site: http://panasonic.net...
-
Page 34: The Radio
The radio Manual tuning Select the Select “FM” or “AM”. Adjust the frequency of the volume. MUSIC P. Numbered desired station. buttons VOLUME, +, – • Press and hold [t] or [y] until the frequency starts scrolling to start u, i, automatic tuning. -
Page 35: Cassette Tapes — Play And Recording
Cassette tapes — Play and Recording OPEN/CLOSE AC IN MULTI CHANGE SINGLE CHANGE SURROUND ENHANCER SUPER SURROUND SUPER SOUND EQ u, i, SOUND EQ 2/REW, FF/1 SUBWOOFER TAPE w q MIC VOL DVD/CD q MUSIC PORT MIC 1 w q, TAPE MUSIC PORT TUNER TAPE... - Page 36 Recording Erasure prevention Use normal position tapes. Use a screwdriver or similar object to break out the tab. High position and metal position tapes can be used, but the unit will not be able to record or erase them correctly. Side A Preparation: 1.
- Page 37 Enjoying karaoke OPEN/CLOSE AC IN MULTI CHANGE SINGLE CHANGE SURROUND ENHANCER SUPER SURROUND VOLUME, +, – SUPER SOUND EQ SOUND EQ SUBWOOFER – MIC VOL + MIC VOL DVD/CD q MIC 1 MUSIC PORT e, r, w, q, MIC 1, MIC 2 MUSIC PORT TUNER TAPE...
-
Page 38: To Record Your Karaoke Performance
Audio mode VCD DVD-VR and other sources (Karaoke discs) DVD-V DVD-VR Solo Television displays are shown in parentheses ( ) . AUDIO L R (LR): Left channel sound is heard from the left speaker Off : No vocal and right channel sound is heard from the right On : Vocal speaker —... - Page 39 Sound field and sound quality SURROUND OPEN/CLOSE AC IN ENHANCER MULTI CHANGE SUPER SURROUND SINGLE CHANGE SURROUND ENHANCER SUPER SOUND EQ SUPER SURROUND SUPER SOUND EQ SOUND EQ SOUND EQ SUBWOOFER MIC VOL SURROUND MIC 1 MUSIC PORT ENHANCER MUSIC PORT TUNER TAPE DVD/CD...
-
Page 40: Speaker Level Adjustments
Super Surround Speaker level adjustments SUPER SURROUND Press [SUPER SURROUND] on the main unit. This is one of the ways to get appropriate surround effects. Every time you press the button: Preparation: MUSIC: Adds surround effects to stereo sources. Press [DVD/CD q] and then [g, STOP]. MOVIE: Use this mode when playing movie software.