Table of Contents
Advertisement
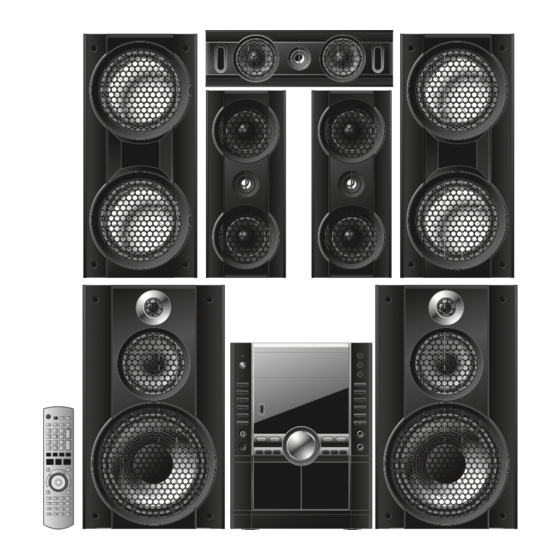
The illustration shows SC-VK960
Before connecting, operating or adjusting this product,
please read the instructions completely.
Please keep this manual for future reference.
Operations in these instructions are described using
the remote control, but you can perform the operations
on the main unit if the controls are the same.
Unless otherwise indicated, illustrations in these
operating instructions are for the Southeast Asia.
Your unit may not look exactly the same as illustrated.
SC-VK960 is used in the illustrations unless otherwise
indicated.
GCS GCT GN
RQTV0239_1L.indd 1
RQTV0239_1L.indd 1
Operating Instructions
DVD Stereo System
Model No.
Region number
The player plays DVD-Video marked with labels
containing the region number or "ALL".
Region
Southeast Asia
Australia and N.Z.
Example:
For Southeast Asia
3
SC-VK960
SC-VK860
SC-VK760
Number
3
4
1
3
4
RQTV0239-1L
6/12/07 12:34:42 PM
6/12/07 12:34:42 PM
Advertisement
Table of Contents

Related Manuals for Panasonic SC-VK760


Summary of Contents for Panasonic SC-VK760
-
Page 1: Operating Instructions
GCS GCT GN RQTV0239_1L.indd 1 RQTV0239_1L.indd 1 Operating Instructions DVD Stereo System SC-VK960 Model No. SC-VK860 SC-VK760 Region number The player plays DVD-Video marked with labels containing the region number or “ALL”. Region Southeast Asia Australia and N.Z. Example: For Southeast Asia... - Page 2 CLIMATES. RQTV0239_1L.indd 2 RQTV0239_1L.indd 2 VK960 : indicates features applicable to SC-VK960 only VK860 : SC-VK860 only VK760 : SC-VK760 only SC-VK960 SC-VK860 SA-VK960 (1 unit) SA-VK860 (1 unit) SB-PF960 (2 units) SB-PF860 (2 units) SB-PC960 (1 unit) SB-PC860 (1 unit)
-
Page 3: Safety Precautions
HighMAT™ and the HighMAT logo are either trademarks or registered trademarks of Microsoft Corporation in the United States and/or other countries. This product is licensed under the MPEG-4 Visual patent portfolio license for the personal and non-commercial use of a consumer for (i) encoding video in compliance with the MPEG-4 Visual Standard (“MPEG-4 Video”) and/or (ii) decoding MPEG-4 Video that was encoded by a consumer engaged in a personal and non-commercial... -
Page 4: Table Of Contents
SUPPLIED ACCESSORIES SUPPLIED ACCESSORIES Please check and identify the supplied accessories. 1 x AC power supply cord For Southeast Asia 1 x Video cable 1 x FM indoor antenna 1 x Remote control For Southeast Asia (N2QAYB000167) VK960 VK860 VK760 For Australia and N.Z. -
Page 5: Simple Setup
Simple setup Placement of speakers Placement of speakers Center speaker (SB-PC960/ (SB-PC760) SB-PC860) (SB-PF960/ (SB-PF760) SB-PF860) Front speaker (left) Television (not included) Subwoofer (left) 1 2 0 (SB-WVK960) Surround Surround speaker speaker (right) (left) (SB-PS960/ (SB-PS760) SB-PS860) Use only the supplied speakers •... - Page 6 Simple setup (continued) Speaker connections Speaker connections Connect all the speakers as illustrated. Gray (+) Red (+) Blue (–) VK960 VK860 RQTV0239_1L.indd 6 RQTV0239_1L.indd 6 Black (–) Connect so cord colors match the terminal colors. Connecting center and surround speakers Gray Blue (–) Gray (+) Blue...
- Page 7 VK760 Connecting center and surround speakers Blue Connecting front speakers and subwoofer Black Other speaker setup options – attaching to a wall Other speaker setup options – attaching to a wall You can attach the surround and center speakers to a wall. 1 Drive a screw (not included) into the wall.
- Page 8 Simple setup (continued) Making the connections Making the connections Connect the AC power supply cord only after all other connections have been made. Conserving power The unit consumes power (approx. 0.9 W) even when it is turned off with [ ] (main unit: [ /I]). To save power when the unit is not to be used for a long time, unplug it from the household AC power socket.
- Page 9 Antenna connections Antenna connections ■ AM loop antenna Black White LOOP ANT GROUND Set the voltage Set the voltage For Southeast Asia Before connecting the AC power supply cord, set the voltage. Voltage Selector Use a fl at-head screwdriver to set the voltage selector on the back of the main unit to the appropriate position for the area in which this...
-
Page 10: Preparing The Remote Control
Simple setup (continued) Preparing the remote control DEMO function SUBWOOFER MUSIC PORT EXT-IN TUNER TAPE DISPLAY DECK 1/2 RECORD STOP DEMO OPEN DISPLAY, -DEMO Language code list Abkhazian: 6566 Danish: Afar: 6565 Dutch: Afrikaans: 6570 English: Albanian: 8381 Esperanto: Ameharic: 6577 Estonian: Arabic:... -
Page 11: Disc Information
fi nalized on the device it was recorded on. Closing the session will also work. MPEG4 data recorded with the Panasonic SD multi cameras or DVD video recorders [conforming to SD VIDEO specifi cations (ASF standard)/MPEG4 (Simple Profi le) video system/G.726 audio system]. -
Page 12: Quick Setup
QUICK SETUP The QUICK SETUP screen assists you to make necessary settings. Turn on the television and select the appropriate video input on the television. Switch on the Select “DVD/CD”. Shows the QUICK unit. Overview of controls Main unit Main unit Refer to the numbers in parentheses for page reference. - Page 13 Overview of controls (continued) Remote control Remote control ➊ Buttons labeled such as function in exactly the same way as the buttons on the main unit. Television operations (33) [CLOCK/TIMER] (31) ˚ PLAY/REC] (31) Numeric (15, 17, 20) [DISC] (14, 16) [PLAY MODE, –...
-
Page 14: Discs - Basic Play
Discs — Basic play Handling of the disc trays and discs Handling of the disc trays and discs Not doing the following will cause damage to the unit. Removing the power plug Press [ /I] to turn off the unit and then remove the power plug only after all the displays have disappeared. - Page 15 Search (during play) Play speed increases up to 5 steps. Slow-motion play (during pause) • Play speed increases up to 5 steps. • Slow motion play is for forward direction only. Skip [ , ]: Group skip. ]: Content skip. This feature does not work during program and random play (\ page 17).
-
Page 16: Discs - Advanced Play
Discs — Advanced play Disc information Disc information You can select the disc after checking the discs loaded with the “Disc Information” screen. You can also select the disc directly with the disc buttons on the main unit. Press [DISC] to show the “Disc Information” screen. -
Page 17: Discs - Program And Random Play
Discs — Program and Random play Program and random playback screens appear sequentially. Every time you press the button: Program → Random → Off (Normal play) (While stopped or in RESUME mode) To exit program or random play mode Press [PLAY MODE] several times while stopped. Start program/random Note: Disable HighMAT disc play to use program and random play. -
Page 18: Discs - Using Navigation Menus
Discs — Using navigation menus Playing data discs Playing data discs You can play JPEG, MPEG4 and DivX video contents on DVD-VR or play HighMAT discs without using the HighMAT function ( page 22, “Play as Data Disc” in Other Menu). Playing items in order Playing items in order (Playback Menu) - Page 19 Playing from the selected Playing from the selected track in the CD track in the CD Titles appear with CD Text disc playback. Press [TOP MENU] or [MENU]. Example: CD text CD Text 1/14 0:53 Disc Title : Celine Dion One Heart Disc Artist : Celine Dion...
-
Page 20: Discs - Using On-Screen Menus
• “On” or “Off” appears only with discs that contain subtitle on/off information (Subtitle on/off information cannot be recorded using Panasonic DVD Recorders). To recall a marker recorded on DVD- Video recorders Press [5, ∞] ] Press [ENTER] (with multiple angles) - Page 21 Other Settings (continued) Other Settings (continued) Play Menu (continued) Marker Except To mark up to 5 positions to play again Press [ENTER]. (The unit is now ready to accept markers.) To mark a position: Press [ENTER] at the desired point. To mark another position: ] to select “✱”...
-
Page 22: Discs - Changing The Player Settings
Discs — Using on-screen menus (continued) Other Settings (continued) Other Settings (continued) Display Menu (continued) Just Fit Zoom To select the appropriate screen size to fi t your television screen Auto 4:3 Standard European Vista 16:9 Standard Standard (x0.25 full-screen) Original (actual recorded size) Full (full-screen) This function may not work depending on the... - Page 23 Discs — Changing the player settings (continued) QUICK SETUP enables successive settings of the items in the shaded area. Player settings (continued) Player settings (continued) “ ” Disc tab (continued) Advanced Disc Review (\ page 21) Ratings Set a ratings level to limit DVD-Video play.
- Page 24 Discs — Changing the player settings (continued) Changing the delay time of the speakers Changing the delay time of the speakers Effective when playing multi-channel audio (Center and surround speakers only) For optimum listening with 5.1-channel sound, all the speakers, except for the subwoofer, should be the same distance from the seating position.
- Page 25 • You can play MPEG4 data [conforming to SD VIDEO specifi cations (ASF standard)/MPEG4 (Simple Profi le) video system/G.726 audio system] recorded with Panasonic SD multi cameras or DVD video recorders with this unit. • The recording date may differ from that of the actual date.
-
Page 26: Using The Radio
Using the radio Manual tuning Manual tuning Press [BAND , TUNER] to select “FM” or “AM”. Press [ ] or [¡] (main unit: [ or [¢, / FF ]) to select the frequency of the required station. • “ ” is displayed when a stereo FM broadcast is being received. - Page 27 Playing and recording using the cassette tapes (continued) Recording Recording Selection of tapes for recording Use normal position tapes. High position and metal position tapes can be used, but this unit will not be able to record or erase them correctly.
-
Page 28: Enjoying Karaoke
Enjoying karaoke The buttons described for “Enjoying karaoke” are mainly for the main unit unless indicated otherwise. Enjoying karaoke with karaoke Enjoying karaoke with karaoke MIC VOL DVD and VCD DVD and VCD Firstly, lower the volume with [- MIC VOL+], then connect the microphone(s) to the microphone jack(s). -
Page 29: Using Sound Effects
Vocal mute function Vocal mute function Use this function on stereo sources to block out the vocals so you can sing along to the music. Press [V. MUTE] on the remote control. Every time you press the button: V.MUTE ON V.MUTE OFF Note: This function is not suitable for the following sources. - Page 30 Using sound effects (continued) Using the Super Sound Equalizer Using the Super Sound Equalizer SUPER SOUND EQ Turning on the super sound equalizer gives you a more powerful sound. Press [SUPER SOUND EQ] on the main unit. The “S.SOUND EQ” indicator lights up. To cancel Press [SUPER SOUND EQ] on the main unit to turn off the indicator.
-
Page 31: Using The Timers
To adjust speaker level during play To adjust speaker level during play Effective when playing multi-channel audio or when Dolby Pro Logic II or Super Surround is turned on. Press [CH SELECT] to select the speaker. SW: Subwoofer • You can adjust SW only if the disc includes a subwoofer channel. -
Page 32: Using Other Equipment
Using the timers (continued) To check the settings Press [CLOCK / TIMER] while the unit is on to select ˚PLAY or ˚REC. The setting are shown in the following order. – Play timer: start time fi nish time volume – Record timer: start time fi... - Page 33 Video MPEG4 It may not be possible to play all the fi les due to the condition on how they were created. For Panasonic D-Snap/DIGA Note: Maximum number of folders Maximum number of fi les Maximum length of folder name Maximum length of fi...
-
Page 34: Glossary
Glossary Decoder A decoder restores the coded audio signals on DVDs to normal. This is called decoding. DivX DivX is a popular media technology created by DivX, Inc. DivX media fi les contain highly compressed video with high visual quality that maintains a relatively small fi le size. Dolby Digital This is a method of coding digital signals developed by Dolby Laboratories. -
Page 35: Troubleshooting Guide
Troubleshooting guide Before requesting service, make the following checks. If you are in doubt about some of the check points, or if the remedies indicated in the chart do not solve the problem, consult your dealer for instructions. Power No power. •... - Page 36 Troubleshooting guide (continued) A-B repeat Point B is automatically set. • The end of an item becomes point B when it is reached. Marker Cannot add markers. Sound Sound distorted. Effects do not work. Humming heard during play. • An AC power supply cord or fl uorescent light is near the cables. Keep other No sound.
- Page 37 Unit displays Although the unit is on • Turn off the demo function. standby mode, the display • If you set the clock, demo function will be turned off automatically. lights up and changes continuously. The display is dark. • Press [DIMMER] to brighten the display. “NO PLAY”...
-
Page 38: Specifi Cations
4:4:4). Extremely long and narrow pictures may not be 100 mV, 4.7 kΩ displayed. Stereo, 3.5 mm jack MPEG4 data recorded with the Panasonic SD multi cameras or DVD video recorders Stereo, 3.5 mm jack Conforming to SD VIDEO specifi cations (ASF standard)/ MPEG4 (Simple Profi... - Page 39 Pick up Wavelength Laser power Audio output (Disc) Number of channels (FL, FR, C, SL, SR, SW) 5.1 ch Audio performance (measurement at: Rec Out terminal) Frequency response (CD-Audio) SPEAKER SECTION Rating with low-cut fi lter equipped amplifi er. VK960 Front speakers SB-PF960 Type 3 way, 3 speaker system (Bass refl...
- Page 40 Speaker unit(s) 1. Woofer Input power (IEC) Output sound pressure Frequency range Dimensions (WxHxD) Mass Matsushita Electric Industrial Co., Ltd. Web Site: http://panasonic.net RQTV0239_1L.indd 40 RQTV0239_1L.indd 40 GENERAL Power supply Impedance 3 Ω For Southeast Asia 6.5 cm Cone type 6.5 cm Cone type...