Table of Contents
Advertisement
Quick Links
Download this manual
See also:
Instruction Manual
1. Description
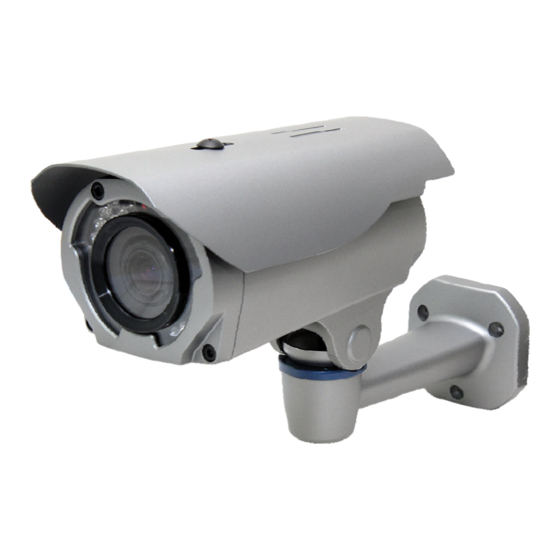
This manual applies to the REHB0309-1 network camera.
The network Camera provides a network service for a progressive-scan image sensor that can be
monitored on a real-time screen regardless of distance or location. By using its dedicated program,
many users are able to access the Network Camera at once, or a single user can monitor various
network cameras at the same time. It also enables users to play, store and retrieve a monitored image
by using a PC. All the settings and real-time monitoring screens are also provided through web access.
The Network Camera is fully featured for security surveillance and remote monitoring needs. It is
based on a DSP compression chip, and makes it available on the network as real-time, full frame rate
Motion JPEG and H.264 (or MPEG-4) video streams.
The alarm input and alarm output can be used to connect various third party devices such as, door
sensors and alarm bells.
•
Installation Steps
Follow these steps to install the network camera on your local network (LAN):
1. Check the package contents against the list below.
2. Connect the Network Camera. See page 3.
3. Set an IP address. See page 6.
4. Set the password. See page 8.
•
Package Component
The system comes with the following components:
Camera unit
•
Contents in the installation CD
1. The REHB0309-1 User's Manual
2. The SmartManager User's Manual
3. The Revo Remote Pro HD User's Manual
4. The SmartManager Installation software
5. The Revo Remote Pro HD Installation software
Note: Check your package to make sure that you received the complete system, including all
components shown above.
Installation CD
Installation Guide
REHB0309-1, Quick Installation Guide
Template Sheet
Accessory Kit
Advertisement
Table of Contents

Summary of Contents for Revo REHB0309-1
- Page 1 REHB0309-1, Quick Installation Guide 1. Description This manual applies to the REHB0309-1 network camera. The network Camera provides a network service for a progressive-scan image sensor that can be monitored on a real-time screen regardless of distance or location. By using its dedicated program, many users are able to access the Network Camera at once, or a single user can monitor various network cameras at the same time.
- Page 2 REHB0309-1, Quick Installation Guide • Connection Cable Wire Color Description Red: DC12V Main Power, 2pin terminal, DC12V 700mA(8.4W) White: GND Ethernet, RJ-45 port compatible with 10/100Mbps having PoE Black Modular Jack functionality. Parts and Description Carefully remove the contents from the box, and verity that nothing was damaged...
- Page 3 REHB0309-1, Quick Installation Guide Camera Dimension See the diagrams below for the exact dimension of the REHB0309-1, IR Bullet network cameras. Dimensions Unit: mm Base Installation(Cable through the wall with the mount base) There are two ways of installing the camera.
- Page 4 REHB0309-1, Quick Installation Guide 1) Installation1 (Cable through the wall with the mount base) A. Drill the mounting location, using the template sheet (or the bottom of the mount base) as a template. B. Insert the plastic anchors into the hole which has just been drilled.
-
Page 5: Installation
REHB0309-1, Quick Installation Guide C. Connect connection cable and network lines. D. Fit the screw holes of the mount base into the plastic anchors. E. Remove the conduit knockout punched for the cable entry. Screw up the mount screws (M5x20). -
Page 6: Network Connection And Ip Assignment
REHB0309-1, Quick Installation Guide 2.2 Network Connection and IP assignment The Network Camera supports the operation through the network. When a camera is first connected to the network it has no IP address. So, it is necessary to allocate an IP address to the device with the “Smart Manager”... -
Page 7: Operation
REHB0309-1, Quick Installation Guide 3. Operation The Network Camera can be used with Windows operating system and browsers. The recommended browsers are Internet Explorer, Safari, Firefox, Opera and Google Chrome for Windows. 3.1 Access from a browser Start a browser (Internet Explorer). -
Page 8: Setting The Admin Password Over A Secure Connection
REHB0309-1, Quick Installation Guide 3.3 Setting the admin password over a secure connection To gain access to the product, the password for the administrator must be set. This is done in the “Admin Password” dialog, which is displayed when the network... -
Page 9: Network Camera Setup
REHB0309-1, Quick Installation Guide The Stop button stops the video stream being played. Pressing the key again toggles the start and stop. The Start button connects to the network camera or starts playing a video stream. The Pause button pauses the video stream being played. - Page 10 REHB0309-1, Quick Installation Guide 4) Focus and Zoom Control You can control Zoom and Focus in the live screen. Press the button on the left top in the live screen to activate the Zoom & Focus control panel. • Adjusting Zoom: Click “–“...
-
Page 11: Resetting To The Factory Default Settings
REHB0309-1, Quick Installation Guide 3.6 Resetting to the factory default settings To reset the Network Camera to the original factory settings, go to the Setup>System >Maintenance web page (described in “3.5.6 System>Maintenance” of the User’s Manual) or use the Reset button on...


