Sanyo FWDV225F Owner's Manual
Dvd player/vcr with line-in recording
Hide thumbs
Also See for FWDV225F:
- Quick start (2 pages) ,
- Quick start (2 pages) ,
- Quick start (2 pages)
Table of Contents
Advertisement
DVD Player/
VCR with Line-in Recording
Owner's Manual
Manual del Propietario
ES
FWDV225F
To obtain a more detailed Electronic Copy of this
Manual or much further contents, go to
ES
Para obtener una Copia Electrónica más detallada de este Manual o mucho otras
contenido, visite
http://www.sanyo-av.com/
Need help?
¿ Necesita ayuda?
ES
Sitio Web en:
sanyo-av.com
Please Call Toll Free 1 866 212 0436 or visit our Web Site above:
Llame por favor sin costo al 1 866 212 0436 ó visite nuestro
Advertisement
Table of Contents

Related Manuals for Sanyo FWDV225F


Summary of Contents for Sanyo FWDV225F
- Page 1 DVD Player/ VCR with Line-in Recording Owner's Manual Manual del Propietario FWDV225F To obtain a more detailed Electronic Copy of this Manual or much further contents, go to Para obtener una Copia Electrónica más detallada de este Manual o mucho otras contenido, visite http://www.sanyo-av.com/...
-
Page 2: Precautions
PRECAUTIONS PRECAUTIONS Safety Instructions The model and serial numbers of this unit may be found on the cabinet. Model No.: You should record and retain those numbers for future reference. Serial No.: WARNING: TO REDUCE THE RISK OF FIRE OR ELECTRIC SHOCK, DO NOT EXPOSE THIS APPARATUS TO RAIN OR MOISTURE. -
Page 3: Location And Handling
Batteries should never be thrown away or incinerated but disposed of in accordance with your local • regulations concerning chemical wastes. For product recycling information, please visit - sanyo-av.com • Notice for Progressive Scan Output Consumers should note that not all high definition television sets are fully compatible with this product and may •... -
Page 4: Table Of Contents
LIMITED WARRANTY · · · · · · · · · · · · · · · · · · ·back cover Supplied Accessories SANYO is a registered trademark of SANYO Electric Co., Ltd. and is used by Funai Electric Co., Ltd. and Funai... -
Page 5: About Cassette Tapes And Discs
PREPARATION About Cassette Tapes and Discs Playable Media Media Type DVD-VIDEO DVD-RW DVD-R CD-DA CD-RW CD-R Cassette Tape Logo Symbols used in this manual digital video Recorded Signal digital video (MPEG2) or JPEG digital audio digital audio or JPEG analog video (MPEG2) Unplayable Disc Caution: Never play the following discs. -
Page 6: Function Overview
PREPARATION Function Overview Remote Control Button names described in this Owner’s Manual The instructions in this manual rest primarily on the premise that you will operate using the remote control (Please be informed that some operations can only be made on the front panel of the unit). 8. - Page 7 PREPARATION 15. PAUSE F p.15 23. MODE (DVD) p.18 DVD mode: Press to play back randomly. (CD) • Press to pause disc playback. • Pulse para reproducir al azar. (CD) Pulse para pausar la reproducción del disco. 24. SEARCH p.16 Press to advance the playback one frame at a time.
-
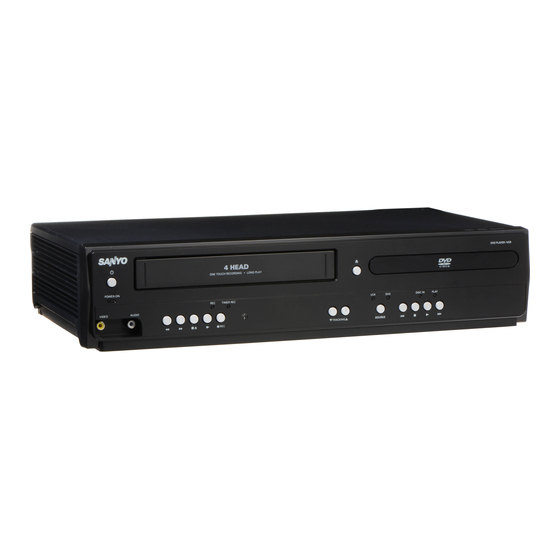
Page 8: Front Panel
PREPARATION Front Panel 9 10 POWER ON TIMER REC DISC IN PLAY VIDEO AUDIO TRACKING SOURCE 13 14 15 17 18 24 25 L2 input jacks 1. y p.14 16. C A (VCR) p.14 Press to turn On the unit, or to turn the unit into •... -
Page 9: Rear Panel
PREPARATION Rear Panel DVD/VCR COMPONENT DIGITAL AUDIO OUT AUDIO OUT VIDEO OUT AUDIO OUT AUDIO IN COAXIAL VIDEO OUT VIDEO IN 5 6 7 1. DVD/VCR AUDIO OUT jack p.10 6. DVD/VCR VIDEO OUT jack p.10 Connect an RCA audio cable from here to the Connect an RCA video cable from here to the •... -
Page 10: Connections
output jack COMPONENT COMPONENT COMPONENT COMPONENT DIGITAL DIGITAL DIGITAL DIGITAL AUDIO OUT AUDIO OUT AUDIO OUT AUDIO OUT AUDIO OUT AUDIO OUT AUDIO OUT AUDIO OUT VIDEO OUT VIDEO OUT VIDEO OUT VIDEO OUT AUDIO OUT AUDIO OUT AUDIO OUT AUDIO OUT PREPARATION To audio L... - Page 11 Input modes for common TV brands: Listed below are inputs for common brand name TV’s. Admiral: JVC: VIDEO, VIDEO1, VIDEO2, Samsung: TV/VIDEO Curtis Mathis: LINE1, LINE2, VIDEO3 SANYO: VIDEO 00, 90, 91, 92, 93 KENWOOD: SHARP: Funai: AUX CHANNEL LXI-Series: SONY: VIDEO1, VIDEO2, VIDEO3...
-
Page 12: Connection To An Audio System
PREPARATION Connection to an Audio System Playing Analog Audio stereo system this unit analog audio input jacks DVD/VCR DIGITAL COMPONENT AUDIO OUT AUDIO OUT VIDEO OUT AUDIO OUT AUDIO IN AUDIO IN COAXIAL To audio L VIDEO OUT VIDEO IN output jack DVD/VCR DVD/VCR... -
Page 13: Initial Setups
PREPARATION Initial Setups Turning On Unit for the First Time Clock Setting Please note: most instructions in this manual refer to Press first. remote control use. Press and Use to select “CLOCK SETUP Be sure your TV’s input is set to VIDEO. SET”. -
Page 14: Basic Operations
BASIC OPERATIONS BASIC OPERATIONS ASIC PLAYBACK Before: Turn on the TV. For VCR Playback For Disc Playback Insert a cassette tape so that the unit will be Press to turn on the unit. turned on automatically. Inserte un casete para que la unidad se encienda Then press automáticamente. -
Page 15: Hint For Disc Playback
BASIC OPERATIONS Hint for Disc Playback Slow Forward Playback The contents of DVD are generally divided into “titles”. Press first. Titles may be further subdivided into “chapters”. Press [PAUSE F] during playback, then press [FWD g] The audio CD contains “tracks”. repeatedly to select the desired forward speed. -
Page 16: Advanced Playback
ADVANCED PLAYBACK ADVANCED PLAYBACK Disc Menu Track / File Search Press first. Press first. Some discs contain menus which allow you to customize 1) Press [SEARCH]. DVD playback. Use [K / L / 0 / 1] to select an item, then press [ENTER]. -
Page 17: Index Search
ADVANCED PLAYBACK 3) Press [ENTER]. Repeat Playback Playback of the selected scene will start. Press first. Repeat function is available only during playback. Index Search Each time you press [REPEAT], repeat function changes as example below. Press first. 1) Press [SEARCH]. (Repeat Off) REP OFF 2) Use [K] or [L] to select a desired index number. -
Page 18: Jpeg Playback
ADVANCED PLAYBACK Settings JPEG Playback JPEG is a method of compressing data in files. Subtitle Language You can copy JPEG files on DVD or CD-R/-RW from a computer and play back the files on this unit. Press first. Press first. This unit allows you to select a subtitle language (if Insert a JPEG formatted disc, then the File List will available) during DVD Playback. -
Page 19: On-Screen Display
ADVANCED PLAYBACK On-Screen Display You can check the information about the current disc by pressing [DISPLAY]. Press first. Insert a JPEG formatted disc, then the Folder/File List will automatically appear on the TV screen. Folder List ( Thumbnail will be displayed when a file is highlighted inside a folder) Title 1 / 6 Chapter... -
Page 20: Recording
RECORDING RECORDING ASIC RECORDING Before: Turn on the TV. This unit has no tuner system so it cannot receive TV broadcasts without external tuner or such devices. Note: You can also set the external tuner for timer recording. Refer to “Satellite • Link” on page 22. You CANNOT dub a DVD to a video cassette tape. • Do not change the external tuner’s channel while you are recording. You • this unit external tuner CANNOT watch one channel and record another at the same time. Recording &... -
Page 21: Timer Recording
RECORDING To Check, Correct or Cancel a Timer Program Timer Recording 1) Press [TIMER SET], and then press [VCR ] on the remote control. Press first. 2) Repeat procedures in step 1 above. 3) Use [K / L] to select the program number you Press , Use to select... -
Page 22: Satellite Link
RECORDING To Cancel the Satellite Link on Standby: Satellite Link Press [TIMER SET] on the remote control or You can set the unit to start recording whenever it [C A] on this unit. detects a video signal from the external tuner. Preparing for the Satellite Link: To Cancel the Satellite Link in Progress: Only L1 (rear) is available for satellite link and be sure... -
Page 23: Optional Settings
OPTIONAL SETTINGS OPTIONAL SETTINGS Changing the DVD Settings (in the setup menu) In the setup menu, you can customize the various kinds of settings as you prefer. Refer to the following instructions to navigate through the setup menus. Press [SETUP]. LANGUAGE Menu AUDIO Menu Use [0 / 1] to select a setup item. - Page 24 OPTIONAL SETTINGS Menu Sets the Language for the On-screen Display. English Français Español Audio Sets the Audio Language. Language options are not available English • with some discs. French Only the Languages supported by the Spanish • disc can be selected. “LANGUAGE”...
- Page 25 OPTIONAL SETTINGS Set Brightness Adjusts the Brightness. The Settings will remain effective even • if the unit is switched into the Standby mode. The effect of Picture Adjustment may • differ depending on the connected TV. Set Contrast Adjusts the Contrast. Set Color Adjusts the Color Saturation.
-
Page 26: Troubleshooting
TROUBLESHOOTING TROUBLESHOOTING Troubleshooting Guide If this unit does not perform properly when operated as instructed in this manual. Refer to the following: Symptom Remedy No power. Make sure the power plug is connected to an AC outlet. • Make sure the power is turned on. •... -
Page 27: Information
INFORMATION INFORMATION Maintenance Servicing Auto Head Cleaning Please refer to relevant topics on the “Troubleshooting Automatically cleans video heads as you insert or • • Guide” on page 26 before returning the product. remove a cassette tape, so you can see a clear picture. If this unit becomes inoperative, do not try to correct the If the playback picture is blurred or interrupted while •... -
Page 28: Limited Warranty
LIMITED WARRANTY NINETY (90) DAY LABOR / ONE (1) YEAR PARTS WARRANTY COVERAGE: or a part that has been modified without written company per- This warranty obligation is limited to the terms as set forth mission, or (d) if any serial number has been removed or defaced, below.