Table of Contents
Advertisement
Quick Links
TIME LAPSE VIDEO CASSETTE RECORDER
INSTALLATION AND
OPERATION MANUAL
MODEL
HS-S8300E(BRS)
VHS
PAL
625
ONLY VIDEO CASSETTE TAPES WITH THE S MARK OR THE V MARK MAY BE USED WITH THIS MODEL.
THIS INSTRUCTION MANUAL IS IMPORTANT TO YOU.
PLEASE READ IT BEFORE USING YOUR VIDEO CASSETTE RECORDER.
POWER
EJECT
S-VHS
PICTURE
OFF
ON
POSITION/
SOFT
SHARP
TRACKING
VERTICAL
ADJUST
JOG/ADJUST
SHUTTLE
REC
CLEAR/
ENTER/
REW
FF
STOP
COUNTER MEMORY/
PLAY
DISPLAY
SKIP/INDEX
REC/PLAY
PAUSE/
COUNTER
MODE
SHUTTLE HOLD
TIMER REC
RESET
Advertisement
Table of Contents

Related Manuals for Mitsubishi HS-S8300E(BRS)


Summary of Contents for Mitsubishi HS-S8300E(BRS)
- Page 1 TIME LAPSE VIDEO CASSETTE RECORDER INSTALLATION AND OPERATION MANUAL MODEL HS-S8300E(BRS) POWER EJECT S-VHS PICTURE SOFT ONLY VIDEO CASSETTE TAPES WITH THE S MARK OR THE V MARK MAY BE USED WITH THIS MODEL. THIS INSTRUCTION MANUAL IS IMPORTANT TO YOU. PLEASE READ IT BEFORE USING YOUR VIDEO CASSETTE RECORDER.
-
Page 2: Caution And Care
VCR. To prevent damage to the VCR or tapes, plug the VCR into the mains outlet and turn the power on for about 2 hours. Do not use the VCR for playback or record during this time. -
Page 3: Table Of Contents
Up to 960 hours of recording: an ideal video system for automated security and surveillance systems. This time lapse VCR is designed especially for industrial, educational and security recording. In addition to ordinary 3-hour recording mode, it has time lapse modes that allow recording of 12, 24, 48, 72, 96, 120, 168, 240, 360, 480, 720 or 960 hours. Also, the recording time can be extended up to 27,000 hours (for E-180 cassette tape) if you choose one-shot recording with 3 minutes interval time. -
Page 4: Features And Functions
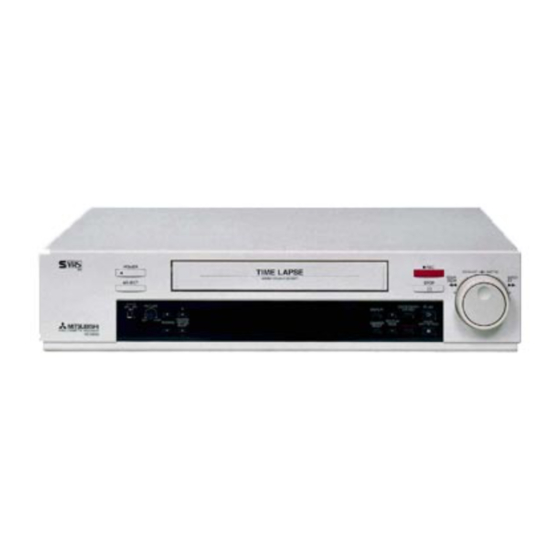
FEATURES AND FUNCTIONS FRONT VIEW POWER 1 POWER button (Press for on; press again for off) The POWER indicator illuminates when the VCR is switched on. 2 EJECT button Press to remove the cassette. 3 Cassette loading slot Cassette tape is inserted in this slot for loading. -
Page 5: Fluorescent Display
SP illuminates to indicate recording in SP mode or playing back a tape recorded in SP mode. 8 S-VHS indicator This indicator illuminates when the VCR is playing back a tape recorded in the S-VHS mode or when the S-VHS switch is ON while recording. -
Page 6: Rear View
When pressed, the present time, alarm recording list, power loss list and the number of tape use will be erased. While the button is pressed, the power is cut off from the VCR. If there is a cassette tape in the VCR and the button is released, the power indicator will light and the tape will fast forward for a few seconds. -
Page 7: Connecting With Other Equipment
1 If the vibration occurs in still, slow motion, fast playback (x2) or normal playback in 12H - 960H or 0H mode, playback a tape which is recorded in 3H mode with this VCR and press the PAUSE button. If the vibration occurs during normal playback in L12H or L24H mode, playback a tape in each playback mode. -
Page 8: Setting The Menus
SETTING THE MENUS The operating parameters of this VCR are set through various on-screen menus. Set the menus as follows: OPERATION 1 Press the DISPLAY button. • The “MAIN MENU” is displayed. 2 Turn the JOG dial to select the desired item. -
Page 9: Main Menu
Search in the reverse direction. • If the desired part of a tape is not found in one direction, the VCR automatically searches in the opposite direction. After the setting, turn the SHUTTLE ring to the right to start searching. - Page 10 A signal is output at the end of the tape or when a malfunction occurs. WRNG•REMAIN: The signal is output when a malfunction occurs in this VCR or when the tape has approximately 3 minutes left in 3H mode. WRNG: When a malfunction occurs in the VCR during recording, a CALL signal is output.
- Page 11 2 SETTING THE FREQUENCY DIVISION RATIO (CLOCK OUT) Sets the frequency division ratio of the CLOCK OUT terminal. First, set the recording mode for the “CLOCK OUT” pulse output in the “REAR TERMINAL” menu. REC: When recording in any mode. T/L-REC: When recording in time lapse mode (L12H, L24H, 48H, 72H, 96H, 120H, 168H, 240H, 360H, 480H, 720H, 960H or 0H).
- Page 12 • This VCR is equpped with two pairs of SP heads. Some VCRs make Time Lapse recordings using same Azimuth heads which are not VHS compatible. Playback of such tapes with the Normal setting will have picture/noise with a 25 Hz flicker, or just noise.
-
Page 13: Setting The Present Time
SETTING THE PRESENT TIME ACCURATELY PRESET THE DAY AND PRESENT TIME BEFORE TIMER PROGRAMMING <Display mode 1> 1 Day-Month-Year 2 Hour:Minute:Second 3 Daylight saving time symbol or power failure symbol 4 Alarm recording number • A 24-hour display is used. 00:00 indicates midnight; 12:00 midday and 15:00 indicates 3 o’clock in the afternoon. -
Page 14: Setting The Present Time
SETTING THE PRESENT TIME 6 Setting the daylight saving time To put the clock forward by 1 hour, set DAYLIGHT SAVINGS to ON. Turn the JOG dial to select “OFF” or “ON”. • The clock is put forward by 1 hour and the daylight saving time symbol “ be displayed next to the present time display . -
Page 15: Loading And Unloading The Cassette Tape
LOADING AND UNLOADING THE CASSETTE TAPE Video cassette tapes can be loaded into your new VCR as long as the VCR is plugged into a power source. Even if the VCR power switch is turned off, loading a cassette will automatically cause it to turn on. Use only video cassette tapes marked V Do not use a E-240 or SE-240 cassette tape when recording in 48H - 960H or 0H mode. -
Page 16: Manual Recording
When the lock button is pressed with a ballpoint pen or a pencil, the control buttons will not operate and the VCR is kept in the current mode. To release the lock mode, press the lock button again. -
Page 17: Repeat Recording
L24H 72H, 96H Series recording is possible if two or more of these units are connected together. When the tape in the first VCR reaches the end during recording, the tape in the second VCR automatically begins recording. 1. Set the “REC IN” of “REAR TERMINAL” menu to “SERIES”. -
Page 18: One Shot/Interval Recording
A number of camera images can be mixed together through a camera switcher and then recorded separately onto several VCRs. A camera is assigned to each VCR with the VCR recording only the camera image it has been assigned. This allows recording without gaps. -
Page 19: Additional Features
POWER CORD is disconnected from the mains outlet. The presets will remain in memory for a maximum of 31days provided that the VCR has been connected to the mains supply for at least 40 hours per week. -
Page 20: Timer Recording
TIMER RECORDING <TIMER PROGRAM> START 1 - - - - - : - - 2 DAY 08 : 40 3 MON 22 : 00 4 WED 22 : 00 5 SPL 20 : 30 6 MON 10 : 10 Program 7 SUN 23 : 30 8 MON 21 : 00 number... - Page 21 SETTING THE RECORDING PERIOD BY SPECIFYING THE DAYS OF THE WEEK (SPECIAL DW) Set the recording period by specifying the start and end day of the week for timer recording. 1. Display the “TIMER PROGRAM” setting display. 2. Turn the JOG dial to select “SPECIAL DW” and turn the SHUTTLE ring to the right. 3.
-
Page 22: Alarm Recording
11:00:00; and if the current time is 11:30:00, it will be reset to 12:00:00. *1: When connecting the MODE terminal of the 1st VCR with RST (RESET) IN terminal of the 2nd VCR and if the “MODE OUT” of the “REAR TERMINAL”... -
Page 23: Setting For Alarm Recording
SETTING FOR ALARM RECORDING Alarm Recording is used to activate more rapid recording when the VCR is recording in one of the Time Lapse modes. Alarm Recording provides for more pictures during the Alarm duration. Emergency Recording enables Alarm Recording even if the VCR is off, stopped or in Timer Recording/Standby. -
Page 24: Alarm Record Time Display
^ SKIP SEARCH The VCR will fast forward or rewind until an index signal is located and then playback for about 4 seconds in 3H mode. This process is repeated until the end or beginning of the tape is reached. -
Page 25: Playback
^ Turn the SHUTTLE ring to the left to rewind the tape when the VCR is in the stop mode. ^ Turn the SHUTTLE ring to the right to fast forward the tape when the VCR is in the stop mode. -
Page 26: Special Effects Playback
You can use the JOG dial to advance the tape frame by frame. 1 While the VCR is playing a tape, press the PAUSE/SHUTTLE HOLD button to freeze the picture on screen. 2 Slightly rotate the JOG dial clockwise to advance the tape forward. Slightly rotate it counterclockwise to reverse the tape. To obtain a frame by frame picture continuously, keep rotating the JOG dial. -
Page 27: Adjustment During Playback
1 If the vibration occurs in still, slow motion, fast playback (x2) or normal playback in 24H - 960H or 0H mode, playback a tape which is recorded in 3H mode with this VCR and press the PAUSE button. If the vibration occurs during normal playback in L12H or L24H mode, playback a tape in each playback mode. -
Page 28: Using With The Personal Computer
USING WITH THE PERSONAL COMPUTER Before connecting the hardware, unplug the power cord of the VCR from the wall outlet, and turn the personal computer power off. 1 Connecting the VCR to a personal computer. REC GND ALM MODE ÉMIC AUDIO 2 Connecting multiple VCRs to a personal computer. - Page 29 When controlling only one VCR via the personal computer, “VCR ADDRESS” is set to “NONE”. • When two or more VCRs are to be controlled in series, each VCR must have a unique VCR ADDRESS (from VCR01 to VCR16). •...
- Page 30 Delimiter code for receive Connections Before connecting the hardware, unplug the power cord of the VCR from the outlet, and turn the personal computer power off. Connect the RS-232C IN terminal of the VCR to the personal computer's serial port.
- Page 31 The commands sent from the personal computer (or other equipment) to the VCR and responses produced by the VCR are detailed in this section. 1 When controlling only one VCR via the personal computer, the "VCR ADDRESS" is set to "NONE".
- Page 32 USING WITH THE PERSONAL COMPUTER 2 When controlling two or more VCRs from a personal computer, the "VCR ADDRESS" of each VCR is set to the different address (from VCR01 to VCR16, except NONE). ( Refer to page 29, item 7.) •...
-
Page 33: Commands And Responses
Enquiry about current index No. (index search only) Timer recording ON/OFF Timer recording OFF Timer recording ON Enquiry about current executing timer program No. Enquiry about current VCR status COMMANDS AND RESPONSES Status after normal execution ↑ ↑ ↑ ↑... - Page 34 USING WITH THE PERSONAL COMPUTER Commands MC+++ DP+++ SD++ SC++ PS++ ,+++ Functions Status after normal execution Lock ON/OFF +:0=OFF, 1=ON Enquiry about current lock status & lock mode Counter reset Enquiry about current count display value Switch over time mode to +++ = 003, L12, L24, 048, 072, 096, 120, 168, 240, 360, 480, 720, 960, 000 Enquiry about current time mode...
- Page 35 Commands Functions Enquiry about setting contents of timer program No. (+=1-8) Clear contents of timer program No. (+=1-8) Setting the special day of the week :Setting on (0-6) Setting off (0-6) 0=SUN, 1=MON, 2=TUE, 3=WED, 4=THU, 5=FRI, 6=SAT Enquiry about the setting of the special day of the week AM++ Alarm mode setting...
-
Page 36: Using With The Personal Computer
ER03 Beginning of the tape ER04 Tape end ER05 Problem with the tape, video input or VCR mechanism ER06 Present time or timer program not yet set Status after normal execution 1=about the second alarm REC from the last one... -
Page 37: Warning Display
CHECK 1. Lack of video input signal. If the VCR is set to record and an input signal is not detected, the indication NO SIGNAL appears on the monitor screen and the CALL signal is output from the rear terminal. -
Page 38: Before Calling For Service
Please contact your dealer. • Is the camera focused? • Make sure the VCR has mains power supplied continuously for at least 40 hours per week. • Make sure the VCR has mains power supplied continuously for at least 40 hours per week. -
Page 39: Control Input/Output Signals And Circuits
Time for active: 0.1 sec or over. Non active: Open the input. SET/RST/REC IN 0.047 F <Interface circuit inside the VCR> Active: “L” level voltage (0 - +0.4V) output; max. drive current 50mA(+5V DC)/ 10mA(+24V DC) Non active: Open; max. voltage +24V DC ALM / MODE/ CALL OUT <Interface circuit inside the VCR>... -
Page 40: Control Input/Output Signals And Circuits
FORWARD FRAME SHIFT FAST FORWARD REWIND 2 Remote Control (optional) The optional Remote Control (R-7100) provides remote operation of the VCR. Before using the remote control, put the label on it as shown in Fig. No function is available. cable 2 ····································... -
Page 41: Specifications
Screw terminal for output while alarm recording is under way. CLK Output: Screw terminal to command camera switching. MODE Output: Screw terminal for indication of VCR selected mode. CALL Output: Screw terminal for external warning device or for series recording. REMOTE Jack: Jack for connecting the remote control unit. - Page 42 872C193C3 PRINTED IN JAPAN...