
Related Manuals for Mitsubishi HS-U510


Summary of Contents for Mitsubishi HS-U510
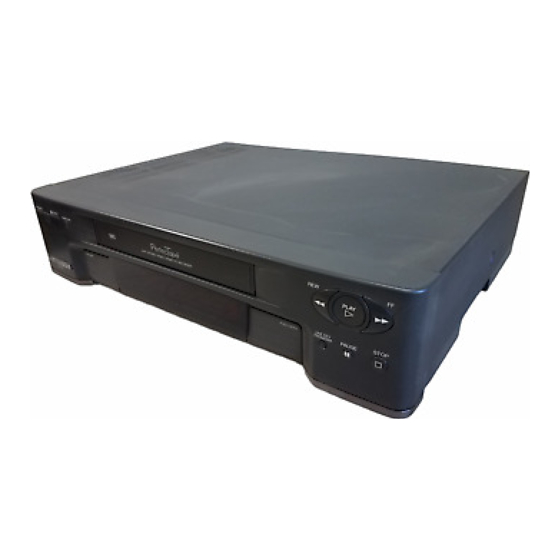
- Page 1 •,_ MITSUBISHI Video Cassette Recorder Owner' s Grade his Video Cassette Recorder is based on the VHS format. Only video cassette tapes with the _ mark may be used with this model.
- Page 2 RISK OF ELECTRIC SHOCK DO NOT OPEN CAUTION: TO REDUCE THE RISK OF ELECTRIC SHOCK, DO NOT REMOVE COVER (OR BACK) NO USER-SERVICABLE PARTS INSIDE REFER SERVICING TO QUALIFIED SERVICE PERSONNEl_. The hghtning flash with arrowhead symbol, within an equilateral triangle, is intended to alert the user...
-
Page 3: Table Of Contents
Using the Audio and Video Functions ..26 Selecting and adjust:.ng the audio Preface and video function:_ ......Welcome to Mitsubishi ....... Descriptions of audi(, and Unpacking Your VCR ........video functions ........Using the Menus to Set the Time ..... 28... -
Page 4: Important Safeguards
IMPORTANT SAFEGUARDS PLEASE READ ALL THESE INSTRUCTIONS REGARDING YOUR VCR AND RETAIN FOR FU- TURE REFERENCE. FOLLOW ALL WARNINGS AND INSTRUCTIONS MAR]_:ED ON THE VCR. Read Instructions All the safety and operating instructions should be read before the appliance operated. 2. - Page 5 12.Power-Cord Protection EXAMPLE OF ANTENNA GROUNDING Power-supply cords shouldberoutedso that theyarenotlikely tobewalkedonor pinched byitemsplaced uponor against them,payingparticularattentionto cords LEAD IN WIRE at plugs,convenience receptacles, andthe pointwhere theyexit fromtheappliance. DISCHARGE UNIT (NEC SECTION 810-20) 13.Lightning Foradded protection for this videoproduct GROUNDliNG receiver d uringa lightningstorm,or when CONDUC]ORS it is left unattended andunused for long...
- Page 6 Important S afeguards DONOT PLACEANYTHINGi O N THE 21.Safety Check Upon completion of any service or repairs RECORDER to this video product, ask the service Heavy objects placed on the recorder will technician to perform safety checks to cause damage. The top of the recorder is also determine...
-
Page 7: Preface
Welcome to Mitsubishi PREFACE " Congratulations on your purchase of this Mitsubishi Video Cassette Recorder. Your new VCR produces superior so_ad and a high resolution VHS picture. It includes VHS Hi-Fi audio recording and playback, delivering compact disc-quality audio. Your owner's... -
Page 8: Front Panelbuttonsand Functions
ng o now Your VCR Now that you have unpacked your player and read through safety information, it's time to become famili_w with the buttons and controls. If you are experienced with using VCRs, you may just want to glance at this section and refer to it later. -
Page 9: Fluorescentdisplay
• POWER --_ EJECT VOWf_^ ' i - 1314151617 ® (_) fluorescent display one key program button (ONE KEY See below. PROGRAM) Press this button tc program the VCR to channel buttons (CHANNEL) record. Press these buttons to change channels. Also use these buttons to adjust tracking... -
Page 10: Overviewof The Remotecontrol
Chapter 1: Getting to KnowYourVCR Fl_Jorescent Display(cont.) -..)ilv(...) !!1/ ,:,., ,,,,1:',:-,: ,-,,-, 13 .. 14 15 16 ® are watching, often _m_ther language. index light This will flash when you are writing @ play light (PLAY) erasing an index mark; it will light when This lights up when the VCR is playing. - Page 11 rewind and reverse search button (PEW) Press this button to rewind a tape or to reverse search. You can also use this button to control the playback speed of a tape. play button (PLkY) Press this button t_ play a tape. VC,R button (VCR) Press this button...
-
Page 12: Rearpanelterminals
(ACTIVE A/V NETWORK) Use these terminals to connect the VCR the switch to "3" or °45 whichever station is NOT used for broadcasting in your area. with other Mitsubishi products that have Active A/V Network terminals or AN (See "Setting... -
Page 13: Chapter Two
CHAPTER Connecting YourVCR Now that you're familiar with some of your VCR's features, you're ready to connect the antenna and the t_;levision. You won't have to complete all of the connections you see in this chapter- make only those connections that apply to your equipment. - Page 14 Chapter2: Connecting YourVCR ConnectingtheAntenna or ,3abletotheVCR (cont.) connecting cablewitha cable box,if allchannels arescrambled If your cable system scrambles all of its charmcls, follow the directions below to connect your cable box to your VCR: ANTENNA Disconnect the cable box from the TV. L(•-)]- --- Connect the cable from the cable box to the ANTENNA...
-
Page 15: Connectingotherantennas
Connect the fourth coaxial cable to the "OUT" terminal on the A/B switch. Connect the other end of t[ds cable to the "AN- TENNA IN" terminal on your VCR. When you are finished, go to page 15, "Connecting the Televi- sionl With this connection, you should set the A,:B switch... -
Page 16: Connecting Separate Uhf/Vhf Antennas
Chapter 2 : Connecting YourVCR Connecting theAntenna or Cabletothe VCR(conL) Wrap each exposed end of wire once or twice around the screw shanks of the adapter (or insert the clips 1ruder the screw heads). Tighten the screws. Insert lead under screws and tighten. -
Page 17: Connecting Thetelevision
UHFAntenna VHF Antenna 300 Ohm -- 300 Ohm Flat Twin Lead Flat Twin Lead :L_ 75 Ohm CoaxialCable ANTENNA • 300 - 75 Ohm Adapter Combiner Connecting theTelevision Now that you have completed the antemla connections to your VCR, you're ready to connect the VCR to the TV. (If you haven't connected the antenna to the VCR, go to page 11, "Cormecting the... -
Page 18: Connectinga Regulartv To The Vcr
Chapter 2: Connecting YourVCR Conne_,'ting theTelevision (cont.) Connectinga regularTV to the VCR To connect a regular TV to the VCR: Take the black cable (called a coaxial cable) that is supplied with your VCR and attach it to the terndr,al labeled AN- TENNA OUT on the back of your VCR. - Page 19 OUT L/"--_ IDEO OUT AUDIO IN L------ _ AUDIO OUT R__L_ AUDIO IN R _ VIDEO IN ConnectingtheAN Network(optional) Some Mitsubishi TVs and VCRs have special input and output terminals called the "A/V Network." The primary purpose of the A/V Network is to "pass"...
- Page 20 .In order for Active A/V Network to function properly, you faust make the connections above and your VCR must be connected to the EXT-1 input terminals of your Mitsubishi TV. Informal;ion on how to use the Active A/V Network features b,-_ginson page 56.
-
Page 21: Setting Upyourvcrfor The Firsttime
5 e nj rVC. Now that you've completed your antenna, VCR, and TV connec- tions, you're ready to start enjoying your ecuipment. To get the most satisfaction out of your VCR, you shmdd carefully read the two sections, "Setting Up Your VCR for t:he First Time"... -
Page 22: Regular Tv
SettingUpYourVC_ for theRrst'time(conL) Setting up your VCR if you are usinga monitor"IV Turn on your TV and switch it to the correct external input. (For most Mitsubishi TVs, this means pressing the TV's INPUT button until you see the words "E:_t-l" on the screen.) -
Page 23: The Vcr
MUTE and number buttons to operate your TV. *Use button 1, 2, or 3 to set up your remote for use with Mitsubishi TVs. Additionally, you will be able to use the I)ISPLAY, INPUT and ENTER buttons, depending on which type ,_f TV you have. Please refer to the table on the nex_ page. -
Page 24: Viewingthepicture Coming From Yourvcr
Chapter 3: Operating YourVCR UsingtheRemote Control(cont.) ifyouused thiscode ... thetheDISPLAY ... andtl IIIPUT ... andthe ENTER button tosetup buttonwill worklike buttonwill like buttonwill worklike your r emote... thisbutton.., this bu thisbutton... DISPLAY INFJl ENTER "I-VN DISPLAY DISPLAY ENTER DISPLAY ENTER RECALL RECALL TV/_... -
Page 25: Loading Andunloadingtapes
TV viewing. Viewingthe picture comingfrom your VCR if you are usinga monitorTV Turn on your TV and switch it to the correct external input. (For most Mitsubishi this means pressing the TV's INPUT button until you see the words "Ext-l" on tile screen.) -
Page 26: Playing Atape
Chapter3: Operating YourVCR Loading andUnloading Tapes(cont.) Unloadinga tape Press the EJECT button oil the front of the: VCR. If the VCR POWER is off, the VCR wi]] turn on, eject the tape, then turn off. Remove the tape. You cannot eject a tape while recording. You nnust first press [>Important: STOP. -
Page 27: Using Basic Playback Controls
Playinga tapeis alsoanActiveA/VNetworkfeature.(Formore information,seepage 56.) Using basic playback controls rewinding a tape Press the REW button on the remote control or on the front panel. If the tape is stopped, you will begin rewinding. If the tape is playing, you will begin "reverse speed search."... -
Page 28: Usingthe Audioandvideo Functions
Chapter 3: Operating YourVCR Selecting theOn-screen Language (cont.) Press the JOG/ADJUST buttons on the reraote control to move the cursor next to the desired language. Espafiol Press the ENTER button on the remote control. The menu Franqais Will change to the _VCR Main Menu." Press the MENU button to exit the menus. - Page 29 Press the AUDIO/VIDEO button until the function you want to select appears. JOG/ADJUST Press the JOG/ADJUST buttons on the remote to adjust setting. The functions will disappear if you do not press any buttons for 5 seconds. The audio and video function displays do not appear when the...
- Page 30 The speed at which you record has an effect on picture quality. will produce the best picture quality and can record up to two hours of video on a T-120 tape. Mitsubishi's EP speed has only slightly poorer quality, but records up to six hoars on a T-120.
- Page 31 The cursor automatically moves to the word _Year." ]_ess JOG/ADJUST buttons to set the year. Press the ENTER Month J_ne button. Date I ThUrsday Clock 12 :00P. Daylight savings (OFF) U_e-,ADJUST select. "" ENTER. Press M__V_-_o_.._et-up ,Men.u.. _- The cursor automatically moves to the word "Date."...
- Page 32 'back on. If you have a Mitsubishi TV with both Active A/V Network "StarSight" features, you don't have to set the time on your VCR. See your TV Owner's Guide for details.
-
Page 33: Using Videomute
Press the MENU button on the remote ,mntrol. You will see First Tim_._"U_ _° .. the "VCR Main Menu" on the TV screer.. Your choices are: clock Customize choices Use the JOG/ADJUST buttons to move the cursor next to I[,_ I i[e| qlJliV,_ ;,gelg_l... -
Page 34: Channels
Chapter 3: Operating YourVCR Programming the VCRto Receive TV Channels (conL) The =First Time Set-Up" menu appears on Four screen. • _-irst-Tim_s_tuUp ..the JOG/ADJUST buttons _o move the cumor next to are: Your choices clock =Customize choices" and press the ENTER button. Memorize channels Add/delete... -
Page 35: Recording
When you are finished adding or deleting channels, press the MENU button once to return to the "First Time Set-Up" menu; press the MENU button a secon3 time to return to the "VCR Main Menu"; press the MENU button a third time to turn off the menu. - Page 36 Chapter 3: Operating YourVCR Recording (cont.) Recordinga currentbroadcast Beforeyou begin, you need to know: * how to view the picture coming from y3ur VCR (page 22.) To record a TV program that you are watching on the VCR: Load a tape that has not had its erasure tab removed into the...
-
Page 37: Your Vcr To Record
Programmingyour VCR to record You can program your VCR to record with the help of Mitsubishi's on-screen operating system. You can schedlfle up to eight record- ing "events" within a one month period. - Page 38 Chapter 3 : Operating YourVCR Recording (cont.) [_Important: When selecting a day, your choices are: a single day up to one month away, every day from Monday through Friday, or the same day every week. To program tbr every day f_om Monday through Friday (to tape a soap opera,...
- Page 39 The contents of the programmed memory will appear on the • Program _o_r_cord- "recap" screen. 2 M019 11:30A I:30PSP --:..:-- SP To program additional recording times, select an empty --:..:-- SP program line by pressing the JOG/ADJUST buttons. Then, press the ENTER button.
- Page 40 Chapter 3: Operating YourVCR Recording (conL) Select the channel you would like to recoz'd by using the CHANNEL buttons on the remote control or the front panel. If you are using a cable box, select channel 3 or 4 on the VCR, and change the channel on the cable box.
- Page 41 Press the ONE KEY PROGRAM button on the front panel. (If you have not set the time, the "Set the clock" menu will appear. Set the clock, and then proceed.) If there is Mready program in the VCR's memory, you will see the "recap" screen.
- Page 42 You can use this feature when the VCR is stepped, playing, recording, fast forwardhlg, rewinding, or off. Quick Program is also an "Active A/V Network" feature. ]:f you have a Mitsubishi TV with Active A/V Network, turn to page 56 for more information.
-
Page 43: Recording
To use quick program: • Program to record. _,Immm_ Press the QUICK PROGRAM button on the remote control. If Start time --:-- the VCR is off, it will turn on. After tun:rag your TV to the Stop time --:-- correct channel or input, you will see the "Program to record"... - Page 44 Chapter 3 : Operating YourVCR Recording (cont.) If there is already a program in the VCR's memory, you will see the "recap" screen when you bring up the :m_mus for programming to record (unless you are programming with the QUICK PROGRAM button).
- Page 45 skipping programs If you have already entered a program into your VCR's :memory, you can skip the program without going into the VCR's menus. Simply press the POWER button on the front panel once. The programmed recording light (£3) will turr_ off, and the :program will be skipped.
- Page 46 Chapter3: Operating YourVCR Recording (cont.) usingtheTIMERRESETbutton You can use the TIMER RESET button on the rear panel 1_ erase both the time and all progranlmed recordings. To use the TIMER RESET button, press it with a pencil or a ball point pen.
-
Page 47: Features
Osing the .dvanced Features CHAPTER FOUR Now that you've learned about the basic operation of your VCR, you're ready to discover its advanced featlm.,s. You'll find infor- mation Usingthe Advanced PlaybackControls Usingthe Advanced RecordingControls SearchingTechniques Using the ActiveAN Network Features Makinga Copyof a Tape Using Child Lock Before you use the advanced... -
Page 48: The Advanced Features
Chapter 4 : Using theAdvanced Features UsingtheAdvanced Playback Controls (cont.) High speed search search " > 1/5 slow-motion playback /_'--_ • 1/10 slow-motion playback ,".f> ,_" Press the REW button 1/30 slOWs_.l_t,on playbac! Press the FF button 1/30 reverse slow-motion playback <... -
Page 49: Tmfeature
manualtracking From time to time, you might play a tape that has excess; "noise" in the picture (often looking like vibration o]"interference at the top or bottom of the screen). To correct the _icture, you _ill have to manually track the tape. While the tape is playing, press the CHANNEL buttons... - Page 50 Chapter 4: UsingtheAdvanced Features UsingtheAdvanced Recording Contliols (conL) Using the PerfecTape feature PerfecTape is an exclusive Mitsubishi feature that tests quality of your video tapes. A!_r each test, the VCR will adjust its internal circuitry in order to make the best possible recording on your tape.
- Page 51 When the test is finished, the VCR will display the rating PerfecTape " your tape for eight seconds. On the front panel, the "PT" light Your tape rated will shine steadily, indicating that the VCR has set its inter- i.,- ..I ..I nal circuitry to make the best possible recording...
-
Page 52: Time
Chapter4: UsingtheAdvanced Features UsingtheAdvanced Recording Controls (cont.) You can turn offthe time gauge and the remaining time by pressing the DISPLAY buttx_n twice. To make the time gauge and the remaining time app_lr: Press the DISPLAY button once. The time gauge and remaining time will appear on the TV screen, and the remaining time will... - Page 53 Edit searching Edit search is very useful for editing out coramercials if you are recording a program while you are watching it. It is also useful as a gener°al editing feature. Tiffs feature is sometimes called EE (electronic-to-electronic) editing. This function works only when you are in "record-pause"...
- Page 54 Chapter 4: UsingtheAdvancedFeatures SearchingTechniques (cont) After a short delay, you will see the contents of the videotape, still in speed search. The picture will slay on the screen as long as you hold down the button. When you release the button, the tape will resume £ast forwarding...
- Page 55 Follow the instructions O through O above. You will see the • Seamch time display at the left. Search 0h00m00s 0h30m00s @) Press ENTER. The VCR will fast forward or rewind to the will search point you select. time select. ADJUST select, ENTER.
- Page 56 Chapter 4: Usingthe Advanced Features Searching Techniques (cont.) manualindexmarks To add an index mark yourself, press the RE,3 button on the remote control while a tape is. recording or playing. [>Important: Index marks must be added at least one minute apart.
- Page 57 When the index mark has been located, and playback has begun, press STOP. Rewind the tape for a few seconds, ther., press STOP. Press the PLAY button, then the REC button on the remote •control. The index light (¥) on the fluorescent display will light up.
- Page 58 UsingtheActiveAN NetworkFeatures The Active A!V Network is a benefit of cert:tin Mitsubishi and VCRs. The Active A/V Network allows you to use many of the commonly used features of your system at th(: press of one button.
-
Page 59: Features
Use the JOG/ADJUST buttons to select =A/V Network. _ Customize choices PerfecTape (AUTO) Video mute Press the ENTER button to set =AN Nel;work" to ACTIVE. (ACTIVE) Press the MENU button three times to turn off the menus. ADJUST select, what the Active AN Networkdoes The Active A/V Network makes it easier an([ faster to use the... - Page 60 Chapter 4: UsingtheAdvanced Features Making a Copyof a Tape(cont.) Using your HS-U510to recordfrom anotherVCR IRECORDING1 [ PLAYRACK ] ° AUDIO OUT R4_ AUDIO OUT L---I--) VIDEO OUT---J-- Connect one RCA audio cable to the AUDIO Put the tape you want to copy into the other OUTPUT terminal on the other VCR.
-
Page 61: Usingchild Lock
UsingyourHS-U510 t o playbacktoanother VCR I PLAYBACK I [RECORDING ] t t'_ AUDIO OUT L41 VIDEO IN--_ _I}--AUDIO IN L --AUDIO IN R AUDIO OUT R----_ Connect one RCA audio cable to the AUDIO Set the input of the other VCR to "External." INPUT terminal on the other VCR. - Page 62 Problems Possible Solutions. For MoreInformation The VCR won't turn on. Q Check the AC cord and the AC outlet. See Chapter 1, "Getting Knc w Your VCR'. Is the LOCK light ON? If so. press and hold the DISPLAY button for more than 8 seconds until the LOCK light disappears.
- Page 63 Index conn6cting input button ...... 6, 8 A/B switch ......AN Network ....installing batteries ....20 A/V Network Active A/V Network ..18 Active features ....antenna ....11, 13, 14 cable ......... connecting ......jog buttons ......9 cable box ......
- Page 64 Index search picture, viewing the one unloading tapes ....from your VCR ....edit ........5 :[ Unpacking your VCR .... 5 play button ......6, 9 index ......... play light ....... skip ........"55 playing a tape ...... speed ......... VCR/TV button ....
- Page 65 Gu[a de Operaci6nB sica de la Videograbadora Funcionesb_sicas de Io_,botones Q-) bot6n de encendido (POWER) Oprima este botSn para encender :y apagar la videograbadora. bot6n de cancelaciSn (CANCEL) Utilice este botSn para cancelar selecciones en los meads en pantalla. bot6n de grabaci6n (REC, RE€',/OTR) Utflice este botSn para comenzar...
- Page 66 Guiade OperacidnBdsicade la Videograbadora Cdmoseleccionar e l idioma de el sistema operativode men_sen pantalla Si nunca se ha usado la videograbadora, wtya al paso 0. Oprfma el botdn TIMER RESET en el panel trasero de la videograbadora. Oprima el botdn POWER para encender la v[deograbadora.
- Page 67 Shipping expenses are your responsibility. The name and address of the nearest service center can be obtained from your MITSU BISHI Dealer, or by writing or calling MELA at the address and telephone number below. Proof of purchase date from an al.thorized MITSUBISHI Dealer is required when requesting warranty service.
- Page 68 MITSUBISHI MITSUBISHI ELECTRONICS AMERICA, INC. 6100 Atlantic Boulevard Norcross, GA 30071-1305 © 1995 Mitsubishi Electronics America, Inc. 872C131A3 PRINTED IN SINGAPORE...