Table of Contents
Advertisement
Available languages
Available languages
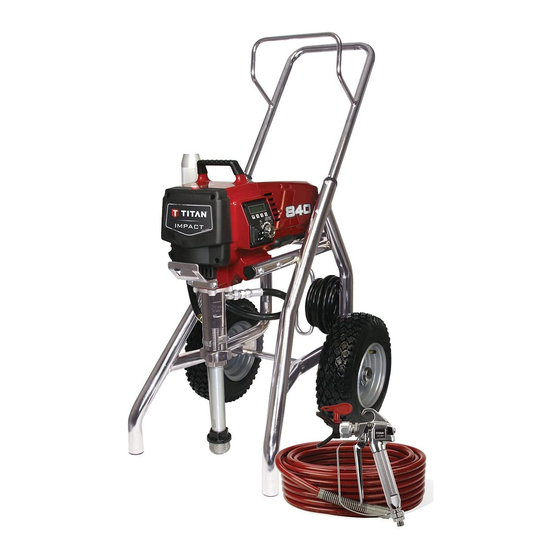
IMPACT 840
Register your product online at:
www.titantool.com
_ _ _ _ _ _ _ _ _ _
Serial Number*
* See pages 6 and 55 for location
Airless Sprayer
Model 805-009
Manual del Propietario
Do not use this equipment before
NOTE: This manual contains important
warnings and instructions. Please
read and retain for reference.
Model 805-010
Anti-Theft Digital Lockout
© Titan Tool Inc. All Rights Reserved. Form No. 0552882E
0814
•
Owner's Manual
Notice d'utilisation
reading this manual!
Security Code
_ _ _ _
Advertisement
Chapters
Table of Contents

Related Manuals for Titan Tool IMPACT 840


Summary of Contents for Titan Tool IMPACT 840
- Page 1 Anti-Theft Digital Lockout www.titantool.com Security Code _ _ _ _ _ _ _ _ _ _ _ _ _ _ Serial Number* * See pages 6 and 55 for location © Titan Tool Inc. All Rights Reserved. Form No. 0552882E 0814 •...
-
Page 2: Safety Precautions
Only use TITAN original-high-pressure grounded to protect against static discharge and sparks. Use only hoses in order to ensure functionality, safety and durability. English © Titan Tool Inc. All rights reserved. -
Page 3: Table Of Contents
The United States Government Safety Standards have been adopted under the Occupational Safety and Health Act (OSHA). These standards, particularly part 1910 of the General Standards and part 1926 of the Construction Standards should be consulted. English © Titan Tool Inc. All rights reserved. -
Page 4: General Description
6. Allow the sprayer to run for 15–30 seconds to flush the test fluid out through the return hose and into the waste container. 7. Turn off the sprayer by moving the ON/OFF switch to the OFF position. English © Titan Tool Inc. All rights reserved. -
Page 5: Preparing To Paint
Be sure to follow the pressure relief procedure when shutting down the sprayer for any purpose, including servicing or adjusting any part of the spray system, changing or cleaning spray tips, or preparing for cleanup. English © Titan Tool Inc. All rights reserved. -
Page 6: Control Panel Indicators
OFF and allow to cool. UNIT SERIAL # The Unit Serial # screen shows the MENU-1 SELECT-4 sprayers serial number. SER # XXXXXXXXXX To select the Unit Serial # screen, press MENU-1 the #4 key. English © Titan Tool Inc. All rights reserved. -
Page 7: Pressure Relief Procedure
If the new code is re-entered incorrectly, the display will return to the “Enter New Code Number” screen and the process will repeat. If you forget or misplace your security code, you can call Titan customer service for assistance. English © Titan Tool Inc. All rights reserved. -
Page 8: Spraying
If the pressure is set too low, tailing will appear or the paint will spatter out in gobs rather than in a fine spray. Paint tailing pattern English © Titan Tool Inc. All rights reserved. -
Page 9: Cleanup
14. Follow the “Pressure Relief Procedure” found in the Operation section of this manual. 15. Unplug the unit and store in a clean, dry area. ImPOrTaNT: Do not store the unit under pressure. English © Titan Tool Inc. All rights reserved. -
Page 10: Replacing The Filters
Motor Ba e complete assembly drawings, please see the LX-80II Motor Screw Belly Pan Professional airless Gun Owner’s manual (P/N 313- Shroud Screw 2293). Motor Controller Motor Controller Screw Motor Cover Motor Cover Screw English © Titan Tool Inc. All rights reserved. -
Page 11: Replacing The Gears
7. Using a wrench, loosen and remove the transducer from the filter housing. Carefully thread the transducer wire out through the mounting plate. 8. Slide the grommet off of the old transducer and onto the new transducer. English © Titan Tool Inc. All rights reserved. -
Page 12: Replacing The Prime/Spray Valve
7. Remove the return hose from the clamp on the siphon tube. 8. Unscrew the siphon tube/siphon set from the foot valve. 9. Loosen and remove the high-pressure hose from the nipple on the back of the upper housing of the fluid section. English © Titan Tool Inc. All rights reserved. - Page 13 (see Fluid Section Assembly parts list for lower packing insertion tool P/N). 18. Place the piston insertion tool (included in the repacking kit) over the top of the piston rod. English © Titan Tool Inc. All rights reserved.
-
Page 14: Troubleshooting
The unit lacks power. The pressure adjustment is too low. Rotate the pressure control knob clockwise to increase the pressure setting. Improper voltage supply. Reconnect the input voltage for 120V AC. English © Titan Tool Inc. All rights reserved. -
Page 15: Digi-Trac™ Control System Error Messages
LOAD when the sprayer shuts down because of high current or when the sprayer goes into current fold back mode. Take the sprayer to a Titan authorized service center for repair. English English © Titan Tool Inc. All rights reserved. -
Page 16: Consignes De Sécurité
à la terre pour pulvérisateurs de peinture sous vide à haute Inspectez le tuyau avant chaque emploi. Changez tous les tuyaux ou pression, spécifiés par le fabricant. pièces endommagés. Pour des raisons de fonctionnement, de sécurité Français © Titan Tool Inc. Tous droits réservés. -
Page 17: Specifications
Garantie ..................56 la ventilation, la prévention d’incendies et le fonctionnement. • Les normes de sécurité du gouvernement des États-Unis ont été adoptées dans la loi Occupational safety and Health Act (OSHA). Ces Français © Titan Tool Inc. Tous droits réservés. -
Page 18: Description Générale
6. Laisser le vaporisateur fonctionner pendant 15 à 30 secondes pour évacuer le liquide d’essai par le flexible de retour, jusqu’au contenant de purge. 7. Arrêter l’appareil en mettant le commutateur à la position OFF. Français © Titan Tool Inc. Tous droits réservés. -
Page 19: Préparation Avant De Peindre
On doit effectuer la procédure de décompression chaque fois qu’on arrête l’appareil pour en faire la maintenance, en changer les réglages de vaporisation, en remplacer/ nettoyer les embouts ou en effectuer la préparation en vue d’un nettoyage. Français © Titan Tool Inc. Tous droits réservés. -
Page 20: Panneau De Contrôle Indicateurs
MENU-1 RESET-3 nécessaire au travail », appuyer sur la en surchauffe. arrêtez la pompe (position « arrÊT ») touche no 4. et laissez-la refroidir. Français © Titan Tool Inc. Tous droits réservés. -
Page 21: Procédure De Décompression
8. Abaisser la soupape PRIME/SPRAY à la un code de sécurité pour la première fois, l’écran « position PRIME. Entrez l’ancien numéro de code » (“Enter Old code Number”) apparaîtra, et vous devrez entrer « 1111 ». Français © Titan Tool Inc. Tous droits réservés. -
Page 22: Vaporisation
Si la pression est trop élevée, le jet sera trop Jet e cace dispersé; si elle est trop basse, le jet produira des traînées ou crachera des grumeaux de produit. Traînées de produit Français © Titan Tool Inc. Tous droits réservés. -
Page 23: Nettoyage
Titan Liquid Shield (se reporter à la section accessoires du présent manuel pour obtenir le numéro de pièce de ce produit). Français © Titan Tool Inc. Tous droits réservés. -
Page 24: Remplacement Des Filtres
à dépression professionnel Ventre pan Vis du capot LX-80 (no 313-2293). du moteur Contrôleur de moteur Vis du contrôleur de moteur Carter de moteur Vis du carter de moteur Français © Titan Tool Inc. Tous droits réservés. -
Page 25: Remplacement Des Engrenages
7. À l’aide d’une clé plate, dévissez et retirez le transducteur du logement de filtre. Dévissez délicatement le câble du transducteur à travers la plaque d’assemblage. 8. Retirez l’anneau isolant du vieux transducteur et placez-le sur le nouveau. Français © Titan Tool Inc. Tous droits réservés. -
Page 26: Remplacement De La Soupape Prime/Spray
7. Retirez le tuyau de retour de la bride de serrage du tube- siphon. 8. Dévissez le tube-siphon/jeu de siphons du clapet de pied. 9. Dévissez et retirez le tuyau à haute pression du raccord derrière le logement supérieur de la section de liquide. Français © Titan Tool Inc. Tous droits réservés. - Page 27 31. Vissez le tube-siphon/jeu de siphons dans le clapet de pied du calibreur de la garniture d’étanchéité inférieure (compris et vissez jusqu’à ce qu’il soit solidement fixé. Assurez vous dans la trousse de garnitures d’étanchéité). Français © Titan Tool Inc. Tous droits réservés.
-
Page 28: Maintenance De La Section Des Liquides
La tige du piston est usée. Remplacer la tige du piston selon la procédure “Maintenance de la Section des Liquides” décrite au chapitre Maintenance de ce manuel. Français © Titan Tool Inc. Tous droits réservés. -
Page 29: Messages D'erreur Du Système De Commande Digi-Trac Md
à cause d’une tension d’entrée basse. Vérifier l’alimentation et corriger le problème. Remettre en marche le pulvérisateur et suivre la procédure « Peindre » de la section « Fonctionnement » du présent manuel. Français © Titan Tool Inc. Tous droits réservés. -
Page 30: Precauciones De Seguridad
Inspeccione la manguera antes de objetos dentro y alrededor de la zona de pulverización se conectarán cada uso. Sustituya las mangueras o las piezas dañadas. Por razones Español © Titan Tool Inc. Todos los derechos reservados. -
Page 31: Especificaciones
Ley de salud y seguridad ocupacional (OSHA). Deben consultarse tres normas, particularmente la sección 1910 de las Normas generales y la sección 1926 de las Normas sobre construcción. Español © Titan Tool Inc. Todos los derechos reservados. -
Page 32: Descripción General
7. Apague la unidad moviendo el interruptor de ON/OFF (ENCENDIDO/APAGADO) a la posición OFF (APAGADO). Español © Titan Tool Inc. Todos los derechos reservados. -
Page 33: Preparación Para Pintar
Español © Titan Tool Inc. Todos los derechos reservados. -
Page 34: Indicadores De Panel De Control
NOTa : Si el motor está en marcha y los indicadores de N° 4. presión parpadean alternadamente, significa que se sobrecalentó el motor. apague la bomba y deje que se enfríe. Español © Titan Tool Inc. Todos los derechos reservados. -
Page 35: Procedimiento Para Aliviar La Presión
“Enter Old code Number” (Ingrese de la pistola a la posición bloqueada. el número de código antiguo) y deberá ingresar 8. Mueva hacia abajo la válvula PRIME/SPRAY a “1111”. la posición PRIME. Español © Titan Tool Inc. Todos los derechos reservados. -
Page 36: Rociado
Si la presión es demasiado baja, aparecerán residuos o la pintura salpicará en exceso en lugar de salir como un rocío fino. Patrón con residuos de pintura Español © Titan Tool Inc. Todos los derechos reservados. -
Page 37: Limpieza
13. Continúe apretando el gatillo de la pistola rociadora en el recipiente de desecho hasta que el solvente que salga por la pistola esté sin pintura. Español © Titan Tool Inc. Todos los derechos reservados. -
Page 38: Reemplazo De Los Filtros
LX-80 (Núm. 313-2293). Controlador del motor Tornillo para el controlador del motor Cubierta del motor Tornillo para la cubierta del motor Español © Titan Tool Inc. Todos los derechos reservados. -
Page 39: Reemplazo De Los Engranajes
6. Tire el prensaestopas fuera de la placa de montaje y deslícelo hacia arriba por el eje del transductor hasta que salga de la placa de montaje. Español © Titan Tool Inc. Todos los derechos reservados. -
Page 40: Reemplazo De La Válvula De Prime/Spray
8. Destornille el conjunto de tubo de sifón/sifón de la válvula de retención. 9. Suelte y retire la manguera de alta presión del niple que está en la parte posterior de la carcasa superior de la sección de líquido. Español © Titan Tool Inc. Todos los derechos reservados. - Page 41 Apriete firmemente. 31. Rosque el conjunto de tubo del sifón/sifón en la válvula de retención y apriételo firmemente. Asegúrese de envolver las Español © Titan Tool Inc. Todos los derechos reservados.
-
Page 42: Servicio A La Sección De Líquidos
Mantenimiento de este manual.. La vara del pistón está desgastada. Reemplace el vástago del pistón siguiendo el procedimiento de “Servicio a la sección de líquidos” de la sección de Mantenimiento de este manual. Español © Titan Tool Inc. Todos los derechos reservados. -
Page 43: Mensajes De Error Del Sistema De Control Digi-Trac
Verifique el suministro de energía y corrija el problema. Vuelva a arrancar el pulverizador con el siguiente procedimiento de “Pintura” en la sección Operación de este manual. Español © Titan Tool Inc. Todos los derechos reservados. -
Page 44: Parts Listings
Parts List • Liste de pièces • Lista de piezas Main Assembly • Vue d’ensemble • Ensamblaje principal © Titan Tool Inc. All rights reserved. -
Page 45: Boîte D'engrenages
710-046 Inlet filter Filtre d’entrée Filtro de entrada 0551972 Surge suppressor (not shown, see Protection contre les surtensions (non Supresor de sobrecarga (no se muestra, schematic) présenté, voir le schéma) consulte el esquema) © Titan Tool Inc. All rights reserved. -
Page 46: Drive Assembly
Controlador de motor 770-099 Tie wrap Attache à tête d’équerre Amarras 9802266 Motor controller screw Vis de contrôleur de moteur Tornillo de controlador de motor 0522027 Capacitor assembly Ensemble capaciteur Conjunto de capacitor © Titan Tool Inc. All rights reserved. -
Page 47: Upright Cart
Washer Rondelle Arandela 0552538 Cart Chariot Carro 0294635 Plug Capuchon Tapa 9885571 Plug Capuchon Tapa 0295687 Wheel spacer Espaceur de roue Separador de rueda 670-109 Wheel Roue Rueda 800-019 Axle cap Chapeau Tapa © Titan Tool Inc. All rights reserved. -
Page 48: Fluid Section Assembly
© Titan Tool Inc. All rights reserved. - Page 49 (comprend les articles 3-4, 7-10, 13, 15, empaquetadura (incluye articulos 3-4, 17, 20 et 22) 7-10, 13, 15, 17, 20 y 22) 800-359 Piston insertion tool Outil d’insertion de piston Herramienta de inserción del pistón © Titan Tool Inc. All rights reserved.
-
Page 50: Filter Assembly
Raccord Conector 700-258 Bypass valve assembly, complete Soupape de dérivation, complet Conjunto de la válvula de derivación, (includes items 9-13) (comprend les articles 9 à 13) completo (incluye los elementos 9 a 13) © Titan Tool Inc. All rights reserved. -
Page 51: Low Rider Cart
Arandela 590-504 Handle sleeve Manche Manga de asa 9841504 Spring button Bouton d’enclenchement Botón, a presion 590-508 Roll pin Goupille rouleau Pasador de rollo 800-592 Handle assembly Ensemble de poignée Ensamblaje de mango © Titan Tool Inc. All rights reserved. -
Page 52: Siphon Set Assembly (Low Rider)
Etiqueta de la cubierta del motor 805-818 Warning label Etiqueta de la cubierta del motor Etiqueta de advertencia 805-853 Control panel cover with label Couvercle de panneau de contrôle avec Tapa de panel de control con etiqueta étiquette © Titan Tool Inc. All rights reserved. -
Page 53: Electrical Schematic
NOTa : Tous les travaux d’électricité doivent NOTa: Todo trabajo eléctrico debe performed by an authorized être effectués par le personnel d’un realizarlo un centro de service center. centre de service autorisé. servicio autorizado. © Titan Tool Inc. All rights reserved. -
Page 54: Accessories
Bypass valve assembly, complete Soupape de dérivation, complet Conjunto de la válvula de derivación, completo * Go to www.titantool.com for tip sizes / voir www.titantool.com pour les dimensions / visite www.titantool.com para conocer los tamaños © Titan Tool Inc. All rights reserved. -
Page 55: Product Registration
Enregistrement du produit Enregistrer votre appareil en ligne à www.titantool.com. registro del producto Registre su producto en línea en www.titantool.com. Serial Number Location • Emplacement du numéro de série • Ubicación del número de serie © Titan Tool Inc. All rights reserved. -
Page 56: Warranty
Titan Tool, Inc., (“Titan”) warrants that at the time of delivery to the original purchaser for use (“End User”), the equipment covered by this warranty is free from defects in material and workmanship. With the exception of any special, limited, or extended warranty published by Titan, Titan’s obligation under this warranty is limited to replacing or repairing without charge those parts which, to Titan’s reasonable satisfaction, are shown to be defective within twelve (12) months after...