Intermec PR2 User Manual
Hide thumbs
Also See for PR2:
- User manual (66 pages) ,
- Quick start manual (2 pages) ,
- Metal belt clip installation instructions (2 pages)
Table of Contents
Advertisement
Advertisement
Table of Contents

Related Manuals for Intermec PR2


Summary of Contents for Intermec PR2
- Page 1 PR 2 |PR 3 Mobile Receipt Printer User Manual...
- Page 2 Lynnwood, WA 98087 The information contained herein is provided solely for the purpose of allowing customers to operate and service Intermec-manufactured equipment and is not to be released, reproduced, or used for any other purpose without written permission of Intermec Inc.
- Page 3 Android and Windows Mobile devices. 6/2012 Revised to support firmware release 2.1. Included information about the Wi-Fi radio, IrDA radio, printer web page, Bluetooth passkey, and additional accessories. Also added Appendix B, “Printer Settings.” PR2 and PR3 Mobile Receipt Printer User Manual...
- Page 4 PR2 and PR3 Mobile Receipt Printer User Manual...
-
Page 5: Table Of Contents
About the PR2 and PR3 ........ - Page 6 Restore Default Settings Using PrintSet........35 PR2 and PR3 Mobile Receipt Printer User Manual...
- Page 7 Wireless 802.11 Security Settings ..........55 PR2 and PR3 Mobile Receipt Printer User Manual...
- Page 8 Contents viii PR2 and PR3 Mobile Receipt Printer User Manual...
-
Page 9: Before You Begin
Safety Information Your safety is extremely important. Read and follow all warnings and cautions in this document before handling and operating Intermec equipment. You can be seriously injured, and equipment and data can be damaged if you do not follow the safety warnings and cautions. -
Page 10: Product Identification
Technical Support portal and report a problem, go to www.hsmcontactsupport.com. For our latest contact information, see www.honeywellaidc.com/ locations. Warranty Information To understand the warranty for your Honeywell product, visit the Honeywell website at www.honeywellaidc.com and click Resources > Warranty. PR2 and PR3 Mobile Receipt Printer User Manual... -
Page 11: Product Service And Repair
ACSHSMTechnicalCommunications@honeywell.com. Who Should Read This Manual This document provides you with information about the features of the PR2 and PR3 printers, as well as how to configure, operate, maintain, and troubleshoot them. PR2 and PR3 Mobile Receipt Printer User Manual... - Page 12 Before You Begin PR2 and PR3 Mobile Receipt Printer User Manual...
-
Page 13: About The Printers
About the Printers This chapter introduces the PR2 and PR3 printers and includes descriptions of printer features and basic tasks. -
Page 14: About The Pr2 And Pr3
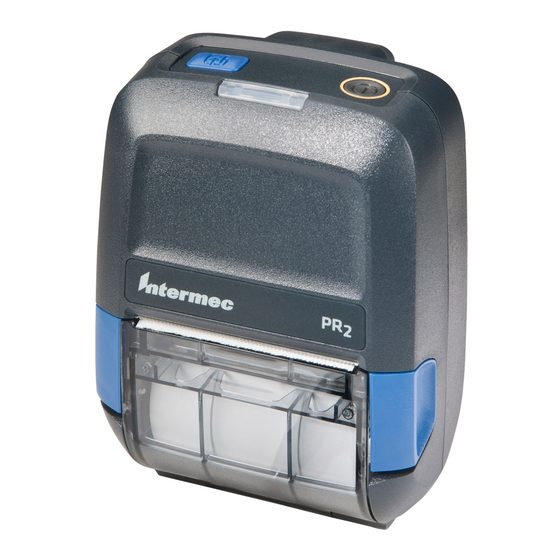
Chapter 1 — About the Printers About the PR2 and PR3 The PR2 and PR3 are small, durable mobile receipt printers that fit easily into your work environment. You can connect the printers to mobile computers, scanners, or desktop PCs. -
Page 15: Printer Features
Printer Features Use these illustrations to familiarize yourself with the PR2 and PR3 printers. Most of the illustrations in this manual show the PR3 printer, but the information is the same for the PR2 printer unless otherwise noted. Magnetic Stripe Reader... -
Page 16: About The Status Leds And Icons
Blinking green: 60% to 95% charged • Steady red: 0% to 60% charged • Blinking amber: Battery error • Steady amber: Battery is out of charging temperature range • Blinking red (not charging): Low battery PR2 and PR3 Mobile Receipt Printer User Manual... - Page 17 Note: While you use the printer, the LEDs and icons also turn on, turn off, or blink in different combinations to indicate additional status information, such as Power Mode or firmware upgrade status. PR2 and PR3 Mobile Receipt Printer User Manual...
-
Page 18: About The Buttons
You can also press and release the buttons in different sequences for different durations to perform additional printer operations, such as change power mode or print a test label. PR2 and PR3 Mobile Receipt Printer User Manual... -
Page 19: About The Battery
Note: For the printer to work, a battery must always be installed in the printer. Use Intermec Model 1013AB01 or 1013AB02 battery only. Use of another battery may present a risk of fire or explosion. The Model 1013AB01 or 1013AB02 battery may present a fire or chemical burn hazard if mistreated. -
Page 20: How To Charge The Battery
DX2 Dual Dock or DX4 Quad Dock Yes 6 hours DX2 Dual Dock or DX4 Quad Dock No 6 hours AE38 Vehicle Power Adapter 4 hours For more information, see the charging accessory instructions. PR2 and PR3 Mobile Receipt Printer User Manual... -
Page 21: About Printer Power Modes
Deep Sleep The printer is in a low power From Normal mode, press and consumption mode, and the hold the Power button for 2 radio is off. seconds. The three LEDs blink once. PR2 and PR3 Mobile Receipt Printer User Manual... -
Page 22: About Printer Command Languages
PrintSet 5.2 or later to set the command language. 1 Connect your printer to a desktop PC with a USB cable. 2 Download and install Intermec PrintSet 5.2 or later from the Intermec website at www.intermec.com. 3 Use PrintSet to add your printer to PrintSet and set the command language. -
Page 23: Load Media
2 If necessary, remove the empty media core from the media compartment. 3 Drop in a new roll of media. Make sure to orient the media roll so that the media curls toward the media door. PR2 and PR3 Mobile Receipt Printer User Manual... -
Page 24: Read Magnetic Stripe Information
Note: To read data from a card, you need an application running on your host PC. 1 Position the card so that the magnetic stripe faces the media door. PR2 and PR3 Mobile Receipt Printer User Manual... -
Page 25: Printer Options And Accessories
Belt Loop Provides a convenient way to carry the printer when you are not using it and allows you to quickly release the printer for easy accessibility. PR2 and PR3 Mobile Receipt Printer User Manual... - Page 26 Protective Boot The protective boot provides added protection to the printer. Thermal Printhead Cleaning The protective boot enhances the Swab ruggedness and durability of the printer. PR2 and PR3 Mobile Receipt Printer User Manual...
-
Page 27: Connect And Configure The Printer
Connect and Configure the Printer This chapter explains how to connect the printer to a desktop PC, wireless network, or USB device. This chapter also describes how to configure printer settings. -
Page 28: About Printer Drivers
Install Printer Drivers Use InterDriver to install Microsoft Windows printer driver software on your PC. 1 Open a web browser and go to www.intermec.com. 2 Select Support > Downloads. 3 Select InterDriver: a In the Product Category list, select Printers. -
Page 29: Connect The Printer With Usb
Windows detects your printer and displays a message, “Device driver software was not successfully installed.” 1 To navigate to the location of the InterDriver installation files, click Browse. The default location is C:\Intermec\InterDriver7. 2 Click Next. PR2 and PR3 Mobile Receipt Printer User Manual... -
Page 30: Install The Printer On A Pc With Microsoft Windows Xp
You can configure Wi-Fi communications: • from the printer web page. You need to know the printer IP address. • using Intermec PrintSet 5.2 or later through a USB connection to the printer. PR2 and PR3 Mobile Receipt Printer User Manual... -
Page 31: Configure Wi-Fi Communications From The Web Page
PC. 1 Connect your printer to a desktop PC with USB. 2 Download and install Intermec PrintSet 5.2 or later from the Intermec website at www.intermec.com. 3 Use the PrintSet online help to add your printer to PrintSet and configure the necessary wireless communications settings. -
Page 32: About Bluetooth Communications
Name (wireless printer language, which is XSim, CSim, or ESC/P), and Service Version (printer firmware version). You configure Bluetooth communications using PrintSet 5.2 or later through a USB connection to your host PC. PR2 and PR3 Mobile Receipt Printer User Manual... -
Page 33: Configure Bluetooth Communications Using Printset
PC. 1 Connect your printer to a desktop PC with a USB cable. 2 Download and install Intermec PrintSet 5.2 or later from the Intermec website at www.intermec.com. 3 Use PrintSet to add your printer to PrintSet and configure Bluetooth communications. -
Page 34: Pair An Android Mobile Device With Nfc
2 Tap NFC. 3 Turn on NFC: • In Windows Phone 8.1, turn on Tap to share. • In Windows Phone 8, tap Tap + Send, and then turn on NFC sharing. PR2 and PR3 Mobile Receipt Printer User Manual... -
Page 35: About Irda Communications
Wi-Fi network connection. You need to know the printer IP address. • Intermec PrintSet version 5.2 or later to communicate with the printer through a USB connection. PR2 and PR3 Mobile Receipt Printer User Manual... -
Page 36: About The Printer Web Page
Wi-Fi network. Note: If you are not using a DHCP network and you do not know your printer IP address, you must configure Wi-Fi settings using Intermec PrintSet 5.2 or later with a USB connection. -
Page 37: Configure The Printer Using Printset
PC. 1 Connect your printer to a desktop PC with a USB cable. 2 Download and install Intermec PrintSet 5.2 or later from the Intermec website at www.intermec.com. 3 Use PrintSet to add your printer to PrintSet and configure printer settings. - Page 38 Chapter 2 — Connect and Configure the Printer PR2 and PR3 Mobile Receipt Printer User Manual...
-
Page 39: Troubleshoot And Maintain The Printer
Troubleshoot and Maintain the Printer This section explains how to troubleshoot and maintain the printer. -
Page 40: Contact Customer Support
Firmware type and version • • Printer command language • Wireless or serial port settings • Installed options • Media settings • Ethernet settings • Bluetooth settings For our latest contact information, see www.honeywellaidc.com/ locations. PR2 and PR3 Mobile Receipt Printer User Manual... -
Page 41: How To Find The Printer Configuration And Serial Numbers
Wi-Fi network. Note: If you are not using a DHCP network and you do not know your printer IP address, you must configure Wi-Fi settings using Intermec PrintSet 5.2 or later with a USB connection. -
Page 42: Get Printer Information Using Printset
PC. 1 Connect your printer to a desktop PC with a USB cable. 2 Download and install Intermec PrintSet 5.2 or later from the Intermec website at www.intermec.com. 3 Use PrintSet to add your printer to PrintSet and view printer settings. - Page 43 USB Host Wireless 802.11 IP Selection Network Settings IP Address Netmask Default Router Name Server MAC Address SSID MODE WPA2 Authentication Country Code Roaming Access Point Signal Strength EAP TYPE Inner Authentication MSCHAPV2 PR2 and PR3 Mobile Receipt Printer User Manual...
-
Page 44: Print A Test Label
Power button. The blue Intermec Ready-to-Work™ indicator starts to blink. 3 Continue to hold the buttons until the Ready-to-Work indicator stays on solid (about 15 seconds). The printer prints a test label. PR2 and PR3 Mobile Receipt Printer User Manual... -
Page 45: Problems And Possible Solutions
Adjust the print contrast. Parts of the print out are missing. Clean the printhead. The Magnetic Stripe Reader LED The card was not successfully read. Try flashes red one time. swiping the card again. PR2 and PR3 Mobile Receipt Printer User Manual... -
Page 46: How To Restore Default Settings To The Printer
6 If you want the printer to print a message, make sure that media is installed in the printer. 7 Close the media door. When the process is complete, the printer automatically restarts. PR2 and PR3 Mobile Receipt Printer User Manual... -
Page 47: Restore Default Settings From The Printer Web Page
1 Connect your printer to a desktop PC with a USB cable. 2 Download and install Intermec PrintSet 5.2 or later from the Intermec website at www.intermec.com. 3 Use PrintSet to add your printer to PrintSet and restore the default settings to your printer. -
Page 48: About Firmware Upgrades
Wi-Fi network. Note: If you are not using a DHCP network and you do not know your printer IP address, you must configure Wi-Fi settings using Intermec PrintSet 5.2 or later with a USB connection. -
Page 49: Upgrade Firmware Using Printset
PC. 1 Connect your printer to a desktop PC with a USB cable. 2 Download and install Intermec PrintSet 5.2 or later from the Intermec website at www.intermec.com. 3 Use PrintSet to add your printer to PrintSet and upgrade printer firmware. -
Page 50: Replace The Platen Roller
If the platen roller becomes worn or damaged, you need to replace it. 1 Turn off the printer. 2 If necessary, disconnect the printer from power. 3 Lift both media release latches to open the media door. PR2 and PR3 Mobile Receipt Printer User Manual... - Page 51 Chapter 3 — Troubleshoot and Maintain the Printer 4 Carefully pry the platen roller out of the media door. 5 Install the new platen roller. PR2 and PR3 Mobile Receipt Printer User Manual...
- Page 52 Chapter 3 — Troubleshoot and Maintain the Printer PR2 and PR3 Mobile Receipt Printer User Manual...
-
Page 53: Specifications
Specifications This appendix lists specifications for the PR2 and PR3 printers. -
Page 54: Printer Specifications
-20 °C to 60 °C (-4 °F to 140 °F) battery): Charging Temperature: 0 °C to 40 °C (32 °F to 104 °F) Operating Humidity: 20% to 85% non-condensing Storage Humidity: 5% to 95% non-condensing PR2 and PR3 Mobile Receipt Printer User Manual... - Page 55 60 μm to 100 μm (2.36 mils to 4 mils) Core ID: 10 mm (0.4 in) Maximum Media OD: 40.64 mm (1.6 in) Supported Command Languages • ESC/P • CSim • XSim PR2 and PR3 Mobile Receipt Printer User Manual...
- Page 56 • Andale Mono Bold • Univers • Univers Bold • Univers Condensed Bold • Univers Extra Condensed • Letter Gothic • CG Times • CG Times Bold • OCR-A • OCR-B • Prestige Elite Bold PR2 and PR3 Mobile Receipt Printer User Manual...
- Page 57 • Europe multilingual (Western and Eastern) • Cyrillic • Arabic • Greek • Hebrew • Japanese • Polish • Thai • Korean • Traditional (Big 5) and Simplified (GB) • Chinese Supported Graphic File Type • PCX PR2 and PR3 Mobile Receipt Printer User Manual...
- Page 58 Appendix A — Specifications PR2 and PR3 Mobile Receipt Printer User Manual...
-
Page 59: Printer Settings
Printer Settings This appendix describes and provides default values for PR2 and PR3 settings. -
Page 60: General System Settings
Unit of Measure Selects the unit of measure (dots, Dots inches, or millimeters) used to define several printing parameters. Connection Selects the way PrintSet communicates with your printer: • Wireless 802.11 • PR2 and PR3 Mobile Receipt Printer User Manual... -
Page 61: Media And Printing Settings
Sets the length of the printable area 8000 measured from one edge of the label to the edge that is closest to the printhead. Unit of measurement is defined in the Unit of Measurement parameter. PR2 and PR3 Mobile Receipt Printer User Manual... -
Page 62: Bluetooth Settings
PrintSet version 5.2 or later. Bluetooth Settings Setting Description Default Connectable Determines if other Bluetooth Enable devices can connect to the printer. Device Address (read-only) The Bluetooth MAC address of the printer. PR2 and PR3 Mobile Receipt Printer User Manual... - Page 63 Reserve Determines if the printer is Disable exclusively reserved for one Bluetooth device. When enabled, the first Bluetooth device that connects with the printer locks out any other connection attempts. PR2 and PR3 Mobile Receipt Printer User Manual...
-
Page 64: Wireless 802.11 General Settings
Power Mode Specifies the power management Constant Awake setting for the radio: Mode • Constant Awake Mode • Fast Power Saving • Power Saving PR2 and PR3 Mobile Receipt Printer User Manual... -
Page 65: Wireless 802.11 Network Settings
Wireless 802.11 Network Settings Setting Description Default Default Router Specifies the IP address of a router 0.0.0.0 that is used when a device sends a packet to another subnet or to an unknown destination. PR2 and PR3 Mobile Receipt Printer User Manual... - Page 66 DHCP. • DHCP: The printer automatically receives its settings from the network through DHCP. • Manual: Manually configure the IP Address. PR2 and PR3 Mobile Receipt Printer User Manual...
-
Page 67: Wireless 802.11 Security Settings
Range is 8 to 64 characters. Network Key Index Selects the active network key to use None for WEP security. Range is 1 to 4. PR2 and PR3 Mobile Receipt Printer User Manual... - Page 68 Sets the certificate name that is on None Name 1 the primary authentication server. If this value is none, then the value for Server Common Name 2 is used.Range is 1 to 96 characters. PR2 and PR3 Mobile Receipt Printer User Manual...
- Page 69 CCKM only works in wireless networks using LEAP. Mixed Mode Determines if the printer can use Disable (Group = TKIP) either TKIP or AES for data encryption, depending on the configuration of the access point. PR2 and PR3 Mobile Receipt Printer User Manual...
- Page 70 Honeywell 16201 25th Avenue West Lynnwood, Washington 98087 U.S.A. www.honeywellaidc.com PR2 and PR3 Mobile Receipt Printer User Manual *935-047-003* P/N 935-047-003...