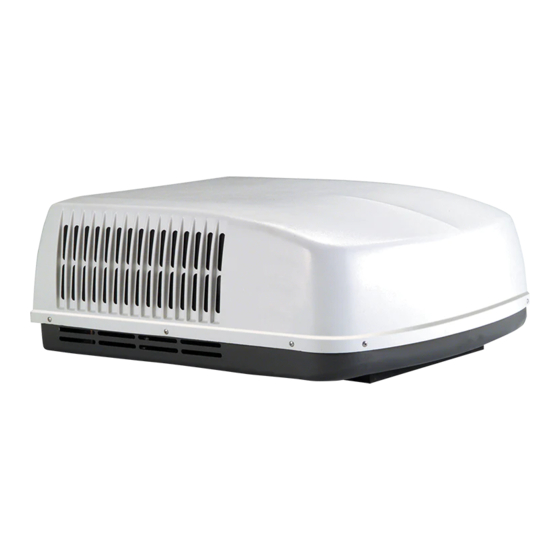
Dometic B3300 Installation & Operating Instructions Manual
Hide thumbs
Also See for B3300:
- Installation & operating instructions manual (12 pages) ,
- Installation & operating instructions manual (16 pages)
Table of Contents
Advertisement
INSTALLATION & OPERATING
INSTRUCTIONS
3314452.000
Form No. 3314452.000 7/12
©2012 Dometic, LLC
LaGrange, IN 46761
DuraSea Roof Top Air Conditioner
Description
Model
Air Conditioner
B3300
Read these instructions carefully. These
instructions MUST stay with this product.
RECORD THIS INFORMATION FOR FUTURE
REFERENCE:
Model Number
Serial Number
ADB Model Number
ADB Serial Number
Date Purchased
Roof Top Unit
Type
Use With Air Distribution Box (not included)
Model
3341P
3309278.004
Control
Integral Mechanical
TYPE
3341P701
Advertisement
Table of Contents

Summary of Contents for Dometic B3300
- Page 1 Use With Air Distribution Box (not included) Model Control Air Conditioner B3300 3341P 3309278.004 Integral Mechanical INSTALLATION & OPERATING TYPE INSTRUCTIONS 3341P701 3314452.000 Form No. 3314452.000 7/12 Read these instructions carefully. These ©2012 Dometic, LLC instructions MUST stay with this product. LaGrange, IN 46761...
-
Page 2: Table Of Contents
This unit can be installed by one person with brief help from additional personnel. Use the following procedure to ensure a properly installed, and properly functioning product. Dometic, LLC reserves the right to modify appearances and specifications without notice. TABLE OF CONTENTS INTRODUCTION ..................................2... -
Page 3: Document Symbols
● This product MUST be [installed / serviced] by a qualified service technician. ● Do NOT modify this product in any way. Modifica- tion can be extremely hazardous. ● Do NOT add any devices or accessories to this product except those specifically authorized in writing by Dometic, LLC. -
Page 4: Specifications
2 Unit - 5.0 kW Rating Plate 3313169.000 Height 333 mm Width 759 mm Depth 886 mm Weight 46.7 kg * Dometic Marine gives GENERAL guidelines for genera- tor requirements. To reduce start-up power draw by up to 65%, consider installing a Dometic SmartStart. -
Page 5: Installation Instructions
INSTALLATION INSTRUCTIONS Choosing Proper Location For Unit FIG. 2 This unit is specifically designed for installation on the roof of a boat. Mount only with front of unit facing the bow (the 508 mm 572 mm vented end should face aft). See (FIG. 4). When determining your cooling requirements, the following 64 mm should be considered:... -
Page 6: Wiring Requirements
INSTALLATION INSTRUCTIONS FIG. 3 FIG. 4 Lift And Place Rear Front Front Towards Bow Good-Rafters Good Location- Do Not Cut Roof Supported By Between Roof Structure Or Cross Beams Rafters Rafters Do Not Slide Frame Opening So It Won't Collapse When 19 mm Min. - Page 7 INSTALLATION INSTRUCTIONS 4. Remove upper duct from ceiling template and FIG. 8 locate it over blower discharge. Upper Discharge E dges WITHOUT flanges install toward Air Duct REAR and SIDE of opening. See (FIG. 6). Step a Remove At FIG.
-
Page 8: Wiring System
INSTALLATION INSTRUCTIONS c. Install Romex connector in junction box. See FIG. 10 (FIG. 13). d. Route the previously run 120 Vac power sup- ply wire through Romex connector and into the junction box. 152 mm leads are suffi- cient for connection to unit wires and ground Knobs screw. -
Page 9: Air Distribution Box Installation
INSTALLATION INSTRUCTIONS k. Plug the unit electrical cord into the mating FIG. 16 connector in the control box. See (FIG. 12). l. Insure the thermostat sensor tube remains in Wood the retainer clip. See (FIG. 12). Screw Air Distribution Box Installation 1. -
Page 10: Operating Instructions
OPERATING INSTRUCTIONS Controls Heating Operation (With Optional Electric Heater Installed) 1. The Selector Switch has 10 positions including “OFF”. This controls fan speed, optional heating T his electric heater will NOT replace a fur- mode, and cooling modes. See (FIG. 18). nace for heating your boat in cold weather. -
Page 11: Maintenance
MAINTENANCE Air Filter Heat Gain The ability of the air conditioner to maintain the desired 1. Periodically (a minimum of every 2 weeks of op- inside temperature depends on the heat gain of the boat. eration) remove the return air filter located be- Some preventative measures taken by the occupants of hind the return air grille and wash it with soap the boat can reduce the heat gain and improve the perfor-... -
Page 12: Service - Unit Does Not Operate
● Go to WWW.dometic.com/marinedealers or ● Check your fuse or circuit breaker to see if it is ● Call Dometic Marine at 1-800-542-2477 8:00 open. Insure fuse is not burnt, or circuit breaker AM to 5:00 PM Eastern Time, or 1-888-440- is “ON”... -
Page 13: Owner's Limited Warranty
Dometic reserves the right to improve its products, through changes in design or material without being obligated to incorporate such changes in products of prior manufacture. Dometic can make changes at any time in design, materials, or part of units of any one, model year, without obligation or liability to owners of units of the same year's model of prior manufacture. -
Page 14: Coverage Period
Dometic warranty as described in Section A. For proof of date put in service, Dometic will require a copy of the bill of sale of the Dometic equipment from the installer or new boat dealer to the original owner. -
Page 15: Table Of Warranty Periods
ABLE ARRANTY ERIODS DOMETIC DURASEA ROOFTOP AIR CONDITIONING Important Notes: 1. Warranty periods begin from the date of possession of the boat by the first owner if OEM installed or date of installation if dealer installed, but not to exceed three (3) years from date of production. The warranty is transferable and will carry the remainder of the original owner's warranty based on the original date of pur- chase or date of installation.


