
Related Manuals for Dell Vostro 200


Summary of Contents for Dell Vostro 200
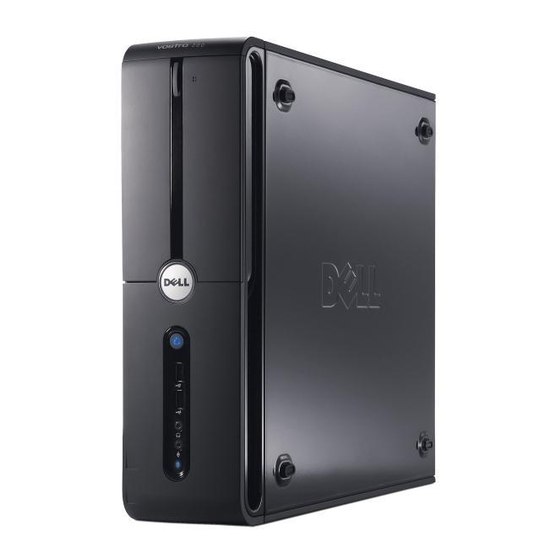
- Page 1 Dell™ Vostro™ 200 Owner’s Manual – Slim Tower Model DCSLF w w w . d e l l . c o m | s u p p o r t . d e l l . c o m...
-
Page 2: Abbreviations And Acronyms
Trademarks used in this text: Dell, the DELL logo, Vostro, TravelLite, and Strike Zone are trademarks of Dell Inc.; Bluetooth is a registered trademark owned by Bluetooth SIG, Inc. and is used by Dell under license; Microsoft, Windows, Outlook, and Windows Vista are either trademarks or registered trademarks of Microsoft Corporation in the United States and/or other countries. -
Page 3: Table Of Contents
Contents Finding Information ....Setting Up and Using Your Computer . . . Front View of the Computer ....Back View of the Computer . - Page 4 Power Management Options in Windows XP ..Standby Mode ....Hibernate Mode ....Power Options Properties .
- Page 5 Drive Problems ..... Optical drive problems ....Hard drive problems .
- Page 6 Hard Drive ..... Starting the Dell Diagnostics From the Drivers and Utilities Media ....
- Page 7 Removing and Installing Parts ..Before You Begin ....Recommended Tools ....Turning Off Your Computer .
- Page 8 Floppy Drive ....Media Card Reader ....Optical Drive .
- Page 9 CDs and DVDs ....Dell Technical Support Policy (U.S. Only) ..Definition of "Dell-Installed" Software and Peripherals .
- Page 10 Glossary ......185 Index ......Contents...
-
Page 11: Finding Information
NOTE: Additional information may ship with your computer. What Are You Looking For? Find it Here • Warranty information Dell™ Product Information Guide • Terms and Conditions (U.S. only) • Safety instructions • Regulatory information • Ergonomics information • End User License Agreement •... - Page 12 • Microsoft Windows License Label These labels are located on your computer. • Use the Service Tag to identify your computer when you use support.dell.com or contact support. • Enter the Express Service Code to direct your call when contacting support. NOTE:...
- Page 13 DSS utility. DSS provides critical Enter your Service Tag or product updates for your operating system and model. support for Dell™ 3.5-inch USB floppy In the Download Category drop-down drives, optical drives, and USB devices. menu, click All. DSS is necessary for correct operation of Select the operating system and your Dell computer.
- Page 14 What Are You Looking For? Find it Here • How to use Windows Vista™ Windows Help and Support Center • How to work with programs and files To access Windows Help and Support: • How to personalize my desktop • In Windows XP, click Start and click Help and Support.
-
Page 15: Setting Up And Using Your Computer
Setting Up and Using Your Computer Front View of the Computer Setting Up and Using Your Computer... - Page 16 Service Tag Use the Service Tag to identify your computer when you access the Dell Support website or call technical support. eject button for optical Press here to open or close the optical drive. drive FlexBay open/close Press here to open or close the floppy/media card...
-
Page 17: Back View Of The Computer
Back View of the Computer back panel connectors Plug USB, audio, and other devices into the appropriate connector. See "Back Panel Connectors" on page 18 for more information. card slots Access connectors for any installed PCI and PCI Express cards. power supply LED Indicates power availability for power supply. -
Page 18: Back Panel Connectors
power connector Insert the power cable. padlock rings Padlock rings are for attaching a commercially available theft-deterrent device. The padlock rings allows you to secure the computer cover to the chassis with a padlock to prevent unauthorized access to the inside of the computer. - Page 19 network adapter To attach your computer to a network or broadband device, connector connect one end of a network cable to either a network port or your network or broadband device. Connect the other end of the network cable to the network adapter connector on the back panel of your computer.
-
Page 20: Installing Your Computer In An Enclosure
microphone Use the pink connector to attach a personal computer connector microphone for voice or musical input into a sound or telephony program. On computers with a sound card, the microphone connector is on the card. side L/R surround Use the gray connector to provide enhanced surround connector audio for computers with 7.1 speakers. - Page 21 • If your computer is installed in a corner on a desk or under a desk, leave at least 5.1 cm (2 in) clearance from the back of the computer to the wall to permit the airflow required for proper ventilation. Setting Up and Using Your Computer...
-
Page 22: Setting Up A Printer
• Do not install your computer in an enclosure that does not allow airflow. Restricting the airflow impacts your computer’s performance, possibly causing it to overheat. Setting Up a Printer NOTICE: Complete the operating system setup before you connect a printer to the computer. -
Page 23: Printer Cable
Printer Cable Your printer connects to your computer with either a USB cable or a parallel cable. Your printer may not come with a printer cable, so if you purchase a cable separately, ensure that it is compatible with your printer and computer. If you purchased a printer cable at the same time you purchased your computer, the cable may arrive in the computer’s shipping box. -
Page 24: Playing Cds And Dvds
3 Turn on the printer and then turn on the computer. 4 Depending on your computer’s operating system, a printer wizard may be available to help you install the printer driver: ® In Windows XP, click Start→ Printers and Faxes→ Add a printer to start the Add Printer Wizard. - Page 25 To format CDs for storing data, to create music CDs, or to copy CDs, see the CD software that came with your computer. NOTE: Ensure that you follow all copyright laws when you create CDs. A CD player includes the following basic buttons: Play Move backward within the current track Pause...
-
Page 26: Adjusting The Volume
Adjusting the Volume NOTE: When the speakers are muted, you do not hear the CD or DVD playing. 1 Open the Volume Control window. 2 Click and drag the bar in the Volume Control column and slide it up or down to increase or decrease the volume. -
Page 27: Copying Cds And Dvds
CD-RW/DVD (combo) drive. NOTE: The types of CD or DVD drives offered by Dell may vary by country. The following instructions explain how to make an exact copy of a CD or DVD using Roxio Creator Plus - Dell Edition. You can also use Roxio Creator Plus for other purposes, such as creating music CDs from audio files stored on your computer or backing up important data. - Page 28 If you have two CD/DVD drives, select the drive into which you have • inserted your source CD or DVD, and then click Disc Copy. The computer copies the data from the source CD or DVD to the blank CD or DVD. Once you have finished copying the source CD or DVD, the CD or DVD that you have created automatically ejects.
- Page 29 Media Type Read Write Rewritable DVD-RW DVD+R DL DVD-R DL Maybe DVD-RAM Maybe Helpful Tips • After you start Roxio Creator Plus and open a Creator project, you can use ® ® Microsoft Windows Explorer to drag and drop files to a CD-R or CD-RW.
-
Page 30: Using A Media Card Reader (Optional)
Using a Media Card Reader (Optional) Use the Media Card Reader to transfer data directly to your computer. The Media Card Reader supports the following memory types: • xD-Picture Card • SmartMedia (SMC) • CompactFlash Type I and II (CF I/II) •... -
Page 31: Connecting Two Monitors
To use the Media Card Reader: 1 Check the media or card to determine the proper orientation for insertion. 2 Slide the media or card into the appropriate slot until it is completely seated in the connector. If you encounter resistance, do not force the media or card. Check the card orientation and try again. -
Page 32: Connecting One Monitor With A Vga Connector And One Monitor With A Dvi Connector
*May not be present on your computer optional DVI adapter DVI (white) connector TV-OUT connector VGA (blue) connector Connecting One Monitor With a VGA Connector and One Monitor With a DVI Connector 1 Follow the procedures in "Before You Begin" on page 99. 2 Connect the VGA connector on the monitor to the VGA (blue) connector on the back of the computer. -
Page 33: Changing The Display Settings
For information on changing the display settings for your graphics card, go to support.dell.com Power Management Options in Windows XP The Microsoft Windows XP power management features can reduce the amount of electricity your computer uses when it is on and you are not using it. -
Page 34: Hibernate Mode
Because hibernate mode requires a special file on your hard drive with enough disk space to store the contents of the computer memory, Dell creates an appropriately sized hibernate mode file before shipping the computer to you. -
Page 35: Power Options Properties
Power Options Properties Define your standby mode settings, hibernate mode settings, and other power settings in the Power Options Properties window. To access the Power Options Properties window: 1 Click Start → → → Control Panel Pick a category Performance and Maintenance. -
Page 36: Power Management Options In Windows Vista
If you want to change the default settings for a scheme, click the drop-down menu in the Turn off monitor, Turn off hard disks, System stand by, or System hibernates field, and then select a time-out from the displayed list. Changing the time-out for a scheme field permanently changes the default settings for that scheme, unless you click Save As and enter a new name for the changed scheme. -
Page 37: Standby Mode
• High Performance Dell has added a fourth, Dell-Recommended, mode that sets power management to the most typical settings for the majority of Dell customers. This is the active power plan. Standby Mode Standby mode is the default "off" state for Windows Vista. Standby conserves power by turning off the display and the hard drive after a time-out. -
Page 38: Hibernate Mode
Because hibernate mode requires a special file on your hard drive with enough disk space to store the contents of the computer memory, Dell creates an appropriately sized hibernate mode file before shipping the computer to you. If the computer's hard drive becomes corrupted, Windows Vista recreates the hibernate file automatically. - Page 39 To access the Power Plan Properties window: 1 Click Start and click Control Panel. 2 Under Pick a category, click System and Maintenance. 3 Under System and Maintenance, click Power Options. 4 This takes you to the main Select a Power Plan window. 5 In the Select A Power Plan window, you can change or modify power settings.
-
Page 40: Enabling Speedstep™ Technology
This section provides an overview of the RAID configuration that you might have selected when you purchased your computer. Although several RAID configurations are available, Dell offers only RAID level 1 for its Vostro computers. RAID level 1 configuration is recommended for the data integrity requirements of digital photography and audio. -
Page 41: Configuring Your Hard Drives For Raid
serial ATA RAID configured for RAID level 1 segment 1 segment 1 duplicated segment 2 segment 2 duplicated segment 3 segment 3 duplicated segment 4 segment 4 duplicated segment 5 segment 5 duplicated segment 6 segment 6 duplicated hard drive 1 hard drive 2 If a drive failure occurs, subsequent read and write operations are directed to the surviving drive. -
Page 42: Configuring For Raid Using The Intel ® Option Rom Utility
Utility. Both methods require that you set your computer to RAID-enabled mode before starting any of the RAID configuration procedures in this document. Setting Your Computer to RAID-Enabled Mode 1 Enter the system setup (see "Entering System Setup" on page 170). 2 Press the left- and right-arrow keys to highlight Drives tab. -
Page 43: Configuring For Raid Using The Intel ® Matrix Storage Manager
7 Select the desired capacity for the volume, and press <Enter>. The default value is the maximum available size. 8 Press <Enter> to create the volume. 9 Press <y> to confirm that you want to create the RAID volume. 10 Confirm that the correct volume configuration is displayed on the main Intel Option ROM screen. - Page 44 • You already have a two-hard drive computer configured into an array, but you still have some space left on the array that you want to designate as a second RAID volume. Creating a RAID 1 Volume NOTE: When you perform this operation, all data on the RAID drives will be lost. 1 Set your computer to RAID-enabled mode (see "Setting Your Computer to RAID-Enabled Mode"...
- Page 45 Deleting a RAID Volume NOTE: While this procedure deletes the RAID 1 volume, it also splits the RAID 1 volume into two non-RAID hard drives with a partition, and leaves any existing data files intact. Deleting a RAID 0 volume, however, destroys all data on the volume. ®...
- Page 46 6 From the drop-down box, select RAID 1 as the RAID level. NOTE: Select the hard drive that already has the data or operating system files that you want to maintain on the RAID volume as your source hard drive. 7 On the Select Source Hard Drive screen, double-click the hard drive from which you want to migrate, and click Next.
-
Page 47: Transferring Information To A New Computer
Rebuilding a Degraded RAID 1 Volume If your computer does not have a spare hard drive, and the computer has reported a degraded RAID 1 volume, you can manually rebuild the computer’s redundancy mirror to a new hard drive by performing the following steps: ®... - Page 48 NOTE: You can transfer information from an old computer to a new computer by directly connecting a serial cable to the input/output (I/O) ports of the two computers. To transfer data over a serial connection, you must access the Network Connections utility from the Control Panel and perform additional configuration steps, such as setting up an advanced connection and designating the host computer and the guest computer.
- Page 49 5 On the Select a transfer method screen, click the transfer method you prefer. 6 On the What do you want to transfer? screen, select the items you want to transfer and click Next. After the information has been copied, the Completing the Collection Phase screen appears.
- Page 50 When all of the settings and files have been applied, the Finished screen appears. 3 Click Finished and restart the new computer. NOTE: For more information about this procedure, search support.dell.com for document #154781 (What Are The Different Methods To Transfer Files From My Old ® ®...
-
Page 51: Setting Up A Home And Office Network
NOTE: Access to the Dell™ Knowledge Base document may not be available in certain countries. Transferring Information using Windows Vista The Windows Vista operating system provides the Easy Transfer wizard to move data from a source computer to a new computer. You can transfer data, such as: •... -
Page 52: Network Setup Wizard
network adapter connector network device network adapter connector on computer network cable Network Setup Wizard The Microsoft Windows operating system provides a Network Setup Wizard to guide you through the process of sharing files, printers, or an Internet connection between computers in a home or small office. Windows XP 1 Click Start, point to All Programs→... -
Page 53: Connecting To The Internet
Windows Vista 1 Click Start , and then click Connect to→ Set up a connection or network. 2 Select an option under Choose a connection option. 3 Click Next, and then follow the instructions in the wizard. For more information, access Help and Support, and use the search term network. -
Page 54: Setting Up Your Internet Connection
Setting Up Your Internet Connection To set up an Internet connection with a provided ISP desktop shortcut: 1 Save and close any open files, and exit any open programs. 2 Double-click the ISP icon on the Windows Vista desktop. 3 Follow the instructions on the screen to complete the setup. If you do not have an ISP icon on your desktop or if you want to set up an Internet connection with a different ISP, perform the steps in the following section. - Page 55 NOTE: If you do not know which type of connection to select, contact your ISP. 7 Use the setup information provided by your ISP to complete the setup. Windows Vista NOTE: Have your ISP information ready. If you do not have an ISP, the Connect to the Internet wizard can help you get one.
- Page 56 Setting Up and Using Your Computer...
-
Page 57: Solving Problems
(see "Replacing the Battery" on page 143). If the battery still does not work properly, contact Dell (see "Contacting Dell" on page 183). -
Page 58: Drive Problems
— See "Restoring Your Operating System" on page 91. U N T H E E L L I A G N O S T I C S — See "Starting the Dell Diagnostics From Your Hard Drive" on page 84. Solving Problems... -
Page 59: Optical Drive Problems
Optical drive problems NOTE: High-speed optical drive vibration is normal and may cause noise, which does not indicate a defect in the drive or the CD or DVD. NOTE: Because of different regions worldwide and different disc formats, not all DVD titles work in all DVD drives. -
Page 60: Hard Drive Problems
Hard drive problems H E C K I S K — Windows XP Click Start and click My Computer. Right-click Local Disk C:. Click Properties→ Tools→ Check Now. Click Scan for and attempt recovery of bad sectors and click Start. Windows Vista Start Click... - Page 61 H E C K T H E T E L E P H O N E L I N E C O N N E C T I O N H E C K T H E T E L E P H O N E J A C K O N N E C T T H E M O D E M D I R E C T L Y T O T H E T E L E P H O N E W A L L J A C K S E A D I F F E R E N T T E L E P H O N E L I N E —...
- Page 62 E R I F Y T H A T T H E M O D E M I S C O M M U N I C A T I N G W I T H I N D O W S —...
-
Page 63: Error Messages
Error Messages If the message is not listed, see the documentation for the operating system or the program that was running when the message appeared. F I L E N A M E C A N N O T C O N T A I N A N Y O F T H E F O L L O W I N G C H A R A C T E R S : \ / : * ? “... -
Page 64: Keyboard Problems
P E R A T I N G S YS T E M N O T F O U N D — Contact Dell (see "Contacting Dell" on page 183). Keyboard Problems CAUTION: Before you begin any of the procedures in this section, follow the safety instructions in the Product Information Guide. -
Page 65: Lockups And Software Problems
Lockups and Software Problems CAUTION: Before you begin any of the procedures in this section, follow the safety instructions in the Product Information Guide. The computer does not start up Ensure that the power cable is firmly connected to the computer and to the electrical outlet. -
Page 66: A Program Is Designed For An Earlier Microsoft Windows Operating System
® ® A program is designed for an earlier Microsoft Windows operating system U N T H E R O G R A M O M P A T I B I L I T Y I Z A R D —... -
Page 67: Other Software Problems
Other software problems H E C K T H E S O F T W A R E D O C U M E N T A T I O N O R C O N T A C T T H E S O F T W A R E M A N U F A C T U R E R F O R T R O U B L E S H O O T I N G I N F O R M A T I O N —... -
Page 68: Media Card Reader Problems
Media Card Reader Problems O D R I V E L E T T E R I S A S S I G N E D — When Windows detects the Media Card Reader, the device is automatically assigned a drive letter as the next logical drive after all other physical drives in the system. -
Page 69: Memory Problems
• Run the Dell Diagnostics (see "Dell Diagnostics" on page 84). F Y O U E X P E R I E N C E O T H E R M E M O R Y P R O B L E M S —... -
Page 70: Mouse Problems
Mouse Problems CAUTION: Before you begin any of the procedures in this section, follow the safety instructions in the Product Information Guide. L E A N T H E M O U S E — See "Mouse" on page 179 for instructions on cleaning the mouse. -
Page 71: Network Problems
E I N S T A L L T H E M O U S E D R I V E R — See "Reinstalling Drivers and Utilities" on page 88. U N T H E A R D W A R E R O U B L E S H O O T E R —... -
Page 72: Power Problems
Power Problems CAUTION: Before you begin any of the procedures in this section, follow the safety instructions in the Product Information Guide. F T H E P O W E R L I G H T I S O F F —... -
Page 73: Printer Problems
L I M I N A T E I N T E R F E R E N C E — Some possible causes of interference are: • Power, keyboard, and mouse extension cables • Too many devices on a power strip •... -
Page 74: Scanner Problems
E R I F Y T H A T T H E P R I N T E R I S R E C O G N I Z E D B Y I N D O W S — Windows XP Click Start→... -
Page 75: Sound And Speaker Problems
H E C K T H E C A B L E C O N N E C T I O N S — • See the scanner documentation for cable connection information. • Ensure that the scanner cables are securely connected to the scanner and the computer. -
Page 76: No Sound From Headphones
N S U R E T H A T T H E S U B W O O F E R A N D T H E S P E A K E R S A R E T U R N E D O N —... -
Page 77: Video And Monitor Problems
N S U R E T H A T T H E C O R R E C T A U D I O S O L U T I O N I S E N A B L E D I N T H E B I O S S E T U P P R O G R A M... -
Page 78: If The Screen Is Difficult To Read
If the screen is difficult to read H E C K T H E M O N I T O R S E T T I N G S — See the monitor documentation for instructions on adjusting the contrast and brightness, demagnetizing (degaussing) the monitor, and running the monitor self-test. -
Page 79: Troubleshooting Tools
Troubleshooting Tools Power Lights CAUTION: Before you begin any of the procedures in this section, follow the safety instructions in the Product Information Guide. The power button light (bi-color LED) located on the front of the computer illuminates and blinks or remains solid to indicate different states: •... -
Page 80: Beep Codes
This beep code tells you that the computer encountered a possible motherboard failure. If your computer beeps during startup: 1 Write down the beep code. 2 Run the Dell Diagnostics to identify a more serious cause (see "Dell Diagnostics" on page 84). Troubleshooting Tools... - Page 81 If available, install good memory of the same type into your computer (see "Installing Memory" on page 112). If the problem persists, contact Dell. Possible motherboard failure Contact Dell. RAM Read/Write failure Ensure that no special memory module/memory connector placement requirements exist (see "Memory...
-
Page 82: System Messages
D I S K D R I V E F A I L U R E — Possible hard disk drive failure during HDD POST. Check cables or swap hard disks. See "Contacting Dell" on page 183 for assistance. A R D D I S K D R I V E R E A D F A I L U R E —... - Page 83 O T I M E R T I C K I N T E R R U P T — A chip on the system board might be malfunctioning or motherboard failure. See "Contacting Dell" on page 183 for assistance.
-
Page 84: Dell Diagnostics
Start the Dell Diagnostics from your hard drive or from the Drivers and Utilities media. Starting the Dell Diagnostics From Your Hard Drive The Dell Diagnostics is located on a hidden diagnostic utility partition on your hard drive. -
Page 85: Starting The Dell Diagnostics From The Drivers And Utilities Media
<Enter>. 5 Type 1 to start the CD menu and press <Enter> to proceed. 6 Select Run the 32 Bit Dell Diagnostics from the numbered list. If multiple versions are listed, select the version appropriate for your computer. 7 When the Dell Diagnostics Main Menu appears, select the test you want to run. - Page 86 The Service Tag for your computer is located at the top of each test screen. If you contact Dell, technical support will ask for your Service Tag. 4 If you run a test from the Custom Test or Symptom Tree option, click the applicable tab described in the following table for more information.
-
Page 87: Drivers
Allows you to customize the test by changing the test settings. 5 When the tests are complete, close the test screen to return to the Main Menu screen. To exit the Dell Diagnostics and restart the computer, close the Main Menu screen. -
Page 88: Identifying Drivers
Reinstalling Drivers and Utilities NOTICE: The Dell Support website at support.dell.com and your Drivers and Utilities media provide approved drivers for Dell computers. If you install drivers obtained from other sources, your computer might not work correctly. Using Windows Device Driver Rollback... - Page 89 Windows XP 1 Click Start and click Control Panel. 2 Under Pick a Category→ Performance and Maintenance→ System→ System Properties→ Hardware→ Device Manager. 3 Right-click the device for which the new driver was installed, then click Properties. 4 Click Driver and click Roll Back Driver. Windows Vista 1 Click Start →...
- Page 90 5 At the Welcome Dell System Owner screen, click Next. NOTE: The Drivers and Utilities media displays drivers only for hardware that came installed in your computer. If you installed additional hardware, the drivers for the new hardware might not be displayed by the Drivers and Utilities media. If those drivers are not displayed, exit the Drivers and Utilities media program.
-
Page 91: Restoring Your Operating System
• Dell PC Restore by Symantec (available in Windows XP) and Dell Factory Image Restore (available in Windows Vista) returns your hard drive to the operating state it was in when you purchased the computer. Both permanently delete all data on the hard drive and remove any programs installed after you received the computer. -
Page 92: Using Microsoft Windows System Restore
NOTE: The procedures in this document were written for the Windows default view, so they may not apply if you set your Dell computer to the Windows Classic view. Starting System Restore NOTICE: Before you restore the computer to an earlier operating state, save and close any open files and exit any open programs. -
Page 93: Using Dell Pc Restore And Dell Factory Image Restore
If possible, back up the data before using these options. Use PC Restore or Dell Factory Image Restore only if System Restore did not resolve your operating system problem. - Page 94 NOTICE: Removing Dell PC Restore from the hard drive permanently deletes the PC Restore utility from your computer. After you have removed Dell PC Restore, you will not be able to use it to restore your computer operating system. Troubleshooting Tools...
- Page 95 Dell PC Restore enables you to restore your hard drive to the operating state it was in when you purchased your computer. It is recommended that you do not remove PC Restore from your computer, even to gain additional hard- drive space.
-
Page 96: Using The Operating System Media
User name field, then click OK. 5 Click Dell Factory Image Restore. NOTE: Depending upon your configuration, you may need to select Dell Factory Tools, then Dell Factory Image Restore. The Dell Factory Image Restore welcome screen appears. 6 Click Next. -
Page 97: Troubleshooting Software And Hardware Problems
The Operating System media provides options for reinstalling Windows XP. The options can overwrite files and possibly affect programs that are installed on your hard drive. Therefore, do not reinstall Windows XP unless a Dell technical support representative instructs you to do so. - Page 98 Windows XP 1 Click Start and click Help and Support. 2 Type hardware troubleshooter in the Search field and click the arrow to start the search. 3 Click Hardware Troubleshooter in the Search Results list. 4 In the Hardware Troubleshooter list, click I need to resolve a hardware conflict on my computer, and click Next.
-
Page 99: Removing And Installing Parts
• You have performed the steps in "Turning Off Your Computer" on page 100 and "Before Working Inside Your Computer" on page 100. You have read the safety information in the Dell™ Product Information Guide. • • A component can be replaced or—if purchased separately—installed by performing the removal procedure in reverse order. -
Page 100: Turning Off Your Computer
NOTICE: Only a certified service technician should perform repairs on your computer. Damage due to servicing that is not authorized by Dell is not covered by your warranty. NOTICE: When you disconnect a cable, pull on its connector or on its pull-tab, not on the cable itself. -
Page 101: Removing The Computer Cover
NOTICE: To disconnect a network cable, first unplug the cable from your computer and then unplug the cable from the network device. 1 Disconnect all telephone or network cables from the computer. 2 Disconnect your computer and all attached devices from their electrical outlets. 3 Press the power button to ground the system board. -
Page 102: Removing The Support Bracket
computer cover screws (2) 4 Release the computer cover by pulling it away from the front of the computer and lifting it up. 5 Set the cover aside in a secure location. Removing the Support Bracket CAUTION: Before you begin any of the procedures in this section, follow the safety instructions in the Product Information Guide. - Page 103 6 Set it aside in a secure location. support bracket cable clamp card retention release lever card retention bracket support bracket hinge tabs Removing and Installing Parts...
-
Page 104: Inside View Of Your Computer
Inside View of Your Computer CAUTION: Before you begin any of the procedures in this section, follow the safety instructions in the Product Information Guide. 1 power supply hard drive support bracket 4 optical drive floppy drive or media reader Removing and Installing Parts... -
Page 105: System Board Components
System Board Components processor socket processor fan memory module (CPU) connector (CPU_FAN) connectors (DIMM_1) memory module memory module memory module connectors (DIMM_2) connectors (DIMM_3) connectors (DIMM_4) Removing and Installing Parts... - Page 106 main power connector floppy drive connector battery socket (ATX_POWER) (FLOPPY) 10 serial ATA drive 11 serial ATA drive 12 CMOS jumper (CLEAR connectors (SATA0) connectors (SATA1) CMOS) 13 password jumper 14 front panel connector 15 serial ATA drive (CLEAR_PW) (F_PANEL) connectors (SATA4) 16 front USB connector 17 serial ATA drive...
-
Page 107: Power Supply Dc Connector Pin Assignments
Power Supply DC Connector Pin Assignments DC Power Connector P1 13 14 15 16 17 18 19 20 21 22 23 24 9 10 11 12 Removing and Installing Parts... - Page 108 Pin Number Signal name Wire Color Wire Size 3.3 V Orange 20 AWG 3.3 V Orange 20 AWG Black 20 AWG 20 AWG Black 20 AWG 20 AWG Black 20 AWG Gray 22 AWG 5 V AUX Purple 20 AWG +12 V Yellow 20 AWG...
- Page 109 DC Power Connector P2 Pin Number Signal Name 18-AWG Wire Black Black +12 VADC Yellow +12 VADC Yellow DC Power Connectors P3, P5, and P6 Pin Number Signal name 18-AWG Wire +3.3 VDC Orange Black +5 VDC Black +12 VBDC White Removing and Installing Parts...
- Page 110 DC Power Connector P4 Pin Number Signal Name 22-AWG Wire +5 VDC Black Black +12 VADC Yellow DC Power Connector P7 Signal Name 18-AWG Number Wire Black Black +3.3 VDC Orange +5 VDC +12 VDC Yellow Removing and Installing Parts...
-
Page 111: Memory
Memory You can increase your computer memory by installing memory modules on the system board. Your computer supports DDR2 memory. For additional information on the type of memory supported by your computer, see "Memory" on page 165. NOTICE: Do not install ECC or buffered memory modules. Only unbuffered, non- ECC memory is supported. -
Page 112: Installing Memory
Dell. If possible, do not pair an original memory module with a new memory module. Otherwise, your computer may not start properly. - Page 113 1 Follow the procedures in "Before You Begin" on page 99. 2 Press the securing clip at each end of the memory module connector. memory connector closest securing clips (2) from processor (DIMM_1) connector 3 Align the notch on the bottom of the module with the crossbar in the connector.
-
Page 114: Removing Memory
NOTICE: To avoid damage to the memory module, press the module straight down into the connector while you apply equal force to each end of the module. 4 Insert the module into the connector until the module snaps into position. If you insert the module correctly, the securing clips snap into the cutouts at each end of the module. -
Page 115: Cards
You can do so by touching an unpainted metal surface on the computer chassis. Your Dell™ computer provides the following slots for PCI and PCI Express cards: • One PCI Express x16 card slot (SLOT1) •... - Page 116 • If you are removing but not replacing a card, see "Removing a PCI/PCI Express Card" on page 120. • If you are replacing a card, remove the current driver for the card from the operating system. Installing a PCI/PCI Express Card 1 Follow the procedures in "Before You Begin"...
- Page 117 5 If you are replacing a card that is already installed in the computer, remove the card. If necessary, disconnect any cables connected to the card. • For PCI card, grasp the card by its top corners, and ease it out of its connector.
- Page 118 1 alignment bar fully-seated card not fully-seated card 4 bracket within bracket caught alignment guide slot outside of slot 8 Replace the support bracket (see "Replacing the Support Bracket" on page 161) and then press down the card retention bracket to seat it on its slot.
- Page 119 NOTICE: Do not route card cables over or behind the cards. Cables routed over the cards can prevent the computer cover from closing properly or cause damage to the equipment. NOTICE: To connect a network cable, first plug the cable into the network device and then plug it into the computer.
- Page 120 13 If you installed an add-in network adapter and want to disable the integrated network adapter: Enter system setup (see "System Setup" on page 170), go to Onboard Devices and select Integrated NIC, and then change the setting to Off. Connect the network cable to the add-in network adapter’s connectors.
-
Page 121: Bezel
8 Replace the computer cover, reconnect the computer and devices to electrical outlets, and then turn them on. 9 Remove the card’s driver from the operating system. 10 If you removed a sound card: Enter system setup (see "System Setup" on page 170), go to Onboard Devices and select Integrated Audio and then change the setting to On. -
Page 122: Removing The Bezel
Removing the Bezel 1 Follow the procedures in "Before You Begin" on page 99. 2 Remove the computer cover (see "Removing the Computer Cover" on page 101). bottom tabs (3) top tabs (3) bezel tab slots 3 Grasp and lift the top tabs one at a time to release the bezel from the front panel. -
Page 123: Replacing The Bezel
Replacing the Bezel 1 Align and insert the bottom tabs into the front panel hinges. 1 bottom tabs (3) top tabs (3) bezel 2 Rotate the bezel toward the computer until the three top tabs snap into place on the front panel. Removing and Installing Parts... -
Page 124: Drives
Drives Your computer supports a combination of these devices: • Up to two serial ATA hard drives • One optional floppy drive or an optional Media Card Reader • One optical drive 1 power supply hard drive support bracket 4 optical drive floppy drive or Media Reader Recommended Drive Cable Connections... -
Page 125: Connecting Drive Cables
Connecting Drive Cables When you install a drive, you connect two cables—a DC power cable and a data cable—to the back of the drive. 1 power cable power input connector data cable Drive Interface Connectors The drive cable connectors are keyed for correct insertion. Properly align the cable connector key on the cable and the drive before connecting. -
Page 126: Connecting And Disconnecting Drive Cables
Connecting and Disconnecting Drive Cables When connecting and disconnecting a serial ATA data cable, disconnect the cable using the pull-tab. The serial ATA interface connectors are keyed for correct insertion; that is, a notch or a missing pin on one connector matches a tab or a filled-in hole on the other connector. - Page 127 1 hard drive serial ATA data cable power cable 4 system board connector securing tab shoulder screws (4) 6 Press in on the securing tab on the side of the drive and slide the drive up and out. 7 If removing this drive changes the drive configuration, then be sure to reflect these changes in system setup.
- Page 128 Installing a Hard Drive 1 Follow the procedures in "Before You Begin" on page 99. 2 Remove the computer cover (see "Removing the Computer Cover" on page 101). 3 Remove the support bracket (see "Removing the Support Bracket" on page 102). 4 Check the documentation for the drive to verify that it is configured for your computer.
- Page 129 10 Replace the support bracket (see "Replacing the Support Bracket" on page 161). 11 Replace the computer cover (see "Replacing the Computer Cover" on page 162). NOTICE: To connect a network cable, first plug the cable into the network port or device and then plug it into the computer.
- Page 130 second hard drive (optional) shoulder screws (4) 6 Connect the power and data cables to the drive. 7 Connect the data cable to the system board. 8 Slide the hard drive into the hard drive bay until it snaps in place. 9 Check all cables to be certain that they are properly connected and firmly seated.
-
Page 131: Floppy Drive
Floppy Drive CAUTION: Before you begin any of the procedures in this section, follow the safety instructions in the Product Information Guide. CAUTION: To guard against electrical shock, always unplug your computer from the electrical outlet before removing the cover. NOTE: If you are adding a floppy drive, see "Installing a Floppy Drive"... - Page 132 7 Press the two spring clamps and slide out the floppy drive along with the FlexBay drive cage from the FlexBay slot. 8 Remove the two screws holding the floppy drive in the FlexBay drive cage. screws (2) FlexBay drive cage 9 Lift the floppy drive to separate it from the FlexBay drive cage.
- Page 133 Installing a Floppy Drive 1 Follow the procedures in "Before You Begin" on page 99. 2 Remove the computer cover (see "Removing the Computer Cover" on page 101). 3 Remove the bezel (see "Removing the Bezel" on page 122). 4 Remove the optical drive (see "Removing an Optical Drive" on page 140). 5 Remove the FlexBay drive insert (see "Removing the FlexBay Drive Panel Insert"...
- Page 134 8 Tighten the two screws on the other side to secure the floppy drive in the FlexBay drive cage. 9 Slide the FlexBay drive cage along with the floppy drive in the FlexBay slot till it snaps in place. 10 Attach the power and data cables to the floppy drive. 11 Connect the other end of the data cable to the connector labeled "FLOPPY"...
- Page 135 17 Enter system setup (see "System Setup" on page 170) and select the appropriate Diskette Drive option. 18 Verify that your computer works correctly by running the Dell Diagnostics (see "Dell Diagnostics" on page 84). Removing the FlexBay Drive Panel Insert 1 Gently press on the release lever outward to release the lock.
-
Page 136: Media Card Reader
Replacing the FlexBay Drive Panel Insert drive panel insert (optional) slot 1 Slide the drive panel insert tab into the slot on the bezel. 2 Push the panel insert towards the bezel till it snaps in place. NOTE: To comply with FCC regulations, it is recommended that you replace the drive panel insert whenever the floppy drive is removed from the computer. - Page 137 3 Remove the bezel (see "Removing the Bezel" on page 122). 4 Remove the optical drive (see "Removing an Optical Drive" on page 140). 5 Disconnect the FlexBay USB cable and the power cable from the back of the Media Card Reader and from the internal USB connector on the system board (see "System Board Components"...
- Page 138 10 If you are not reinstalling the Media Card Reader, replace the drive panel insert, as needed. 11 Replace the optical drive (see "Installing an Optical Drive" on page 141). 12 Replace the bezel (see "Replacing the Bezel" on page 123). 13 Replace the computer cover (see "Replacing the Computer Cover"...
-
Page 139: Optical Drive
Not present on all computers. Media Card Reader 12 Replace the optical drive (see "Installing an Optical Drive" on page 141). 13 Replace the bezel (see "Replacing the Bezel" on page 123). 14 Replace the computer cover (see "Replacing the Computer Cover" on page 162). - Page 140 Removing an Optical Drive 1 Follow the procedures in "Before You Begin" on page 99. 2 Remove the computer cover (see "Removing the Computer Cover" on page 101). 3 Remove the bezel (see "Removing the Bezel" on page 122). 4 Disconnect the optical drive data cable from the system board connector. 5 Disconnect the power cable and the optical drive data cable from the back of the drive.
- Page 141 8 Replace the bezel (see "Replacing the Bezel" on page 123). 9 Replace the computer cover (see "Replacing the Computer Cover" on page 162). 10 Connect your computer and devices to electrical outlets, and then turn them on. 11 Configure the drives in system setup (see "Entering System Setup" on page 170).
- Page 142 11 Enter system setup (see "System Setup" on page 170) and select the appropriate Drive option. 12 Verify that your computer works correctly by running the Dell Diagnostics (see "Dell Diagnostics" on page 84). Removing and Installing Parts...
-
Page 143: Battery
Battery Replacing the Battery CAUTION: Before you begin any of the procedures in this section, follow the safety instructions in the Product Information Guide. NOTICE: To prevent static damage to components inside your computer, discharge static electricity from your body before you touch any of your computer’s electronic components. - Page 144 battery release lever battery (positive side) 8 Replace the computer cover (see "Replacing the Computer Cover" on page 162). 9 Replace the support bracket (see "Replacing the Support Bracket" on page 161). NOTICE: To connect a network cable, first plug the cable into the network device and then plug it into the computer.
-
Page 145: Power Supply
Power Supply CAUTION: Before you begin any of the procedures in this section, follow the safety instructions located in the Product Information Guide. NOTICE: To prevent static damage to components inside your computer, discharge static electricity from your body before you touch any of your computer’s electronic components. - Page 146 power supply screws (3) 8 Slide out the power supply and lift it out. 9 Slide the replacement power supply toward the back of the computer. 10 Replace and tighten all screws that secure the power supply to the back of the computer chassis.
-
Page 147: I/O Panel
15 Replace the computer cover (see "Replacing the Computer Cover" on page 162). 16 Connect your computer and devices to an electrical outlet, and turn them on. 17 Verify that the computer works correctly by running the Dell Diagnostics (see "Dell Diagnostics" on page 84). I/O Panel CAUTION: Before you begin any of the procedures in this section, follow the safety instructions in the Product Information Guide. -
Page 148: Installing The I/O Panel
5 Replace the computer cover (see "Replacing the Computer Cover" on page 162). 6 Connect your computer and devices to an electrical outlet, and turn them 7 Verify that the computer works correctly by running the Dell Diagnostics (see "Dell Diagnostics" on page 84). Removing and Installing Parts... -
Page 149: Processor Fan
I/O panel Processor Fan CAUTION: Before you begin any of the procedures in this section, follow the safety instructions in the Product Information Guide. CAUTION: To guard against electrical shock, always unplug your computer from the electrical outlet before opening the cover. CAUTION: The heat sink assembly, power supply, and other components may be very hot during normal operation. -
Page 150: Removing The Processor Fan/Heat Sink Assembly
Removing the Processor Fan/Heat Sink Assembly NOTICE: Do not touch the fan blades when you are removing the processor fan/heat sink assembly. This could damage the fan. 1 Follow the procedures in "Before You Begin" on page 99. 2 Remove the computer cover (see "Removing the Computer Cover" on page 101). -
Page 151: Installing The Processor Fan/Heat Sink Assembly
Installing the Processor Fan/Heat Sink Assembly NOTICE: When reinstalling the fan, ensure that you do not pinch the wires that run between the system board and the fan. 1 Align the captive screws on the processor fan/heat sink assembly to the four metal screw hole projections on the system board. -
Page 152: Processor
Processor CAUTION: Before you begin any of the procedures in this section, follow the safety instructions located in the Product Information Guide. Removing the Processor 1 Follow the procedures in "Before You Begin" on page 99. 2 Remove the computer cover (see "Removing the Computer Cover" on page 101). -
Page 153: Installing The Processor
processor cover processor socket release lever NOTICE: When replacing the processor, do not touch any of the pins inside the socket or allow any objects to fall on the pins in the socket. 5 Gently remove the processor from the socket. Leave the release lever extended in the release position so that the socket is ready for the new processor. - Page 154 NOTICE: When replacing the processor, do not touch any of the pins inside the socket or allow any objects to fall on the pins in the socket. 1 Follow the procedures in "Before You Begin" on page 99. 2 Unpack the new processor, being careful not to touch the underside of the processor.
- Page 155 1 processor cover 2 tab 3 processor 4 processor socket 5 center cover latch 6 release lever 7 front alignment-notch 8 processor pin-1 indicator 9 rear alignment notch 9 Clean the thermal grease from the bottom of the heat sink. NOTICE: Ensure that you apply new thermal grease.
-
Page 156: Chassis Fan
Chassis Fan CAUTION: Before you begin any of the procedures in this section, follow the safety instructions in the Product Information Guide. CAUTION: To guard against electrical shock, always unplug your computer from the electrical outlet before opening the cover. CAUTION: The heat sink assembly, power supply, and other components may be very hot during normal operation. - Page 157 screw 4 Slide the chassis fan towards the front of the computer and lift it up. Removing and Installing Parts...
-
Page 158: Replacing The Chassis Fan
Replacing the Chassis Fan 1 Follow the procedures in "Before You Begin" on page 99. screw 2 Remove the computer cover (see "Removing the Computer Cover" on page 101). 3 Slide the chassis fan in place towards the back of the computer. 4 Tighten the screw to secure the chassis fan. -
Page 159: System Board
System Board Removing the System Board CAUTION: To guard against electrical shock, always unplug your computer from the electrical outlet before opening the cover. CAUTION: The heat sink assembly, power supply, and other components may be very hot during normal operation. Be sure that they have had sufficient time to cool before you touch them. -
Page 160: Installing The System Board
System Board Screws screws (8) system board Place the system board assembly that you just removed next to the replacement system board to compare and ensure they are identical. Installing the System Board 1 Gently align the board into the chassis and slide it toward the back of the computer. -
Page 161: Replacing The Support Bracket
7 Replace the computer cover (see "Replacing the Computer Cover" on page 162). 8 Connect your computer and devices to an electrical outlet, and turn them on. 9 Verify that the computer works correctly by running the Dell Diagnostics (see "Dell Diagnostics" on page 84). Replacing the Support Bracket CAUTION: Before you begin any of the procedures in this section, follow the safety instructions located in the Product Information Guide. -
Page 162: Replacing The Computer Cover
1 support bracket card retention release card retention bracket lever Replacing the Computer Cover CAUTION: Before you begin any of the procedures in this section, follow the safety instructions located in the Product Information Guide. 1 Ensure that all cables are connected, and fold cables out of the way. 2 Ensure that no tools or extra parts are left inside the computer. - Page 163 5 Ensure that the cover is seated correctly. 6 Replace and tighten the two screws that secure the computer cover. computer cover tab slot screws (2) computer cover 7 Move the computer to the upright position. NOTICE: To connect a network cable, first plug the cable into the network device and then plug it into the computer.
- Page 164 Removing and Installing Parts...
-
Page 165: Appendix
Appendix Specifications Processor ® Processor type Intel Core™ 2 Duo processor ® ® Intel Pentium Dual-Core processor ® ® Intel Celeron processor Level 2 (L2) cache At least 512 KB pipelined-burst, eight-way set associative, writeback SRAM Memory Type 667-MHz, 800-MHz DDR2 SDRAM Memory connectors four Memory capacities... - Page 166 Audio Type Realtec ALC888 (7.1 Channel audio) Expansion Bus Bus type PCI 2.3 PCI Express 1.0A SATA 1.0 and 2.0 USB 2.0 Bus speed PCI: 133 MB/s PCI Express: x1 slot bidirectional speed - 500 MB/s x16 slot bidirectional speed - 8GB/s SATA: 1.5 Gbps and 3.0 Gbps USB: 480 Mbps high speed, 12 Mbps full speed, 1.2 Mbps low speed...
- Page 167 Drives Externally accessible: one 3.5-inch drive bay (FlexBay) one 5.25-inch drive bay Internally accessible two 3.5-inch drive bays Available devices two 3.5-inch Serial ATA hard drives and one 5.25-inch Serial ATA CD-ROM, CD-RW, DVD-ROM, DVD-RW, or combo drive (optional) 3.5-inch floppy drive (optional) or Media Card Reader (optional) Connectors External connectors:...
- Page 168 Connectors Processor one 775-pin connector Memory four 240-pin connectors Power 12V one 4-pin connector Power one 24-pin connector Controls and Lights Front of computer: Power button push button Power light blue light — Blinking blue in sleep state; solid blue for power-on state amber light —...
- Page 169 Power Voltage (see the safety 115/230 VAC, 50/60 Hz, 6A/3A instructions located in the Product Information Guide for important voltage setting information) Coin cell battery 3-V CR2032 lithium coin cell Physical Height 36.2 cm (14.2 inches) Width 10.0 cm (3.9 inches) Depth 43.5 cm (17.1 inches) Weight...
-
Page 170: System Setup
Certain changes can make your computer work incorrectly. Entering System Setup 1 Turn on (or restart) your computer. 2 When the blue DELL™ logo appears, press <F2> immediately. If you wait too long and the operating system logo appears, continue to ®... - Page 171 Options List — This Option Field — This field contains information field appears on the about each option. In this field you can view your left side of the current settings and make changes to your settings. system setup window. Use the right and left arrow keys to highlight an The field is a option.
-
Page 172: System Setup Options
System Setup Options NOTE: Depending on your computer and installed devices, the items listed in this section may not appear, or may not appear exactly as listed. System Info Shows the BIOS version number and date information BIOS Info Lists system information such as the computer name, and System Info other system-specific information. - Page 173 Off; On (On by default) Boot Up NumLock Status Boot Device Configuration Used to set the device priority of removable devices like Removable Device USB floppy drives. The items displayed are dynamically Priority updated according to the removable devices connected. Used to set the device priority of hard drives.
-
Page 174: Boot Sequence
Enabled or Disabled (Disabled by default) Onboard LAN Boot IDE; RAID; AHCI (IDE by default) SATA Mode Power Management Setup S1(POS); S3(STR) (S3(STR) by default) ACPI Suspend Type Disabled; Enabled (Disabled by default) Quick Resume On; Off (On by default) Remote Wake Up Enabled;... - Page 175 You can use this feature, for example, to tell the computer to boot from the CD drive so that you can run the Dell Diagnostics on the Dell Drivers and Utilities media, but you want the computer to boot from the hard drive when the diagnostic tests are complete.
-
Page 176: Clearing Forgotten Passwords
Changing Boot Sequence for Future Boots 1 Enter system setup (see "Entering System Setup" on page 170). 2 Use the arrow keys to highlight the Boot Sequence menu option and press <Enter> to access the menu. NOTE: Write down your current boot sequence in case you want to restore it. 3 Press the up- and down-arrow keys to move through the list of devices. -
Page 177: Clearing Cmos Settings
4 Remove the 2-pin jumper plug from pins 2 and 3 and fix it on pins 1 and 2. 5 Wait for approximately five seconds to clear the password. 6 Remove the 2-pin jumper plug from pins 1 and 2 and replace it on pins 2 and 3 to enable the password feature. -
Page 178: Flashing The Bios
The BIOS may require flashing when an update is available or when replacing the system board. 1 Turn on the computer. 2 Locate the BIOS update file for your computer at the Dell Support website at support.dell.com. 3 Click Download Now to download the file. -
Page 179: Computer, Keyboard, And Monitor
Computer, Keyboard, and Monitor CAUTION: Before you clean your computer, disconnect the computer from the electrical outlet. Clean your computer with a soft cloth dampened with water. Do not use liquid or aerosol cleaners, which may contain flammable substances. • Use a vacuum cleaner with a brush attachment to gently remove dust from the slots and holes on your computer and from between the keys on the keyboard. -
Page 180: Floppy Drive
Dell, as well as the verification of appropriate functionality of the computer and all Dell-installed hardware. -
Page 181: Definition Of "Dell-Installed" Software And Peripherals
All Dell-standard components included in a Custom Factory Integration (CFI) project are covered by the standard Dell limited warranty for your computer. However, Dell also extends a parts replacement program to cover all nonstandard, third-party hard- ware components integrated through CFI for the duration of the computer’s service... - Page 182 NOTICE: The FCC regulations provide that changes or modifications not expressly approved by Dell Inc. could void your authority to operate this equipment. These limits are designed to provide reasonable protection against harmful interference in a residential installation. However, there is no guarantee that interference will not occur in a particular installation.
-
Page 183: Contacting Dell
NOTE: If you do not have an active Internet connection, you can find contact information on your purchase invoice, packing slip, bill, or Dell product catalog. Dell provides several online and telephone-based support and service options. Availability varies by country and product, and some services may not be available in your area. - Page 184 Appendix...
- Page 185 Glossary Terms in this Glossary are provided for informational purposes only and may or may not describe features included with your particular computer. AC — alternating current — The form of electricity that powers your computer when you plug the AC adapter power cable in to an electrical outlet. ACPI —...
- Page 186 understand what effect these settings have on the computer, do not change them. Also referred to as system setup. bit — The smallest unit of data interpreted by your computer. Blu-ray Disc™ (BD)— An optical storage technology offering storage capacity of up to 50 GB, full 1080p video resolution (HDTV required), and as many as 7.1 channels of native, uncompressed surround sound.
- Page 187 CD-RW — CD rewritable — A rewritable version of a CD. Data can be written to a CD-RW disc, and then erased and written over (rewritten). CD-RW drive — A drive that can read CDs and write to CD-RW (rewritable CDs) and CD-R (recordable CDs) discs.
- Page 188 DIMM — dual in-line memory module — A circuit board with memory chips that connects to a memory module on the system board. DIN connector — A round, six-pin connector that conforms to DIN (Deutsche Industrie-Norm) standards; it is typically used to connect PS/2 keyboard or mouse cable connectors.
- Page 189 ExpressCards. ExpressCards support both the PCI Express and USB 2.0 standard. Express Service Code — A numeric code located on a sticker on your Dell™ computer. Use the Express Service Code when contacting Dell for assistance. Express Service Code service may not be available in some countries.
- Page 190 Fahrenheit — A temperature measurement scale where 32° is the freezing point and 212° is the boiling point of water. FBD — fully-buffered DIMM — A DIMM with DDR2 DRAM chips and an Advanced Memory Buffer (AMB) that speeds communication between the DDR2 SDRAM chips and the system.
- Page 191 hard drive — A drive that reads and writes data on a hard disk. The terms hard drive and hard disk are often used interchangeably. heat sink — A metal plate on some processors that helps dissipate heat. hibernate mode — A power management mode that saves everything in memory to a reserved space on the hard drive and then turns off the computer.
- Page 192 IrDA — Infrared Data Association — The organization that creates international standards for infrared communications. IRQ — interrupt request — An electronic pathway assigned to a specific device so that the device can communicate with the processor. Each device connection must be assigned an IRQ.
- Page 193 — A bay that supports devices such as optical drives, a second battery, or a Dell TravelLite™ module. memory — A temporary data storage area inside your computer. Because the data in...
- Page 194 MP — megapixel — A measure of image resolution used for digital cameras. ms — millisecond — A measure of time that equals one thousandth of a second. Access times of storage devices are often measured in ms. network adapter — A chip that provides network capabilities. A computer may include a network adapter on its system board, or it may contain a PC Card with an adapter on it.
- Page 195 PCI Express — A modification to the PCI interface that boosts the data transfer rate between the processor and the devices attached to it. PCI Express can transfer data at speeds from 250 MB/sec to 4 GB/sec. If the PCI Express chip set and the device are capable of different speeds, they will operate at the slower speed.
- Page 196 read-only — Data and/or files you can view but cannot edit or delete. A file can have read-only status if: • It resides on a physically write-protected floppy disk, CD, or DVD. • It is located on a network in a directory and the system administrator has assigned rights only to specific individuals.
- Page 197 Service Tag — A bar code label on your computer that identifies your computer when you access Dell Support at support.dell.com or when you call Dell for customer service or technical support.
- Page 198 The number of colors and resolution that a program displays depends on the capabilities of the monitor, the video controller and its drivers, and the amount of video memory installed in the computer. S-video TV-out — A connector used to attach a TV or digital audio device to the computer.
- Page 199 UPS — uninterruptible power supply — A backup power source used when the electrical power fails or drops to an unacceptable voltage level. A UPS keeps a computer running for a limited amount of time when there is no electrical power. UPS systems typically provide surge suppression and may also provide voltage regulation.
- Page 200 turned on, the computer is infected when it reads the boot sectors of the floppy disk expecting to find the operating system. If the computer is infected, the boot virus may replicate itself onto all the floppy disks that are read or written in that computer until the virus is eradicated.
- Page 201 ZIF — zero insertion force — A type of socket or connector that allows a computer chip to be installed or removed with no stress applied to either the chip or its socket. Zip — A popular data compression format. Files that have been compressed with the Zip format are called Zip files and usually have a filename extension of .zip.
- Page 202 Glossary...
- Page 203 65 boot sequence, 174 conflicts changing, 175-176 software and hardware option settings, 174 incompatibilities, 97 booting contacting Dell, 183 to a USB device, 175 copying CDs general information, 27 helpful tips, 29 how to, 27 cards copying DVDs...
- Page 204 58 contacting, 183 removing floppy, 131 support policy, 180 removing hard drive, 126 support site, 13 removing optical drive, 140 Dell Diagnostics, 84 second hard drive, 129 serial ATA, 126 diagnostics beep codes, 80 DVD drive Dell, 84 problems, 59...
- Page 205 60 problems, 64 removing, 126 hardware beep codes, 80 conflicts, 97 labels Dell Diagnostics, 84 Microsoft Windows, 12 Hardware Troubleshooter, 97 Service Tag, 12, 16 hibernate mode, 34, 36, 38 Media Card Reader installing, 136, 138 I/O panel...
- Page 206 modem problems, 60 password monitor clearing, 176 blank, 77 jumper, 176 clone mode, 33 PC Restore, 93 connect DVI, 31-32 PCI cards connect TV, 31-32 installing, 116 connect two, 31-32 removing, 120 connect VGA, 31-32 display settings, 33 phone numbers, 183 extended desktop mode, 33 playing CDs and DVDs, 24 hard to read, 78...
- Page 207 180 computer crashes, 65-66 troubleshooting tips, 57 computer stops responding, 65 volume adjusting, 76 conflicts, 97 Product Information Guide, 11 Dell Diagnostics, 84 Program Compatibility drives, 58 Wizard, 66 DVD drive, 59 e-mail, 60 error messages, 63...
- Page 208 Hardware Troubleshooter, 97 video, 165 restore to previous state, 92 tips, 57 standby mode, 33, 37 Starting the Dell Diagnostics connect to computer, 31-32 From the Drivers and Utilities CD, 85 Starting the Dell Diagnostics From Your Hard Drive, 84...
- Page 209 Windows XP Device Driver Rollback, 89 volume hibernate mode, 34 adjusting, 76 PC Restore, 93 standby mode, 33 wizards Files and Settings Transfer warranty information, 11 Wizard, 47 Network Setup Wizard, 52 Windows Program Compatibility Files and Settings Transfer Wizard, 66 Wizard, 47 Network Setup Wizard, 52 Windows Vista...
- Page 210 Index...