Miele DA2210 Operating And Installation Instructions
Ventilation system
Hide thumbs
Also See for DA2210:
- Installation instructions manual (19 pages) ,
- Dimension manual (1 page) ,
- Operating and installation instructions (44 pages)

Related Manuals for Miele DA2210


Summary of Contents for Miele DA2210
- Page 1 Operating and Installation Instructions Ventilation System DA 2280 DA 2210 en - US, CA To prevent accidents and machine damage, read these instructions before installation or use. M.-Nr. 06 921 100...
-
Page 2: Table Of Contents
Contents IMPORTANT SAFETY INSTRUCTIONS....... . . 3 Functional description ..........7 Guide to the hood . -
Page 3: Important Safety Instructions
Read these Operating Instructions carefully before installing or using the Ventilation System. This appliance is intended for residential use only. Use the appliance only for its intended purpose. The manufacturer cannot be held responsible for damages caused by improper use of the hood. - Page 4 However, under certain conditions it may be possible for installation in these applications. Please contact the nearest Miele dealer or the Technical Service Department with specific requirements. Before servicing or cleaning the unit,...
- Page 5 , WARNING - TO REDUCE THE RISK OF A COOKTOP GREASE FIRE: Never leave surface units unattended at high settings. Boilovers cause smoking and greasy spillovers may ignite. Heat oils slowly on low or medium settings. Always turn the hood on when cooking at a high heat.
- Page 6 IMPORTANT SAFETY INSTRUCTIONS Installation , WARNING To reduce the risk of fire only use metal ductwork. Provided a larger distance is not given by the manufacturer of the cooktop, follow the minimum safety distances between a cooktop and the bottom of the hood: –...
-
Page 7: Functional Description
The ventilation hood offers two modes of operation: Air extraction The air is drawn in and cleaned by the grease filters and directed outside. The hood comes equipped with a non-return flap. This flap automatically closes when the hood is turned off so that no exchange of outside air and room air can occur. -
Page 8: Guide To The Hood
Guide to the hood... -
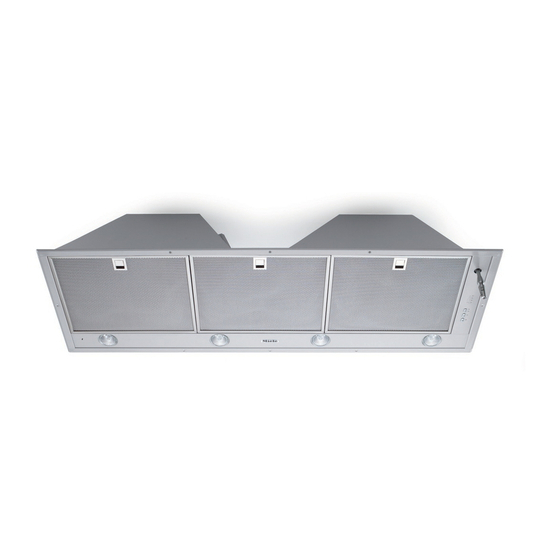
Page 9: Guide To The Hood
a Control panel b Joystick The fan and light can be operated with the joystick. c Overhead lighting d Charcoal filters optional accessory for recirculation mode DA 2280: 2 filters DA 2210: 4 filters e Grease filters f Fan power selection g Delayed Shut Down This button activates the Delayed Shut Down feature. -
Page 10: Operation
Operation Joystick The joystick controls the fan power and overhead lighting. Turning on the fan ^ Press the joystick once to the right. The fan runs at power level "2" and the second indicator of the fan power scale lights. Selecting the power level ^ Press the joystick to the right, to increase the fan speed. -
Page 11: Delayed Shut Down
Automatically switching back to the "Intensive" setting The intensive level "4" can be programmed to automatically switch back to level "3" after 10 minutes. ^ Turn the fan and the lights off. ^ Press and hold the Delay Shut Down button for 10 secs. -
Page 12: Overhead Lighting
Operation Overhead lighting The overhead lighting can be turned on and off independently of the fan. ^ To turn the light on or off, press the joystick either once backwards or once forwards. Dimming the lighting The brightness of the lighting can be adjusted. -
Page 13: Filter Timers
Filter timers Grease filter timer A timer monitors the hours of operation. The indicator for the grease filter will light after 30 hours of fan operation. The grease filters must then be cleaned. After the grease filters have been cleaned and put back in place, the grease filter timer must be reset. -
Page 14: Reprogramming The Timers
Operation Reprogramming the timers The grease filter timer is preset to 30 hours. This time can be lengthened or shortened to 20, 30, 40 or 50 hours. – A time of 20 hours should be programmed in kitchens with frequent pan or deep frying. –... - Page 15 Reprogramming the charcoal filter timer The active charcoal filters can only be used in recirculation mode and cannot be used to exhaust fumes. The charcoal filter timer is not preset. Before using the hood in recirculation mode, the charcoal filter timer must be programmed.
-
Page 16: Cleaning And Care
Cleaning and care Before cleaning or servicing the hood, disconnect it from the power supply by either removing the fuse, unplugging it from the outlet or manually "tripping" the circuit breaker. Cleaning the casing Warning: Never use abrasive cleansers, scouring pads, steel wool or caustic (oven) cleaners on the hood. - Page 17 Cleaning the grease filters ^ By hand: use a scrub brush with a solution of warm water and mild detergent. Do not use pure detergent, aggressive all purpose cleaners, oven sprays or limescale removers. They could destroy the filters. ^ In a dishwasher: place the filters vertically in the lower basket, making sure that the spray arm is not blocked.
-
Page 18: Active Charcoal Filter
The active charcoal filters will be replaced in the canopy above the grease filters. Replacement active charcoal filters can be ordered from Miele. ^ Remove the grease filters to access the charcoal filters. See "Cleaning and Care - Grease filters". -
Page 19: Changing The Light Bulb
Changing the light bulb Before changing the light bulb, disconnect the hood from the power supply by either removing the fuse, unplugging it, or manually "tripping" the circuit breaker. When in use halogen bulbs become extremely hot, and they can burn your hands. -
Page 20: After Sales Service
Miele’s Service department, Extended Service Contracts offered by other providers for Miele products will not be recognized by Miele. Our goal is to prevent unauthorized (and untrained) service personnel from working on your Miele products, possibly doing further damage to them, you and/or your home. -
Page 21: Installation Instructions
Installation Instructions... -
Page 22: Caring For The Environment
Caring for the environment Disposal of packing material The cardboard box and packing materials protect the appliance during shipping. They have been designed to be biodegradable and recyclable. Please recycle. To prevent suffocation of children, ensure that any plastic wrappings, bags, etc. -
Page 23: Electrical Data
Canadian Electrical Code. If there is any question concerning the electrical connection of this appliance to your power supply, please consult a licensed electrician or contact Miele's Technical Service Department. WARNING: THIS APPLIANCE MUST BE GROUNDED Electrical data Grounding Instructions This appliance must be grounded. - Page 24 Electrical data Important The hood comes equipped with a 4 ft (1.2 m) power cord with a NEMA 5-15 molded plug for connection to a 120 VAC, 60 Hz, 15 A power outlet. DA 2280 Maximum load ....450 W Fan.
-
Page 25: Appliance Dimensions
Appliance dimensions DA 2280... - Page 26 Appliance dimensions DA 2210...
- Page 27 *Cut out dimensions A depth T, min. 1" (25 mm), is necessary in the rear of the cabinet. Appliance dimensions Distance between cooktop and hood Do not install this exhaust hood over cooktops burning solid fuel. Provided a larger distance is not given by the manufacturer of the cooktop, follow the minimum safety distances between a cooktop and...
-
Page 28: Installation
Installation Non-return flap The hood comes equipped with a non-return flap. This flap automatically closes when the hood is turned off so that no exchange of outside air and room air can occur. Uninstall the non-return flap when your exhaust system is equipped with a non-return flap or if the hood is used in recirculation mode. -
Page 29: Reducing Collar
Reducing collar ^ DA 2280: The hood is designed for use with a 6" (150 mm) diameter exhaust hose. If using 5" (125 mm) ducting, place the supplied reducing collar into the exhaust connection (see "Air extraction"). ^ DA 2210: The hood has two exhaust connections for use with two 6"... -
Page 30: Recirculation Mode
It can be ordered from your Miele dealer or the Technical Service Dept. It contains a 6" (150 mm) diameter hose, a grille and a hose clamp to secure the hose at the exhaust connection of the hood. -
Page 31: Installing The Joystick
Installing the joystick ^ Insert the lower half of the desired joystick into the socket, loosely secure it in place with the included screw and spring washer. The screws have different lengths. Make sure the respective screw for the desired joystick is used. ^ Turn the printed part of the joystick so that the m-symbol faces front. -
Page 32: Electrical Connection
Installation Electrical connection Before connecting the appliance to power read the "Important Safety Instructions". ^ Plug in the power cord. Before using the appliance remove the grease filters and remove the protective foil from the filter frame. Insert the grease filters back into place. -
Page 33: Air Extraction
" per foot (1 cm per meter) to prevent condensation dripping into the appliance. – If the exhaust is ducted through an outside wall, a Miele Telescopic Wall Vent can be used. -
Page 34: Condensate Trap
Air extraction – If the exhaust is ducted into an inactive flue, the air must be expelled parallel to the flow direction of the flue. Never connect an exhaust hood to an active chimney, dryer vent, flue, or room venting ductwork. Seek professional advice before connecting an exhaust hood vent to an existing, inactive chimney or vent... - Page 36 Alteration rights reserved / 4607 M.-Nr. 06 921 100 / 03 For the most updated manual see the Miele web site.