Advertisement
Quick Links
INSTALLATION INSTRUCTIONS FOR PART 99-8223
99-8223/
99-8223S
KIT FEATURES
• DIN Radio With Pocket Provision
• ISO Mount Radio with Pocket Provision
• Painted To Match Factory Dash
99-8223= BLACK
99-8223S= SILVER
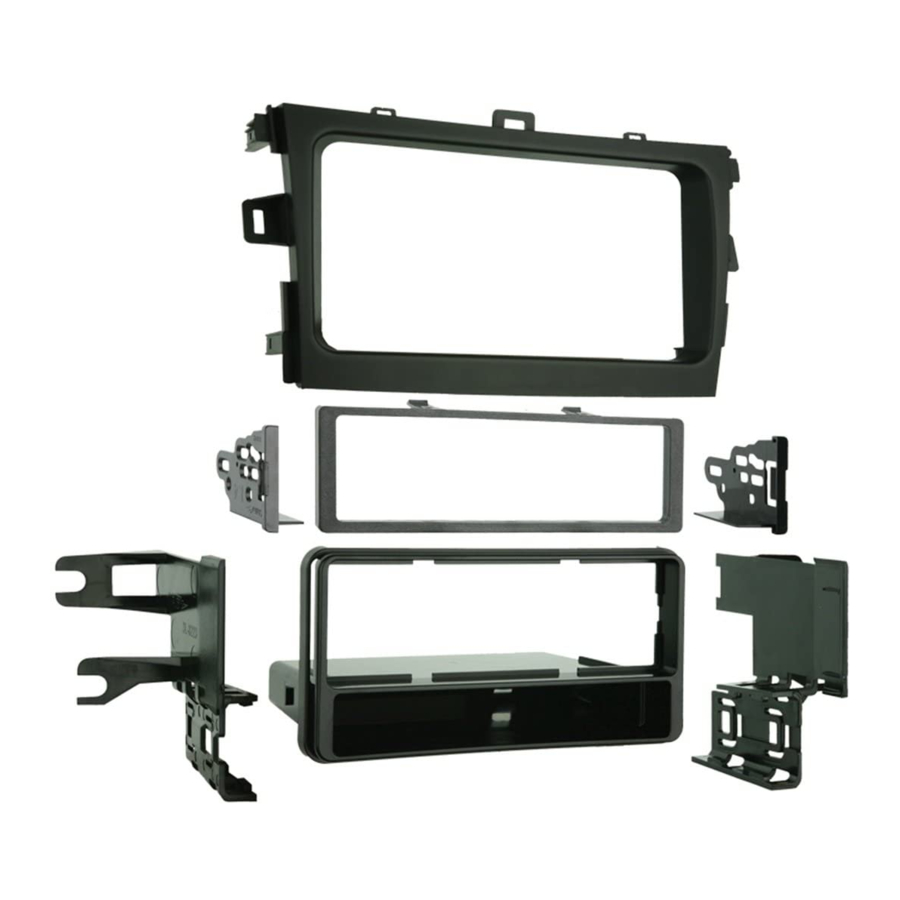
KIT COMPONENTS
• A) Radio Housing • B) Radio Housing Trim Plate • C) Radio Housing Brackets
•D) ISO Brackets • E) ISO Trim Plate
A
B
D
1-800-221-0932
© COPYRIGHT 2010 METRA ELECTRONICS CORPORATION
APPLICATIONS
Toyota Corolla
2009-10
C
Harness & Antenna Connections (sold separately)
• 70-1761 Toyota Harness 87-up
E
• TYTO-01 Toyota Amp Interface 03-up
TOOLS REQUIRED:
Small Flat Blade Screwdriver/ Panel Removal Tool
• Phillips Screwdriver
www.metraonline.com
Advertisement

Related Manuals for Metra Electronics 99-8223


Summary of Contents for Metra Electronics 99-8223
- Page 1 INSTALLATION INSTRUCTIONS FOR PART 99-8223 Toyota Corolla 99-8223/ 99-8223S KIT FEATURES • DIN Radio With Pocket Provision • ISO Mount Radio with Pocket Provision • Painted To Match Factory Dash 99-8223= BLACK 99-8223S= SILVER KIT COMPONENTS • A) Radio Housing • B) Radio Housing Trim Plate • C) Radio Housing Brackets •D) ISO Brackets •...
- Page 2 Final Assembly ......... . . 4 *Note: Refer also to the instructions included with the aftermarket radio. 99-8223 NOWLEDGE IS Enhance your installation and fabrication skills by enrolling in the most recognized and respected mobile electronics school in our industry.
-
Page 3: Toyota Corolla 2009-10
B) Remove (4) 10 MM bolts securing the radio. (Figure C) Remove (4) plastic clips from the back of the factory radio. (Retain the clips for re-use during kit assembly.) Continue to kit assembly. 99-8223 DASH DISASSEMBLY... -
Page 4: Din Radio With Pocket Provision
Slide the DIN cage into the Radio Housing and secure by bending the metal locking tabs outward. (Figure C) Slide the aftermarket radio into the cage until it snaps into place. (Figure D) Continue to final assembly. 99-8223 KIT ASSEMBLY... -
Page 5: Iso Mount Radio With Pocket Provision
(Figure C) Slide the radio into the radio housing until it snaps into place. (Figure D) Snap the Trim plate onto the front of the Radio Housing. (Figure D) Continue to final assembly. 99-8223 KIT ASSEMBLY... -
Page 6: Final Assembly
Re-connect the negative battery terminal and test the unit for proper operation. Reassemble in reverse order of disassembly using the 99-8223 Radio Housing Trim Plate in place of the factory radio trim panel. - Page 7 99-8223 NOTES...
- Page 8 99-8223 INSTRUCTIONS www.metraonline.com 1-800-221-0932 REV. 04/29/10 © COPYRIGHT 2004-2010 METRA ELECTRONICS CORPORATION INST99-8223...