Table of Contents
Advertisement
Quick Links
Broan-NuTone LLC. 926 West State Street, Hartford, WI 53027
NuTone, Inc., 4820 Red Bank Road, Cincinnati, OH 45227
Broan-NuTone Canada, INC.1140 Tristar Drive, Mississauga, Ontario, L5T 1H9
63000
Series
ENGLISH......................................3
FRANÇAIS.................................12
ESPAÑOL..................................21
- 1 -
Advertisement
Table of Contents

Related Manuals for Rangemaster 63000 Series


Summary of Contents for Rangemaster 63000 Series
- Page 1 63000 Series ENGLISH........3 FRANÇAIS.........12 ESPAÑOL........21 Broan-NuTone LLC. 926 West State Street, Hartford, WI 53027 NuTone, Inc., 4820 Red Bank Road, Cincinnati, OH 45227 Broan-NuTone Canada, INC.1140 Tristar Drive, Mississauga, Ontario, L5T 1H9 - 1 -...
- Page 2 READ AND SAVE THESE INSTRUCTIONS INTENDED FOR DOMESTIC COOKING ONLY WARNING TO REDUCE THE RISK OF FIRE, ELECTRIC SHOCK, OR INJURY TO PERSONS, OBSERVE THE FOLLOWING: 1. Use this unit only in the manner intended by the manufacturer. If you have questions, contact the manufacturer at the address or telephone number listed in the warranty.
- Page 3 CAUTION 1. To reduce risk of fire and to properly exhaust air, be sure to duct air outside. Do not vent exhaust air into spaces within walls or ceilings or into attics, crawl spaces, or garages. 2. Take care when using cleaning agents or detergents. 3.
-
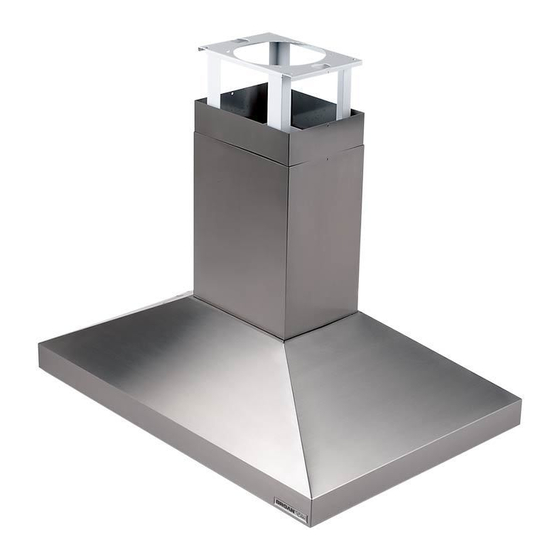
Page 4: Prepare The Hood
PREPARE THE HOOD Unpack hood and check contents. You should receive: 1 - Hood DUCT COLLAR 1 - Decorative Flue Assembly 1 - Support Frame 1 - Parts Bag (B080810004) containing: 4 - Mounting Screws (6 x 70mm) 8 - Washers Ø 6.4mm 13 - Mounting Screws (3.9 x 9.5mm Pan Head) 4 - Nuts 8 WASHERS... -
Page 5: Install The Ductwork
INSTALL THE DUCTWORK ROOF CAP 8” ROUND DUCT NOTE: To reduce the risk of fire, use only metal ductwork. 1. Decide where the ductwork will run between the hood and the outside. 8” ROUND 2. A straight, short duct run will allow the hood ELBOW to perform most efficiently. -
Page 6: Connect Decorative Flue
CONNECT DECORATIVE MOUNTING SCREWS FLUE (3.9x9.5mm) 1. Secure the upper flue to the upper support frame with the mounting screws. 2. Insert the lower flue moving it completely towards the top and fix it temporarily with UPPER FLUE retaining screws. INSERT THE LOWER FLUE RETAINING SCREWS... - Page 7 MOUNT HOOD TO SUPPORT ELECTRICAL BOX FRAME 1. Before mount hood to support frame remove the electrical box. 2. Mount hood to support frame. 3. Insert four (4) bolts through the top of the hood - from the inside. 4. Use four (4) nuts and four (4) washers (Ø6,4mm) to secure hood to support frame as shown.
-
Page 8: Connect Ductwork
CONNECT DUCTWORK 1. Use 8" round metal duct to connect the duct collar on the hood to the ductwork above. 2. Use duct tape to make all joints secure and air tight. LOWER DECORATIVE 3. Slide the lower decorative flue section FLUE downward, until it fits properly around hood. -
Page 9: Operation
OPERATION BLOWER LIGHT ON / OFF SWITCH BLOWER Controls SWITCH SPEED The hood is operated using the slide controls CONTROL under the front edge of the hood. The light switch turns the halogen lights on and off. The blower on / off switch turns the blower on PILOT to the running speed set by the blower speed LAMP... -
Page 10: Fuse Replacement
FUSE REPLACEMENT FUSE SWITCH OFF THE ELECTRICITY SUPPLY. Remove the grease filters. Remove the 2 screws of the electrical box support and open the fuse box. Replace with the same type of fuse (5x20mm, 5A, 125V). FUSE BOX ELECTRICAL BOX SUPPORT SCREWS WARRANTY BROAN-NUTONE LLC ONE YEAR LIMITED WARRANTY...