Table of Contents
Advertisement
Quick Links
Advertisement
Chapters
Table of Contents

Related Manuals for Mercedes-Benz 2010 GL-Class


Summary of Contents for Mercedes-Benz 2010 GL-Class
- Page 1 Operator’s Manual...
- Page 2 Symbols ® Trademarks ® AdBlue is a registered trademark of the German Association of the Automotive Industry (VDA). BabySmart is a trademark of Siemens Automotive Corp. ® Bluetooth is a registered trademark of Bluetooth SIG Inc. ® ® and PRE-SAFE are registered trademarks of Daimler.
- Page 3 Our company and staff congratulate you on the purchase of your new Mercedes-Benz. Your selection of our product is a demonstration of your trust in our company name. Furthermore, it exemplifies your desire to own an automobile that will be as easy as possible to operate and will provide years of service.
-
Page 5: Contents
Index ... 4 Introduction ... 20 At a glance ... 25 Safety and security ... 35 Controls in detail ... 69 Operation ... 225 Practical hints ... 283 Technical data ... 359 Contents... -
Page 6: Table Of Contents
Index 1, 2, 3 ... 115V AC Socket ... 213 3-zone automatic climate control see Climate control system 4-ETS (Electronic Traction System) ... 64 4MATIC see All-wheel drive (4MATIC) ABS (Antilock Brake System) ... 62 Indicator lamp ... 315 Messages in the multifunction display ... - Page 7 Ashtrays ... 211 Aspect ratio (tires) ... 255 Audio/DVD menu ... 129 Auto-dimming rear view mirrors ... 94 Automatic central locking ... 74, 138 Automatic headlamp mode ... 98 Automatic interior lighting control .. 101 Automatic locking when driving ... 138 Automatic transmission ...
- Page 8 Index Central locking Automatic ... 74, 138 KEYLESS-GO ... 71 Locking/unlocking from inside ... 75 SmartKey ... 70 Central locking/unlocking switch ... 75 Certification label ... 360 Children in the vehicle Air bags ... 37 BabySmart™ air bag deactivation system ... 46 Child safety locks (rear doors) ...
- Page 9 Resume function ... 147 Setting current speed ... 145 Cup holders ... 209 Curb weight ... 255 Customer Assistance Center (CAC) ... 23 Customer Relations Department ... 23 Dashboard see Instrument cluster Data recording ... 24 Date, Setting ... 135 Daytime running lamp mode ...
- Page 10 Index Through standing water ... 262 With Distronic ... 153 Driving and parking Safety notes ... 108 Driving off ... 110, 261 Driving safety systems ... 61 4-ETS ... 64 ABS ... 62 BAS ... 63 EBP ... 63 ® ...
- Page 11 ETD (Emergency Tensioning Device) ... 52 Safety guidelines ... 39 Express operation Power windows ... 105 Tilt/sliding sunroof ... 192 Exterior lamp switch ... 97 Exterior rear view mirrors ... 94 Fold-in function ... 95, 140 Parking position ... 95 Power-folding ...
- Page 12 Index Transmission position indicator ... 116 Transmission positions ... 116 Generator see Alternator Global locking/unlocking see Key, SmartKey Glove box ... 207 Gross Axle Weight Rating see GAWR Gross Trailer Weight see GTW Gross Vehicle Weight see GVW Gross Vehicle Weight Rating see GVWR GTW (Gross Trailer Weight) ...
- Page 13 Interior lighting Delayed shut-off ... 138 Emergency lighting ... 102 Front ... 101 Front reading lamps ... 101 Rear ... 102 Rear reading lamps ... 102 Interior rear view mirror ... 93 Auto-dimming rear view mirrors ... 94 Interior storage spaces see Storage compartments Intermittent wiping Rain sensor ...
- Page 14 Index LATCH-type child seat anchors see Children in the vehicle License plate lamps Messages in the multifunction display ... 311 Replacing bulbs ... 330 Light alloy wheels, cleaning ... 279 Lighter see Cigarette lighter Lighting ... 97 Daytime running lamp mode ... 99 Exterior ...
- Page 15 Brake pads ... 299 Coolant ... 306 Cruise control ... 294 Differential locks ... 123, 302 Distronic ... 294 Doors ... 304 Downhill Speed Regulation (DSR) . . 303 EBP ... 300 Engine oil ... 308 ® ... 289, 300 Fog lamps ...
- Page 16 Index Returning ... 268 Ruts ... 267 Steep terrain ... 264 Off-road driving program ... 158 Off-road menu ... 131 Oil, oil level see Engine oil On-board computer see Control system One-touch gearshifting ... 118 Operating safety ... 23 Ornamental moldings, cleaning ... 277 Outside temperature see Displays Overhead control panel ...
- Page 17 Radiator ... 230, 257 Radio Selecting stations ... 129 Radio transmitters ... 272 Rain sensor see Intermittent wiping Rear axle oil ... 369 Rear center console ashtray see Ashtrays Rear doors Child safety locks ... 60 Rear door window Override switch ... 60 Rear fog lamp see Fog lamps Rear lamps...
- Page 18 Index Self-test BabySmart™ ... 47 OCS (Occupant Classification System) ... 45 Tele Aid ... 215 Service see Maintenance Service, parts ... 360 Service and warranty information ... 20 Service intervals see Maintenance System, Service indicator message Service life (tires) ... 247 Settings Factory setting (KEYLESS-GO) ...
- Page 19 Capacities fuels, coolants, lubricants etc..368 Coolant ... 373 Engine oil additives ... 371 Engine oils ... 370 Fuel requirements ... 371 Gasoline additives ... 372 Identification labels ... 360 Premium unleaded gasoline ... 371 Rims and tires ... 365 Spare wheel ...
- Page 20 Index Problems under-/overinflation ... 236 Retreads ... 233 Rims and tires (technical data) ... 365 Rotation ... 249 Service life ... 247 Sizes ... 365 Snow chains ... 258 Speed rating ... 252, 256 Storing ... 248 Temperature ... 235, 249 Terminology ...
- Page 21 Modifications and alterations, Operating safety ... 23 Towing ... 352 Unlocking/locking manually ... 323 Vehicle configuration menu ... 140 Vehicle dimensions see Vehicle specification Vehicle Identification Number (VIN) ... 360 Vehicle jack see Jack Vehicle level control see Air suspension program Vehicle lighting ...
-
Page 22: Product Information
Therefore, you may find explanations for optional equipment not installed in your vehicle. If you have any questions about operating particular equipment, any authorized Mercedes-Benz Center will be glad to demonstrate the proper procedures. Optional equipment is also described in this manual, including operating instructions wherever necessary. -
Page 23: Maintenance
Control System Warranty State Warranty Enforcement Laws (Lemon Laws) Important notice for California retail buyers and lessees of Mercedes-Benz automobiles Under California law you may be entitled to a replacement of your vehicle or a refund of the purchase price or lease price, if after a... - Page 24 If you change your address, be sure to send in the “Change of Address Notice” found in the Service and Warranty Information Booklet, or simply call the Mercedes-Benz Customer Assistance Center (in the USA) at 1-800-FOR-MERCedes (1-800-367-6372), or Customer Service (in Canada) at 1-800-387-0100.
-
Page 25: Customer Relations Department
If the matter is not handled to your satisfaction, please discuss the problem with the Mercedes-Benz Center management or, if necessary, contact us at one of the following addresses: In the USA:... -
Page 26: Reporting Safety Defects
However, NHTSA cannot become involved in individual problems between you, your dealer, or Mercedes-Benz USA, LLC. To contact NHTSA, you may call the Vehicle Safety Hotline toll-free at 1-888-327-4236 (TTY: 1-800-424-9153); go to www.safercar.gov;... - Page 27 Exterior view ... 26 Cockpit ... 27 Instrument cluster ... 28 Multifunction steering wheel ... 30 Center console ... 31 Overhead control panel ... 33 Door control panel ... 34...
-
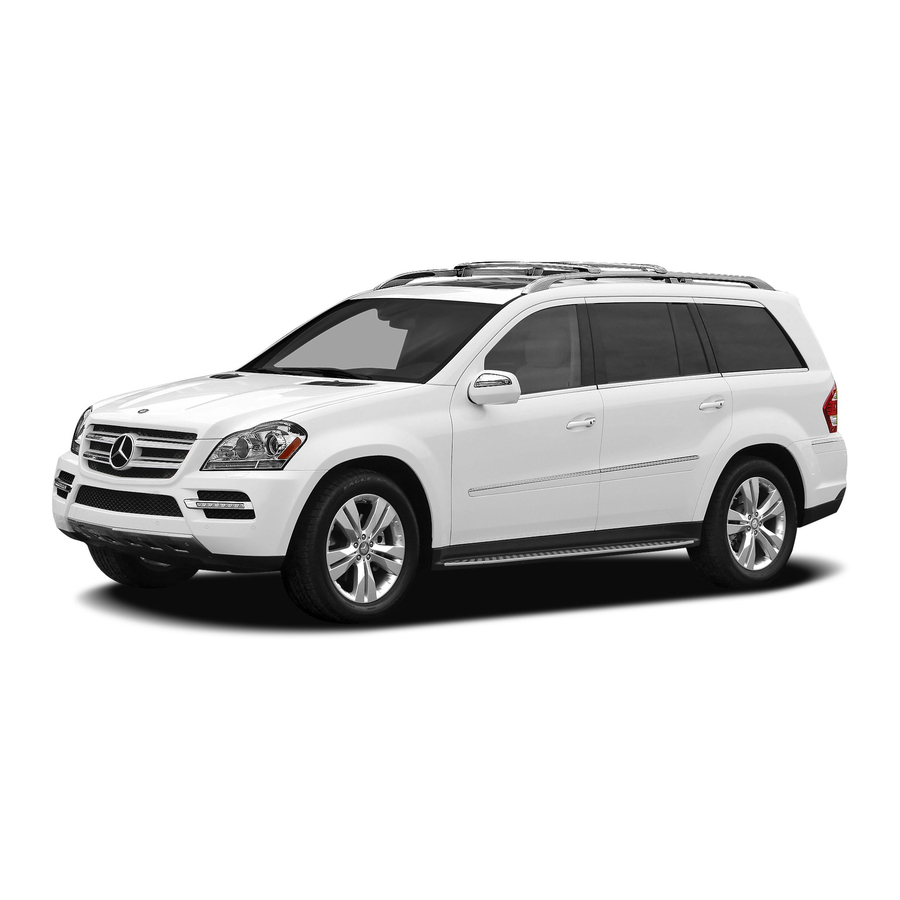
Page 28: Exterior View
Exterior view Exterior view This Operator’s Manual describes all features, standard or optional, potentially available for your vehicle at the time of purchase. Please be aware that your vehicle might not be equipped with all features described in this manual. Function Tailgate Power tailgate... -
Page 29: Cockpit
Cockpit Function Cruise control lever: Cruise control Distronic Instrument cluster Multifunction steering wheel Horn Steering wheel gearshift control Gear selector lever Front Parktronic warning indicators Overhead control panel Glove box lid release, glove box lock Glove box Power outlet Center console Page Function Starter switch... -
Page 30: Instrument Cluster
Instrument cluster Instrument cluster Function # Left turn signal indicator lamp To dim instrument cluster illumination Reset button for: Trip odometer Settings To brighten instrument cluster illumination ! Right turn signal indicator lamp Clock Speedometer with: ! Antilock Brake System (ABS) indicator lamp È... -
Page 31: Indicator Lamp
Function Multifunction display with: Trip odometer Main odometer Tachometer with: 7 Seat belt telltale % Preglow indicator lamp, diesel engine only + Supplemental Restraint System (SRS) indicator lamp L Low-beam headlamp indicator lamp ; Engine malfunction indicator lamp, Canada only ! Engine malfunction indicator lamp, USA only K High-beam headlamp... -
Page 32: Multifunction Steering Wheel
Multifunction steering wheel Multifunction steering wheel Function Multifunction display Press button ~: to end a call to reject an incoming call Press button 6: to answer a call to dial to redial Press button W or X: to select submenus in the Settings menu to set values to set the volume... -
Page 33: Center Console
Center console Upper part (Vehicles without enhanced off-road package) Function COMAND system, see separate operating instructions Climate control system Rear window defroster Seat heating, front passenger side Seat ventilation, front passenger side Parktronic system deactivation switch Vehicle level control switch Front passenger front air bag off indicator lamp (USA only) - Page 34 Center console Upper part (Vehicles with enhanced off-road package) Function COMAND system, see separate operating instructions Climate control system Rear window defroster Seat heating, front passenger side Seat ventilation, front passenger side Rotary switch for differential locks Switch for LOW RANGE mode Switch for Downhill Speed Regulation (DSR)
-
Page 35: Overhead Control Panel
Lower part Function Ashtray with storage compartment Cigarette lighter Cup holder Front armrest storage compartment Removable card/ticket holder Overhead control panel Overhead control panel Page Function Left front reading lamp on/ Automatic interior lighting Rear interior lighting on/off Front interior lighting on/ Right reading lamp on/off Front right interior lamp Power tilt/sliding sunroof... -
Page 36: Door Control Panel
Door control panel Function Hands-free microphone for Tele Aid (emergency call system), telephone and Voice Control System, see separate operating instructions Front left interior lamp Door control panel Page Function Inside door handle Central locking/unlocking switch Exterior rear view mirror adjustment Selection buttons for exterior rear view mirror... - Page 37 Vehicle equipment ... 36 Occupant safety ... 36 Panic alarm ... 61 Driving safety systems ... 61 Anti-theft systems ... 66...
-
Page 38: Vehicle Equipment
Occupant safety Vehicle equipment This Operator’s Manual describes all features, standard or optional, potentially available for your vehicle at the time of purchase. Please be aware that your vehicle might not be equipped with all features described in this manual. Occupant safety Introduction In this section you will learn the most... -
Page 39: Occupant Safety
4 seconds after the engine was started comes on while driving For your safety, we strongly recommend that you contact an authorized Mercedes-Benz Center immediately to have the system checked. Otherwise the SRS may not be activated when needed in an accident, which could result in serious or fatal injury. - Page 40 Canada only: Children 12 years old and under must never ride in the front seat, except in a Mercedes-Benz authorized BabySmart™ compatible child seat, which operates with the BabySmart™ air bag deactivation system installed in the vehicle to deactivate the front passenger front air bag when it is installed properly.
-
Page 41: Safety Guidelines
SRS inoperative or causing unintended air bag deployment. Work on the SRS must therefore only be performed by qualified technicians. Contact an authorized Mercedes-Benz Center. For your protection and the protection of others, when scrapping the air bag unit or ETD, our safety instructions must be followed. -
Page 42: Front Passenger Front Air Bag
Occupant safety Also refer them to the applicable section in the Operator’s Manual. Front air bags Observe Safety notes, see page 37. Driver’s front air bag : and front passenger front air bag ; are designed to provide increased protection for the driver and front passenger against the risk of injuries to the head and thorax. -
Page 43: Side Impact
Warning! Only use seat covers which have been tested and approved by Mercedes-Benz for your vehicle model. Using other seat covers may interfere with or prevent the deployment of the side impact air bags. Contact an authorized Mercedes-Benz Center for availability. -
Page 44: Window Curtain
Always make sure the seat has clearance in all directions at all times. If your seat, including the trim cover and cushion, needs to be serviced in any way, take the vehicle to an authorized Mercedes-Benz Center. Only seat accessories approved by Mercedes-Benz may be used. - Page 45 Warning! If the 42 indicator lamp illuminates when an adult or someone larger than a small individual is in the front passenger seat, have the front passenger reposition himself or herself in the seat until the 42 indicator lamp goes out, or check whether objects are caught under or around the seat.
- Page 46 Occupant safety The infant or child restraint must be properly secured with the vehicle’s seat belt, the seat belt and top tether strap, or lower anchors and top tether strap, fully in accordance with the child seat manufacturer’s instructions. Occupants, especially children, should always sit as upright as possible, wear the seat belt properly and use an appropriately sized infant restraint, toddler restraint, or booster seat...
-
Page 47: Self-Test
Warning! If the 42 indicator lamp does not illuminate, the system is not functioning. You must contact an authorized Mercedes-Benz Center before seating any child on the front passenger seat. For more information, see the “Practical hints”... -
Page 48: Air Bag Deactivation System
Occupant safety with the passenger seat cushion and backrest. If necessary, adjust the tilt of the passenger seat backrest. An incorrectly mounted child seat could cause injuries to the child in case of an accident, instead of increasing protection for the child. Follow the manufacturer’s instructions for installation of child seats. -
Page 49: Babysmart
BabySmart™ restraint to transport a child on the front passenger seat until the system has been repaired. Special BabySmart™ compatible child seats, designed for use with the Mercedes-Benz system, are required for use with the BabySmart™ air bag deactivation system. Occupant safety Please contact an authorized Mercedes-Benz Center for information on availability. -
Page 50: Seat Belts
Also, the seat belt anchoring points must be checked. Only use seat belts which have been approved by Mercedes-Benz. Do not make any modifications to the seat belts. This can lead to unintended activation of the ETDs or to their failure to activate when necessary. -
Page 51: Proper Use Of
Have all work carried out only by qualified technicians. Contact an authorized Mercedes-Benz Center. Proper use of seat belts Warning! USE SEAT BELTS PROPERLY Seat belts can only protect when used properly. Never wear seat belts in any other way than as described in this section, as that could result in serious injuries in case of an accident. -
Page 52: Fastening The Seat Belts
Vehicles with BabySmart™ air bag deactivation system, Canada only: Children 12 years old and under must never ride in the front seat, except in a Mercedes-Benz authorized BabySmart™ compatible child seat, which operates with the BabySmart™ system installed in the vehicle to deactivate the front passenger front air bag when it is installed properly. -
Page 53: Adjustment Function
This can damage the seat belt and impair its effectiveness, and/or cause damage to the door and/or door trim panel. Such damage is not covered by the Mercedes-Benz Limited Warranty. Damaged seat belts must be replaced. Contact an authorized Mercedes-Benz Center. -
Page 54: Pre-Safe
Pyrotechnic ETDs that were activated must be replaced. For your safety, when disposing of the pyrotechnic ETDs always follow our safety instructions. These are available at any authorized Mercedes-Benz Center. ® The PRE-SAFE system has electrically operated reversible pre-tensioners that do not require replacement after activation. -
Page 55: Restraints
NECK-PRO active front head restraints and/ or the deployment of the front side impact air bags. Contact an authorized Mercedes-Benz Center for availability. When the NECK-PRO active front head restraints have been triggered in an accident,... -
Page 56: Steering Wheel
Occupant safety must be reset. Otherwise, the NECK-PRO active front head restraints cannot offer any additional protection in the event of another rear-end collision. For information on resetting the activated NECK-PRO active front head restraints, see “Resetting activated head restraints” page 325). -
Page 57: Safety Notes
Make sure: The seat belt is always fitted snugly. Adjust the seat belt so that the shoulder section is located as close as possible to the middle of the shoulder. Place the lap portion of the seat belt as low as possible on your hips. -
Page 58: Infant And Child Restraint Systems
Occupant safety Unsecured or improperly positioned cargo increases a child’s risk of injury in the event strong braking maneuvers sudden changes of direction an accident Infant and child restraint systems Observe Safety notes, see page 55. We recommend all infants and children be properly restrained at all times while the vehicle is in motion. - Page 59 Canada only: Children 12 years old and under must never ride in the front seat, except in a Mercedes-Benz authorized BabySmart™ compatible child seat, which operates with the BabySmart™ system installed in the vehicle to deactivate the front passenger front air bag when it is installed properly.
-
Page 60: Top Tether
Occupant safety accident, they could be crushed between the occupant and seat belt. A child’s risk of serious or fatal injuries is significantly increased if the child restraints are not properly secured in the vehicle and/ or the child is not properly secured in the child restraint. -
Page 61: Child Seat Anchors – Latch-Type
Guide top tether strap ? between the head restraint and top of the seat backrest. Securely fasten hook =, which is part of top tether strap ?, to anchorage ring ;. Make sure hook = is attached to anchorage ring ; beyond the safety catch, as illustrated top tether strap ? is not twisted the head restraint is installed and... -
Page 62: Override Switch
Occupant safety Remove anchorage ring covers : from anchors ; of the seat on which a child seat is to be installed. Example, second-row seats Install a LATCH-type child seat according to the manufacturer’s instructions. A rigid connection between the child seat and the body of the vehicle is established. -
Page 63: Controls In Detail
The rear door windows can no longer be operated using the respective switch located in the rear doors. You can still operate the rear door windows using the switches located on the door control panel of the driver’s door. Deactivating: Press override switch : again. - Page 64 Driving safety systems achieved with winter tires, or snow chains as required. Safety notes Warning! The following factors increase the risk of accidents: Excessive speed, especially in turns Wet and slippery road surfaces Following another vehicle too closely The driving safety systems described in this section cannot reduce these risks or prevent the natural laws of physics from acting on the vehicle.
- Page 65 If the ABS malfunctions, the wheels may lock during hard braking, reducing steering capability and extending the braking distance. Off-road ABS With the off-road driving program switched on, or with the transmission in LOW RANGE mode, the ABS designed for off-road driving is activated automatically.
- Page 66 If such tests are necessary, contact an authorized Mercedes-Benz Center. You could otherwise seriously damage the brake system or the transfer case which is not covered by the Mercedes-Benz Limited Warranty. ® Because the ESP operates...
-
Page 67: Off-Road Esp
Avoid spinning of a drive wheel for an extended period with the ESP off. This may cause serious damage to the drivetrain which is not covered by the Mercedes-Benz Limited Warranty. Switching on the ESP Press ESP warning lamp d in the instrument cluster goes out. -
Page 68: Anti-Theft Systems
In the event that the engine cannot be started (yet the vehicle’s battery is charged), the system is not operational. Contact an authorized Mercedes-Benz Center or call 1-800-FOR-MERCedes (in the USA) or 1-800-387-0100 (in Canada). Anti-theft alarm system ®... -
Page 69: Anti-Theft Systems
Arming: Lock the vehicle with the SmartKey or with KEYLESS-GO. The turn signal lamps flash three times to indicate that the vehicle is locked. Indicator lamp : flashes to indicate that the alarm system is armed. If the turn signal lamps do not flash three times, a door or the tailgate may not be properly closed. - Page 71 Vehicle equipment ... 70 Locking and unlocking ... 70 Starter switch positions ... 80 Seats ... 82 Multifunction steering wheel ... 91 Mirrors ... 93 Memory function ... 96 Lighting ... 97 Wipers ... 103 Power windows ... 105 Driving and parking ... 108 Automatic transmission ...
-
Page 72: Vehicle Equipment
323). Use the mechanical key to lock the vehicle page 324). Have the vehicle battery and the vehicle battery connections checked at an authorized Mercedes-Benz Center. If the SmartKey is malfunctioning, contact Roadside Assistance or an authorized Mercedes-Benz Center. SmartKey... -
Page 73: Locking And Unlocking
Canada only: This device complies with RSS-210 of Industry Canada. Operation is subject to the following two conditions: 1. This device may not cause interference, 2. this device must accept any interference received, including interference that may cause undesired operation of the device. Any unauthorized modification to this device could void the user’s authority to operate the equipment. -
Page 74: Factory Setting
Locking and unlocking Important notes on using KEYLESS-GO You can also use the SmartKey with KEYLESS-GO like a normal SmartKey page 70). You can combine KEYLESS-GO functions with normal SmartKey functions (e.g. unlocking with KEYLESS-GO and locking with button &). Always carry the SmartKey with you. - Page 75 Mercedes-Benz Center. Report the loss of the SmartKey or the mechanical key to your car insurance company immediately. Have the mechanical lock replaced if necessary. Any authorized Mercedes-Benz Center will be glad to supply you with a replacement. For...
-
Page 76: Automatic
Activating the key Once you, or an authorized person, has provided the appropriate documents, the Mercedes-Benz Center will need to synchronize the key to your vehicle before it can be used. In order to do so, the Mercedes- Benz Center need access to your vehicle. -
Page 77: Opening
Locking and unlocking from the inside Observe Safety notes, see page 55. You can lock or unlock the vehicle from the inside using the central locking switches. This can be useful, for example, if you want to lock the vehicle before starting to drive. The central locking switches do not lock or unlock the fuel filler flap. -
Page 78: Power Tailgate
Locking and unlocking Lower tailgate by pulling firmly on handles :. Close tailgate with hands placed flat on it. Once the tailgate touches the latch, the tailgate will pull itself shut automatically. Opening the tailgate from the inside Warning! Do not leave children unattended in the vehicle. - Page 79 pressing the tailgate closing switch pressing the KEYLESS-GO locking/ closing switch Notes for operating the tailgate with the SmartKey: You can also open, close, and stop the tailgate by pressing button F on the SmartKey. The prerequisites for this are: No SmartKey is inserted in the starter switch.
- Page 80 Locking and unlocking Press tailgate closing switch : or press and hold button F on the SmartKey until the tailgate begins to close. If the tailgate comes into contact with an object while closing, the closing procedure is stopped and the tailgate reopens. This may happen if luggage has been piled too high, for example.
- Page 81 Opening/closing the tailgate from the inside Opening Observe Safety notes, see page 76. Warning! Maintain sight of the area around the rear of the vehicle while operating the tailgate with the door-mounted remote tailgate switch. Monitor the opening procedure carefully to make sure no one is in danger of being injured.
-
Page 82: Starter Switch Positions
Starter switch positions Press and hold the tailgate closing switch in the tailgate ( page 78) until you hear a short acoustic signal. The opening height of the tailgate is limited. The tailgate will now stop at the stored position when opened. Deactivating Press and hold the tailgate closing switch in the tailgate (... -
Page 83: Starter Switch Positions
the SmartKey is in the vehicle, the vehicle’s electrical systems can be switched on or the engine can be started using the KEYLESS-GO start/stop button. KEYLESS-GO start/stop button Starter switch Insert the KEYLESS-GO start/stop button into the starter switch (if not inserted already). -
Page 84: Head Restraints
Seats Seats Safety notes Warning! In order to avoid possible loss of vehicle control the following must be done before the vehicle is put into motion: seat adjustment head restraint adjustment steering wheel adjustment rear view mirror adjustment fastening of seat belts Warning! Do not adjust the driver’s seat while driving. -
Page 85: Seats
Do not drive the vehicle without the seat head restraints. Head restraints are intended to help reduce injuries during an accident. Seat adjustment When moving the seats, make sure there are no items in the footwell or behind the seats. Otherwise, you could damage the seats and/or the items. -
Page 86: Adjustment
They can only be removed by qualified technicians. We recommend that you have this work carried out by an authorized Mercedes-Benz Center. Raising: Adjust the height of head restraint : by pulling it upward. If head restraint : is fully retracted, press release button ;... - Page 87 Easy-entry/exit feature for third-row seats This feature allows for easier access to and exit from the vehicle’s third-row seats. Warning! To help avoid personal injury, the second-row seat backrests must be properly locked either in the upright position or, when using the expanded cargo volume, in the fully folded position while the vehicle is in motion.
- Page 88 Seats Easy-exit feature for third-row seats The easy-exit strap is located on the right rear of the second-row seat base. Easy-exit strap To exit the vehicle when seated on a third- row seat, pull up and hold easy-exit strap :. The right second-row seat backrest folds forward.
-
Page 89: Lumbar Support
Make sure the head restraint is pushed all the way down. Pull emergency release : in the direction of arrow. Push seat backrest ; forwards. Warning! To help avoid personal injury when folding the seat backrest forward, make sure you move both feet and legs all the way back and out of the way to avoid them contacting the seat as it pivots forward. - Page 90 Seats backrest could fold. The child seat would no longer be properly supported or positioned to provide its intended benefit. Seat backrest tilt (second-row seats) Warning! The seat belt only offers its intended protection when the seat backrest is in a nearly vertical position and the occupant is sitting upright.
- Page 91 Head restraint fore and aft adjustment The angle of the head restraint for the outer second-row seats or the third-row seats can be adjusted manually. While seated, reach behind you with both hands and find lower edge of the head restraint.
-
Page 92: Multicontour Seat
Seats Multicontour seats The multicontour seat has a movable seat cushion and inflatable air cushions built into the seat backrest to provide additional lumbar and side support. Switch on the ignition. Seat cushion depth: Adjust the seat cushion depth to the length of your upper leg using switch :. - Page 93 Rear seat heating switches The red indicator lamps ; in front or rear seat heating switch : come on to show which heating level you have selected. The seat heating switches from level 3 (high) to level 2 after approximately 5 minutes. The seat heating switches from level 2 to level 1 (low) after approximately 10 minutes.
-
Page 94: Multifunction Steering Wheel
Multifunction steering wheel Locking: Push release handle : back to its original position. Make sure the steering wheel is securely locked by trying to move it up and down as well as in and out before driving off. Steering wheel adjustment, electrical Adjusting steering wheel in or out: Move stalk in direction of arrows :. -
Page 95: Heated Steering Wheel
motion. Driving off with the steering wheel still adjusting could cause the driver to lose control of the vehicle. Crash-responsive exit aid When you open the driver’s door after an accident has occurred, the steering column moves up. The position of the SmartKey in the starter switch is insignificant. -
Page 96: Auto-Dimming Rear View Mirrors
Mirrors Interior rear view mirror, antiglare position Tilt the mirror to the antiglare position by moving lever : towards the windshield. The interior rear view mirror is dimmed. Exterior rear view mirrors Warning! Exercise care when using the passenger-side exterior rear view mirror. The mirror surface is convex (outwardly curved surface for a wider field of view). -
Page 97: Parking Position
The rear view mirrors will not react if the automatic transmission is set to reverse gear R or the interior lighting is switched on. Warning! The auto-dimming function does not react if incoming light is not aimed directly at sensors in the interior rear view mirror. -
Page 98: Memory Function
Memory function The exterior rear view mirrors fold in automatically as soon as the vehicle is locked from the outside. The exterior rear view mirrors fold out automatically as soon as the vehicle is unlocked and the driver’s or front passenger door is subsequently opened. -
Page 99: Exterior Lamp Switch
When the parking lamps are on, the tail lamps, the license plate lamps, the side marker lamps, and the instrument cluster illumination are also on. modified for symmetrical low beams. Relevant information can be obtained at any authorized Mercedes-Benz Center. Vehicles equipped with active Bi-Xenon headlamps: The active Bi-Xenon headlamps increase... -
Page 100: Automatic Headlamp Mode
Lighting The exterior lamps (except standing lamps or parking lamps) go out automatically when you remove the SmartKey from the starter switch or open the driver’s door with the ignition switched off. When the parking lamps or the rear fog lamp are switched on and you remove the SmartKey from the starter switch and open the driver’s door, an acoustic signal... -
Page 101: Lighting
Daytime running lamp mode In Canada, the daytime running lamp mode is mandatory and therefore in a constant mode. In the USA, the daytime running lamp mode is deactivated by default. Activate the daytime running lamp mode using the control system, see “Switching daytime running lamp mode on or off (USA only)”... -
Page 102: High-Beam Headlamps
Lighting Vehicles with front fog lamps Switching on front fog lamps: Pull out the exterior lamp switch to first stop. The green indicator lamp N in the exterior lamp switch comes on. Switching on rear fog lamp: Pull out the exterior lamp switch to second stop. -
Page 103: Hazard Warning Flasher
High-beam flasher Switching on: Pull the combination switch briefly in direction of arrow =. Hazard warning flasher The hazard warning flasher can be switched on at all times, even with the SmartKey removed from the starter switch. The hazard warning flasher comes on automatically when an air bag deploys. -
Page 104: Emergency Lighting
Lighting unlock the vehicle remove the SmartKey from the starter switch (Interior Lighting Delayed Shut-off must be switched on page 138)) open a door open the tailgate The interior lighting goes out after a short time. If a door remains open, the interior lamps go out automatically after approximately 5 minutes when the SmartKey is removed or in starter switch position 0. -
Page 105: Rain Sensor
Third-row reading lamps and interior lighting p Right third-row reading lamp on/off p Left third-row reading lamp on/off Left third-row reading lamp Rear interior lighting Right third-row reading lamp The rear interior lighting is switched on and off using the button on the front overhead control panel ( page 101). -
Page 106: Rear Window Wiper/Washer
Wipers If you have set intermittent wiping, dirt on the surface of the rain sensor or optical effects may cause the windshield wipers to wipe in an undesired fashion. This could then damage the windshield wiper blades or scratch the windshield. You should therefore switch off the windshield wipers when weather conditions are dry. -
Page 107: Power Windows
Ä or Å, set the combination switch to the next higher wiper speed have the windshield wipers checked at the nearest authorized Mercedes-Benz Center Power windows Opening and closing The door windows and the hinged quarter windows are opened and closed electrically. -
Page 108: Hinged Quarter Windows
Power windows Warning! Do not keep any part of your body up against the window pane when opening a window. The downward motion of the pane may pull that part of your body down between the window pane and the door frame and trap it there. If there is a risk of entrapment, release the switch and pull it to close the window. -
Page 109: Tilt/Sliding Sunroof
Closing: Pull switch A and release. Both hinged quarter windows close completely. When the obstruction sensor detects that a hinged quarter windows is blocked during the closing process, they will stop and open slightly. Halting closing process: Press or pull switch A once more during the closing process. -
Page 110: Starting
Driving and parking anyone being harmed by the closing procedure, press and hold button &. Vehicles with KEYLESS-GO: Release the lock button on the outside door handle to stop the closing procedure. Immediately pull on the same outside door handle and hold firmly. The windows and the tilt/sliding sunroof will open for as long as the door handle is held but the door not opened. -
Page 111: Driving And Parking
Automatic transmission Gearshift pattern for automatic transmission Button for selecting park position P Park position Reverse gear Neutral position Drive position For more information on how to operate the gear selector lever, see “Automatic transmission” ( page 114). Make sure the automatic transmission is in park position P. -
Page 112: Driving Off
Release the parking brake. Avoid spinning of a drive wheel. This may cause serious damage to the drivetrain which is not covered by the Mercedes-Benz Limited Warranty. -
Page 113: While Driving
Simultaneously depressing the accelerator pedal and applying the brakes reduces engine performance and causes premature brake and drivetrain wear which is not covered by the Mercedes-Benz Limited Warranty. Once the vehicle is in motion, the automatic central locking function engages and the locking knobs in the doors move down. -
Page 114: Accidents
Exit the vehicle at a safe distance from the roadway. Notify local fire and/or police authorities. If the extent of the damage cannot be determined: Contact an authorized Mercedes-Benz Center or call Roadside Assistance. If no damage on major assemblies, fuel system, and engine mount can be determined: Start the engine in the usual manner. -
Page 115: Turning Off
(Canada only) in the instrument cluster comes on. Turning off the engine Warning! Do not turn off the engine before the vehicle has come to a complete stop. With the engine not running, there is no power assistance for the brake and steering systems. In this case, it is important to keep in mind that a considerably higher degree of effort is necessary to brake and steer the vehicle. -
Page 116: Automatic Transmission
This may cause serious damage to the engine and the drivetrain which is not covered by the Mercedes-Benz Limited Warranty. During the brief warm-up, transmission upshifting is delayed. This allows the... -
Page 117: Automatic Transmission
Shifting the automatic transmission out of park position P is only possible with the brake pedal depressed. Without the brake pedal depressed, the gear selector lever can be moved up or down, but the parking pawl remains engaged, not allowing shifting to occur. Depending on vehicle production date: The automatic transmission will shift into park position P automatically when... -
Page 118: Shifting Procedure
Automatic transmission With SmartKey: Make sure the ignition is switched on. With the vehicle at a standstill, depress the brake pedal and keep it pressed. Shift the automatic transmission into neutral position N. Release the brake pedal. If engaged, release the parking brake. Switch off the ignition and leave the SmartKey in the starter switch. -
Page 119: Kickdown
P. Have the vehicle’s electrical system checked at an authorized Mercedes-Benz Center as soon as possible. C Reverse gear Shift the automatic transmission into reverse gear R only when the vehicle is stopped. -
Page 120: Gear Range Indicator
Automatic transmission Rocking the vehicle Rocking the vehicle by shifting the automatic transmission directly between drive position D and reverse gear R can help free a vehicle stuck in mud or snow. The engine control system of this vehicle electronically limits directly shifting the automatic transmission between drive position D and reverse gear R to very low speeds, i.e. -
Page 121: Emergency Operation (Limp-Home Mode)
Restart the engine. Shift the automatic transmission into drive position D (for second gear) or reverse gear Have the automatic transmission checked at an authorized Mercedes-Benz Center as soon as possible. Transfer case The vehicle is equipped with all-wheel drive (4MATIC). -
Page 122: Transfer Case
Transfer case covered by the Mercedes-Benz Limited Warranty. ® Because the ESP operates automatically, the engine and ignition must be shut off (SmartKey in starter switch position 0 or 1 or KEYLESS-GO start/stop button in position 0 or 1) when the parking brake is being tested on a brake test dynamometer. -
Page 123: Practical Hints
Switching LOW RANGE mode Switching LOW RANGE mode on (switching from HIGH RANGE to LOW RANGE) The shifting procedure can only be performed when the following conditions are met: The engine is running. The automatic transmission is in neutral position N. The vehicle speed does not exceed 25 mph (40 km/h). -
Page 124: A Few Words About
Differential locks and rear axle differential to improve vehicle traction. The center differential compensates for differences in wheel rotation between the front and rear axle. The rear axle differential compensates differences between the rear wheels. At the front axles, the 4-ETS system compensates for any traction problems. -
Page 125: Display
You can select between three locking modes. Rotary switch for differential locks Rotatable outer adjustment ring with indicator lamp AUTO mode: center differential is automatically locked Center differential is completely locked Center and rear axle differential are completely locked AUTO mode The AUTO mode is adequate for most driving situations since the center differential is locked and released as required. -
Page 126: Instrument Cluster
Instrument cluster menu, see the “Controls in detail” section page 131). Example illustration Center differential completely locked If the differential locks have been manually engaged, the tires will scuff on the road surface when cornering because the differences between the individual wheel rotation speeds will not be compensated for. -
Page 127: Control System
29) denotes excessive engine speed. Avoid driving at excessive engine speeds, as it may result in serious engine damage that is not covered by the Mercedes-Benz Limited Warranty. To help protect the engine, the fuel supply is interrupted if the engine is operated within the red marking. -
Page 128: Multifunction Display
Control system : Multifunction display ; Press button ~ to end a call to reject an incoming call 6 to answer a call to dial to redial Press button to select submenus in the Settings menu to set values to set the volume Press button ? to turn Voice Control System , see separate operating... -
Page 129: Multifunction Display
The number of menus available in the system depends on which optional equipment is installed in your vehicle. Multifunction display Trip odometer Main odometer Menus and submenus The headings used in the menus table are designed to facilitate navigation within the system and are not necessarily identical to those shown in the multifunction display. -
Page 130: Standard Display
Control system Function Standard display menu page 128) Audio/DVD menu ( Navigation menu ( Off-road menu ( Distronic menu ( Vehicle status message memory menu ( Settings menu ( Vehicle configuration menu page 140) Trip computer menu ( Telephone menu ( Standard display menu Standard display In the standard display, trip odometer : and... -
Page 131: Audio/Dvd Menu
The engine should not be operated with a coolant temperature above 248‡ (120†). Doing so may cause serious engine damage which is not covered by the Mercedes-Benz Limited Warranty. Calling up digital speedometer or outside temperature You can select whether the digital... -
Page 132: Navigation
Control system Selecting next or previous stored station: Press button * or & briefly to select a stored station. Selecting next or previous station in the station list: Press and hold button * or & to select a station. Selecting next or previous station in wave band (Only if no station list is available): Press and hold button * or &... -
Page 133: Distronic
Have all required maintenance and safety checks performed on the vehicle. Bring the vehicle to an authorized Mercedes-Benz Center to address the malfunction and warning messages. Press button V or U repeatedly until the Vehicle status message memory menu appears in the multifunction display. -
Page 134: Resetting To Factory Settings
Control system Press button & or *. The stored messages will now be displayed in the order in which they have occurred. For malfunction and warning messages, see “Vehicle status messages in the multifunction display” ( After you have scrolled through all recorded status messages, the first recorded message appears again. -
Page 135: Fold-In Function
approximately 5 seconds, the Settings menu reappears in the multifunction display. Submenus in the Settings menu Press button V or U repeatedly until the Settings menu appears in the multifunction display. Press button &. The collection of the submenus appears in the multifunction display. -
Page 136: Selecting Digital Speedometer Display Mode
Control system The following functions are available: Selecting speedometer/odometer display mode ( page 134) (Canada only) Selecting digital speedometer display mode ( page 134) Selecting language ( Selecting display (digital speedometer or outside temperature) for status indicator page 135) Selecting speedometer/odometer display mode (Canada only) Press button V or U repeatedly until the Settings menu appears in the... -
Page 137: Time/Date
Selecting display (digital speedometer or outside temperature) for status indicator Press button V or U repeatedly until the Settings menu appears in the multifunction display. Press button &. Move the selection marker with button W or X to the Instrument Cluster submenu. -
Page 138: Locator Lighting
Control system Example illustration for setting the month Press button W or X to set the month, day, or year. Lighting submenu Access the Lighting submenu via the Settings menu. Use the Lighting submenu to change the lamp and lighting settings on your vehicle. -
Page 139: Delayed Shut-Off
Parking lamps Tail lamps License plate lamps Side marker lamps Front fog lamps The locator lighting goes out when the driver’s door is opened. If you do not open the driver’s door after unlocking the vehicle with the SmartKey, the lamps will go out automatically after approximately 40 seconds. -
Page 140: Vehicle
Control system Press button V or U repeatedly until the Settings menu appears in the multifunction display. Press button &. Move the selection marker with button W or X to the Lighting submenu. Press button & or * repeatedly until the message Headlamp Delayed Shut- off appears in the multifunction display. -
Page 141: Seat Belt Adjustment Feature
Move the selection marker with button W or X to the Vehicle submenu. Press button & or * repeatedly until the message Automatic Door Locking appears in the multifunction display. The selection marker is on the current setting. Press button W or X to switch the automatic central locking On or Off. -
Page 142: Fold-In Function For Exterior Rear View Mirrors
Control system Move the selection marker with button W or X to the Comfort submenu. Press button & or * repeatedly until the message Belt Adjustment appears in the multifunction display. The selection marker is on the current setting. Press button W or X to active (On) or deactivate (Off) the seat belt adjustment feature. -
Page 143: Trip Computer
Symbol for activated distance warning function If the distance warning function is switched on you will see the symbol Ä in the Standard display. When the distance warning function is switched off the symbol Ä will not appear. DSR (Downhill Speed Regulation) programmed default speed Use this function to program the default speed the DSR is set to when it is activated. -
Page 144: Menu
Control system Fuel consumption statistics since last reset Press button U or V repeatedly until the message From Start appears in the multifunction display. Press button & or * repeatedly until the message From Reset appears in the multifunction display. Distance driven since last reset Time elapsed since last reset Average speed since last reset... -
Page 145: Phone Book
your safety and the safety of others, we recommend that you pull over to a safe location and stop before placing or taking a telephone call. If you choose to use the telephone while driving, please use the hands- free device and only use the telephone when weather, road and traffic conditions permit. -
Page 146: Cruise Control
Driving systems If the connection is successful and this feature is supported by your network provider, the name of the party (if stored in your phone book) you are calling will appear in the multifunction display. The control system stores the dialed number in the redial memory. -
Page 147: Driving Systems
remain responsible for the vehicle’s speed and for safe brake operation. Only use the cruise control if the road, traffic, and weather conditions make it advisable to travel at a constant speed. The use of the cruise control can be dangerous on winding roads or in heavy traffic because conditions do not allow safe driving at a constant speed. -
Page 148: Canceling
Driving systems the grade eases, the set speed will be resumed. On downhill grades, the cruise control maintains the set speed by braking with the vehicle’s brake system. In addition, on longer downhill grades the automatic transmission will downshift automatically. Canceling cruise control Depress the brake pedal. -
Page 149: Last Stored Speed
Increasing: Briefly lift the cruise control lever up past the resistance point in direction of arrow :. Decreasing: Briefly press the cruise control lever down past the resistance point in direction of arrow ;. Release the cruise control lever. The new speed is set and the vehicle will accelerate or decelerate. - Page 150 Driving systems Warning! The Distronic adaptive cruise control is not a substitute for active driving involvement. It does not react to pedestrians or on stationary objects, nor does it recognize or predict the lane curvature or the movement of preceding vehicles.
-
Page 151: Distronic
This device has been approved by the FCC as a “Vehicular Radar System”. The radar sensor is intended for use in an automotive radar system only. Removal, tampering, or altering of the device will void any warranties, and is not permitted by the FCC. -
Page 152: Menu
Driving systems Immediately brake the vehicle to increase your distance to the preceding vehicle. The warning sound is intended as a final caution in which you should intercede with your own braking inputs to avoid a potentially dangerous situation. Do not wait for the operation of the warning signal to intercede with your own braking. -
Page 153: Speed Settings
Setting current or higher speed Setting current or lower speed Deactivating the Distronic Activating the Distronic or resuming to the last set speed Activating Distronic You can activate the Distronic when the vehicle speed is between 20 mph (30 km/h) and 110 mph (180 km/h). -
Page 154: Resume Function
Driving systems When you use the cruise control lever to decelerate, the brake system will brake the vehicle automatically if the engine’s braking power does not brake the vehicle sufficiently. Adjustment in 1 mph (Canada: 1 km/h) increments The set speed value is increased or decreased in 1 mph (Canada: 1 km/h) increments each time you lift or press the cruise control lever up or down to the... -
Page 155: With Distronic
® the ESP has switched off due to a malfunction you shift the automatic transmission into neutral position N while driving The cruise control speed segments in the speedometer dial goes out and an acoustic warning will sound. Observe additional messages in the multifunction display that may appear. - Page 156 Driving systems The Distronic regulates only the distance between your vehicle and those directly ahead of it, but does not register stationary objects in the road, e.g.: a stopped vehicle in a traffic jam a disabled vehicle an oncoming vehicle The driver must always be alert, observe all traffic and intercede as required by means of steering or braking the vehicle.
-
Page 157: Distance Warning Function
have not yet been detected by the Distronic. There will be insufficient distance to the preceding vehicles. Distance warning function This function warns you at a vehicle speed of above approximately 20 mph (30 km/h) in the following cases: At the current speed, the distance between your vehicle and the preceding vehicle is too low for several seconds. - Page 158 Driving systems The DSR is an aid for driving downhill. The DSR regulates your vehicle’s speed when driving downhill to the value set in the control system ( page 141). The steeper the downhill gradient is, the greater the brake application.
- Page 159 Warning! If the accelerator pedal is depressed while the Downhill Speed Regulation (DSR) is activated, the vehicle can drive faster than the programmed set speed. You should therefore drive downhill with particular caution as it could otherwise lead to an accident and/or serious injury to you or others.
-
Page 160: Off-Road Driving Program
Driving systems Increase set speed: Briefly lift the cruise control lever up to the resistance point in direction of arrow :. Release the cruise control lever. The vehicle speed increases in increments of 1 mph (Canada: 1 km/h). Reduce set speed: Briefly press the cruise control lever down to the resistance point in direction of arrow ;. -
Page 161: Suspension Tuning
Switching off: Press switch : again. Indicator lamp ; goes out. The symbol Ç disappears. Air suspension program The system lets you select the chassis and suspension setup. The chassis and suspension setup adjusts the damping behavior and the ride height for your vehicle. The system consists of two components. - Page 162 Driving systems Changes to the vehicle level should be made while the vehicle is moving. The vehicle will then reach the set level as fast as possible. When you park the vehicle and the ambient temperature changes, the vehicle level may change visibly.
- Page 163 Basic settings The following vehicle chassis ride heights can be selected using vehicle level control switch : in the center console: Level Driving situation Raised level For off-road driving or driving in rough terrain. Indicator lamp ; is on. Highway For driving on paved roads level in fair or better condition.
- Page 164 Driving systems damage to the vehicle underbody. Always make sure the vehicle has sufficient ground clearance before adjusting it to a lower level. Start the engine. When indicator lamp ; is on: Press vehicle level control switch :. Indicator lamp ; flashes. The vehicle adjusts to the highway level.
- Page 165 Level Ride height Off-road +3.5 in (90 mm) level 3 Off-road +2.3 in (60 mm) level 2 Off-road +1.2 in (30 mm) level 1 Highway +/-0 in (0 mm) level Highspeed -0.6 in (-15 mm) level Vehicles with ADS: Depending on the ADS setting page 159), the vehicle will be lowered to the highspeed level when traveling at higher speeds.
- Page 166 Driving systems Off-road level 1, lower indicator lamp flashes Off-road level 2, lower and middle indicator lamps flashes Off-road level 3, lower, middle and upper indicator lamps flashes The vehicle adjusts to the corresponding off-road level. For example, the following message appears in the multifunction display while the level is being set: The vehicle is raised from off-road level 1 to...
- Page 167 The vehicle is lowered to off-road level 2. Once off-road level 2 is reached, you will see, for example, the following message in the multifunction display: While driving, the vehicle is lowered automatically as follows: At vehicle speeds above 55 mph (88 km/h) or if the vehicle speed stays between 40 mph (64 km/h) and 55 mph (88 km/h) for approximately 20 seconds,...
-
Page 168: All-Wheel Drive (4Matic)
Do not tow with one axle raised. Doing so could damage the transfer case, which is not covered by the Mercedes-Benz Limited Warranty. All wheels must be on or off the ground. Observe instructions for towing the vehicle with all wheels on the ground. -
Page 169: Minimum Distance
in the front bumper and four sensors in the rear bumper. To function properly, sensors : must be free of dirt, ice, snow and slush. Clean sensors : regularly. Be careful not to scratch or damage sensors :, see “Cleaning the driving systems sensors”... - Page 170 Driving systems signal. If the obstacle is closer than the minimum distance, the actual distance may no longer be indicated by the Parktronic system. Warning indicators Visual signals indicate the relative distance between the sensors and an obstacle. Front area warning indicators Rear area warning indicators Each warning indicator is divided into five yellow and two red distance segments for left...
-
Page 171: Rear View Camera
20 seconds and indicator lamp ; in Parktronic switch : comes on. Have the Parktronic system checked at an authorized Mercedes-Benz Center as soon as possible. If only the red distance segments illuminate and no acoustic warning sounds, the Parktronic system sensors are dirty (e.g. -
Page 172: Switching On/Off
In this case, have the position and setting of the camera checked by a qualified specialist workshop. Mercedes-Benz recommends that you contact a Mercedes- Benz Center for this purpose. Do not use the rear view camera in these situations. - Page 173 Warning! Please note that objects which do not touch the ground may appear to be further away than they actually are, for example: the bumper of a vehicle parked behind you a trailer hitch the back of a truck In such cases, you should not use the guidelines to judge the distance.
-
Page 174: Climate Control System
Overview of climate control system functions and air vents Overview of climate control system functions and air vents Your vehicle is equipped with either of the following climate control systems: Climate control ( page 175) The climate control combines an automatic heating and ventilation system with a cooling system. -
Page 175: Overview Of Climate Control System Functions And Air Vents
Overview of climate control system functions and air vents For best possible performance of the climate control: Keep the air intake grille in front of the windshield free of snow, leaves, sticks, and any other debris. Always keep all air vents and grilles in the passenger compartment free from obstruction. - Page 176 Overview of climate control system functions and air vents Air vents in the roof liner over the second-row seats Vehicles with 3-zone automatic climate control only Thumbwheel for air volume control Air vent, adjustable Opening/closing: Turn thumbwheels : upward or downward. Air vents in the roof liner over the third- row seats Vehicles with 3-zone automatic climate control...
-
Page 177: Climate Control
Climate control Control panel Function : Temperature control, driver’s side ; Air distribution and air volume (automatic mode) = Front defroster ? Increasing air volume A Air distribution (directs air through the windshield and side air vents) B AC cooling on/off Residual heat/ventilation Recommendation/Notes Set the temperature to 72‡... - Page 178 Climate control Function C Temperature control, passenger side D ± Rear climate control on/ off or air supply for rear passenger compartment on/off (USA only) ^ Rear climate control on/ off or air supply for rear passenger compartment on/off (Canada only) E Air distribution (directs air through center and side air vents)
-
Page 179: Climate Control
Have a clogged filter replaced as soon as possible at an authorized Mercedes-Benz Center. The air conditioning will not engage (no cooling) if the A/C mode is deactivated page 177). - Page 180 The compressor has turned off. Have the air conditioning checked at the nearest authorized Mercedes-Benz Center. Automatic mode When operating the climate control system in automatic mode, the interior air temperature, air volume and air distribution are adjusted automatically.
- Page 181 Adjusting air volume Decreasing/increasing: Press button I or K. The automatic mode is switched off. The selected blower speed is shown in air volume display G ( page 175). When using the Voice Control System, the blower speed reduces automatically. When the Voice Control System is not used anymore, the blower speed increases to the previously selected level.
- Page 182 Climate control Air recirculation mode Switch to air recirculation mode to prevent unpleasant odors from entering the vehicle from the outside (e. g. before driving through a tunnel). This setting cuts off the intake of outside air and recirculates the air in the passenger compartment.
-
Page 183: 3-Zone Automatic Climate Control
3-zone automatic climate control Control panels USA only Function : Temperature control, driver’s side ; Air distribution and air volume (automatic mode) = Front defroster ? Increasing air volume A Air distribution (directs air through the windshield and side air vents) 3-zone automatic climate control Recommendation/Notes Set the temperature to 72‡... - Page 184 3-zone automatic climate control Function B AC cooling on/off Residual heat/ventilation C Temperature control, passenger side D Operating the rear climate control from the front E Air distribution (directs air through center and side air vents) F Air distribution (directs air through the footwells and side air vents) G Air volume display...
- Page 185 Canada only Function : Temperature control, driver’s side ; Air distribution and air volume (automatic mode) = Air distribution, driver’s side (directs air through the windshield and side air vents) ? Front defroster A Increasing air volume B Rear window defroster C Air distribution, passenger side (directs air through the windshield and side air vents)
- Page 186 3-zone automatic climate control Function F Automatic climate control on/ G Air distribution, passenger side (directs air through the footwells and side air vents) H Air distribution, passenger side (directs air through center and side air vents) I AC cooling on/off Residual heat ventilation J Display K Decreasing air volume...
- Page 187 Have a clogged filter replaced as soon as possible at an authorized Mercedes-Benz Center. The air conditioning will not engage (no cooling) if the A/C mode is deactivated page 186).
- Page 188 3-zone automatic climate control Canada only: Display J ( cleared. Reactivating: Press button Ã. You can also press button ^ on the climate control panel. If you press button ¦ to reactivate the climate control system, the defrosting mode is activated. Deactivating the rear climate control from the front USA only...
- Page 189 The compressor has turned off. Have the air conditioning checked at the nearest authorized Mercedes-Benz Center. Automatic mode You can switch the climate control system on and off for each zone of the passenger compartment as desired.
- Page 190 3-zone automatic climate control Front temperature with front climate control panel USA only Increasing/decreasing: Turn temperature control : and/or C page 181) slightly clockwise or counterclockwise. Canada only Increasing/decreasing: Turn temperature control : and/or E page 183) slightly clockwise or counterclockwise.
- Page 191 Symbol Symbol Function Driver’s Passenger side side Directs air to the windshield and side air vents Directs air through the center, side and rear passenger compartment air vents Directs air to the footwells and side air vents Press the desired air distribution button Z, \, or c for the driver’s side, or M, P, or O for the passenger side.
- Page 192 3-zone automatic climate control was set before the front defroster was switched on. The indicator lamp in button ¦ goes out. The indicator lamp in button Á comes Turn temperature control : and/or C (USA only) ( page 181) or : and/or E (Canada only) ( page 183) slightly in any direction.
-
Page 193: Rear Window Defroster
The manually selected air recirculation mode is deactivated automatically: after 5 minutes if the outside temperature is below approximately 41‡ (5†) after 5 minutes if the air conditioning and air-drying are turned off after 30 minutes if the outside temperature is above approximately 41‡... -
Page 194: Operation
If water enters the vehicle interior, vehicle electronics could be damaged which is not covered by the Mercedes-Benz Limited Warranty. You can also open or close the tilt/sliding sunroof using the SmartKey or the KEYLESS-GO function, see “Summer opening feature”... -
Page 195: Power Tilt/Sliding Sunroof
Sunroof switch With the sunroof closed or raised, you can slide the sunroof screen forward and back. Sunroof screen Switch on the ignition. Opening Opening manually: Press and hold the sunroof switch to the resistance point in direction of arrow ;. Release the sunroof switch when the desired position is reached. -
Page 196: Synchronizing
If the tilt/sliding sunroof cannot be closed or synchronized, contact an authorized Mercedes-Benz Center or call Roadside Assistance. Vehicles with SmartKey: Switch off the ignition and remove the SmartKey from the starter switch. -
Page 197: Loading And Storing
The cargo compartment is the preferred place to carry objects. Always use cargo tie-down rings, and if so equipped, always use the cargo net when transporting cargo. Never drive a vehicle with the tailgate open. Deadly carbon monoxide (CO) gases may enter vehicle interior resulting in unconsciousness and death. -
Page 198: Technical Data
Large Ski and Snowboard Carrier – Standard Ski and Snowboard Carrier – Deluxe (Only in connection with corresponding adapter.) For more information on Mercedes-Benz accessories, contact your authorized Mercedes-Benz Center. Roof rails Crossbars The maximum roof load of any add-on roof equipment is reduced by the unladen weight of the crossbars (13.7 Ibs/6.2 kg). - Page 199 Warning! Do not use accessories which have not been approved by Mercedes-Benz for use in conjunction with these crossbars. If non- approved accessories are used, these accessories and/or the objects attached to...
- Page 200 Loading and storing Cover cap Sticker FRONT (or REAR) Screw for clamping claw Clamping claw The front and rear crossbars are of different lengths. Please pay close attention to stickers = FRONT and REAR on the crossbars. Unlock cover cap ; with key :. Remove cover cap ;.
- Page 201 Attach cover caps ( page 198) and lock them. Store key and hex key back into the storage well ( page 284). Adjusting the clamping widths of the crossbars Warning! Only install the crossbars at the exact locations designated on the roof rails. The designated locations for the front crossbars are between the markings engraved on the inside of the roof rails.
-
Page 202: Tie-Down Rings
Loading and storing Unlock cover cap ; with key :. Remove cover cap ;. Turn screws for clamping claws A counterclockwise until the crossbars can be lifted from the roof rails. Shortening the cover strip The cover strips reduce the wind noise caused by the crossbars. -
Page 203: Hooks
Cargo tie down rings, second-row footwell For Information on how to fold the third-row seats, see “Expanding cargo volume” page 201). Hooks Two hooks are located on the rear compartment trim panels, one on each side. Use the hooks to secure light-weight items only. - Page 204 Loading and storing Use the right button, indicated by R, to fold down the right third-row seat. Two buttons are located on the right side trim of the third-row seats. It is only possible to fold the third-row seats down when the rear right door is open.
- Page 205 accident and be thrown around the vehicle interior. Objects thrown around the vehicle interior may cause an accident and/or serious personal injury. Folding second-row seats When the second-row seats are folded forward, the front seats may not be moved to the rearmost position. Otherwise you could damage the front and second-row seats.
- Page 206 Loading and storing It is only possible to fold the third-row seats down when the tailgate is open. Example, button for the right third-row seats Button for returning third-row seats to upright position Button for folding the third-row seats Lower the head restraints of the third-row seats completely ( page 88).
-
Page 207: Cover Blind
Step 2: Pull and hold lever ; in direction of arrow at resistance point. Fold seat backrest : rearward until it engages. Check for secure locking by pushing and pulling on seat backrest :. Fold seat cushion = rearward until it locks into position. -
Page 208: Cargo Net
Loading and storing Press on mount cover at its upper edge as indicated by arrow. The mount cover’s lower edge flips up. Remove mount cover by pulling its lower edge out of the side trim. To avoid loss of the mount covers, insert the mount covers into the mounts currently not in use. -
Page 209: Aux Socket
Hang cargo net bar ; on holder : as indicated by the arrow. Push cargo net bar ; forward into holder : in direction of arrow. Engage lower cargo net bar. The cargo net bar must engage audibly. Pulling the cargo net tight Belt hook attached behind the third-row seat backrest Hook belt hook : into cargo tie-down... - Page 210 Loading and storing Opening: Pull glove box lid release :. Closing: Push glove box lid ; upwards until it engages. You can lock the glove box, e.g. when the vehicle is in the shop for service. The glove box can only be locked or unlocked with the mechanical key.
-
Page 211: Cup Holders
Liquids spilled on vehicle occupants may cause serious personal injury. Liquids spilled on vehicle equipment may cause damage not covered by the Mercedes-Benz Limited Warranty. Useful features When not in use, keep the cup holder closed. -
Page 212: Vanity Mirror
Useful features Do not sit on or lean your body weight against the armrest when it is folded down, as you could otherwise damage it. Cup holders in third-row side trims Cup holders are located in the side trims of the third-row seats. -
Page 213: Ashtrays
Vanity mirror Vanity mirror lamp = only functions when sun visor : is engaged in mounting C. Flip sun visor down. Lift up vanity mirror cover ?. Vanity mirror lamp = comes on. Rear panorama roof sunshade The rear panorama roof sunshade over the third-row seats prevents the sun from shining directly into the vehicle. -
Page 214: Cigarette Lighter
Useful features Reinstalling ashtray insert: Install ashtray insert :. Closing: Push cover ;. Cigarette lighter Observe Safety notes, see page 55. Warning! Never touch the heating element or sides of the lighter; they are extremely hot. Hold the knob only. Make sure any children traveling with you do not injure themselves or start a fire with the hot cigarette lighter. -
Page 215: V Ac Socket
Front passenger footwell Second-row footwell Cargo compartment 115V AC Socket Warning! The 115V AC socket operates at high voltage. Use the 115V AC socket in the vehicle with the same caution and prudence that you exercise when using power outlets at home. Keep any fluids away from the 115V AC socket. - Page 216 When connecting such a device, 115V AC socket : will not provide power. If LED ; still does not come on, contact an authorized Mercedes-Benz Center. Tele Aid In order to activate the Tele Aid system, a subscriber agreement must be completed.
-
Page 217: Tele Aid
In case of an emergency, help will have to be summoned by other means. Have the system checked at the nearest Mercedes-Benz Center or contact the Customer Assistance Center at 1-800-FOR-MERCedes (1-800-367-6372) (USA only) or 1-888-923-8367 (Canada only) as soon as possible. -
Page 218: Initiating An Emergency Call Manually
Useful features (determined by the GPS satellite location system), vehicle model, identification number and color are generated. A voice connection between the Customer Assistance Center and the occupants of the vehicle will be established automatically soon after the emergency call has been initiated. The Customer Assistance Center will attempt to determine the nature of the emergency more precisely, provided they can speak to... -
Page 219: Information Button
Press and hold Roadside Assistance button : for longer than 2 seconds. A call to a Mercedes-Benz Roadside Assistance dispatcher will be initiated. The indicator lamp in Roadside Assistance button : will flash while the call is in progress. The message Connecting Call will appear in the multifunction display and the COMAND system is muted. -
Page 220: Search & Send
Information regarding the operation of your vehicle, the nearest authorized Mercedes- Benz Center or Mercedes-Benz USA products and services is available to you. For more details concerning the Tele Aid system, please visit www.mbusa.com (USA only), log in to “Owner’s Online”... -
Page 221: Stolen Vehicle Recovery Services
on “Search & Send”, refer to separate COMAND system operating instructions. Remote door unlock In case you have locked your vehicle unintentionally (e.g. SmartKey inside vehicle), and the reserve SmartKey is not available: Contact the Customer Assistance Center at 1-800-FOR-MERCedes (1-800-367-6372) (USA only) or 1-888-923-8367 (Canada only). - Page 222 Useful features When programming a garage door opener, park vehicle outside the garage. Do not run the engine while programming the integrated remote control. Inhalation of exhaust gas is hazardous to your health. All exhaust gas contains carbon monoxide (CO), and inhaling it can cause unconsciousness and possible death.
- Page 223 Rolling code programming To train a garage door opener (or other rolling code devices) with the rolling code feature, follow these instructions after completing the “Programming” portion (steps 1 through 6) of this text. For your convenience and to complete the procedure faster, you might want to have someone assist you.
- Page 224 Certain types of garage door openers are incompatible with the integrated remote control. If you should experience further difficulties with programming the integrated remote control, contact an authorized Mercedes-Benz Center, or call the Mercedes-Benz Customer Assistance Center (USA only) at 1-800-FOR-MERCedes (1-800-367-6372), ®...
-
Page 225: Floormats
USA only: This device complies with Part 15 of the FCC Rules. Operation is subject to the following two conditions: 1. This device may not cause harmful interference, and 2. this device must accept any interference received, including interference that may cause undesired operation. - Page 226 Useful features To allow the use of these devices in the vehicle, infrared transparent areas : are placed in the windshield. Seat cover under third-row seats If something falls under the third-row seats, you can remove the seat cover in order to reach under the seats.
- Page 227 Vehicle equipment ... 226 The first 1000 miles (1500 km) ... 226 At the gas station ... 226 Engine compartment ... 228 Tires and wheels ... 233 Winter driving ... 257 Driving instructions ... 259 Maintenance ... 273 Vehicle care ... 275...
-
Page 228: Vehicle Equipment
Mercedes-Benz Limited Warranty. If you have accidentally filled the tank with incorrect or non-approved fuel, do not switch on the ignition. -
Page 229: At The Gas Station
Contact an authorized Mercedes-Benz Center to have the fuel system drained completely. Gasoline engine: To prevent damage to the catalytic converters, only use premium unleaded gasoline in this vehicle. Any noticeable irregularities in engine operation should be repaired promptly. -
Page 230: Compartment
The fuel system and engine will otherwise be damaged, which is not covered by the Mercedes-Benz Limited Warranty. To prevent malfunctions, diesel fuel with improved cold flow characteristics is offered in the winter months. Check with your fuel retailer. -
Page 231: Engine Compartment
Warning! You could be injured when the hood is open – even when the engine is turned off. Parts of the engine can become very hot. To prevent burns, let the engine cool completely before touching any components on the vehicle. -
Page 232: Consumption
Do not use any special lubricant additives, as these may damage the drive assemblies. Using special additives not approved by Mercedes-Benz may cause damage not covered by the Mercedes-Benz Limited Warranty. For further information contact an authorized Mercedes-Benz Center. -
Page 233: Transmission Fluid Level
Only use approved engine oils and oil filters required for vehicles with Maintenance System. For a listing of approved engine oils and oil filters, contact an authorized Mercedes-Benz Center or visit www.mbusa.com (USA only). The following will result in engine or emission control system damage not... - Page 234 Engine compartment Using a rag, slowly open the cap approximately turn to relieve excess pressure. If opened immediately, scalding hot fluid and steam will be blown out under pressure. Do not spill antifreeze on hot engine parts. Antifreeze contains ethylene glycol which may burn if it comes into contact with hot engine parts.
-
Page 235: Tires And Wheels
When replacing rims, only use genuine Mercedes-Benz wheel bolts specified for the particular rim type. Failure to do so can result in the bolts loosening and possibly an accident. -
Page 236: Important Guidelines
Tires and wheels Important guidelines Only use sets of tires and rims of the same type and make. Tires must be of the correct size for the rim. Break in new tires for approximately 60 miles (100 km) at moderate speeds. Regularly check the tires and rims for damage. -
Page 237: Important Notes On
If you are not sure about the proper tire inflation pressure, contact an authorized Mercedes-Benz Center. Tires and wheels Driving comfort may be reduced when the tire inflation pressure is adjusted to the... -
Page 238: Tire Inflation Pressure
Tires and wheels Example illustration: Tire inflation pressures for all approved, factory equipped tires When a tire size is specified, the tire inflation pressure that follows applies to that particular tire size only. Example illustration: Tire inflation pressures for particular tire sizes Some tire inflation pressure labels may only show the rim diameter instead of the entire tire size, e.g. -
Page 239: Tire Pressure Loss Warning System
Checking tire inflation pressure Safety notes Warning! Follow recommended tire inflation pressures. Do not underinflate tires. Underinflated tires wear excessively and/or unevenly, adversely affect handling and fuel economy, and are more likely to fail from being overheated. Do not overinflate tires. Overinflated tires can adversely affect handling and ride comfort, wear unevenly, increase stopping distance, and result in sudden deflation (blowout) -
Page 240: Regular Checks
Tires and wheels Each tire, including the spare, should be checked at least once a month when cold. Inflate the tires to the recommended tire inflation pressure as specified on the Tire and Loading Information placard on the driver’s door B-pillar the tire inflation pressure label located on the inside of the fuel filler flap The recommended tire inflation pressures... -
Page 241: Monitoring System (Advanced Tpms)
After a certain “learning phase”, the tire pressure loss warning system checks the set pressure values for all four tires. If you wish to cancel: Press button X. Advanced Tire Pressure Monitoring System (Advanced TPMS), (USA only) Your vehicle is equipped with the Advanced Tire Pressure Monitoring System (Advanced TPMS). - Page 242 Tires and wheels illuminated, the system may not be able to detect or signal low tire pressure as intended. TPMS malfunctions may occur for a variety of reasons, including the installation of incompatible replacement or alternate tires or wheels on the vehicle that prevent the TPMS from functioning properly.
-
Page 243: Tire Pressure
Tire inflation pressure warnings If the system detects a significant loss of tire inflation pressure in one or more than one tire, a message appears in the multifunction display. In addition, an acoustic warning sounds and the low tire pressure telltale in the instrument cluster comes on. -
Page 244: Tire And Loading Information Placard
Tires and wheels Maximum tire inflation pressure Warning! Never exceed the maximum tire inflation pressure. Follow recommended tire inflation pressures. Do not underinflate tires. Underinflated tires wear excessively and/or unevenly, adversely affect handling and fuel economy, and are more likely to fail from being overheated. Do not overinflate tires. -
Page 245: Seating Capacity
Loading Information placard with regards to loading your vehicle. Tire and Loading Information Warning! Do not overload the tires by exceeding the specified load limit as indicated on the Tire and Loading Information placard on the driver’s door B-pillar. Overloading the tires can overheat them, possibly causing a blowout. -
Page 246: Capacities
Tires and wheels Step 3: Subtract the combined weight of the driver and passengers from XXX kilograms or XXX lbs. Step 4: The resulting figure equals the available amount of cargo and luggage load capacity. For example, if the “XXX” amount equals 1 400 lbs and there will be five 150 lbs passengers in your vehicle, the amount of available cargo and luggage load... - Page 247 Step 1 Combined weight limit of occupants and cargo from Tire and Loading Information placard Step 2 Number of occupants (driver and passengers) Seating configuration Occupants weight Combined weight of all occupants Step 3 Available cargo/ luggage and trailer tongue weight (total load limit from Tire and Loading Information placard minus...
-
Page 248: Direction Of Rotation, Spinning
Tires and wheels Weight Rating (GVWR) and the Gross Axle Weight Rating (GAWR) for either the front or rear axle. You can obtain the GVWR and GAWR from the certification label. The certification label can be found on the driver’s door B-pillar, see the “Technical data”... -
Page 249: Care And Maintenance
TIREFIT kit. TIREFIT kits are available at any authorized Mercedes-Benz Center. For information on driving in case of pressure loss in one or more tires (emergency mode), see the “Practical hints”... -
Page 250: Storing Tires
Tires and wheels recommended minimum tire tread depth for winter tires is in (4 mm). Treadwear indicator : appears as a solid band across the tread. Storing tires Keep unmounted tires in a cool, dry place with as little exposure to light as possible. Protect tires from contact with oil, grease and fuels. -
Page 251: Rotation
Exercise appropriate caution. Avoid spinning of a drive wheel. This may cause serious damage to the drivetrain which is not covered by the Mercedes-Benz Limited Warranty. Temperature Warning! The temperature grade for this tire is established for a tire that is properly inflated and not overloaded. -
Page 252: Tire Labeling
Tires and wheels dimension front vs. rear), tire rotation is not possible. If applicable to your vehicle’s tire configuration, tires can be rotated according to the tire manufacturer’s recommended intervals in the tire manufacturer’s warranty pamphlet located in your vehicle literature portfolio. -
Page 253: Tire Load Rating
Tire size designation, load and speed rating Tire width Aspect ratio in % Radial tire code Rim diameter Load index Speed symbol For illustration purposes only. Actual data on tires are specific to each vehicle and may vary from data shown in above illustration. -
Page 254: Tire Speed Rating
Tires and wheels For example, a load rating of 91 corresponds to a maximum load of 1356 lb (615 kg) the tire is designed to support. See also “Maximum tire load” ( maximum load associated with the load index is indicated in kilograms and lbs. For additional information on the load index, see “Load identification”... - Page 255 “Technical data” section ( for example when purchasing new tires. If you are uncertain about the correct reading of the information given on a tire’s sidewall, any authorized Mercedes-Benz Center will be glad to assist you. or M+Sifor winter tires Load identification For illustration purposes only.
-
Page 256: Tire And Loading Terminology
Tires and wheels The TIN is a unique identifier. The TIN facilitates efforts by tire manufactures to notify purchasers in recall situations or other safety matters concerning tires. It gives purchasers the means to easily identify such tires. The TIN is comprised of “Manufacturer’s identification mark”... -
Page 257: Cold Tire Inflation Pressure
radio, and heater, to the extent that these items are available as factory-installed equipment (whether installed or not). Air pressure The amount of air inside the tire pressing outward on each square inch of the tire. Air pressure is expressed in pounds per square inch (psi), kilopascal (kPa), or bar. -
Page 258: Maximum Permissible Tire Inflation Pressure
Tires and wheels Maximum loaded vehicle weight The sum of curb weight, accessory weight, total load limit, and production options weight. Maximum permissible tire inflation pressure This number is the greatest amount of air pressure that should ever be put in the tire. Normal occupant weight The number of occupants the vehicle is designed to seat, multiplied by 68 kilograms... -
Page 259: Winter Driving
Have the spare wheel replaced by a regular road wheel with a winter tire at the nearest authorized Mercedes-Benz Center. Always use winter tires at temperatures below 45‡ (7†) and whenever wintry road conditions prevail. Not all M+S rated tires provide special winter performance. -
Page 260: Snow Chains
The tires or the vehicle could be damaged as a result. Only use snow chains that are approved by Mercedes-Benz. Any authorized Mercedes- Benz Center will be glad to advise you on this subject. Use of snow chains may be prohibited depending on location. -
Page 261: Driving Instructions
Have all maintenance work performed at the intervals specified in the Maintenance Booklet and as required by the Maintenance system. Contact an authorized Mercedes-Benz Center. Fuel consumption is also increased by driving in cold weather, in stop-and-go traffic, on short trips and in mountainous areas. -
Page 262: Brakes
This may cause serious damage to the drivetrain which is not covered by the Mercedes-Benz Limited Warranty. Continuous or hard braking Warning! Resting your foot on the brake pedal will cause excessive and premature wear of the brake pads. -
Page 263: Driving Off
If such tests are necessary, contact an authorized Mercedes-Benz Center. You could otherwise seriously damage the brake system or the transfer case which is not covered by the Mercedes-Benz Limited Warranty. ® Because the ESP operates... -
Page 264: Hydroplaning
Simultaneously depressing the accelerator pedal and applying the brakes reduces engine performance and causes premature brake and drivetrain wear which is not covered by the Mercedes-Benz Limited Warranty. Hydroplaning Depending on the depth of the water layer on the road, hydroplaning may occur, even at low speeds and with new tires. - Page 265 We recommend that you start out with easy off-road travel. Special driving features for off-road driving The following driving features are available for specific kind of operation: Off-road ABS ( page 63) ® Off-road ESP page 65) Off-road 4-ETS ( page 64) Hill-start assist system ( page 117)
-
Page 266: Checklist
The engine oil level warnings should not be ignored. Extended driving with the symbol displayed could result in serious engine damage that is not covered by the Mercedes-Benz Limited Warranty. Tires Check the tread depth and maintain specified tire inflation pressure. A placard with the recommended tire inflation pressures is located on the driver’s door B-... -
Page 267: Driving Downhill
100% grade which is equivalent to a slope angle of 45°. Keep in mind that the climbing ability of the vehicle depends on terrain conditions. Shift automatic transmission into gear range 1 ( page 118). Drive slowly. Avoid excessive engine speeds – drive with moderate engine speeds (max. -
Page 268: Driving Through Water
Driving instructions The special Off-road ABS ( setting allows for precise and brief (cyclical) blocking of the front wheels, permitting them to dig into loose ground. Remember that, when stopped, the front wheels slide across a surface and thus lose their ability to steer the vehicle. -
Page 269: Crossing Obstacles
Crossing obstacles Obstacles can damage the vehicle underbody or suspension components. If possible use the assistance of a second person outside the vehicle to scout the path you intend to take and check for adequate ground clearance when you cross obstacles with your vehicle. -
Page 270: Returning
Inspect the tires and the vehicle underbody for possible damage. If the vehicle or tires appear unsafe, have the vehicle towed to the nearest authorized Mercedes-Benz Center or tire dealer for repairs. Off-road driving increases strain on the vehicle. -
Page 271: Electrical Connections
Electrical connections The vehicle is prewired to accept the seven- wire harness included in the Mercedes-Benz approved trailer hitch receiver kit. A four-pole conversion plug is available from your authorized Mercedes-Benz Center as a spare part. -
Page 272: Coupling A Trailer
Driving instructions The values as measured must not exceed the weight limits listed under “Vehicle and trailer weights and ratings” ( Coupling a trailer Warning! While you are coupling or decoupling a trailer, make sure nobody locks or unlocks the vehicle and/or opens or closes doors or the tailgate. -
Page 273: Decoupling
practice turning, stopping and backing up in an area which is free of traffic. Before you start driving check the trailer hitch break-away switch safety chains electrical connections lighting tires Adjust the mirrors ( page 94) to permit unobstructed view beyond rear of trailer. If the trailer has electric brakes, start your vehicle and trailer moving slowly, and then apply only the trailer brake controller by... -
Page 274: Abroad
Driving abroad If you plan to drive the vehicle outside the U.S. or Canada, you should request dealer Observe all legal requirements. network information for your destination from any authorized Mercedes-Benz Center. Control and operation of radio transmitter Safety notes Warning! Please do not forget that your primary responsibility is to drive the vehicle. -
Page 275: Maintenance
Engine adjustments should not be altered in any way. Moreover, the specified service procedures must be carried out regularly according to Mercedes-Benz servicing requirements. For details refer to the Maintenance Booklet. Warning! Inhalation of exhaust gas is hazardous to your health. -
Page 276: Service Indicator Display
In the event that the maintenance service on your vehicle is not carried out at an authorized Mercedes-Benz Center, you can have the maintenance service indicator reset. The automotive maintenance facility carrying out the maintenance service will find the... -
Page 277: Vehicle Care
Mercedes-Benz Limited Warranty. Vehicle care Cleaning and care of the vehicle Notes Regular and proper care will help to maintain the value of your vehicle. Warning! Many cleaning products can be hazardous. Some are poisonous, others are flammable. -
Page 278: Cleaning
Affixing stickers, magnets, adhesive tape or similar materials to painted body components may damage the paintwork. Mercedes-Benz approved Paint Care should be applied when water drops on the paint surface do not “bead up”. This should normally be done every 3 to 5 months, depending on the climate and washing detergent used. - Page 279 For very dirty ornamental moldings of which you are sure are chrome-plated, use a chrome cleaner. If in doubt whether an ornamental molding is chrome-plated, contact an authorized Mercedes-Benz Center. Headlamps, brake lamps, tail lamps, side markers, turn signal lenses...
-
Page 280: Sensor Cover
Be careful not to apply wax to rear view camera lens : when waxing the vehicle. If necessary, remove the wax using the Mercedes-Benz approved Car Shampoo with plenty of water. Do not clean the camera and the area around the camera... - Page 281 Doing so may damage the windows. Light alloy wheels If possible, clean wheels once a week. Use Mercedes-Benz approved Wheel Care, a soft bristle brush and a strong spray of water for cleaning the light alloy wheels. Only use acid-free cleaning materials.
-
Page 282: Cleaning
Vehicle care Steering wheel Wipe with a damp cloth and dry thoroughly or clean with Mercedes-Benz approved Leather Care. Carpets Use Mercedes-Benz approved Carpet and Fabric Care for cleaning the carpets. Headliner Use a soft bristle brush or a dry-shampoo cleaner in case of excessive dirt. - Page 283 Regular cleaning and care of chrome-plated exhaust tips will help to maintain their shine and the classy appearance. Use Mercedes-Benz approved Chrome Polishing Paste each time the vehicle has been washed, especially during the winter. Do not use alkaline cleaners such as wheel cleaners as they could cause corrosion.
- Page 285 Vehicle equipment ... 284 Where will I find ...? ... 284 Vehicle status messages in the multifunction display ... 287 What to do if … ... 314 Unlocking/locking manually ... 323 Resetting activated NECK-PRO active front head restraints ... 325 Replacing SmartKey batteries ...
-
Page 286: Vehicle Equipment
Where will I find ...? Vehicle equipment This Operator’s Manual describes all features, standard or optional, potentially available for your vehicle at the time of purchase. Please be aware that your vehicle might not be equipped with all features described in this manual. Where will I find ...? First aid kit Check expiration dates and contents for... -
Page 287: Where Will I Find
Some tools required for a wheel change are specific to your vehicle. Contact an authorized Mercedes-Benz Center to obtain the tools approved for your vehicle. The illustration shows the vehicle retrofitted with the necessary tools for a wheel change. -
Page 288: Collapsible Wheel Chock
Where will I find ...? Collapsible wheel chock The collapsible wheel chock serves to secure the vehicle, e.g. while changing a wheel. Take the collapsible wheel chock from the vehicle tool kit ( page 284). Setting up: Tilt both plates upward :. Fold the lower plate outward ;. -
Page 289: Vehicle Status Messages In The Multifunction Display
Vehicle status messages in the multifunction display Removing: Open the tailgate ( Lift the cargo compartment floor and secure it on the upper cargo compartment lip ( page 284). To prevent damage, always disengage the securing hook from upper cargo compartment lip and lower the cargo compartment floor before closing the tailgate. -
Page 290: Text Messages
Continue driving with added caution. Wheels may lock during hard braking, reducing steering capability. Have the system checked at an authorized Mercedes-Benz Center as soon as possible. Failure to follow these instructions increases the risk of an accident. - Page 291 BAS, the ESP , and the PRE-SAFE operational again and the message should disappear. If the message does not disappear: Have the system checked at an authorized Mercedes-Benz Center as soon as possible. ® In addition, the yellow ESP warning lamp d comes on.
-
Page 292: Pre-Safe
The display will clear after driving a short distance at a vehicle speed of above 12 mph (20 km/h). ® The PRE-SAFE system has failed. All other occupant safety systems, such as the air bags, are still available. Contact an authorized Mercedes-Benz Center as soon as possible. -
Page 293: Messages In The Multifunction Display
Vehicle status messages in the multifunction display Display messages Front Passenger Airbag Enabled Operator’s Manual Possible causes/consequences and M Solutions USA only: The front passenger front air bag is activated while driving even though a child, small individual, or object below the system’s weight threshold is on the front passenger seat, or the front passenger seat is empty. - Page 294 OCS, the 42 indicator lamp will remain illuminated or go out. If above conditions are not met, the system is not working properly. Have the system checked at an authorized Mercedes-Benz Center as soon as possible.
- Page 295 OCS, the 42 indicator lamp will remain illuminated or go out. If above conditions are not met, the system is not working properly. Have the system checked at an authorized Mercedes-Benz Center as soon as possible. page 83).
-
Page 296: Messages In The Multifunction Display
Check the activation conditions for Distronic page 151). The Distronic or the display are malfunctioning. Contact an authorized Mercedes-Benz Center as soon as possible. You have accelerated. The Distronic has switched off. Stop accelerating. Distronic had been deactivated and is available again. - Page 297 Vehicle status messages in the multifunction display Display messages DISTRONIC Currently Unavailabl Operator’s Manual DISTRONIC Currently Unavailabl Operator’s Manual Warning! Distronic cannot take weather conditions into account. Switch off Distronic or do not turn it on if the sensor is dirty or visibility is diminished as a result of snow, rain or fog.
-
Page 298: Battery
If the automatic transmission is in drive position D: Without shifting the automatic transmission out of drive position D, drive to an authorized Mercedes-Benz Center. If the automatic transmission is set to neutral position N, reverse gear R or park position P: Do not drive. -
Page 299: Tires
The tire pressure loss warning system is malfunctioning. Have the tire pressure loss warning system checked at an authorized Mercedes-Benz Center. The tire pressure loss warning system indicates that the tire inflation pressure is too low in at least one tire. - Page 300 The respective tire is indicated by – – instead of the tire inflation pressure in the multifunction display. Have the Advanced TPMS checked at an authorized Mercedes-Benz Center. Have the wheel sensors installed at an authorized Mercedes-Benz Center. At least one wheel without appropriate wheel sensors is mounted (e.g.
-
Page 301: Symbol Messages
Vehicle status messages in the multifunction display Display messages Check Tire(s) Warning! Do not drive with a flat tire. A flat tire affects the ability to steer or brake the vehicle. You may lose control of the vehicle. Continued driving with a flat tire will cause excessive heat build-up and possibly a fire. -
Page 302: Brake Fluid
Adjust driving to be consistent with reduced braking responsiveness. Have the system checked at an authorized Mercedes-Benz Center as soon as possible. You are driving with the parking brake engaged. In addition an acoustic warning sounds. -
Page 303: Messages In The Multifunction Display
Reduce vehicle speed and set the desired vehicle level again ( page 159). Observe the notes on trailer towing ( The air suspension is malfunctioning. Do not drive faster than 50 mph (80 km/h). Have the system checked at an authorized Mercedes-Benz Center. page 269). -
Page 304: Display
Do not drive faster than 12 mph (20 km/h) until the off-road level 2 is reached. The differential locks are malfunctioning. Do not drive faster than 50 mph (80 km/h). Have the vehicle checked at an authorized Mercedes-Benz Center. -
Page 305: Messages In The Multifunction Display
The LOW RANGE system is malfunctioning. Do not drive faster than 50 mph (80 km/h). Engage the parking brake if parked. Contact an authorized Mercedes-Benz Center as soon as possible. Speed too high for shifting procedure. Continue driving more slowly. -
Page 306: Doors
Take the SmartKey with you when leaving the vehicle. Remove the SmartKey from the starter switch. The SmartKey is malfunctioning. Contact an authorized Mercedes-Benz Center. The SmartKey in the starter switch does not belong to the vehicle. Find the SmartKey that belongs to the vehicle to operate the vehicle. -
Page 307: Washer Fluid
The SmartKey with KEYLESS-GO is permanently not detected. Remove the KEYLESS-GO button from the starter switch page 80). Operate the vehicle with the SmartKey in the starter switch. Contact an authorized Mercedes-Benz Center. The telephone has not yet been connected to the COMAND ® system via Bluetooth Connect the telephone to the COMAND system via ®... -
Page 308: Coolant
You could be seriously burned. Do not ignore the low engine coolant level warning. Extended driving with the message and symbol displayed may cause serious engine damage not covered by the Mercedes-Benz Limited Warranty. - Page 309 Vehicle status messages in the multifunction display The engine should not be operated with the coolant temperature above 248‡ (120†). Doing so may cause serious damage which is not covered by the Mercedes-Benz Limited Warranty. Display messages Coolant Stop car,...
-
Page 310: Engine Oil
Stop the vehicle in a safe location or as soon as it is safe to do so. Engage the parking brake. Do not continue to drive. Contact an authorized Mercedes-Benz Center. The engine oil level is too low. Check the engine oil level ( as required ( page 231). -
Page 311: Air Filter
If it is closed properly: Have the fuel system checked at an authorized Mercedes-Benz Center. The air filter is clogged. Have the air filter checked at an authorized Mercedes-Benz Center. There is water in the fuel filter. Have the water drained at an authorized Mercedes-Benz Center as soon as possible. -
Page 312: Fog Lamps
Possible causes/consequences and M Solutions The active Bi-Xenon headlamp system is malfunctioning. Contact an authorized Mercedes-Benz Center as soon as possible. The left or right daytime running lamps are malfunctioning. Contact an authorized Mercedes-Benz Center as soon as possible. -
Page 313: High-Beam Lamps
Replace the bulb as soon as possible ( The light sensor is malfunctioning. The headlamps come on automatically. Contact an authorized Mercedes-Benz Center as soon as possible. To switch off the headlamps (U.S. vehicles only): In the control system, set daytime running lamp mode to manual ( page 136). -
Page 314: Rear
Vehicle status messages in the multifunction display Display messages Low Beam Left Low Beam Right Foglamp Rear Left Switch Off Lights Tail Lamp Left Tail Lamp Right Trailer Brake Lamp Trailer Tail Lamp Left Trailer Tail Lamp Right Trailer Turn Signal Left Trailer... -
Page 315: Turn Signals
The turn signal in the left or right exterior rear view mirror is malfunctioning. This message will only appear if all LEDs have stopped working. Contact an authorized Mercedes-Benz Center as soon as possible. Possible causes/consequences and M Solutions The tire inflation pressure is too low in at least one tire. -
Page 316: What To Do If
What to do if … Display messages Tire Pressure Check Tires Warning! Do not drive with a flat tire. A flat tire affects the ability to steer or brake the vehicle. You may lose control of the vehicle. Continued driving with a flat tire will cause excessive heat build-up and possibly a fire. -
Page 317: Indicator Lamp
Read and observe messages that may appear in the multifunction display ( Have the system checked at an authorized Mercedes-Benz Center as soon as possible. Failure to follow these instructions increases the risk of an accident. -
Page 318: Warning Lamp
® The ABS, the BAS, the ESP and PRE-SAFE Have the system checked at an authorized Mercedes-Benz Center as soon as possible. Failure to follow these instructions increases the risk of an accident. You are driving with the parking brake engaged. -
Page 319: Seat Belt Telltale
Safety systems Problem Possible causes/consequences and M Solutions 7 The red seat belt The seat belt telltale reminds you and your passengers to fasten telltale comes your seat belts before driving off. on for a Fasten your seat belts. maximum of Regardless of whether the seat belts are fastened or not, the seat 6 seconds after belt telltale always comes on and remains lit for 6 seconds after... -
Page 320: Warning Lamp
® If the ESP cannot be switched back on: Have the system checked at an authorized Mercedes-Benz Center as soon as possible. ® The ESP is not operational due to a malfunction. - Page 321 Problem Possible causes/consequences and M Solutions ® d The yellow ESP The ESP warning lamp detected traction loss in at least one tire. flashes while The cruise control is deactivated. driving. When driving off, apply as little throttle as possible. While driving, ease up on the accelerator pedal.
- Page 322 If it is not closed properly: Close the fuel cap. If it is closed properly: Have the fuel system checked by an authorized Mercedes-Benz Center. Diesel engine: Your fuel tank was driven empty. After refueling, start, turn off and restart the engine three or four times in succession.
- Page 323 Tires Problem Possible causes/consequences and M Solutions h USA only: The Advanced TPMS detects a loss of pressure in at least one tire. Combination Carefully bring the vehicle to a halt, avoiding abrupt steering and low tire pressure braking maneuvers. Observe the traffic situation around you. telltale/TPMS Read and observe messages in the multifunction display malfunction...
- Page 324 The system is malfunctioning when there is no BabySmart seat installed on the front passenger seat. Have the system checked as soon as possible at an authorized Mercedes-Benz Center. The system is malfunctioning. Make sure there is nothing between seat cushion and child seat.
-
Page 325: Unlocking/Locking Manually
Mercedes-Benz Center. Do not transport a child on the front passenger seat until the system has been repaired. Read and observe messages in the multifunction display and... -
Page 326: Manually
Unlocking/locking manually SmartKey with KEYLESS-GO Move locking tab : in the direction of arrow. Slide mechanical key ; out of the housing. Unlocking the driver’s door Insert mechanical key ; into the driver’s door lock. Turn mechanical key ; counterclockwise to position 1. -
Page 327: Resetting Activated Neck-Pro Active Front Head Restraints
Warning! For safety reasons, have the NECK-PRO active front head restraints checked at an authorized Mercedes-Benz Center after a rear-end collision. Warning! When pushing back the head restraint cushion, make sure your fingers do not become caught between the head restraint cushion and the cover. -
Page 328: Replacing
When inserting the batteries, make sure they are clean and free of lint. When replacing batteries, always replace both batteries. The required replacement batteries are available at any authorized Mercedes-Benz Center. Replacement batteries: Lithium, type CR 2025 or equivalent. Remove the mechanical key from the SmartKey ( page 323). -
Page 329: Replacing Smartkey Batteries
SmartKey Press mechanical key ; into the SmartKey opening until battery compartment cover : opens. Do not keep the cover shut. Remove the battery compartment cover. Pat the SmartKey against the palm of your hand until battery = falls out. Insert the new battery with the positive terminal (+) facing up. -
Page 330: Replacing Bulbs
Correct headlamp adjustment is extremely important. Have headlamps checked and readjusted at regular intervals and when a bulb has been replaced. Contact an authorized Mercedes-Benz Center for headlamp adjustment. Warning! Bulbs and bulb sockets can be very hot. Allow the lamp to cool down before changing a bulb. -
Page 331: Replacing Bulbs
Bulbs You can replace the following bulbs yourself: Halogen headlamps Bi-Xenon headlamps Replacing bulbs Type : Low-beam lamp: H7 55 W ; High-beam lamp/High-beam flasher lamp: H7 55 W = Parking and standing lamp: W 5 W ? Turn signal lamp: 3457A A Side marker lamp: WY 5 W Type : High-beam flasher lamp/High-beam... -
Page 332: Replacing Bulbs
Your hands should be dry and free of oil and grease. If the newly installed bulb does not come on, contact an authorized Mercedes-Benz Center. Type : Backup lamp: P 21 W ; Rear foglamp (driver’s side only): H 21 W... - Page 333 Example illustration: Driver’s side headlamp Housing cover for low-beam halogen or Bi- Xenon headlamp Housing cover for high-beam halogen bulb (high beam and high-beam flasher) Bulb socket for parking and standing lamp bulb Bulb socket for front turn signal lamp bulb Bulb socket for side marker lamp bulb Warning! Do not remove the cover for the Bi-Xenon...
- Page 334 Replacing bulbs Turn housing cover ; counterclockwise and remove it. Turn bulb socket C with the bulb counterclockwise and remove it. Pull the bulb out of bulb socket C. Gently press the new bulb into bulb socket Place bulb socket C back into the housing and turn it clockwise until it engages.
- Page 335 Insert a suitable object such as a coin into the slot of lock :. Turn lock : by 90° in direction of the arrow. Remove cover ;. Replacing bulbs Example illustration: LED rear lamp driver’s side Backup lamp bulb socket Rear fog lamp bulb socket (driver’s side only) Depending on which bulb needs to be...
-
Page 336: Replacing Wiper Blades
Screw at arrow ?: 0.50° pitch The left and right headlamps must be adjusted individually. If it is not possible to obtain a proper headlamp adjustment, have the system checked at an authorized Mercedes-Benz Center. Replacing wiper blades Safety notes Warning! -
Page 337: Replacing Wiper Blades
Removing wiper blades Front wiper blades Do not pull on the wiper blade inserts. They could tear. Fold the wiper arms forward until they engage. Press tabs ; together. Tilt wiper blade : away from wiper arm Take off wiper blade : in direction of arrow. -
Page 338: Flat Tire
Flat tire Rear wiper blade Insert wiper blade ; into wiper arm :. Hold wiper arm : and engage wiper blade ; by pushing it in direction of arrow until it locks into place. Check whether the wiper blade is securely fastened. -
Page 339: Flat Tire
Open doors only when conditions are safe to do so. Vehicles with KEYLESS-GO: Remove the KEYLESS-GO start/stop button from the starter switch. Have any passenger exit the vehicle at a safe distance from the roadway. Open doors only when conditions are safe to do Vehicles retrofitted with TIREFIT kit: Only use the power outlet in the second- row footwell for electric air pump... - Page 340 Flat tire If sealant has leaked out, let it dry. You can then peel it off. If clothing has come in contact with TIREFIT, have it dry-cleaned with perchloroethylene as soon as possible. Warning! Observe safety instructions on air pump label. Your vehicle may be equipped with either of two versions of the electric air pump: Version 1: The air hose with pressure...
- Page 341 In this case, TIREFIT cannot properly seal the tire. Do not drive the vehicle. Contact the nearest Mercedes-Benz Center or call Roadside Assistance. After attaining a tire inflation pressure of at least 26 psi (1.8 bar): Press 0 on electric air pump switch =.
-
Page 342: Mounting The Spare Wheel
Version 2: Press deflate button F located at the end of the filler hose. Drive to the nearest qualified workshop, e.g. an authorized Mercedes-Benz Center, to have the damaged tire replaced. Recommended duration of use: A maximum of 300 miles (500 km) at 50 mph (80 km/h) or below with the recommended tire inflation pressure. -
Page 343: Lifting The Vehicle
Warning! When jacking up the vehicle, only use the jack which has been specifically approved by Mercedes-Benz for your vehicle. The jack is designed exclusively for jacking up the vehicle at the jack take-up brackets built into both sides of the vehicle. Make sure the jack arm is fully seated in the jack take-up bracket. - Page 344 Flat tire Changing wheel on passenger side (example illustration) Place wheel chocks or other sizeable objects on the downhill side in front of both wheels on the side opposite to the side on which the wheel is to be changed. Changing a wheel on a slight incline Always try lifting the vehicle using the jack on a level surface.
-
Page 345: Removing
Incorrect wheel bolts or improperly tightened wheel bolts can cause the wheel to come off. This could cause an accident. Make sure to use the correct wheel bolts. Warning! Only use genuine Mercedes-Benz wheel bolts. Other wheel bolts may come loose. Flat tire... -
Page 346: Lowering The Vehicle
Flat tire Do not tighten the wheel bolts when the vehicle is raised. Otherwise the vehicle could fall off the jack. Wheel bolt : must be used for 19", 20", and 21" light alloy wheels. Wheel bolt ; must be used for the Minispare wheel. -
Page 347: Bleeding The Fuel System (Diesel Engine Only)
After driving in emergency mode, you must have the rims inspected by an authorized Mercedes-Benz Center to check if they are suitable for further use. The failed tire must be replaced in any case. - Page 348 (corresponds to approximately 2 AdBlue refill containers). Always use the particular AdBlue containers for refilling outside the maintenance service interval. Contact an authorized Mercedes-Benz Center or call Roadside Assistance if necessary page 216). Additional information on BlueTEC exhaust gas aftertreatment and AdBlue at any authorized Mercedes-Benz Center.
-
Page 349: Refilling
If ® AdBlue reaches the diesel fuel tank, the engine could be damaged which is not covered by the Mercedes-Benz Limited Warranty. For more information on AdBlue page 373). ® The AdBlue filler neck is located under the cargo compartment floor. - Page 350 Operator’s Manual still appears in the multifunction display, refill with one more container of AdBlue Have the AdBlue necessary, filled completely afterward at an authorized Mercedes-Benz Center. ® refill Battery Safety notes A battery should always be sufficiently charged in order to achieve its rated service life.
-
Page 351: Battery
Risk of explosion. Fire, open flames and smoking are prohibited when handling batteries. Avoid creating sparks. Battery acid is caustic. Do not allow it to come into contact with skin, eyes or clothing. Wear suitable protective clothing, especially gloves, apron and faceguard. Wear eye protection. -
Page 352: Charging
Warning! Never charge a battery while still installed in the vehicle unless the accessory battery charge unit approved by Mercedes-Benz is being used. Gases may escape during charging and could cause an explosion that may result in personal injury, paint damage or corrosion. -
Page 353: Jump Starting
Read all instructions before proceeding. Do not tow-start the vehicle. You could otherwise seriously damage the automatic transmission which is not covered by the Mercedes-Benz Limited Warranty. Jump starting should only be performed using the jump-start terminals located in the engine compartment. -
Page 354: Towing The Vehicle
Have the battery checked at the nearest authorized Mercedes-Benz Center. Towing the vehicle Safety notes Mercedes-Benz recommends that the vehicle be transported with all wheels off the ground using flatbed or appropriate wheel lift/dolly equipment. This method is preferable to other types of towing. -
Page 355: Towing The Vehicle
Do not tow with one axle raised. Doing so could damage the transfer case, which is not covered by the Mercedes-Benz Limited Warranty. All wheels must be on or off the ground. Observe instructions for towing the vehicle with all wheels on the ground. - Page 356 Towing the vehicle Removing cover in rear bumper Warning! In order to avoid possible serious burns or injury, use extreme caution when removing the rear cover, because the rear exhaust pipe is extremely hot. Press mark on cover : as indicated by the arrow.
-
Page 357: Fuses
(recognizable by its color or the fuse rating given on the fuse) of the amperage recommended in the fuse chart. Any Mercedes-Benz Center will be glad to advise you on this subject. In case of a blown fuse contact Roadside Assistance or an authorized Mercedes- Benz Center. - Page 358 Fuses Turn off the engine. Remove the SmartKey from the starter switch. Vehicles with KEYLESS-GO: Open the driver’s door (this puts the starter switch in position 0, same as with the SmartKey removed from the starter switch). The driver’s door then can be closed again. Fuse box in passenger compartment Do not use sharp objects such as a screwdriver to open the fuse box cover in...
-
Page 359: Fuse Box
Fuse box in cargo compartment Opening: Open the cargo compartment. Insert a suitable object such as a coin into the slot of lock :. Turn lock : by 90° in direction of arrow. Remove cover ;. Closing: Install everything in reverse order. Emergency engine shutdown If the engine cannot be turned off as described (... - Page 361 Vehicle equipment ... 360 Parts service ... 360 Warranty coverage ... 360 Identification labels ... 360 Vehicle specification GL 350 Blue- TEC (164.825) ... 362 Vehicle specification GL 450 (164.871) ... 362 Vehicle specification GL 550 (164.886) ... 363 Rims and tires ... 365 Fuels, coolants, lubricants, etc.
-
Page 362: Vehicle Equipment
Parts service All authorized Mercedes-Benz Centers maintain a stock of Genuine Mercedes-Benz Parts required for maintenance and repair work. In addition, strategically located parts distribution centers provide quick and reliable parts service. -
Page 363: Identification Labels
The Vehicle Identification Number (VIN) can be found on certification label : on the driver’s door B-pillar on passenger side underneath the second- row seat ( page 361) on the lower edge of the windshield page 361) Example certification label (U.S. vehicles) Paintwork code Example certification label (Canada vehicles) Paintwork code... -
Page 364: Vehicle Specification Gl 350 Bluetec (164.825)
Vehicle specification GL 450 (164.871) Vehicle specification GL 350 BlueTEC (164.825) The quoted data apply only to the standard vehicle. Contact an authorized Mercedes- Benz Center for the corresponding data of all special bodies and special equipment. Engine GL 350 BlueTEC Engine, type Mode of operation No. -
Page 365: Vehicle Specification Gl 550 (164.886)
Engine GL 450 No. of cylinders Bore 3.66 in (92.90 mm) Stroke 3.39 in (86.00 mm) Total piston 284.5 cu in displacement (4 663 cm Compression ratio Output acc. to 335 hp/6 000 rpm (250 kW/6 000 rpm) SAE J 1349 Maximum torque 339 lb-ft/ acc. - Page 366 Vehicle specification GL 550 (164.886) Engine GL 550 Engine, type Mode of operation No. of cylinders Bore Stroke Total piston displacement Compression ratio Output acc. to (285 kW/6 000 rpm) SAE J 1349 Maximum torque acc. to SAE J 1349 Maximum engine speed Firing order...
-
Page 367: Moextended Tires
ABS or the ® . Tires specially developed for your vehicle and tested and approved by Mercedes-Benz can be identified by finding the following on the tire’s sidewall: MO = Mercedes-Benz Original equipment tires... - Page 368 Rims and tires your vehicle. For more information contact an authorized Mercedes-Benz Center.
- Page 369 Same size tires Model 19" wheels Rims (light alloy) Wheel offset All-season tires 35,39 Winter tires All-terrain tires Model 20" wheels Rims (light alloy) Wheel offset All-season tires Model 21" wheels AMG rims (light alloy) Wheel offset All-season tires Radial-ply tires. Must not be used with snow chains.
-
Page 370: Spare Wheel
Fuels, coolants, lubricants, etc. Spare wheel Compare the recommended tire inflation pressure for your vehicle with the tire inflation pressure on the yellow label located on the spare wheel rim. If the tire inflation pressure on the yellow label on the spare wheel rim differs from the values given in this Operator’s Manual, inflate the tire to the recommended tire inflation pressure given on the yellow label on the spare wheel rim. -
Page 371: Adblue
Model Engine with oil GL 350 BlueTEC filter GL 450 GL 550 Automatic All models transmission Front axle All models Rear axle All models Rear axle with All models differential lock Transfer case All models single speed Transfer case All models double speed Power steering All models... -
Page 372: Filter
Please follow Maintenance System recommendations for scheduled oil changes. Failure to do so will result in engine or emission control system damage not covered by the Mercedes-Benz Limited Warranty. Mercedes-Benz recommends MOBIL OIL. Mixed with water or commercially available premixed washer solvent/antifreeze. -
Page 373: Fuels, Coolants, Lubricants, Etc
Therefore, the brake fluid must be replaced regularly. Refer to your vehicle’s Maintenance Booklet for replacement interval. Only brake fluid approved by Mercedes-Benz is recommended. Any authorized Mercedes- Benz Center will provide you with additional information. -
Page 374: Gasoline
Benz Center or visit www.mbusa.com (USA only). Biodiesel (FAME = Fatty Acid Methyl Ester) containing fuels Mercedes-Benz USA approves the use of B5 (standard ULSD which may contain a maximum of 5% biodiesel) in all Common-rail injection (CDI) and BlueTEC diesel engines. -
Page 375: Engine Coolant
-35‡ (-37†) and corrosion protection. Add premixed coolant solution only. Adding water and MB 325.0 Anticorrosion/ ® preheating Antifreeze separately from each other, could cause engine damage not covered by the Mercedes-Benz Limited Warranty. ® complying with ® with ® is of particular... -
Page 376: Anticorrosion/Antifreeze
The replacement interval published in the Maintenance Booklet is only applicable if MB 325.0 Anticorrosion/Antifreeze solution or other Mercedes-Benz approved products of equal specification are used to renew the coolant concentration or bring it back up to the proper level. -
Page 377: Mixing Ratio
Washer system and headlamp cleaning system Warning! Washer solvent/antifreeze is highly flammable. Do not spill washer solvent/ antifreeze on hot engine parts, because it may ignite and burn. You could be seriously burned. Use MB Windshield Washer Concentrate “MB SummerFit”. Mix with water for temperatures above freezing point. -
Page 379: Service And Literature
Service and Literature Your authorized Mercedes-Benz Center has trained technicians and Genuine Mercedes- Benz Parts to service your vehicle properly. For expert advice and quality service, contact an authorized Mercedes-Benz Center. If you are interested in obtaining service literature for your vehicle, please contact an authorized Mercedes-Benz Center. - Page 380 É1645841583&ËÍ 1645841583 Order no. 6515 4318 13 Part no. 164 584 15 83 Edition B 2010...