Xerox WorkCentre 6025 User Manual
Color multifunction printer
Hide thumbs
Also See for WorkCentre 6025:
- Quick use manual (14 pages) ,
- Installation manual (2 pages) ,
- Service manual (99 pages)
Table of Contents
Advertisement
Quick Links
Xerox
WorkCentre
®
Color Multifunction Printer
Imprimante multifonction couleur
User Guide
Guide d'utilisation
Italiano
Guida per l'utente
Deutsch
Benutzerhandbuch
Español
Guía del usuario
Português
Guia do usuário
Nederlands
Gebruikershandleiding
Svenska
Användarhandbok
Dansk
Betjeningsvejledning
Suomi
Käyttöopas
Norsk
Brukerhåndbok
Русский
Руководство пользователя
6025
®
Čeština
Uživatelská příručka
Polski
Przewodnik użytkownika
Magyar
Felhasználói útmutató
Türkçe
Kullanıcı Kılavuzu
Ελληνικά
Εγχειρίδιο χρήστη
Advertisement
Table of Contents
Troubleshooting

Related Manuals for Xerox WorkCentre 6025


Summary of Contents for Xerox WorkCentre 6025
-
Page 1: User Guide
Xerox WorkCentre 6025 ® ® Color Multifunction Printer Imprimante multifonction couleur User Guide Guide d'utilisation Svenska Italiano Guida per l’utente Användarhandbok Čeština Uživatelská příručka Dansk Deutsch Benutzerhandbuch Betjeningsvejledning Polski Przewodnik użytkownika Suomi Español Käyttöopas Magyar Felhasználói útmutató Guía del usuario Português... - Page 2 © 2015 Xerox Corporation. All rights reserved. Unpublished rights reserved under the copyright laws of the United States. Contents of this publication may not be reproduced in any form without permission of Xerox Corporation. Copyright protection claimed includes all forms of matters of copyrightable materials and information now allowed by statutory or judicial law or hereinafter granted, including without limitation, material generated from the software programs which are displayed on the screen such as styles, templates, icons, screen displays, looks, and so on.
-
Page 3: Table Of Contents
Connecting the Printer..............................32 Selecting a Connection Method ......................... 32 Connecting to a Computer Using USB ......................33 Connecting to a Wireless Network ........................33 Connecting to Wi-Fi Direct ........................... 36 ® ® Xerox WorkCentre 6025 Multifunction Printer User Guide... - Page 4 Supported Paper Types and Weights ....................... 67 Supported Standard Paper Sizes ........................68 Supported Custom Paper Sizes ........................... 68 Loading Paper ..................................69 Loading Paper ................................69 Loading Paper in the Bypass Tray ........................72 ® ® Xerox WorkCentre 6025 Multifunction Printer User Guide...
- Page 5 Macintosh Printing Options ..........................85 Printing from Mobile Devices ............................86 Printing with AirPrint ............................... 86 ® Printing with Xerox PrintBack ........................... 86 Using Custom Paper Sizes ............................. 87 Defining Custom Paper Sizes ..........................87 Printing on Custom Paper Sizes .......................... 88 Printing on Both Sides of the Paper ..........................
- Page 6 Adjusting the Fuser ..............................133 Refreshing the Bias Transfer Roller ......................... 133 Adjusting the Altitude............................133 Toner Cartridges ................................134 General Precautions ............................... 134 Replacing Toner Cartridges ..........................134 Refreshing the Toner ............................. 135 ® ® Xerox WorkCentre 6025 Multifunction Printer User Guide...
- Page 7 Temperature ................................166 Relative Humidity ..............................166 Elevation ..................................166 Electrical Specifications ..............................167 Power Supply Voltage and Frequency ......................167 Power Consumption .............................. 167 ENERGY STAR Qualified Product ........................167 ® ® Xerox WorkCentre 6025 Multifunction Printer User Guide...
- Page 8 European Union ................................184 Domestic/Household Environment ......................... 184 Professional/Business Environment ........................ 184 Collection and Disposal of Equipment and Batteries ................185 Battery Symbol Note ............................. 185 Battery Removal ..............................185 Other Countries................................186 ® ® Xerox WorkCentre 6025 Multifunction Printer User Guide...
-
Page 9: Safety
• Environmental, Health, and Safety Contact Information .................. 17 Your printer and the recommended supplies have been designed and tested to meet strict safety requirements. Attention to the following information ensures the continued safe operation of your Xerox printer. ®... -
Page 10: Notices And Safety
® The safety and environment testing and performance of this product have been verified using Xerox materials only. Note: Unauthorized alterations, which can include the addition of new functions or connection of external devices, can affect the product certification. -
Page 11: Electrical Safety
The printer causes a circuit breaker, fuse, or other safety device to activate. If any of these conditions occur, do the following: Turn off the printer immediately. Disconnect the power cord from the electrical outlet. Call an authorized service representative. ® ® Xerox WorkCentre 6025 Multifunction Printer User Guide... -
Page 12: Power Cord
Emergency Turn Off If any of the following conditions occur, turn off the printer immediately and disconnect the power cord from the electrical outlet. Contact an authorized Xerox service representative to correct the problem if: • The equipment emits unusual odors or makes unusual noises. -
Page 13: Operational Safety
Ozone is heavier than air and is not produced in amounts large enough to harm anyone. Install the printer in a well-ventilated room. For more information in the United States and Canada, go to www.xerox.com/environment. In other markets, please contact your local Xerox representative or go to www.xerox.com/environment_europe. -
Page 14: Printer Location
Total Satisfaction Guarantee do not cover damage, malfunction, or degradation of performance caused by use of non-Xerox supplies, or the use of Xerox supplies not specified for this printer. The Total Satisfaction Guarantee is available in the United States and Canada. Coverage could vary outside these areas. -
Page 15: Maintenance Safety
• Clean with a dry lint-free cloth only. ® • Do not burn any consumables or routine maintenance items. For information on Xerox supplies recycling programs, go to www.xerox.com/gwa. WARNING: Do not use aerosol cleaners. Aerosol cleaners can cause explosions or fires when used on electromechanical equipment. -
Page 16: Printer Symbols
Do not touch the part or area of the printer. Warning: Wait for the printer to cool for the specified time before touching the fuser. This item can be recycled. For details, see Recycling and Disposal on page 181. ® ® Xerox WorkCentre 6025 Multifunction Printer User Guide... -
Page 17: Environmental, Health, And Safety Contact Information
Safety Environmental, Health, and Safety Contact Information For more information on Environment, Health, and Safety in relation to this Xerox product and supplies, contact the following customer help lines: United States and Canada: 1-800-ASK-XEROX (1-800-275-9376) Europe: +44 1707 353 434 For product safety information in the United States and Canada, go to www.xerox.com/environment. -
Page 19: Features
Features This chapter includes: • Parts of the Printer................................20 • Information Pages ................................24 • Power Saver Mode ................................25 • Administrative Features ..............................26 • More Information ................................28 ® ® Xerox WorkCentre 6025 Multifunction Printer User Guide... -
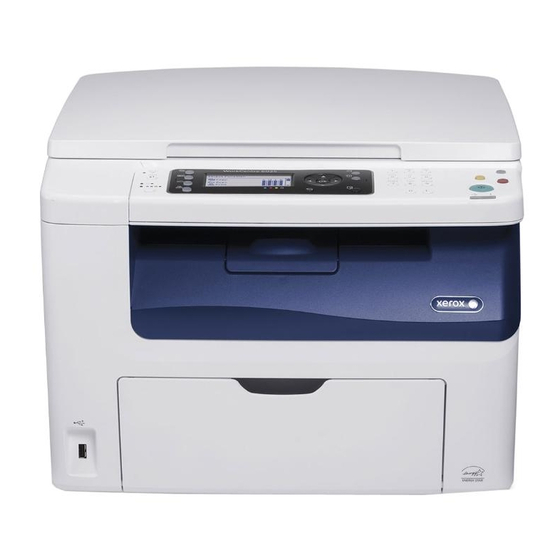
Page 20: Parts Of The Printer
Power Switch Output Tray Paper Tray Control Panel 10. Width Guides Document Cover 11. Slide Bar Side Door 12. Length Guide Document Glass 13. USB Memory Port Cleaning Rod 14. Bypass Tray ® ® Xerox WorkCentre 6025 Multifunction Printer User Guide... -
Page 21: Rear View
Current operating status of the printer • Access to copy, print, and scan features • Access to information pages • Prompts you to load paper, replace supplies, and clear jams • Displays errors and warnings ® ® Xerox WorkCentre 6025 Multifunction Printer User Guide... - Page 22 Power Saver button This button illuminates when the printer is in Power Saver mode. Pressing this button causes the printer to exit Power Saver mode. Stop Button This button cancels the current job. ® ® Xerox WorkCentre 6025 Multifunction Printer User Guide...
- Page 23 This button provides access to the Print menu. Color Mode Button Press the Color Mode button to toggle the selection between color and black and white. Color Mode Lights These lights indicate which color mode is selected. ® ® Xerox WorkCentre 6025 Multifunction Printer User Guide...
-
Page 24: Information Pages
To print information pages: Note: The following procedure is for Windows 7. Click Start > All Programs > Xerox Office Printing > WorkCentre 6025 > Printer Settings Utility. Click the Printer Settings Report tab. Click Information Pages. Select the page that you want to print. -
Page 25: Power Saver Mode
Exiting Power Saver Mode The printer exits Power Saver mode automatically when it receives data from a connected device. To exit Power Saver mode manually, on the control panel, press the Power Saver button. ® ® Xerox WorkCentre 6025 Multifunction Printer User Guide... -
Page 26: Administrative Features
The total number of pages printed in color. Meter 2 The total number of pages printed in black and white. Meter 3 This usage meter always displays 0. Meter 4 The total number of pages printed. ® ® Xerox WorkCentre 6025 Multifunction Printer User Guide... -
Page 27: Centreware Internet Services
At your computer, open a Web browser, in the address field, type the IP address of the printer, then press Enter or Return. Click the Jobs, Address Book, Properties, or Support tab. Type the administrator user name. Type your password, then click Login. ® ® Xerox WorkCentre 6025 Multifunction Printer User Guide... -
Page 28: More Information
You can obtain more information about your printer from these sources: Resource Location Installation Guide Packaged with the printer. Other documentation for your printer www.xerox.com/office/WC6025docs Technical support information for your printer; www.xerox.com/office/WC6025support including online technical support, Online Support Assistant, and driver downloads. Information about menus or error messages Press the control panel Help (?) button. -
Page 29: Installation And Setup
Configuring AirPrint ................................57 • Setting Up Scanning ................................58 • Installing the Printer as a Web Services Device ...................... 64 See also: Installation Guide packaged with your printer. Online Support Assistant at www.xerox.com/office/WC6025support ® ® Xerox WorkCentre 6025 Multifunction Printer User Guide... -
Page 30: Installation And Setup Overview
You can connect to your printer directly from your computer using a USB cable or a wireless network connection. If the Software and Documentation disc is not available, you can download the latest drivers Note: from www.xerox.com/office/WC6025drivers. See also: Selecting a Location for the Printer on page 31... -
Page 31: Selecting A Location For The Printer
After positioning the printer, you are ready to connect it to the power source and computer or network. See also: Total Space Requirements on page 165 Clearance Requirements on page 165 ® ® Xerox WorkCentre 6025 Multifunction Printer User Guide... -
Page 32: Connecting The Printer
A USB connection does not provide access to CentreWare Internet Services. • Wi-Fi Direct: You can connect to the printer with a Wi-Fi mobile device using Wi-Fi Direct. Xerox recommends that only one user at a time accesses the printer using Wi-Fi Direct. -
Page 33: Connecting To A Computer Using Usb
You can connect using the 3-click connection method one time on the first installation attempt only. • WPA2 Enterprise networks are not supported. • The 3-click connection method is supported for Windows 7 and later only. ® ® Xerox WorkCentre 6025 Multifunction Printer User Guide... - Page 34 At the License Agreement, select I Agree, then click Next. On the Select a Connection Method screen, click Wireless. If a wireless connection is established, the Xerox Printer Found screen appears. To connect to the wireless network, click Next, or click Connect to a different wireless network.
- Page 35 12. Select Install printer driver, then click Next. 13. In the Software and Documentation window, clear the check box for any undesired options. 14. Click Next. 15. To complete the installation, click Finish. ® ® Xerox WorkCentre 6025 Multifunction Printer User Guide...
-
Page 36: Connecting To Wi-Fi Direct
Wi-Fi Direct. Note: Wi-Fi Direct is disabled by default. Connecting with Wi-Fi Direct from Your Mobile Device To connect with Wi-Fi Direct, follow the directions provided with your mobile device. ® ® Xerox WorkCentre 6025 Multifunction Printer User Guide... -
Page 37: Installing The Software
Finding the IP Address of Your Printer on page 27. If the Software and Documentation disc is not available, download the latest drivers from www.xerox.com/office/WC6025drivers. Operating System Requirements • Windows XP SP1 and later, or Windows Server 2003 and later •... -
Page 38: Installing The Print Drivers For A Windows Network Printer
To install the printer support software, select Software, then click Next. In the Software and Documentation window, clear the check box for any undesired options. Click Next. To complete the installation, click Finish. ® ® Xerox WorkCentre 6025 Multifunction Printer User Guide... -
Page 39: Installing The Drivers And Utilities For Macintosh Os X Version 10.5 And Later
If the Software and Documentation disc is not available, you can download the latest drivers Note: from www.xerox.com/office/WC6025drivers. Double-click WorkCentre 6025 Installer. At the Introduction installer window, click Continue. At the License Agreement, select I Agree, then click Next. Select the destination disk, then click Continue. -
Page 40: Adding The Printer
Scanning on page 105. See also: Online Support Assistant at: www.xerox.com/office/WC6025support Utilities The Address Book Editor and Express Scan Manager are installed automatically when you install the scan driver. For details, see Installing the Drivers and Utilities for Macintosh OS X Version 10.5 and Later page 39. -
Page 41: Installing Scan Drivers For Macintosh
To accept the license agreement, click Continue, then click Agree. Click Continue again. Enter your password, then click OK. If prompted to close other installations, click Continue Installing. 10. To restart, click Log Out. ® ® Xerox WorkCentre 6025 Multifunction Printer User Guide... -
Page 42: Configuring Network Settings
You can view the IP address of your printer on the Configuration Page. • To enable continued use of the printer even if the IP Address assigned by the DHCP server changes, you can use the installer or CentreWare Internet Services. ® ® Xerox WorkCentre 6025 Multifunction Printer User Guide... -
Page 43: Assigning The Ip Address Automatically
For example, if your computer has IP address 192.168.1.2, and your device allows IP addresses to 192.168.1.25, select an address between 192.168.1.20 and 192.168.1.25. In IPv6 network configurations, the IPv6 address is assigned automatically. ® ® Xerox WorkCentre 6025 Multifunction Printer User Guide... - Page 44 15. To return to the Ready screen, press Return. 16. Print the System Settings Page to verify the new settings. You are ready to install software. See also: Online Support Assistant at: www.xerox.com/office/WC6025support ® ® Xerox WorkCentre 6025 Multifunction Printer...
-
Page 45: Enabling The Printer For Scanning
If your printer is connected using the USB cable, you cannot scan to an email address or a network location, such as a shared folder on your computer. For details, see Scanning Setup Overview on page 58. ® ® Xerox WorkCentre 6025 Multifunction Printer User Guide... -
Page 46: Configuring General Settings Using Centreware Internet Services
For custom paper sizes, for Custom Paper Length - Y, type a length, and for Custom Paper Width - X, type a width. To set the display to prompt you for the paper settings each time the paper tray is loaded, for Tray Display Prompt, select On. Click Save Changes. ® ® Xerox WorkCentre 6025 Multifunction Printer User Guide... -
Page 47: Configuring Printer Defaults
To reset the network memory and restart the printer, for Reset network memory and restart the printer, click Start Printer. To restart the printer without resetting any of the default settings, for Restart the printer, click Start Printer. ® ® Xerox WorkCentre 6025 Multifunction Printer User Guide... -
Page 48: Configuring General Setup Using The Control Panel
To navigate to the Power On Wizard, use the Up or Down arrows, then select Power On Wizard. Select Yes, then press OK. Complete the steps in the wizard, then press OK. ® ® Xerox WorkCentre 6025 Multifunction Printer User Guide... -
Page 49: Configuring System Settings
To set the Auto Reset timer: In the System Settings menu, navigate to Auto Reset, then press OK. To select a setting, press the arrow buttons, select it, then press OK. ® ® Xerox WorkCentre 6025 Multifunction Printer User Guide... - Page 50 Select an alert tone volume, then press OK. Setting the Units for Custom Paper Sizes In the System Settings menu, navigate to mm/inch, then press OK. Select Millimeters (mm) or Inches ("), then press OK. ® ® Xerox WorkCentre 6025 Multifunction Printer User Guide...
-
Page 51: Setting The Paper Size And Type
Select the paper size that matches the size of paper that is loaded in the tray, then press OK. Navigate to Paper Type, then press OK. Select the paper type that matches the type of paper that is loaded in the tray, then press OK. ® ® Xerox WorkCentre 6025 Multifunction Printer User Guide... -
Page 52: Configuring Security Settings Using Centreware Internet Services
To enter the default user name and password, leave the fields blank, then click OK. For Access denial by the authentication failure of the Administrator, enter the number of login attempts allowed before the user is locked out. Click Save Changes. ® ® Xerox WorkCentre 6025 Multifunction Printer User Guide... -
Page 53: Configuring The Host Access List
You can also accept printing from one IP address within a rejected network mask. The following table shows an example. Access List IP Address Address Mask Active Mode 192.168.200.10 255.255.255.255 Accept 192.168.200.0 255.255.255.0 Reject 192.168.0.0 255.255.0.0 Accept ® ® Xerox WorkCentre 6025 Multifunction Printer User Guide... - Page 54 Accept: You can use this setting to allow the specified IP address or range of addresses access to the printer. − Reject: You can use this setting to deny the specified IP address or range of addresses access to the printer. Click Save Changes. ® ® Xerox WorkCentre 6025 Multifunction Printer User Guide...
-
Page 55: Managing Certificates
This printer does not support Certificate Authority (CA) certificates. To ensure that the printer can communicate with other devices over a secure trusted connection, both devices must have specific certificates installed. ® ® Xerox WorkCentre 6025 Multifunction Printer User Guide... -
Page 56: Deleting A Digital Certificate
At your computer, open a Web browser, in the address field, type the IP address of the printer, then press Enter or Return. Click Properties. In the navigation panel, click Security > SSL/TLS Server Communication, then click Delete All Certificates. To confirm, click Delete. ® ® Xerox WorkCentre 6025 Multifunction Printer User Guide... -
Page 57: Configuring Airprint
45.325026, -122.766831 for a location. Click Save Changes. At the prompt, click Restart, or click Back to cancel. If you click Restart, the printer takes several minutes to restart and apply the new settings. ® ® Xerox WorkCentre 6025 Multifunction Printer User Guide... -
Page 58: Setting Up Scanning
You can scan to a folder on your computer, or scan into an application after installing the scan drivers and the Express Scan Manager utility. For details, see Installing the Software on page 37. ® ® Xerox WorkCentre 6025 Multifunction Printer User Guide... -
Page 59: Setting Up Scanning To A Shared Folder On Your Computer
The folder is ready. Now add the folder as an Address Book entry. For details, see Adding the Folder as an Address Book Entry Using CentreWare Internet Services on page 61. ® ® Xerox WorkCentre 6025 Multifunction Printer User Guide... - Page 60 61. Adding a Folder as an Address Book Entry Using the Address Book Editor Click Start > All Programs > Xerox Office Printing > WorkCentre 6025. In the left navigation pane, under Printer Address Book, click Server. For Name, enter the name of the shared file on your computer.
- Page 61 Subdirectory Path: Enter the path of the folder on the FTP server. For example, if you want the scanned files to go in a folder named colorscans inside the scans folder, type /colorscans. Click Save Changes. ® ® Xerox WorkCentre 6025 Multifunction Printer User Guide...
-
Page 62: Setting Up Scanning To An Ftp Server
12. For Subdirectory path, type the path of the folder as needed. For example, to save scans to a folder called colorscans that is one level below the scans folder, type /colorscans. 13. Click Save Changes. A new address book entry is created. ® ® Xerox WorkCentre 6025 Multifunction Printer User Guide... -
Page 63: Setting Up Scanning To An Email Address
Express Scan Manager utility. Starting Express Scan Manager To start Express Scan Manager on Windows computers: Click Start > All Programs > Xerox Office Printing. Select your printer. Double-click Express Scan Manager. To start Express Scan Manager on Macintosh computers: Navigate to Applications >... -
Page 64: Installing The Printer As A Web Services Device
For the Device type field, select Web Services Device. Enter the printer IP address in the Hostname or IP address field, then click Next. Complete the steps in the wizard, then click Finish. ® ® Xerox WorkCentre 6025 Multifunction Printer User Guide... -
Page 65: Paper And Media
Paper and Media This chapter includes: • Supported Paper ................................... 66 • Loading Paper ..................................69 • Printing on Special Paper ..............................74 ® ® Xerox WorkCentre 6025 Multifunction Printer User Guide... -
Page 66: Supported Paper
For best results, use Xerox paper and media recommended for your printer. Ordering Paper To order paper or other media, contact your local reseller or visit www.xerox.com/office/WC6025supplies. General Paper Loading Guidelines •... -
Page 67: Paper Storage Guidelines
The Xerox Warranty, Service Agreement, or Xerox Total Satisfaction Guarantee does not cover damage caused by using unsupported paper or specialty media. The Xerox Total Satisfaction Guarantee is available in the United States and Canada. Coverage could vary outside these areas. -
Page 68: Supported Standard Paper Sizes
4.1 x 9.5 in.) Supported Custom Paper Sizes You can use custom-sized paper within the following dimensions in your printer: • Width: 76.2–215.9 mm (3–8.5 in.) • Length: 127–355.6 mm (5–14 in.) ® ® Xerox WorkCentre 6025 Multifunction Printer User Guide... -
Page 69: Loading Paper
To avoid paper jams, do not remove the dust cover while printing is in progress. • Use only laser print media. Open the front door. Pull the slide bar forward until it stops. ® ® Xerox WorkCentre 6025 Multifunction Printer User Guide... - Page 70 This procedure separates any sheets that are stuck together and reduces the possibility of jams. Load the paper into the tray with the top edge going into the printer and the print side up. ® ® Xerox WorkCentre 6025 Multifunction Printer User Guide...
- Page 71 Depending on the size of the paper, first push the slide bar toward the printer until it stops. Pinch the length guide and slide it in until it touches the paper edge. ® ® Xerox WorkCentre 6025 Multifunction Printer User Guide...
-
Page 72: Loading Paper In The Bypass Tray
To avoid paper jams, do not remove the bypass tray while printing is in progress. Open the front door. Place the bypass tray on the main tray, then align the tabs with the marks. ® ® Xerox WorkCentre 6025 Multifunction Printer User Guide... - Page 73 Ensure that you change the paper type and size at the control panel and in your print driver software. For details, see Using Custom Paper Sizes on page 87. Note: If you are printing on custom size paper, define the custom size in the printer properties before printing. ® ® Xerox WorkCentre 6025 Multifunction Printer User Guide...
-
Page 74: Xerox ® Workcentre ® 6025 Multifunction Printer User Guide
This section includes: • Printing Envelopes ................................75 • Printing Labels ..................................78 • Printing on Glossy Cardstock ............................79 To order paper or other media, contact your local reseller or visit www.xerox.com/office/WC6025supplies. ® ® Xerox WorkCentre 6025 Multifunction Printer User Guide... -
Page 75: Printing Envelopes
The Xerox Warranty, Service Agreement, or Xerox Total Satisfaction Guarantee does not cover damage caused by using unsupported paper or specialty media. The Xerox Total Satisfaction Guarantee is available in the United States and Canada. Coverage could vary outside these areas. -
Page 76: Loading Envelopes
• When you load envelopes long-edge feed, ensure that you specify landscape orientation in the print driver. Adjust the paper guides so they rest lightly against the edges of the envelopes. ® ® Xerox WorkCentre 6025 Multifunction Printer User Guide... - Page 77 • When you load envelopes long-edge feed, ensure that you specify landscape orientation in the print driver. Adjust the bypass tray width guides to rest against the edges of the envelope. ® ® Xerox WorkCentre 6025 Multifunction Printer User Guide...
-
Page 78: Printing Labels
On the control panel, change the type to Label. On the control panel, select the size. Touch OK. In the Printing Preferences of the print driver, on the Paper/Output tab, change the Paper Type setting. ® ® Xerox WorkCentre 6025 Multifunction Printer User Guide... -
Page 79: Printing On Glossy Cardstock
132. • Adjust the bias transfer roller. For details, see Adjusting the Bias Transfer Roller on page 132. • Adjust the fuser. For details, see Adjusting the Fuser on page 133. ® ® Xerox WorkCentre 6025 Multifunction Printer User Guide... -
Page 81: Printing
Printing from Mobile Devices ............................86 • Using Custom Paper Sizes ..............................87 • Printing on Both Sides of the Paper ..........................90 • Printing From a USB Flash Drive ............................ 92 ® ® Xerox WorkCentre 6025 Multifunction Printer User Guide... -
Page 82: Printing Overview
Windows or CMD+P for Macintosh. Select your printer. To access the print driver settings for Windows, select Properties or Preferences. For Macintosh ® select Xerox Features. Note: Depending on your application, the title of the button varies. Modify the print driver settings as needed, then click OK. -
Page 83: Selecting Printing Options
In the Printing Preferences window, click a tab, select the options, then click OK to save. Note: For more information about Windows print driver options, click the Help button (?) in the Printing Preferences window. ® ® Xerox WorkCentre 6025 Multifunction Printer User Guide... -
Page 84: Selecting Printing Options For An Individual Job In Windows
To save the set of options in the Saved Settings list, type a name for the set of printing options, then click OK. To print using these options, select the name from the list. ® ® Xerox WorkCentre 6025 Multifunction Printer User Guide... -
Page 85: Macintosh Printing Options
With the document open in your application, click File > Print. Select your printer. ® Select Xerox Features from the Copies & Pages menu. Select the desired printing options from the drop-down lists. Click Print to send the job to the printer. -
Page 86: Printing From Mobile Devices
Select your printer, then set the printer options. Tap Print. ® Printing with Xerox PrintBack ® This printer supports printing from Android or iOS mobile devices using Xerox PrintBack. PrintBack consists of three components. ® • Xerox PrintBack app: Installed on your mobile device, the app sends print jobs to your selected online service. -
Page 87: Using Custom Paper Sizes
Defining Custom Paper Sizes ............................87 • Printing on Custom Paper Sizes ............................. 88 ® ® The Xerox WorkCentre 6025 Multifunction Printer prints on custom paper sizes that are within the minimum and maximum size range supported by the printer. Defining Custom Paper Sizes To print custom paper sizes, define the custom width and length of the paper in the print driver software and on the printer control panel. -
Page 88: Printing On Custom Paper Sizes
If you are printing on custom size paper, define the custom size in the printer properties before printing. From the Paper Type drop-down list, select the paper type. Select any other desired options, then click OK. In the Print dialog box, click OK to start printing. ® ® Xerox WorkCentre 6025 Multifunction Printer User Guide... - Page 89 Loading Paper on page 69. In the application, click Page Setup. From the Paper Size drop-down list, select the custom paper size. Click OK. In the application, click Print. Click OK. ® ® Xerox WorkCentre 6025 Multifunction Printer User Guide...
-
Page 90: Printing On Both Sides Of The Paper
• Loading Paper for Manual 2-Sided Printing ......................91 ® ® The Xerox WorkCentre 6025 Multifunction Printer supports manual 2-sided printing. You can set printing preferences to print your jobs on both sides of the paper. Use 2-Sided Printing to specify the page orientation for the printed output. -
Page 91: Loading Paper For Manual 2-Sided Printing
Remove the printed pages from the output tray and reload them into the main tray without rotating or flipping the pages. The unprinted sides of the pages are facing up. Press OK. The odd pages are printed, page 1, page 3, then page 5. ® ® Xerox WorkCentre 6025 Multifunction Printer User Guide... -
Page 92: Printing From A Usb Flash Drive
To print the file the original size, press the arrow buttons to select Auto Off. − If necessary, press the arrow buttons to highlight the file name. Press the green Start button on the control panel. For best results, save files in .jpg format. Note: ® ® Xerox WorkCentre 6025 Multifunction Printer User Guide... -
Page 93: Copying
Copying This chapter includes: • Making Copies ..................................94 • Copying an ID Card ................................96 • Adjusting Copying Options .............................. 97 • Changing the Default Copy Options ......................... 102 ® ® Xerox WorkCentre 6025 Multifunction Printer User Guide... -
Page 94: Making Copies
Coated or carbonless paper or items other than paper such as cloth or metal • Envelopes • Books To make a copy: Open the document cover. Place the original on the document glass. ® ® Xerox WorkCentre 6025 Multifunction Printer User Guide... - Page 95 For details on how to customize the copy settings, see Adjusting Copying Options on page 97. Using the control panel keypad, enter the desired number of copies. Press the Start button. ® ® Xerox WorkCentre 6025 Multifunction Printer User Guide...
-
Page 96: Copying An Id Card
Reposition the document about 6 mm (0.25 in.) from the upper left corner of the document glass, then close the document cover. Press the Start button. Remove the ID card from the scanner. ® ® Xerox WorkCentre 6025 Multifunction Printer User Guide... -
Page 97: Adjusting Copying Options
You can adjust numerous options for your copy jobs, specify characteristics of the original documents, and customize the output. You can also modify the default settings for many options. For details, see Selecting the Default Copy Settings on page 102. ® ® Xerox WorkCentre 6025 Multifunction Printer User Guide... -
Page 98: Basic Settings
At the control panel, press the Copy button. To select Output Paper Size, press the arrow buttons, select an option, then press OK. Select a document size from the list, then press OK. ® ® Xerox WorkCentre 6025 Multifunction Printer User Guide... -
Page 99: Collating Copies
Text: Use this option for black and white or colored text. − Mixed: Use this option for both text and photographs, such as magazines or newspapers. − − Photo: Use this option for photographs. Press OK. ® ® Xerox WorkCentre 6025 Multifunction Printer User Guide... -
Page 100: Image-Quality Settings
The Auto Exposure setting removes the light background and only prints the image. To set Auto Exposure: At the control panel, press the Copy button. Navigate to Auto Exposure, then press OK. Select On, then press OK. ® ® Xerox WorkCentre 6025 Multifunction Printer User Guide... -
Page 101: Image-Layout Adjustments
At the control panel, press the Copy button. To select a setting, press the arrow buttons, select it, then press OK. To set the margin value, use the arrow buttons, then press OK. Press OK. ® ® Xerox WorkCentre 6025 Multifunction Printer User Guide... -
Page 102: Changing The Default Copy Options
Changing the Auto Exposure Level To select Auto Exposure Level, press the arrow buttons, then press OK. Select an auto exposure setting: − − The default setting is On. Press OK. ® ® Xerox WorkCentre 6025 Multifunction Printer User Guide... -
Page 103: Changing The Color Balance
To adjust the density setting from -2 through +2, press the arrow buttons. Press OK. Select another color and adjust its density, or press the Return button to return to the Ready screen. ® ® Xerox WorkCentre 6025 Multifunction Printer User Guide... -
Page 105: Scanning
Scanning Images into an Application on a USB Connected Computer ............. 114 • Adjusting Scanning Settings ............................116 • Changing the Default Scan Settings ......................... 119 See also: Setting up Scanning on page 58 ® ® Xerox WorkCentre 6025 Multifunction Printer User Guide... -
Page 106: Scanning Using The Document Glass
Paper with wrinkles, curls, folds, tears, or notches • Coated or carbonless paper or items other than paper such as cloth or metal • Envelopes • Books Loading Documents for Scanning Position the original document as shown. ® ® Xerox WorkCentre 6025 Multifunction Printer User Guide... -
Page 107: Scanning To A Usb Flash Drive
Yes prompts you to place the next page on the document glass. 10. Select Continue or Cancel the Action. 11. Press OK. The printer scans your images to the folder you specified. ® ® Xerox WorkCentre 6025 Multifunction Printer User Guide... -
Page 108: Scanning To A Folder On A Usb Connected Computer
Scanning to a Folder on a USB Connected Computer Start Express Scan Manager: Windows: Click Start > Programs > Xerox. Select your printer from the list. Double-click Express − Scan Manager. Macintosh: Navigate to Applications > Xerox. Select your printer from the list. Double-click −... -
Page 109: Scanning To A Shared Folder On A Network Computer
Click the Sharing tab, then click Share this folder. Click the Permissions button. Select the Everyone group, and verify that all permissions are enabled. Click OK. Note: Remember the Share name for later use. Click OK again. ® ® Xerox WorkCentre 6025 Multifunction Printer User Guide... -
Page 110: Sharing A Folder Using Macintosh Os X Version 10.5 And Later
The folder and its contents are shared with network users. 12. Close the Sharing window. Note: When you open a shared folder, a Shared Folder banner appears in the Finder for the folder and its subfolders. ® ® Xerox WorkCentre 6025 Multifunction Printer User Guide... -
Page 111: Adding A Folder As An Address Book Entry Using Centreware Internet Services
Yes prompts you to place the next page on the document glass. − Select Continue or Cancel the Action. 10. Press OK. The printer scans the documents to the shared folder on your computer. ® ® Xerox WorkCentre 6025 Multifunction Printer User Guide... -
Page 112: Scanning To An Email Address
Yes prompts you to place the next page on the document glass. Select Continue or Cancel the Action. Press OK. The printer sends the scanned image as email attachments of the default file type. See also: Adjusting Scanning Settings on page 116 ® ® Xerox WorkCentre 6025 Multifunction Printer User Guide... -
Page 113: Scanning To An Ftp Server
To select the FTP address, press the arrow buttons, then press OK. To begin the scan, press the Start button. The printer scans the document and places the image on the FTP server. See also: Adjusting Scanning Settings on page 116 ® ® Xerox WorkCentre 6025 Multifunction Printer User Guide... -
Page 114: Scanning Images Into An Application On A Usb Connected Computer
For Windows System heading, click Control Panel. For Hardware and Sound, click View devices and printers. Right-click on your printer, then click New Scan. Select the scan settings, then click Preview or Scan. ® ® Xerox WorkCentre 6025 Multifunction Printer User Guide... -
Page 115: Scanning An Image Using Windows Vista Or Windows 7
The scanned image is stored in the default Scanned Documents folder or in a folder that you selected. Scanning an Image Using Windows XP On your computer, select Start > Control Panel. Double-click Scanners and Cameras. In the Scanners and Cameras window, click Next. Double-click Xerox WC6025. Select an option: − Color picture − Grayscale picture Black and white picture or text −... -
Page 116: Adjusting Scanning Settings
To set the color mode: To select Color Mode, press the arrow buttons, then press OK. Select a color mode. Press OK. ® ® Xerox WorkCentre 6025 Multifunction Printer User Guide... -
Page 117: Setting The Scan Resolution
Changing the Auto Exposure Level To select Auto Exposure Level, press the arrow buttons, then press OK. Select an auto exposure setting: − − The default setting is On. Press OK. ® ® Xerox WorkCentre 6025 Multifunction Printer User Guide... -
Page 118: Setting The Margins
− Margin Left/Right Margin Middle − Press OK. Adjust the margins from 0.0–2.0 in. using the arrow buttons. Press OK. Repeat the steps for other margins, then press the Return button. ® ® Xerox WorkCentre 6025 Multifunction Printer User Guide... -
Page 119: Changing The Default Scan Settings
Setting the Scan to Network Option To select Scan to Network, press the arrow buttons, then press OK. To select a setting, press the arrow buttons: − Computer (Network) − Server (FTP) Press OK. ® ® Xerox WorkCentre 6025 Multifunction Printer User Guide... -
Page 120: Setting The File Format
Select a setting: − Color Color (Photo) − Press OK. Specifying the Original Size To select Document Size, press the arrow buttons, then press OK. Select the document size. Press OK. ® ® Xerox WorkCentre 6025 Multifunction Printer User Guide... -
Page 121: Making The Image Lighter Or Darker
− Margin Left/Right Margin Middle − Press OK. Adjust the margins from 0.0–2.0 in. using the arrow buttons. Press OK. Repeat the steps for other margins, then press the Return button. ® ® Xerox WorkCentre 6025 Multifunction Printer User Guide... -
Page 122: Setting The Tiff File Format
To select Max Email Size, press the arrow buttons, then press OK. To set a size from 50–16384 KB, press the arrow buttons, or use the alphanumeric keypad. The default setting is 2048 KB. Press OK. ® ® Xerox WorkCentre 6025 Multifunction Printer User Guide... -
Page 123: Maintenance
Cleaning the Printer ................................124 • Adjustments and Maintenance Procedures ......................131 • Toner Cartridges ................................. 134 • Ordering Supplies ................................136 • Managing the Printer ............................... 137 • Moving the Printer ................................138 ® ® Xerox WorkCentre 6025 Multifunction Printer User Guide... -
Page 124: Cleaning The Printer
Do not touch the electrical contacts or gears. Doing so could damage the printer and cause the print quality to deteriorate. • Ensure any parts removed during cleaning are replaced before you plug in the printer. ® ® Xerox WorkCentre 6025 Multifunction Printer User Guide... -
Page 125: Cleaning The Scanner
Moisten a soft, lint-free cloth with the glass cleaner of your choice. Remove any paper or other media from the output tray. Open the document cover. Wipe the surface of the document glass until it is clean and dry. ® ® Xerox WorkCentre 6025 Multifunction Printer User Guide... -
Page 126: Cleaning The Exterior
CAUTION: Do not spray detergent directly on the printer. Liquid detergent could enter the printer through a gap and cause problems. Never use cleaning agents other than water or mild detergent. ® ® Xerox WorkCentre 6025 Multifunction Printer User Guide... -
Page 127: Cleaning The Interior
20 minutes for the fuser to cool. Try to remove the jam after the printer has cooled. Cleaning the LED Lenses Turn off the printer. Open the side door. Pinch the release tab on the toner cartridge as shown. ® ® Xerox WorkCentre 6025 Multifunction Printer User Guide... - Page 128 Insert the cleaning rod into the hole indicated by the arrow in the middle of the toner cartridge slot. Push in the cleaning rod until it stops, then pull it out. ® ® Xerox WorkCentre 6025 Multifunction Printer User Guide...
- Page 129 10. Align the black toner cartridge with the rear toner slot. Press firmly near the center of the cartridge until it clicks into place. 11. Replace the remaining three toner cartridges in the same manner. 12. Close the side door. ® ® Xerox WorkCentre 6025 Multifunction Printer User Guide...
-
Page 130: Cleaning The Toner Density Sensor
Turn off the printer. Push down on the rear door release and pull open the door. Use a dry cotton swab to clean the color toner density sensors. Close the rear door. ® ® Xerox WorkCentre 6025 Multifunction Printer User Guide... -
Page 131: Adjustments And Maintenance Procedures
Select Adjust Color Regi, then press OK. At Auto Adjust, press OK. At the Are you sure? prompt, press the arrow buttons to select Yes. To begin the calibration, press OK. ® ® Xerox WorkCentre 6025 Multifunction Printer User Guide... -
Page 132: Adjusting Paper Type
Press the arrow buttons to increase or decrease the amount of offset, then press OK. Repeat this procedure for each paper type you need to adjust. To return to the Ready screen, press Return. ® ® Xerox WorkCentre 6025 Multifunction Printer User Guide... -
Page 133: Adjusting The Fuser
Select Adjust Altitude, then press OK. Press the arrow buttons to select the altitude of the location of the printer, then press OK. To return to the Ready screen, press Return. ® ® Xerox WorkCentre 6025 Multifunction Printer User Guide... -
Page 134: Toner Cartridges
Use a damp cloth to wipe off spilled toner. Never use a vacuum cleaner to remove spills. Electric sparks inside the vacuum cleaner can cause a fire or explosion. If you spill a large volume of toner, contact your local Xerox representative. WARNING: Never throw a toner cartridge into an open flame. -
Page 135: Refreshing The Toner
Navigate to Clean Developer, then press OK. Select Yes, then press OK. The process runs automatically. Wait three minutes for the process to complete and the printer to return to Ready. ® ® Xerox WorkCentre 6025 Multifunction Printer User Guide... -
Page 136: Ordering Supplies
Total Satisfaction Guarantee do not cover damage, malfunction, or degradation of performance caused by use of non-Xerox supplies, or the use of Xerox supplies not specified for this printer. The Total Satisfaction Guarantee is available in the United States and Canada. Coverage could vary outside these areas. -
Page 137: Managing The Printer
Enter the current four-digit password, then press OK. Select Secure Settings, then press OK. At Panel Lock, press OK. Select Change Password, then press OK. Enter a new four-digit password, then press OK. The default password is 0000. ® ® Xerox WorkCentre 6025 Multifunction Printer User Guide... -
Page 138: Moving The Printer
Remove any paper or other media from the output tray. Remove the paper from the paper tray. Keep the paper wrapped and away from humidity and dirt. ® ® Xerox WorkCentre 6025 Multifunction Printer User Guide... - Page 139 Maintenance Lift the bypass tray and push it into the printer. Push in the length guides and slide bar until they stop. ® ® Xerox WorkCentre 6025 Multifunction Printer User Guide...
- Page 140 CAUTIONS: • Failure to repackage the printer properly for shipment can result in damage not ® covered by the Xerox Warranty, Service Agreement, or Total Satisfaction Guarantee. ® The Xerox Warranty, Service Agreement, or Total Satisfaction Guarantee do not cover damage to the printer caused by improper moving.
-
Page 141: Troubleshooting
Troubleshooting This chapter includes: • General Troubleshooting ..............................142 • Paper Jams .................................... 145 • Print-Quality Problems ..............................156 • Getting Help ..................................162 ® ® Xerox WorkCentre 6025 Multifunction Printer User Guide... -
Page 142: General Troubleshooting
A system error occurred. Turn off the printer, then turn it on again. If the error persists, contact your Xerox representative. The printer is connected to an uninterruptible Turn off the printer, then connect the power cord to a suitable power supply. -
Page 143: Printer Does Not Print
Turn off the printer, confirm that the power cord is plugged in correctly to the printer and the outlet, then turn on the printer. If the error persists, contact your Xerox representative. The printer is busy. • If the Ready Indicator is flashing, it is normal. A previous print job could be the problem. -
Page 144: Printing Takes Too Long
Turn off the printer and remove the obstruction or debris. If you printer. cannot remove it, contact your Xerox representative. Condensation has Formed Inside the Printer Moisture can condense inside a printer where the humidity is above 85% or when a cold printer is located in a warm room. -
Page 145: Paper Jams
Troubleshooting Paper Jams ............................154 Minimizing Paper Jams The printer is designed to function with minimal paper jams using Xerox supported paper. Other paper types can cause jams. If supported paper is jamming frequently in one area, clean that area of the paper path. - Page 146 Loading more than one type, size, or weight of paper in a tray at the same time. • Overfilling the trays. • Allowing the output tray to overfill. For a detailed list of supported paper, go to www.xerox.com/paper. ® ® Xerox WorkCentre...
-
Page 147: Locating Paper Jams
Switch off the printer immediately and wait 20 minutes for the fuser to cool. Try to remove the jam after the printer has cooled. If the error persists, contact your Xerox representative. CAUTION: Do not attempt to clear any paper jams using tools or instruments. -
Page 148: Clearing Paper Jams
After the printer engine stops running, turn the power off, then remove the jammed paper. Clearing Paper Jams From the Front of the Printer Remove any paper from the bypass tray. Remove the bypass tray. Remove any paper jammed at the front of the printer. ® ® Xerox WorkCentre 6025 Multifunction Printer User Guide... - Page 149 To resolve the error displayed on the control panel you must clear all paper from the paper path. Clearing Paper Jams From the Back of the Printer Push down on the rear door release and pull open the door. Lift the levers as shown. ® ® Xerox WorkCentre 6025 Multifunction Printer User Guide...
- Page 150 Follow the instructions on the control panel display and in the Printer Status window of PrintingScout. Press OK. To resolve the error displayed on the control panel you must clear all paper from the paper path. ® ® Xerox WorkCentre 6025 Multifunction Printer User Guide...
-
Page 151: Clearing Paper Jams From The Output Tray
Push down on the rear door release and pull open the door. Lift the levers as shown. Remove any jammed paper from the back of the printer. Lift and open the scanner. ® ® Xerox WorkCentre 6025 Multifunction Printer User Guide... - Page 152 Troubleshooting Remove any paper or other media from the output tray. Lower the scanner and close it. Lower the levers to their original position. Close the rear door. ® ® Xerox WorkCentre 6025 Multifunction Printer User Guide...
- Page 153 Follow the instructions on the control panel display and in the Printer Status window of PrintingScout. 10. Press OK. 11. To resolve the error displayed on the control panel you must clear all paper from the paper path. ® ® Xerox WorkCentre 6025 Multifunction Printer User Guide...
-
Page 154: Troubleshooting Paper Jams
Remove the paper from the tray, and replace it with new dry paper. Too much static electricity is present. • Try a new ream of paper. • Do not fan transparencies before loading in tray. Use only Xerox approved paper. For details, see Supported Paper Using unsupported paper. page 66. -
Page 155: Label And Envelope Misfeeds
Check the doors on the printer and close any door that is open. The rear door interlock switch is not reset. To reset the interlock switch and clear the paper jam message, open and close the back door. ® ® Xerox WorkCentre 6025 Multifunction Printer User Guide... -
Page 156: Print-Quality Problems
The Xerox Warranty, Service Agreement, or Xerox Total Satisfaction Guarantee does not cover damage caused by using unsupported paper or specialty media. The Xerox Total Satisfaction Guarantee is available in the United States and Canada. Coverage could vary outside these areas. -
Page 157: Solving Print-Quality Problems
You can also print a Demo Page to more precisely determine the print-quality problem. For details, see Information Pages on page 24. If the print quality does not improve after carrying out the appropriate action, contact your Xerox representative. Notes: •... - Page 158 Adjusting the Fuser on page 133. The paper is damp. Replace the paper. ® The high-voltage supply is For assistance, go to the Xerox Support defective. website at www.xerox.com/office/WC6025support. Only one color is faded Toner cartridge is empty or Check the condition of the toner damaged.
- Page 159 For details, see Supported Paper on page 66. ® The printer is worn or damaged. For assistance, go to the Xerox Support website at www.xerox.com/office/WC6025support. The toner cartridges are not Replace the toner cartridges with ®...
- Page 160 Turn on the printer and leave it on for at causes partial blanks or creased least one hour remove the condensation. ® paper. For assistance, go to the Xerox Support website at www.xerox.com/office/WC6025support. Vertical blanks The lenses are being blocked.
- Page 161 Paper curls or frequent jams in The bias transfer roller needs to Refresh the bias transfer roller. For the rear cover be refreshed. details, see Refreshing the Bias Transfer Roller on page 133. ® ® Xerox WorkCentre 6025 Multifunction Printer User Guide...
-
Page 162: Getting Help
The Online Support Assistant is a knowledge base that provides instructions and troubleshooting help to solve your printer problems. You can find solutions for print-quality problems, paper jams, software installation issues, and more. To access the Online Support Assistant, go to www.xerox.com/office/WC6025support. ® ®... -
Page 163: Specifications
This appendix includes: • Standard Features ................................164 • Physical Specifications ..............................165 • Environmental Specifications ............................166 • Electrical Specifications ..............................167 • Performance Specifications ............................168 • Controller Specifications ..............................169 ® ® Xerox WorkCentre 6025 Multifunction Printer User Guide... -
Page 164: Standard Features
• Universal Serial Bus (USB 2.0) • Wireless network adapter Scan functions • Scan to USB Memory • Scan to Computer Scan resolution Maximum Resolution: 1200 x 2400 dpi Remote access CentreWare Internet Services ® ® Xerox WorkCentre 6025 Multifunction Printer User Guide... -
Page 165: Physical Specifications
389 mm (15.3 in.) Height 318 mm (12.5 in.) Weight 15 kg (33.1 lb.) Total Space Requirements Width 848 mm (33.4 in.) Depth 937 mm (36.9 in.) Height 691 mm (27.2 in.) Clearance Requirements ® ® Xerox WorkCentre 6025 Multifunction Printer User Guide... -
Page 166: Environmental Specifications
Under extreme environmental conditions, such as 10°C and 85% relative humidity, defects can occur due to condensation. Elevation For optimum performance, use the printer at elevations below 3100 m (10,170 ft.). ® ® Xerox WorkCentre 6025 Multifunction Printer User Guide... -
Page 167: Electrical Specifications
AC outlet. ENERGY STAR Qualified Product ® ® ® The Xerox WorkCentre 6025 Multifunction Printer is ENERGY STAR qualified under the ENERGY STAR Program Requirements for Imaging Equipment. The ENERGY STAR and ENERGY STAR mark are registered United States trademarks. -
Page 168: Performance Specifications
Performance Specifications Printer warm up time Power on: 32 seconds or less. Recovery from sleep mode: 32 seconds or less. Note: Warm up time assumes an ambient temperature of 22°C (71.6°F). ® ® Xerox WorkCentre 6025 Multifunction Printer User Guide... -
Page 169: Controller Specifications
Specifications Controller Specifications Processor 525 MHz ARM11MP Memory 256 MB RAM Interfaces • Universal Serial Bus (USB 2.0) • Wireless network connectivity ® ® Xerox WorkCentre 6025 Multifunction Printer User Guide... -
Page 171: B Regulatory Information
Regulatory Information This appendix includes: • Basic Regulations ................................172 • Copy Regulations ................................177 • Material Safety Data Sheets ............................180 ® ® Xerox WorkCentre 6025 Multifunction Printer User Guide... -
Page 172: Basic Regulations
• Consult the dealer or an experienced radio/TV technician for help. Changes or modifications to this equipment not approved by Xerox can void the authority of the user to operate this equipment. Note: To ensure compliance with Part 15 of the FCC rules, use shielded interface cables. -
Page 173: European Union
This printer, if used properly in accordance with the instructions, is not dangerous for the consumer or for the environment. To ensure compliance with European Union regulations, use shielded interface cables. A signed copy of the Declaration of Conformity for this printer can be obtained from Xerox. European Union Lot 4 Imaging Equipment Agreement Environmental Information... - Page 174 Regulatory Information Environmental Benefits of Duplex Printing Most Xerox products have duplex printing, also known as 2-sided printing, capability. This enables you to print on both sides of the paper automatically, and therefore helps to reduce the use of valuable resources by reducing your paper consumption.
-
Page 175: Germany
This product is certified to Environmental Choice standard for office machines, meeting all requirements for reduced environmental impact. As part of achieving certification, Xerox Corporation has proven this product meets the Environmental Choice criteria for energy efficiency. Certified copier, printer, multifunctional device, and fax products must also meet criteria such as reduced chemical emissions and demonstrate compatibility with recycled supplies. -
Page 176: Regulatory Information For 2.4 Ghz Wireless Network Adapter
(2) this device must accept any interference received, including interference that may cause undesired operation. Changes or modifications to this device not specifically approved by the Xerox Corporation may void the user's authority to operate this equipment. ®... -
Page 177: Copy Regulations
“fair use” or library reproduction rights provisions of the copyright law. Further information of these provisions may be obtained from the Copyright Office, Library of Congress, Washington, D.C. 20559. Ask for Circular R21. ® ® Xerox WorkCentre 6025 Multifunction Printer User Guide... -
Page 178: Canada
Canada or a department, board, Commission, or agency established by the Government of Canada or of a province or of a government of a state other than Canada ® ® Xerox WorkCentre 6025 Multifunction Printer User Guide... -
Page 179: Other Countries
• Postage stamps and other negotiable instruments This list is not inclusive and no liability is assumed for either its completeness or accuracy. In case of doubt, contact your legal counsel. ® ® Xerox WorkCentre 6025 Multifunction Printer User Guide... -
Page 180: Material Safety Data Sheets
Material Safety Data Sheets For Material Safety Data information regarding your printer, go to: • North America: www.xerox.com/msds • European Union: www.xerox.com/environment_europe For the Customer Support Center phone numbers, go to www.xerox.com/office/worldcontacts. ® ® Xerox WorkCentre 6025 Multifunction Printer User Guide... -
Page 181: Recycling And Disposal
Recycling and Disposal This appendix includes: • All Countries ..................................182 • North America ..................................183 • European Union .................................. 184 • Other Countries ................................... 186 ® ® Xerox WorkCentre 6025 Multifunction Printer User Guide... -
Page 182: All Countries
Recycling and Disposal All Countries If you are managing the disposal of your Xerox product, please note that the printer may contain lead, mercury, perchlorate, and other materials whose disposal may be regulated due to environmental considerations. The presence of these materials is fully consistent with global regulations applicable at the time that the product was placed on the market. -
Page 183: North America
North America Xerox operates an equipment take-back and reuse/recycle program. Contact your Xerox representative (1-800-ASK-XEROX) to determine if this Xerox product is part of the program. For more information about Xerox environmental programs, visit www.xerox.com/environment, or for recycling and disposal information, contact your local authorities. -
Page 184: European Union
In accordance with European legislation, end of life electrical and electronic equipment subject to disposal must be managed within agreed procedures. Prior to disposal, please contact your local reseller or Xerox representative for end of life take-back information. ®... -
Page 185: Collection And Disposal Of Equipment And Batteries
This wheeled bin symbol may be used in combination with a chemical symbol. This establishes compliance with the requirements set out by the Directive. Battery Removal Batteries should only be replaced by a MANUFACTURER-approved service facility. ® ® Xerox WorkCentre 6025 Multifunction Printer User Guide... -
Page 186: Other Countries
Recycling and Disposal Other Countries Please contact your local waste management authority to request disposal guidance. ® ® Xerox WorkCentre 6025 Multifunction Printer User Guide...