
Related Manuals for Memorex MVD2042


Summary of Contents for Memorex MVD2042
- Page 1 MVD2042 User’s Guide DVD/VCD/MP3/PHOTO CD Player Before operating this product, please read these instructions completely.
-
Page 2: Table Of Contents
Contents...1 Important Safety Instructions ...2 Precautions...5 Power Source ...5 Location of Controls ...6 • Front...6 • Rear ...6 • Remote ...7 Remote Control ...8 • Battery Installation ...8 • Effective Distance of the Remote Control Transmitter ...8 Connection...9 • Connecting the DVD to a TV Using the Audio/Video Output Jacks ...9 •... -
Page 3: Important Safety Instructions
IMPORTANT SAFETY INSTRUCTIONS CAUTION RISK OF ELECTRIC SHOCK DO NOT OPEN CAUTION:TO REDUCE THE RISK OF ELECTRIC SHOCK, DO NOT REMOVE COVER (OR BACK). NO USER-SERVICEABLE PARTS INSIDE. REFER SERVICING TO QUALIFIED SERVICE PERSONNEL. CAUTION: THIS DIGITAL VIDEO DISC PLAYER EMPLOYS A LASER SYSTEM. - Page 4 PLEASE KEEP ALL PACKAGING MATERIAL FOR AT LEAST 90 DAYS IN CASE YOU NEED TO RETURN THIS PRODUCT TO YOUR PLACE OF PURCHASE OR TO MEMOREX. Before using the unit, be sure to read all operating instructions carefully. Please note that these are general precautions and may not pertain to your unit.
- Page 5 IMPORTANT SAFETY INSTRUCTIONS (CONTINUED) should be taken to keep from touching such power lines or circuits as contact with them might be fatal. 15. OVERLOADING Do not overload wall outlets and extension cords as this can result in a risk of fire or electric shock. 16.
-
Page 6: Precautions
When the DVD player is not in use, be sure to remove the disc and turn off the power. • If you do not use the DVD player for a long period, the unit may not function properly in the future. Turn on and use the DVD player occasionally. -
Page 7: Location Of Controls
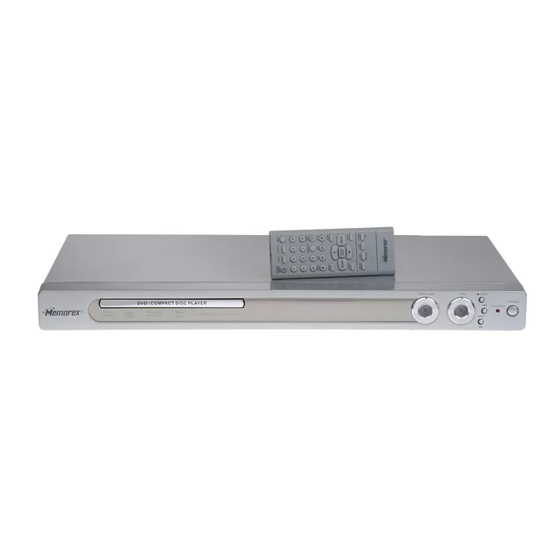
LOCATION OF CONTROLS FRONT 1. Disc Tray 2. Display 3. OPEN/CLOSE Button 4. PLAY (®) Button 5. STOP (I) Button 6. SKIP n Button 7. SKIP o Button 8. ON/STANDBY Indicator 9. STANDBY Button REAR 1. AC Power Cord 2. Stereo Audio Left/Right Output Jacks 3. -
Page 8: Remote
LOCATION OF CONTROLS (CONTINUED) REMOTE 1. DISPLAY Button 2. MUTE Button 3. REPEAT Button 4. RANDOM Button 5. SLOW/F Button 6. SLOW/R Button 7. PLAY (‹ ‹ ) Button 8. PAUSE/STEP Button 9. SKIP (o ) Button 10. Navigation (œ) Button 11. -
Page 9: Remote Control
BATTERY INSTALLATION – – Follow these precautions when using batteries in this device: 1. Use only the size and type of batteries specified. 2. Be sure to follow the correct polarity when installing the batteries as indicated next to the battery compartment. Reversed batteries may cause damage to the device. -
Page 10: Connection
If your TV only has one audio input, the use of a “Y” connector may be necessary. Visit your local electronics supply store. • Connect the DVD player to your TV directly. If you connect the DVD player through a VCR, the playback picture will be distorted because DVD video discs are copy protected. -
Page 11: Connecting The Dvd To A Tv Using The Y/P B /P R Jacks
When connecting the DVD to the TV, make sure the power is off and both units are unplugged before making any connections. • Connect the DVD player to your TV directly. If you connect the DVD player through a VCR, the playback picture will be distorted because DVD video discs are copy protected. •... -
Page 12: Connecting The Dvd To A Home Theatre System
When connecting, make sure the power is off and all units are unplugged before making any connections. • Connect the DVD player to your TV directly. If you connect the DVD player through a VCR, the playback picture will be distorted because DVD video discs are copy protected. -
Page 13: About Discs
It is important that you read the manual that accompanies the DVD disc, as there are features that are on the DVD player that cannot be used with certain DVDs. There are also extra features on the DVD disc that are different for each DVD disc, so they are not explained in this owner’s manual. - Page 14 DVD disc. If the Region number described on the DVD disc does not correspond to the Region number of this DVD player, this DVD player cannot play that disc. You may not be able to play back some DVD video discs on this player if they were purchased from outside your geographic area or made for business purposes.
-
Page 15: Setup Menu
The setup menu lets you customize the DVD player by allowing you to select various language preferences, set up a parental level, turn screen saver on and off, adjust what type of television screen you have and more. Below, find the menu, and then find the corresponding page that describes the features of the selected menu option. -
Page 16: General Setup Menu
NTSC: Select when using an NTSC TV. PAL: Select when using a PAL TV. IMPORTANT: In the USA, the standard is NTSC. When the DVD player is turned on, it will be set to NTSC. TV SYSTEM SYSTEM SETUP TV TYPE... -
Page 17: Language Setup Menu
LANGUAGE SETUP MENU: Select LANGUAGE SETUP using the Navigation (¦,‹) buttons, then select/change the setup option as described on page OSD LANGUAGE LANGUAGE SETUP OSD LANGUAGE ENGLISH AUDIO LANG GERMAN SUBTITLE LANG SPANISH MENU LANG FRENCH EXIT SETUP Select the desired language (ENGLISH, GERMAN, SPANISH, FRENCH) for the On-Screen display to display text. -
Page 18: Audio Setup Menu
AUDIO SETUP MENU Select AUDIO SETUP using the Navigation (¦,‹) buttons, then select/change the setup option as described on page AUDIO OUT Sets the Digital Audio Output. AUDIO SETUP AUDIO OUT SPDIF/OFF EXIT SETUP SPDIF/RAW SPDIF/PCM SPDIF/OFF: Select to disable Digital Output. SPDIF/RAW: Select to hear the Digital Output in RAW format. -
Page 19: Password/Parental
PASSWORD Select this option to change the password. You must know the old password in order to change it. If you have forgotten the password, call customer service at the number listed in the Warranty. At the SYSTEM SETUP MENU, use the Navigation (œ,ƒ) buttons ‚... -
Page 20: Basic Operation
When “INVALID KEY” appears while pressing a button, this means that the corresponding function cannot be performed either on the disc inserted, or in 3D SOUND 3D audio post-processing will give a multichannel effect when using only 2 speakers. During playback of a disc, press the 3D button 1 once and the sound options will appear on the screen. -
Page 21: Mute
MUTE Press the MUTE button once to mute the sound, “MUTE” will appear on the TV screen. Press the MUTE button again to restore the sound; “DEMUTE” will appear on the TV screen for three seconds. DISPLAY Press DISPLAY button for DVD: 1 press show "... -
Page 22: Dvd Basic Operation
IMPORTANT NOTES: • After plugging in, the unit will be in the Standby mode (the Standby indicator will be lit). Press the STANDBY ON/OFF button on the main unit or the remote to turn on the unit. As long as you do not press the STANDBY ON/OFF button to turn the unit off, it will return to Standby mode and the STANDBY indicator will light. -
Page 23: Skip
DVD BASIC OPERATION (CONTINUED) SKIP Press the Skip (n) button 1 to advance the DVD to the beginning of the next chapter. Press the Skip (o ) button 2 to move the DVD to the beginning of the previous chapters. SLOW/R AND SLOW/F Use this feature to move the DVD in slow motion. -
Page 24: Title/Chapter Search
DVD BASIC OPERATION (CONTINUED) TITLE/CHAPTER SEARCH Use this feature to directly go to a specific title and/or chapter. Press the SEARCH button 1 . Press the Navigation (¦,‹) buttons ƒ to select the TITLE, then use the Number buttons 3 to select the desired title number. Press the ENTER 4 button and playback will start immediately. -
Page 25: Audio Menu
DVD BASIC OPERATION (CONTINUED) AUDIO MENU Press the AUDIO MENU button repeatedly to change the audio language. This feature is not available on all discs. DVD MENU Press the DVD MENU button ‚, and the Main Menu of the disc will appear. Use the Navigation (¦,‹,œ,ƒ) buttons ƒ to select the desired option, and then press the ENTER button „. -
Page 26: Programmed Playback
PROGRAMMED PLAYBACK The DVD player in this unit has a 16 chapter programmable memory that allows you to program up to 16 chapters on any disc for playback in any desired order. You may program 16 different chapters or you may also program certain chapters to play more than once. -
Page 27: Mp3 Basic Operation
PLAYBACK OF AN MP3 CD Press the STANDBY ON/OFF button on the main unit/remote to turn on the unit; the STANDBY indicator will go out. Press the OPEN/CLOSE button ‚ to close the disc tray. “LOAD” will appear on the screen and the display. After loading, playback will start immediately. -
Page 28: Buttons 2
MP3 BASIC OPERATION (CONTINUED) SELECTING FOLDERS/TRACKS During playback, press the (n) 1 or (o) 1 button to skip to the next or previous track to be played. You can also enter a track directly using the Number buttons 2. FORWARD‹‹/REVERSE ¦¦¤ Each press of the SEARCH ‹‹... -
Page 29: Programmed Playback
MP3 BASIC OPERATION (CONTINUED) PROGRAMMED PLAYBACK The disc player in this unit has a 16 track programmable memory that allows you to program up to 16 tracks on any disc for playback in any desired order. You may program 16 different tracks or you may also program certain tracks to play more than once. -
Page 30: Cd/Vcd Basic Operation
PLAYBACK OF A CD/VCD Press the STANDBY ON/OFF button on the main unit/remote to turn on the unit; the STANDBY indicator will go out and the Backlights will turn on. Press the OPEN/CLOSE button to close the disc tray. “LOAD” will appear on the screen and in the display. After loading, playback will start automatically. -
Page 31: Forward/Reverse
CD/VCD BASIC OPERATION (CONTINUED) FORWARD‹‹/REVERSE ¦¦¤ Each press of the SEARCH ‹‹ or ¦¦¤ button ‚ will increase the search as follows: 1st press: 2nd press: 3rd press: 4th press: x 20 5th press: Resume Normal Playback Press the PLAY (‹) button ƒ to resume normal playback. IMPORTANT NOTE ON VCD REPEAT PLAYBACK: PBC must be Off to use repeat/random playback with VCDs. -
Page 32: Programmed Playback
CD/VCD BASIC OPERATION (CONTINUED) PROGRAMMED PLAYBACK The CD player in this unit has a 16 track programmable memory that allows you to program up to 16 tracks on any disc for playback in any desired order. You may program 16 different tracks or you may also program certain tracks to play more than once. -
Page 33: Picture Cd Basic Operation
Press the STANDBY ON/OFF button on the main unit/remote to turn on the unit; the STANDBY indicator will go out. Press the OPEN/CLOSE button ‚ to close the disc tray. “LOAD” will appear on the TV screen. After loading, the picture will automatically show on the TV screen. -
Page 34: Troubleshooting Guide
Check the following before requesting service: SYMPTOM GENERAL No power. Power on, but unit not functioning properly. No picture. No sound. Playback picture rolls. The playback picture is poor. The Search feature is not working. The picture is not fitting properly. The remote control is not working. - Page 35 WWW.MEMOREXELECTRONICS.COM OR CONTACT CUSTOMER SERVICE AT PLEASE KEEP ALL PACKAGING MATERIAL FOR AT LEAST 90 DAYS IN CASE YOU NEED TO RETURN THIS PRODUCT TO YOUR PLACE OF PURCHASE OR MEMOREX. FOR PARTS AND ACCESSORIES, CONTACT FOX INTERNATIONAL AT 1-800-321-6993.
-
Page 36: Care And Maintenance
Caring for Discs • Treat the disc carefully. Handle the disc only by its edges. Never allow your fingers to come in contact with the shiny, unprinted side of the disc. • Do not attach adhesive tape, stickers, etc. to the disc label. •... -
Page 37: Specifications
Power Requirements...AC120V, 60Hz Power Consumption...<15W (approx. 5W when set to Standby mode by remote) Weight...3.75 Lbs Dimensions ...17 (L) x 9 (W) x 1.7 (H) inches Weight and dimensions are approximate. Signal System ...NTSC/PAL Operating Temperature ...+5° to +35°C Operating Humidity Range...5% to 90% (no condensation) Discs Played: DVD-VIDEO Disc 12cm single-sided, single layer... - Page 38 Memcorp, Inc. Weston, FL Printed in Hong Kong Visit our website at www.memorexelectronics.com...