Sign In
Upload
Manuals
Brands
Unipower Manuals
Battery Charger
ARE-S4830A
Unipower ARE-S4830A Manuals
Manuals and User Guides for Unipower ARE-S4830A. We have
1
Unipower ARE-S4830A manual available for free PDF download: Product Manual
Unipower ARE-S4830A Product Manual (72 pages)
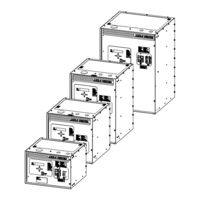
48V and 130V Float Chargers Single-Phase Input
Brand:
Unipower
| Category:
Battery Charger
| Size: 3 MB
Table of Contents
Important Safety Instructions
2
Table of Contents
6
1 Introduction
9
Product Description
9
Model Designation
10
Options
10
Mechanical
10
TABLE 1-1 48V Model Designation
11
TABLE 1-2 130V Model Designation
12
Electrical
13
TABLE 1-3 Cabinet Dimensions by Model
13
TABLE 1-4 General AC Voltage Range
13
Front Panel Displays and Controls
15
TABLE 1-5 Model Specific and Related Specifications
15
Environmental
16
TABLE 1-6 Settable Parameters, Standard Models
16
Abbreviations and Acronyms
17
Product Support
18
2 Installation
19
Installation Summary
19
Reference Material
20
Tools and Accessories
20
Selecting and Sizing DC Power Cables
20
TABLE 2-1 Copper Wire Sizing
21
Mechanical Installation
22
TABLE 2-2 Torque Specifications, Steel Fasteners
22
Electrical Installation
23
Figure 2-1 Electrical Installation, Block Diagram
23
Figure 2-2 Typical Charger Electrical Entrance and Breaker Locations
24
Figure 2-3 Electrical Installation Terminals, 12" Cabinet Models
25
Figure 2-4 Electrical Installation Terminals, 17", 24", and 30" Cabinet Models
25
Connecting AC Input Cables
26
Grounding the Cabinet
26
Installing a User's AC Electrical Service Panel
26
Connecting an External DC Load
27
Connecting the Battery String
27
Connecting Alarm Annunciation
28
TABLE 2-3 Alarm State/Condition
28
Figure 2-5 Interface Board Connections
29
Figure 2-6 Relay Board Alarm Connections
29
Connecting the Battery Temperature Probe (Option)
30
3 Commissioning
31
Preparatory Steps
31
Figure 3-1 Operator Controls (Front View Typ.)
31
Commissioning Procedure
32
4 Setup and Operation
34
Turning on a Commissioned Charger
34
Turning off a Commissioned Charger
34
Setting up and Operating a Charger
34
The 4-Button Keypad
34
The Home Screen and Menus
35
Figure 4-1 Main Menu
35
Figure 4-2 Charger Status Menu
36
Figure 4-3 Charger Operating Mode Menu
36
Figure 4-4 Charger Setup (Configuration) Menu
37
View Active Alarms
38
View Charger Status
38
Change Operating Mode (Manual Equalization)
38
Alarm Relay/Lamp Test
39
Change Charger Setup (Configuration)
39
System Setpoints, System Alarms, and Summary Alarm
40
Guidelines
40
Float and Equalize Voltages
40
Low Voltage Alarm (LVA)
40
TABLE 4-1 Factory Default Setup Parameter Values
40
High Voltage Alarm (HVA)
41
Primary (Software) High Voltage Shutdown Voltage (HVSD)
41
Secondary (Hardware/Software) High Voltage Shutdown (HVSD2)
41
Current Limit Alarm (CL)
41
Low Current (no Charge) Alarm (LCA/NCA)
41
TABLE 4-2 Typical Float/Equalize Voltages
41
Rectifier Fail Alarm (RECTF)
42
Set Parameter Values
42
Battery Temperature Compensation
42
Auto-Equalize
43
Load Share
44
Field Connection and Setup of Load Share
44
Figure 4-5 Issue 1 Control Board (Not Load Share Compatible)
45
Figure 4-6 Issue 1A Board (Requires 306.2988.00 Isolator Board)
45
Figure 4-7 Issue 2, 2A or Later Board (Load Share Ready)
45
Figure 4-8 2-Charger Load Share Setup Example
46
Figure 4-9 3-Charger Load Share Setup Example
46
Figure 4-10 Eol (End of Line) Jumper (Issue 2A Board Shown)
47
Activating Load Share
48
Operational Notes
48
Figure 4-12 Home Screen During Active Loadsharing
48
Password
49
Factory Defaults
50
ARE-S User-Programmable Alarm Relays Functionality
51
TABLE 4-3 Default (Standard) Charger Settings
51
Figure 4-13 Extended Relay Board
51
User-Programmable Alarm Relays Setup and Operation
52
TABLE 4-4 Custom Setup Menu Tree
52
Figure 4-14 Front Panel Custom Leds
52
Factory Calibration
53
Field Calibrations
53
Figure 4-15 Digital Inputs
53
5 Circuit Description
54
Figure 5-1 Block Diagram, Typical Are-S Float Charger
54
6 Maintenance
56
Preventive
56
Troubleshooting
57
Service Access
57
Circuit Board Handling
57
ARE-S LCD Display Codes
58
TABLE 6-1 Troubleshooting Chart
60
Checking Components
63
Interface Board (306.2991.48 or 306.2991.130)
64
Board Interchangeability
64
Troubleshooting
64
TABLE 6-2 J4, Interface Board Jumper Settings
64
Replacing the Interface Board
65
Figure 6-1 Interface Board Connections
65
Control and Display Board (306.2993.00)
66
Replacing the Board
66
Figure 6-2 Control and Display Board
66
Control Power Supply Board (306.2990.48 or 306.2990.130)
67
Replacing the Board
67
Figure 6-3 Control Power Supply Board
67
Scr Trigger Board (306.2989.00)
68
Replacing the Board
68
Figure 6-4 Scr Trigger Board
68
Extended Relay Board (306.2994.00)
69
Replacing the Board
69
Figure 6-5 Extended Relay Board
69
7 Options and Accessories
70
Lightning Arrester
70
Figure 7-1 Lightning Arrester; 120, 208, 240 and 480 Vac Connections
70
Blocking Diode
71
Figure 7-2 Blocking Diode
71
Output Movs
72
Drip Shield
72
Temperature Sensor
72
Ground Detection Switch (Standard)
72
Remote Communications
72
Medium and High Interrupt Ac Breakers
72
High Interrupt DC Breakers (Standard on 48V Systems)
72
Advertisement
Advertisement
Related Products
Unipower ARE-S4806A
Unipower ARE-S4812A
Unipower ARE-S4850A
Unipower ARE-S Series
Unipower ARE-S13012A
Unipower ARE-S13025A
Unipower ARE-S13035A
Unipower ARE-S13075A
Unipower ARE-S13050A
Unipower ARE-S13016A
Unipower Categories
Power Supply
Power distribution unit
Inverter
Measuring Instruments
Battery Charger
More Unipower Manuals
Login
Sign In
OR
Sign in with Facebook
Sign in with Google
Upload manual
Upload from disk
Upload from URL