Sign In
Upload
Manuals
Brands
TKH Manuals
Digital Camera
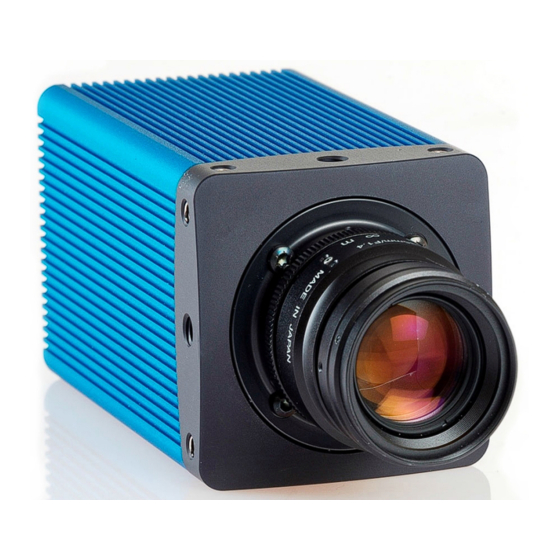
SVS-Vistek GiGE VISION EoSens QUAD1.1S
TKH SVS-Vistek GiGE VISION EoSens QUAD1.1S Manuals
Manuals and User Guides for TKH SVS-Vistek GiGE VISION EoSens QUAD1.1S. We have
1
TKH SVS-Vistek GiGE VISION EoSens QUAD1.1S manual available for free PDF download: Manual
TKH SVS-Vistek GiGE VISION EoSens QUAD1.1S Manual (83 pages)
Brand:
TKH
| Category:
Digital Camera
| Size: 10 MB
Table of Contents
Table of Contents
2
Before You Start
7
About this Manual
7
Tips, Remarks, and Notes
7
Registered Trademarks
7
Conformity and Use
7
Supplements
8
Warranty and Non-Warranty Clause
9
Support
9
Introduction
10
Intended Use
10
Scope of Delivery
10
Optional Accessories
10
System Requirements
10
The Camera
12
Camera Description
12
Identification Plate
13
Date and Time
13
External Synchronization
13
Operating Temperature
13
Additional Cooling
14
Interfaces of the Camera
14
Fig.: 3-1: Interfaces of the Camera Eosens® QUAD1.1S
14
Status LED
15
Fig.: 3-2: Leds
15
Table: 3-1: Status LED
15
Table: 3-2: Power LED
15
Gige Interface
16
Table: 3-3: Recording LED
16
Table: 3-4: Pin Assignment of the External I/O Connector
17
First Steps
18
Connecting the Camera
18
Connecting the Power Supply
18
Manually Assigning an IP Address
19
Table: 4-1: Connector Pinning
19
Accelerating the Network Speed
20
Using Multiple Network Cards
22
Resetting the Gige Link
23
Cleaning Sensor and Lens
23
The Visualmarc2 Software
24
Introduction
24
About the Visualmarc2 Software
24
Prerequisites
24
System Requirements
24
Installing the Software
24
The User Interface
25
Overview
25
Start Communicating with the Camera
25
The Workspace
25
Fig.: 5-1: Connection Manager
25
Status Bar Entries
28
The Global Function Tabs
28
The Connection Manager Tab
28
The Import Tab
29
Fig.: 5-3: the Connection Manager Tab
29
Table: 5-1: File Formats for Import
29
The Export Tab
30
The "About" Tab
31
The Application Settings Tab
31
Fig.: 5-4: about Tab
31
Fig.: 5-5: the Application Settings Tab
31
The Tools Bar
32
Overview
32
Fig.: 5-6: the Tools Bar
32
The Tools Bar Icons
33
Assignment of Keys
33
Table: 5-2: the Tools Bar Icons
33
Table: 5-3: Key Assignment
34
The Image Processing and Analysis Tabs
35
Overview
35
Debayering Tab
35
Resize and Rotate Tab
35
Fig.: 5-7: Image Processing and Analysis Tabs
35
Color Management
36
Fig.: 5-8: Cropping the Frame
36
Fig.: 5-9: Flipping and Rotating a Frame
36
Fig.: 5-10: Image Type Conversion
40
Fig.: 5-11: Color Transform Panel
41
Fig.: 5-12: Color Transformation, Example 1
41
Fig.: 5-13: Color Transformation to Sepia
42
Fig.: 5-14: Color Transformation, Example 2
42
Fig.: 5-15: Color Transformation Applied
43
Fig.: 5-16: Adjustment Panel
43
Fig.: 5-17: Linear Brightness
44
Fig.: 5-18: Contrast (Example)
44
Fig.: 5-19: Gamma Correction (Example)
45
Fig.: 5-20: Original Image with Saturation Value 0 and Its Histogram
45
Histograms
46
Fig.: 5-21: Decreased Saturation to 50 with Histogram
46
Fig.: 5-22: Increased Saturation to 190 with Histogram
46
Fig.: 5-23: Gray8 Ramp
46
Fig.: 5-24: Pixel Value Frequency
49
Markers
52
Fig.: 5-25: Adjusting Colors in Histograms
52
Fig.: 5-26: Adjusting Red Values
52
Fig.: 5-27: Setting Markers
53
Info Field
54
Fig.: 5-28: the Analog to Digital Converter
54
The Recording and Live View Control Bar
55
Overview
55
Icons of the Recording and Live View Control Bar
55
Playback
56
Exporting Frames
57
Table: 5-4: Export Formats
58
Selections
59
Events
60
The Device Control Panels
61
Overview
61
Fig.: 5-29: the Device Control Panels
61
The Camera Info Panel
62
The Camera Settings Panel
62
Fig.: 5-30: Camera Info Panel
62
Fig.: 5-31: Camera Settings Panel
62
Fig.: 5-32: the Camera Settings Panel
63
Fig.: 5-33: ROI Split View
64
The Record Settings Panel
65
Fig.: 5-34: Record Settings Panel
65
Fig.: 5-35: Autosave in Ring Mode
66
The Imageblitz Panel
67
Fig.: 5-36: Imageblitz Split View
67
Fig.: 5-37: Imageblitz Panel
68
The Trigger Control Panel
69
Fig.: 5-38: the Trigger Control Panel
69
Fig.: 5-39: the Digital Input Section of the Trigger Control Panel
69
Fig.: 5-40: Digital Input Example
70
Fig.: 5-41: the Digital Output Section of the Trigger Control Panel
70
The Advanced Settings Panel
72
Fig.: 5-42: Advanced Settings Panel
72
Fig.: 5-43: Black Level Settings (Example)
73
Fig.: 5-44: Digital Gain in the Advanced Settings Panel
73
The Expert Settings Panel
74
Fig.: 5-45: Expert Settings Panel
74
Table: 5-5: Analog Gain
74
The Camera User Sets Panel
75
Fig.: 5-46: Camera User Sets Panel
75
Technical Data
76
Camera Specifications
77
Sensor Specifications
78
Resolution and Frame Rate
78
Camera Dimensions
79
Fig.: 6-1: Back View
79
Fig.: 6-2: Side View
79
Spectral Response
80
Monochrome and Color
80
Fig.: 6-3: Quantum Efficiency Monochrome
80
Fig.: 6-4: Quantum Efficiency Color
80
Appendix
81
Declaration of Conformity
82
Advertisement
Advertisement
Related Products
TKH ECO Series
TKH exo990MGE
TKH FD360v2
TKH PD950
TKH PD980
TKH shr411CCX
TKH shr411MCX
TKH shr461CCX
TKH Categories
Security Camera
Digital Camera
Lighting Equipment
Transmitter
Machine Vision Systems
More TKH Manuals
Login
Sign In
OR
Sign in with Facebook
Sign in with Google
Upload manual
Upload from disk
Upload from URL