Sign In
Upload
Manuals
Brands
Thrane&Thrane Manuals
Antenna
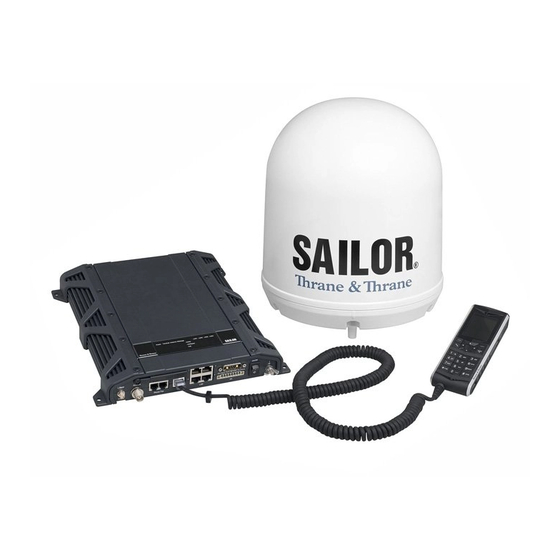
SAILOR 900
Thrane&Thrane SAILOR 900 Manuals
Manuals and User Guides for Thrane&Thrane SAILOR 900. We have
1
Thrane&Thrane SAILOR 900 manual available for free PDF download: Installation And User Manual
Thrane&Thrane SAILOR 900 Installation And User Manual (208 pages)
VSAT SYSTEM
Brand:
Thrane&Thrane
| Category:
Antenna
| Size: 14 MB
Table of Contents
Safety Summary
5
Table of Contents
9
Chapter 1 About this Manual
21
Intended Readers
21
Manual Overview
21
Related Documents
22
Typography
22
Precautions
22
Chapter 1 About this Manual
22
Table 1-1: List of Related Documents
22
Chapter 1 About this Manual
24
Chapter 2 Introduction
25
SAILOR 900 VSAT System
25
Chapter 2 Introduction
26
Figure 2-1: above Deck Unit and Antenna Control Unit (ACU)
26
Figure 2-2: above Deck Unit and Antenna Control Unit (ACU), 19" Rack Version
26
Above Deck Unit (ADU)
27
Figure 2-3: above Deck Unit (ADU)
27
Figure 2-4: above Deck Unit Modules 1/2
28
Chapter 2 Introduction
29
Figure 2-5: above Deck Unit Modules 2/2
29
Antenna Control Unit (ACU)
30
Figure 2-6: SAILOR 900 VSAT ACU, Connector Overview
31
Figure 2-7: SAILOR 900 VSAT ACU, 19" Rack Version
31
Figure 2-8: Antenna Control Unit for Bulkhead Installation
32
Figure 2-9: Antenna Control Unit for 19" Rack Installation
32
VSAT Modem Unit (VMU)
33
Satellite Type Approvals
33
Power Supply
33
Service Activation
33
Part Numbers and Options
34
Applicable Thrane & Thrane Model- and Part Numbers
34
Options for SAILOR 900 VSAT
34
Table 2-1: Model and Part Numbers for the SAILOR 900 VSAT System (T&T Units)
34
Table 2-2: Model and Part Numbers for Options of the SAILOR 900 VSAT System
34
Chapter 3 Installation
35
Unpacking
35
What's in the Box
35
Initial Inspection
36
Tools Needed
36
Site Preparation
37
General Site Considerations
37
Obstructions (ADU Shadowing)
37
Chapter 3 Installation
37
Figure 3-1: Signal Degradation Because of Obstructing Objects
38
Blocking Zones - Azimuth and Elevation
39
Figure 3-2: 2 Blocking Zones with No-Transmit Zones, Azimuth (Example)
39
Figure 3-3: Blocking Zone with No-Transmit Zones, Elevation Angle (Example)
39
Safe Access to the ADU: Radiation Hazard
40
Figure 3-4: Radiation Hazard, Safety Distance 30 M
40
Ship Motion and Offset from the Ship's Motion Centre
41
Figure 3-5: Maximum Distance from the Ship's Motion Centre (H Max)
41
Table 3-1: Maximum Distance from the Ship's Motion Center Versus Ship's Roll Period
41
ADU Mast Design: Foundation and Height
42
Figure 3-6: ADU Mast Flange, Top and Side View
42
Figure 3-7: ADU Mast Flange, Recommended Flatness on the Mast Mount Plateau
42
Figure 3-8: ADU Mast Flange, Distance to the Welded Seam
43
Figure 3-9: ADU, Bottom View
43
Figure 3-10: Free Mast Length and Bracing for a Tall Mast
44
Table 3-2: Mast Dimensions Without Braces
45
Table 3-3: Mast Dimensions with 3 Braces
45
Table 3-4: Mast Dimensions with 2 Braces
46
Interference
47
Figure 3-11: Interference with the Vessel's Radar
47
Table 3-5: Minimum Radar Separation, X-Band
48
Table 3-6: Minimum Radar Separation, S-Band
48
Figure 3-12: Recommended Distance to Transmitters (M) for Frequencies below 1000 Mhz
50
Other Precautions
51
Figure 3-13: Drain Pipe with Free Space
51
Installation of the ADU
52
Figure 3-14: Use of Strong Sling with a Belt and Tag Lines for Safe Hoisting
52
Installing the ADU
53
Figure 3-15: Free Space for Access to the Service Hatch
53
Figure 3-16: ADU Installation, Webbed Sling Attached to the 4 Lifting Brackets
54
Figure 3-17: Mounting the ADU on the Mast Flange
54
Figure 3-18: Connecting the ADU Cable
55
Grounding the ADU
56
Alternative ADU Cable
56
Table 3-7: ADU Cable Types and Maximum Lengths
56
Installation of the ACU (Bulkhead)
57
Installing the ACU (Bulkhead)
57
Figure 3-19: ACU, Connector Panel
57
Grounding the ACU (Bulkhead)
58
SAILOR 900 VSAT ACU (Bulkhead) with Cable Support
58
Figure 3-20: SAILOR 900 VSAT ACU, Bulkhead Version, Ground Stud
58
Figure 3-21: Mounting the Cable Relief 1/2
59
Installation of the 19" Rack Version of the ACU
60
Installing the 19" Rack Version of the ACU
60
Figure 3-23: ACU, 19" Rack Version, On/Off Switch at the Back
60
Grounding the 19" Rack Version of the ACU
61
Figure 3-24: ACU, LAN Connector at the Front: Service Port
61
Figure 3-25: ACU, 19" Rack Version, Ground Stud
61
Installation of the VMU
62
General Mounting Considerations - VMU
62
Chapter 4 Interfaces
63
Interfaces of the SAILOR 900 VSAT ACU
63
ACU Bulkhead - Leds, Display and Keypad
63
ACU 19" Rack Version - Leds, Display and Keypad
63
Figure 4-1: ACU Bulkhead, Leds, Display and Keypad
63
Figure 4-2: ACU Rack Version, Leds, Display and Keypad
63
ACU Bulkhead - Connector Panel - Overview
64
ACU 19" Rack Version - Connector Panel - Overview
64
Figure 4-3: ACU Bulkhead, Connector Panel Overview
64
Figure 4-4: ACU Rack Version, Connector Panel Overview
64
DC Input Connector
65
Figure 4-5: DC Input Connector with Power Cable
65
Chapter 4 Interfaces
65
Table 4-1: DC Input Plug, Outline and Pin Assignment
65
ADU Connector
66
Rx/Tx Connectors for VMU
66
Table 4-2: N Connector, Outline and Pin Assignment
66
Table 4-3: F Connector, Rx and Tx, Outline and Pin Assignment
66
NMEA 0183/2000 Connector
67
Table 4-4: NMEA 0183/2000 Connector, Outline and Pin Assignment
67
And RS-422 Connectors
68
Table 4-5: RS-232 Connector, Male, Outline and Pin Assignment
68
LAN1, LAN2, LAN3 and LAN4 Connectors
69
Figure 4-6: LAN1 -LAN4 Connectors
69
Table 4-6: RS-422 Connector, Male, Outline and Pin Assignment
69
Table 4-7: Ethernet Connector, Outline and Pin Assignment
70
Interfaces of the VMU
71
Connecting an Infiniti® 5000 Series Satellite Router
71
Figure 4-7: Connecting an Infiniti® 5000 Series Satellite Router
71
Table 4-8: Cables to Connect an Infiniti® 5000 Series Satellite Router
71
Connecting an Evolution® X5 Satellite Router
72
Figure 4-8: Connecting an Evolution X5 Satellite Router
72
Connecting a Comtech 570 L or 625 Satellite Modem
73
Figure 4-9: Connecting a Comtech 570 L or 625 Satellite Modem
73
Table 4-9: Cables to Connect a Comtech 570 L-Band Satellite Modem
73
Chapter 5 Connecting Power
75
Power Source
75
Power Cable Selection
76
Source Impedance
76
Measuring the Ship Source Impedance
76
Power Cable Recommendations
77
Figure 5-1: Measuring the Ship Source Impedance
77
Chapter 5 Connecting Power
77
Connecting Power
78
Figure 5-2: Connecting Power to DC Input
78
Power up
79
Figure 5-3: ACU Display after First Power on (Example with LAN Ports 1 and 4 Used)
79
Chapter 6 Configuration
81
Introduction to the Built-In Web Interface
81
Overview
81
Figure 6-1: Configuration Setup
81
Connecting to the Web Interface
82
Figure 6-2: LAN Connector Used for Configuring the SAILOR 900 VSAT
82
Calibration of the SAILOR 900 VSAT
83
Figure 6-3: SAILOR 900 VSAT Dashboard
83
Setting up a Service Profile for Calibration
84
Figure 6-4: Service Profile, Add a Service 'Modem' for Calibration
84
Figure 6-5: Service Profile, Add Satellite Information
85
Table 6-1: Satellite Requirements for Elevation and Carrier
85
Calibration of Azimuth and Cable
86
Figure 6-6: Web Interface: SERVICE, Calibration: Azimuth and Cable
86
Configuration with the Web Interface
88
Overview and Navigation
88
Figure 6-7: Topics in the Web Interface (SITE MAP)
88
Figure 6-8: Sections of the Web Interface
89
Table 6-2: Web Interface: Icons
90
Using the Dashboard
92
Figure 6-9: Web Interface: DASHBOARD
92
Table 6-3: Web Interface, SAILOR 900 VSAT Parameters on DASHBOARD
93
Table 6-4: Web Interface, VSAT MODEM Parameters on DASHBOARD
94
Satellite Profiles and VSAT Modem Profiles
95
Figure 6-10: Web Interface: SETTINGS - List of Satellite Profiles (Example)
95
Figure 6-11: Web Interface: SETTINGS, Satellite Profiles - New Entry (Example)
96
Figure 6-12: Web Interface: SETTINGS, VSAT Modem Profiles - List (Example)
97
Figure 6-13: Web Interface: SETTINGS, VSAT Modem Profiles - New Entry (Example)
98
Setting up Blocking Zones (RX and TX)
99
Figure 6-14: Web Interface: SETTINGS, Blocking Zones - Azimuth and Elevation
99
Figure 6-15: Blocking Zone, Example: 315 - 45 Degrees
100
Figure 6-16: Blocking Zone, Example: 45 - 315 Degrees
100
Chapter 6 Configuration
100
Configuring the LAN Network
101
Figure 6-17: Web Interface: SETTINGS, Network (LAN Connectors)
101
Table 6-5: LAN Port - Preferred Use
101
E-Mail Setup
103
Figure 6-18: Web Interface: SETTINGS, E-Mail Setup
103
Sending Statistics Reports
104
Figure 6-19: Web Interface: SETTINGS, Reports (Example)
104
Table 6-6: Parameters Recorded in a Statistics Report
105
Figure 6-20: Statistics - How to Read Data for a Range
106
Sending a Diagnostic Report
107
Figure 6-21: Statistics Report (Example)
107
Upload
108
Administration
108
Figure 6-22: Web Interface: Administration
108
Figure 6-23: Web Interface: Administration, Change Administrator Logon
109
Figure 6-24: Web Interface: ADMINISTRATION, Reset Administrator Password
109
Figure 6-25: Web Interface: ADMINISTRATION, User Permissions
111
Figure 6-26: Web Interface: ADMINISTRATION, Factory Default
112
Keypad of the SAILOR 900 VSAT ACU
113
ACU Display and Keypad
113
Figure 6-27: Display (Example) and Keypad of the ACU
113
Table 6-7: Items in the ACU Display (Example)
113
Navigating the Menus
114
The Menu Tree
115
Figure 6-28: Antenna Control Unit, Menu Tree
115
Table 6-8: Top-Level Menus of the ACU
116
Table 6-9: ANTENNA Menu of the ACU
117
Table 6-10: MODEM Menu of the ACU
117
Table 6-11: NETWORK Menu of the ACU
118
Table 6-12: SATELLITE Menu of the ACU
118
Adjusting Brightness of the Display
119
Resetting the System
119
Figure 6-29: Reset the System
119
Table 6-13: EVENTS Menu of the ACU
119
Chapter 7 Installation Check
121
Installation Check List: Antenna
121
Chapter 7 Installation Check
122
Table 7-1: Installation Check List: Antenna
122
Installation Check List: ACU, Connectors and Wiring
123
Table 7-2: Installation Check List: ACU, Connectors and Wiring
124
Installation Check List: Functional Test in Harbor
125
Figure 8-1: SAILOR 900 VSAT Quick Guide - Web Interface and Satellite Profiles
127
Figure 8-2: SAILOR 900 VSAT Quick Guide - Viewing System Parameters
128
Chapter 8 Daily Use - Quick Guide
129
Chapter 9 Service
129
Getting Support: Helpdesk
130
Help Desk and Diagnostic Report
130
Figure 9-1: Web Interface: HELPDESK
130
Figure 9-2: Web Interface: HELPDESK, Enter Support Contact
130
Software Update
132
Software Update (ADU and ACU)
132
Figure 9-3: LAN Connector Used for Configuring the SAILOR 900 VSAT
132
Verifying the Software Update
133
Figure 9-4: Web Interface: SERVICE, Upload
133
Figure 9-5: Verifying Software Update
134
Status Signalling with Leds and Status Messages
135
Leds of the ADU Modules
136
Table 9-1: Leds of the ADU Modules
136
Leds in the ACU
137
Figure 9-6: Leds on the ACU
137
Figure 9-7: Leds on the ACU, 19" Rack Version
137
Table 9-2: Leds on the ACU
137
Removal and Replacement of the ACU
139
Figure 9-8: Removal and Replacement of the ACU Bulkhead
139
Figure 9-9: Removal and Replacement of the ACU 19" Rack
139
Removal and Replacement of ADU Modules
140
Figure 9-10: ADU Modules and Motor Stop Switch
140
Figure 9-11: above Deck Unit Modules (Continued)
141
Initial Troubleshooting
143
Viewing the Event List
143
Appendix A Technical Specifications
147
SAILOR 900 VSAT System Components
147
General Specifications
147
Table A-1: General Specifications
147
Adu
148
Table A-2: Technical Specifications for the above Deck Unit
148
A.1.2 Adu
148
Acu
150
Table A-3: Technical Specifications for the ACU
150
A.1.3 Acu
150
Supported VSAT Modems
151
Table A-4: Supported VSAT Modems
151
Outline Drawings
152
Adu
152
Figure A-1: Outline Drawing: ADU
152
A.2 Outline Drawings
152
ACU, Bulkhead
153
Figure A-2: Outline Drawing: ACU, Bulkhead
153
ACU, 19 Inch Rack
154
Figure A-3: Outline Drawing: ACU, 19 Inch Rack
154
Appendix Bvmu Cable Specifications
156
Modem Cable Comtech Serial & RSSI TT7016A
156
Figure B-1: Modem Cable Comtech Serial & RSSI TT7016A
156
Modem Cable Inifiniti Idirect VSAT Modem
157
Appendix Cvmu Settings Requirements
160
Open AMIP Setup for Idirect INFINITI 5000 & Evolution X5
160
Protocol and Interfaces
160
Figure C-1: Connecting Idirect Infiniti 5000 Series to the ACU (Openamip
161
Figure C-2: Connecting Idirect Evolution X5 to the ACU (Openamip
161
Figure C-3: Supported Openamip Commands
162
Table C-1: Messages Sent from the VSAT Modem to the ACU (Examples
162
Sample Options File
163
Table C-2: Messages Sent from the ACU to the VSAT Modem (Examples
163
Table C-3: Ranges for Signal Strength for Idirect Open AMIP VSAT Modem
163
Table C-4: Information in the VSAT Modem Option File
165
Configuration Examples (Openamip
166
Figure C-4: VSAT Modem Profile, Openamip (Example
166
Figure C-5: Satellite Profile, Openamip (Example
167
Non-Open-AMIP Setup for Idirect Infiniti 5000 & Evolution X5
168
Protocol and Interfaces
168
Figure C-6: Connecting Idirect Infiniti 5000 Series to the ACU (Non-Openamip
168
Figure C-7: Connecting Idirect Evolution X5 to the ACU (Non-Openamip
168
Console Port Settings
169
Figure C-8: RS-232 Console Cable for Idirect Non-Openamip VSAT Modem
169
Figure C-9: Requirements for VSAT Modem Option File, Non-Openamip
170
Configuration Examples (Non-Openamip
171
Figure C-10: VSAT Modem Profile, Non-Openamip (Example
171
Figure C-11: Satellite Profile, Non-Openamip (Example
171
Setup of Comtech 570L, ROSS Box & ACU
172
Protocols and Interfaces
172
Figure C-12: Connecting Comtech 570L and ROSS Box to the ACU (Example
172
Appendix D Grounding and RF Protection
173
Why Is Grounding Required
173
Reasons for Grounding
173
Safety
173
ESD Protection
173
D.1 Why Is Grounding Required?
173
Grounding Recommendations
174
Grounding the ACU
174
Figure D-1: Extending the Ground Plane
174
D.2 Grounding Recommendations
174
Grounding the ADU
175
Alternative Grounding for Steel Hulls
176
Grounding the ACU
176
Grounding the ADU
176
Figure D-3: Grounding at a Dedicated RF Ground (Alternative
177
Alternative Grounding for Aluminum Hulls
178
Grounding the ACU
178
Grounding the ADU
178
Alternative Grounding for Fiberglass Hulls
179
Grounding the ACU
179
Grounding the ADU
179
Figure D-4: Alternative Grounding for Aluminium Hulls
179
Figure D-5: Alternative Grounding for Fiberglass Hulls
180
Separate Ground Cable
181
Ground Cable - Construction
181
Ground Cable - Connection
181
Isolation of the ADU from the Mounting Base
182
Figure D-7: Isolation of the ADU from the Mounting Base
182
RF Interference
183
Recommendations
183
Figure D-8: ADU Isolation and Grounding Cable
183
D.7 RF Interference
183
Appendix E System Messages
185
Event Messages - Overview
185
E.1 Event Messages — Overview
185
List of ADU Events
186
Table E-1: ADU Event Messages
186
List of ACU Events
192
Table E-2: ACU Event Messages
192
Glossary
197
Index
201
Advertisement
Advertisement
Related Products
Thrane&Thrane SAILOR 150
Thrane&Thrane SAILOR 150 FleetBroadband
Thrane&Thrane SAILOR 6110
Thrane&Thrane SAILOR 6120
Thrane & Thrane SAILOR 6140
Thrane & Thrane SAILOR 6150
Thrane&Thrane SAILOR 6130
Thrane&Thrane SAILOR FleetBroadband Series
Thrane&Thrane SAILOR TT-3084A Fleet 77
Thrane&Thrane SAILOR TT-3086A Fleet 55
Thrane&Thrane Categories
Antenna
Touch terminals
Marine GPS System
Transceiver
Marine Equipment
More Thrane&Thrane Manuals
Login
Sign In
OR
Sign in with Facebook
Sign in with Google
Upload manual
Upload from disk
Upload from URL