Sign In
Upload
Manuals
Brands
Supero Manuals
Server
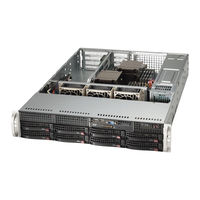
SUPERSERVER 6027R-WRF
Supero SUPERSERVER 6027R-WRF Server Manuals
Manuals and User Guides for Supero SUPERSERVER 6027R-WRF Server. We have
1
Supero SUPERSERVER 6027R-WRF Server manual available for free PDF download: User Manual
Supero SUPERSERVER 6027R-WRF User Manual (130 pages)
Brand:
Supero
| Category:
Server
| Size: 8 MB
Table of Contents
About this Manual
3
Manual Organization
3
Table of Contents
6
Chapter 1 Introduction
11
Overview
11
Serverboard Features
12
Processors
12
Memory
12
Serial ATA
12
SAS (6027R-N3RF Server Only)
12
Onboard Controllers/Ports
13
Graphics Controller
13
Other Features
13
Server Chassis Features
13
System Power
13
Hard Drive Subsystem
13
PCI Expansion Slots
13
Front Control Panel
14
I/O Backplane
14
Cooling System
14
Advanced Power Management
14
Intel® Intelligent Power Node Manager (NM)
14
Manageability Engine (ME)
14
Contacting Supermicro
16
Chapter 2 Server Installation
17
Overview
17
Unpacking the System
17
Preparing for Setup
17
Choosing a Setup Location
18
Cautions
18
Rack Precautions
18
Server Precautions
18
Rack Mounting Considerations
19
Ambient Operating Temperature
19
Reduced Airfl Ow
19
Mechanical Loading
19
Circuit Overloading
19
Reliable Ground
20
Installing the System into a Rack
20
Separating the Sections of the Rack Rails
20
Installing the Inner Rail Extension
20
Outer Rack Rails
22
Checking the Serverboard Setup
24
Checking the Drive Bay Setup
26
Chapter 3 System Interface
27
Overview
27
Control Panel Buttons
27
Reset
27
Power
27
Control Panel Leds
28
Power Fail
28
Nic1
28
Nic2
28
Hdd
29
Power
29
Drive Carrier Leds
29
Chapter 4 Standardized Warning Statements for AC Systems
31
About Standardized Warning Statements
31
Warning Defi Nition
31
Installation Instructions
34
Circuit Breaker
35
Power Disconnection Warning
36
Equipment Installation
38
Restricted Area
39
Battery Handling
40
Redundant Power Supplies
42
Backplane Voltage
43
Comply with Local and National Electrical Codes
44
Product Disposal
45
Hot Swap Fan Warning
46
Power Cable and AC Adapter
48
Chapter 5 Advanced Serverboard Setup
51
Handling the Serverboard
51
Precautions
51
Unpacking
51
Processor and Heatsink Installation
52
Installing a Passive CPU Heatsink
56
Removing the Heatsink
57
Connecting Cables
58
Connecting Data Cables
58
Connecting Power Cables
58
Connecting the Control Panel
58
I/O Ports
59
Installing Memory
60
Memory Support
60
Adding PCI Expansion Cards
62
Serverboard Details
63
X9DRW-3F/If Quick Reference
64
Connector Defi Nitions
66
Jumper Settings
75
Explanation of Jumpers
75
5-10 Onboard Indicators
77
5-11 SATA/SAS Drive Connections
78
5-12 Installing Software
79
Superdoctor III
81
5-13 Serverboard Battery
82
Chapter 6 Advanced Chassis Setup
83
Static-Sensitive Devices
83
Precautions
83
Unpacking
83
Control Panel
84
Removing the Chassis Cover
85
System Fans
86
Installing the Air Shroud
87
Drive Bay Installation/Removal
88
Accessing the Drive Bays
88
SAS/SATA Drive Installation
89
Installing the Motherboard
92
I/O Shield
92
Installing the I/O Shield
92
Permanent and Optional Standoffs
92
Power Supply
94
Power Supply Failure
94
Replacing the Power Distributor
95
Chapter 7 BIOS
97
Introduction
97
Starting the Setup Utility
97
Main Menu
97
System Time/System Date
98
Advanced Settings Menu
98
North Bridge
104
DIMM Information
106
Serial Port Console Redirection
113
Console Redirection Settings
113
Tpm Enable Status
116
Discard Changes and Exit
117
Event Logs
118
Ipmi
120
Boot
122
Security
123
Save & Exit
123
Appendix A BIOS Error Beep Codes
125
Appendix B System Specifi Cations
127
Advertisement
Advertisement
Related Products
Supero SuperServer 6027R-3RF4+
Supero SUPERSERVER 6027R-N3RF
Supero SUPERSERVER 6027R-72RFT+
Supero SUPERSERVER 6027R-TRF
Supero 6027R-3RF4
Supero SUPERSERVER 6027R-73DARF
Supero SUPERSERVER 6027R-TDARF
Supero SUPERSERVER 6027TR-HTRF+
Supero SUPERSERVER 6027B-URF
Supero SUPERSERVER 6027AX-72RF
Supero Categories
Motherboard
Server
Chassis
Computer Hardware
Desktop
More Supero Manuals
Login
Sign In
OR
Sign in with Facebook
Sign in with Google
Upload manual
Upload from disk
Upload from URL