Sign In
Upload
Manuals
Brands
Speck pumpen Manuals
Water Pump
BADU Jet Primavera
Speck pumpen BADU Jet Primavera Manuals
Manuals and User Guides for Speck pumpen BADU Jet Primavera. We have
2
Speck pumpen BADU Jet Primavera manuals available for free PDF download: Original Operation Manual, Operation Manual
Speck pumpen BADU Jet Primavera Original Operation Manual (260 pages)
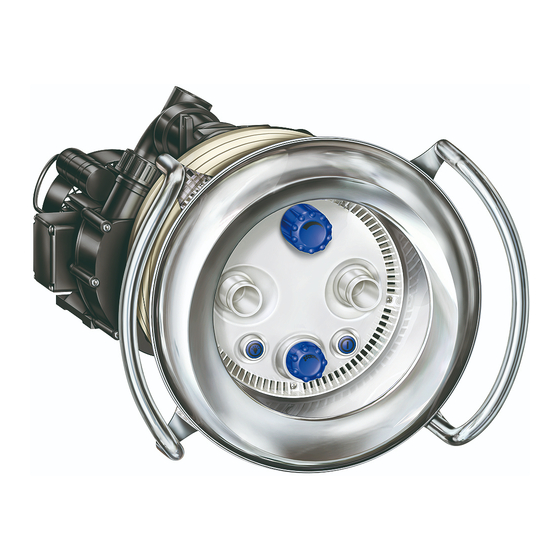
Submerged counter swim unit
Brand:
Speck pumpen
| Category:
Water Pump
| Size: 36 MB
Table of Contents
Table of Contents
2
Originalbetriebsanleitung Für
3
Zu Diesem Dokument
7
Umgang Mit Dieser Anleitung
7
Mitgeltende Dokumente
7
Symbole Und Darstellungsmittel
7
Sicherheit
9
Bestimmungsgemäße Verwendung
9
Mögliche Fehlanwendungen
9
Personalqualifikation
9
Sicherheitsvorschriften
10
Schutzeinrichtungen
10
Bauliche Veränderungen Und Ersatzteile
10
Schilder
11
Restrisiken
11
Herabfallende Teile
11
Rotierende Teile
11
Elektrische Energie
11
Heiße Oberflächen
12
Ansauggefahr
12
Verletzungsgefahr an Den EinströMDüsen
12
Störungen
12
Vermeidung Von Sachschäden
13
Undichtigkeit Und Rohrleitungsbruch
13
Trockenlauf
13
Kavitation
13
Überhitzen
14
Druckstöße
14
Blockieren Der Pumpe
14
Leckageabfluss
14
Frostgefahr
14
Beschreibung
15
Komponenten
15
Funktion
15
Transport Und Zwischenlagerung
16
Pumpe Anheben
16
Installation
17
Einbauort
17
Aufstellung IM Freien
17
Bodenablauf (Muss Vorhanden Sein)
17
Be- Und Entlüftung
17
Körper- Und Luftschallübertragung
17
Platzreserve
17
Befestigungselemente
17
Aufstellung
18
Montage Des Einbaugehäuses in Ein Betonbecken
20
Montage Des Einbaugehäuses in Polyester-, Stahl- Oder Alubecken
22
Ausrichtung Des Spannrings
24
Schutzschlauch Und Schlauch Für Luftregulierung
24
Rohrleitung Dimensionieren
25
Rohrleitung Verlegen
25
Absperrschieber
25
Pumpenschacht
25
Elektrische Steuerung
25
Fertigmontage
26
Pumpe Aufstellen Und an Rohrleitung Anschließen
33
Elektrischer Anschluss
34
Elektrischer Anschluss Für BADU ® Jet Primavera
34
Schaltplan 3~ 400/230V 50 Hz
35
Schaltplan 1~ 230V 50 Hz
35
Inbetriebnahme
36
Pumpe Auf Leichtgängigkeit Prüfen
36
Pumpe Einschalten
36
Betrieb
37
Verwendung Des Massageschlauches
38
Störungen
39
Übersicht
39
Pumpe Nach Ansprechen Eines Schutzkontakts/-Schalters Prüfen
40
Instandhaltung
41
Überwinterungsvorschlag
41
Austausch Des LED-Scheinwerfers
42
Technische Daten
44
Original Operation Manual for
45
About this Document
48
Using this Manual
49
Other Applicable Documents
49
Symbols and Means of Representation
49
Safety
51
Intended Use
51
Possible Misuse
51
Personnel Qualification
51
Safety Regulations
52
Protective Equipment
52
Structural Modifications and Spare Parts
52
Signs
52
Residual Risk
53
Falling Parts
53
Rotating Parts
53
Electrical Energy
53
Hot Surfaces
54
Suction Danger
54
Danger of Injury at the Inlet Nozzles
54
Defects
54
Preventing Material Damage
55
Leakage and Pipe Breakage
55
Dry Run
55
Cavitation
55
Overheating
56
Pressure Surges
56
Blockages of the Pump
56
Drain Gap
56
Danger of Frost
56
Description
57
Components
57
Transport and Intermediate Storage
58
Lifting the Pump
58
Installation
59
Installation Site
59
Outdoor Installation
59
Ground Drain (Has to Exist)
59
Aeration and Ventilation
59
Structure-Borne and Airborne Noise Transmission
59
Reserve Space
59
Fasteners
59
Installation
60
Mounting the Main Housing in a Concrete Pool
62
Mounting the Main Housing in a Polyester, Steel or Aluminium Pool
64
Aligning the Support Ring
66
Protective Conduit and Hose for Air Regulator
66
Pipe Sizing
67
Laying Pipes
67
Shut-Off Valves
67
Pump Shaft
67
Electrical Control Unit
67
Final Assembly
68
Installing the Pump and Connecting It to the Pipe
75
Electrical Connection
76
Electrical Connection for BADU ® Jet Primavera
76
Wiring Diagram 3-Phase 400/230 V 50 Hz
77
Wiring Diagram 1-Phase 230 V 50 Hz
77
Start-Up
78
Checking How Easily the Pump Rotates
78
Switching the Pump on
78
Operation
79
Using the Massage Hose
79
Defects
80
Overview
80
Checking the Pump after the Overload Switch Has Tripped
81
Maintenance
82
Suggestion for Winter Conditions
82
Replacing the LED Floodlight
83
Technical Data
85
Instruction D'utilisation Originale Pour
86
Propos De Ce Document
90
Utilisation De Ce Manuel
90
Documents Applicables
90
Symboles Et Représentations Graphiques
90
Sécurité
92
Utilisation Conforme Aux Dispositions
92
Erreurs De Manipulation Possibles
92
Qualification Du Personnel
92
Consignes De Sécurité
93
Équipements De Protection
93
Changements Structurels Et Pièces De Rechange
93
Plaques Signalétiques
94
Restrictions
94
Chute De Pièces
94
Pièces Rotatives
94
Energie Électrique
94
Surfaces À Température Élevée
95
Risque D'aspiration
95
Danger De Blessure Aux Buses De Refoulement
95
Dérangements
95
Prévention Des Dégâts Matériels
96
Défaut D´étanchéité Et Rupture De Canalisation
96
Fonctionnement Sans Eau
96
Cavitation
96
Surchauffe
97
Coups De Bélier
97
Blocage De La Pompe
97
Fuite
97
Risque De Gel
97
Description
98
Composants
98
Fonction
98
Transport Et Stockage Intermédiaire
99
Soulever La Pompe
99
Installation
100
Lieu De Montage
100
Installation En Plein Air
100
Bonde D´évacuation De L´eau (Doit Être Installée)
100
Aération Et Ventilation
100
Vibrations Structurelles Et Aériennes
100
Espace Disponible
100
Eléments De Fixation
100
Mise En Place
101
Montage De La Pièce À Sceller Dans Une Piscine En Béton
103
Montage De La Pièce À Sceller Dans Une Piscine Polyester, En Acier Ou En Alu
105
Alignement De L'anneau De Serrage
107
Gaine De Protection Et Flexible De La Régulation D'air
108
Dimensions Des Tuyauteries
108
Pose Des Tuyauteries
108
Vannes À Guillotine
108
Fosse D´installation Du Groupe Motopompe
109
Boitier De Commande Électrique
109
Montage Final
110
Installer La Pompe Et La Raccorder Aux Tuyauteries
118
Branchement Électrique
119
Raccordement Électrique Pour BADU Jet Primavera
120
Schéma De Câblage 3~ 400/230 V 50 Hz
121
Schéma De Câblage 1~ 230 V 50 Hz
121
Mise En Service
122
Vérifier Le Bon Fonctionnement De La Pompe
122
Démarrer La Pompe
122
Fonctionnement
123
Utilisation Du Flexible De Massage
124
Anomalies
125
Aperçu
125
Contrôler La Pompe Après Le Déclenchement D'un Contacteur/Disjoncteur De Protection
126
Maintenance
127
Mesures À Prendre Pour L´hivernage
127
Remplacement Du Projecteur LED
128
Caractéristiques Techniques
130
Oorspronkelijke Gebruikershandleiding Voor
131
Over Dit Document
135
Omgang Met Deze Handleiding
135
Overige Relevante Documenten
135
Symbolen En Speciale Opmaak
135
Veiligheid
137
Gebruik Volgens Bestemming
137
Mogelijk Onjuist Gebruik
137
Kwalificaties Van Het Personeel
137
Veiligheidsvoorschriften
138
Veiligheidsvoorzieningen
138
Constructieve Wijzigingen En Reserveonderdelen
138
Afbeeldingen
139
Overige Risico´s
139
Vallende Delen
139
Draaiende Delen
139
Elektrische Energie
139
Hete Oppervlakken
140
Aanzuiggevaar
140
Gevaar Voor Letsel Bij De Nozzles
140
Storingen
140
Voorkomen Van Materiële Schade
141
Lekkages En Leidingbreuk
141
Drooglopen
141
Cavitatie
141
Oververhitting
142
Drukstoten
142
Blokkeren Van De Pomp
142
Lekkage-Afvoer
142
Bevriezingsgevaar
142
Beschrijving
143
Componenten
143
Werking
143
Transport En Tijdelijke Opslag
144
Pomp Optillen
144
Installatie
145
Inbouwlocatie
145
Plaatsing in De Buitenlucht
145
Bodemafvoer (Moet Aanwezig Zijn)
145
Be- En Ontluchting
145
Overdracht Van Trillingen En Geluidsgolven
145
Benodigde Ruimte
145
Bevestigingselementen
145
Plaatsing
146
Montage Van Het Inbouwhuis in Een Betonnen Zwembad
148
Montage Van De Het Inbouwhuis in Polyester, Stalen of Aluminium Zwembaden
150
Uitlijning Van De Spanring
152
Beschermslang En Slang Voor Luchtregeling
152
Leiding Dimensioneren
153
Leiding Aanleggen
153
Afsluiters
153
Pompschacht
153
Elektrische Besturing
153
Eindmontage
154
Pomp Plaatsen En Op Leiding Aansluiten
161
Elektrische Aansluiting
162
Elektrische Aansluiting Voor BADU ® Jet Primavera
162
Schakelschema 3~ 400/230 V 50 Hz
163
Schakelschema 1~ 230 V 50 Hz
163
Inbedrijfstelling
164
Soepel Lopen Van De Pomp Controleren
164
Pomp Inschakelen
164
Gebruik
165
Gebruik Van De Massageslang
166
Storingen
167
Overzicht
167
Pomp Controleren Na Het Inwerking Zetten Van De Beveiligingsschakelaar
168
Onderhoud
169
Winter Klaar Maken
169
Vervangen Van De LED-Spot
170
Technische Gegevens
172
Manuale D'istruzioni Originale Per
173
Informazioni Sul Presente Documento
177
Utilizzo Delle Presenti Istruzioni
177
Altra Documentazione Valida
177
Simboli E Mezzi Illustrativi
177
Sicurezza
179
Uso Conforme
179
Possibili Usi Errati
179
Qualifica Del Personale
179
Disposizioni DI Sicurezza
180
Dispositivo DI Protezione
180
Modifiche Strutturali E Parti DI Ricambio
180
Targhette
181
Rischi Conseguenti
181
Caduta DI Parti
181
Parti Rotanti
181
Energia Elettrica
181
Superfici Ad Alta Temperatura
182
Pericolo DI Aspirazione
182
Pericolo DI Lesioni Sugli Ugelli DI Ingresso
182
Guasti
182
Evitare Danni Materiali
183
Perdite E Rottura DI Tubi
183
Funzionamento a Secco
183
Cavitazione
183
Surriscaldamento
184
Colpi D'ariete
184
Bloccaggio Della Pompa
184
Scarico Delle Perdite
184
Pericolo DI Gelo
184
Descrizione
185
Componenti
185
Funzione
185
Trasporto Ed Immagazzinamento Temporaneo
186
Sollevamento Della Pompa
186
Installazione
187
Luogo DI Montaggio
187
Installazione All'aperto
187
Scarico DI Fondo (Deve Essere Presente)
187
Ventilazione E Scarico Dell'aria
187
Trasmissione DI Vibrazioni Sonore Intrinseche E Propagantesi Attraverso L'aria
187
Riserva DI Spazio
187
Elementi DI Fissaggio
187
Installazione
188
Montaggio Della Parte Da Murare in Una Vasca DI Cemento Armato
190
Montaggio Della Parte Da Murare in Una Vasca DI Poliestere, DI Acciaio O DI Alluminio
192
Posizionamento Dell'anello Elastico
194
Tubo DI Protezione E Tubo DI Regolazione Dell'aria
194
Dimensionamento Del Tubo
195
Posa Del Tubo
195
Saracinesche
195
Pozzetto Della Pompa
196
Comando Elettrico
196
Finitura
197
Installazione Della Pompa E Collegamento Al Tubo
205
Collegamento Elettrico
206
Collegamento Elettrico Del BADU ® Jet Primavera
206
Schema Elettrico 3 ~ 400 / 230 V, 50 Hz
207
Schema Elettrico 1 ~ 230 V, 50 Hz
207
Messa in Servizio
208
Controllo Della Scorrevolezza Della Pompa
208
Accensione Della Pompa
208
Funzionamento
209
Utilizzo Del Tubo DI Massaggio
210
Guasti
211
Tabella Dei Guasti
211
Controllo Della Pompa in Seguito All'intervento DI Un Contatto/Interruttore DI Sicurezza
212
Manutenzione
213
Proposta Per Lo Svernamento
213
Sostituzione Del Proiettore a LED
214
Dati Tecnici
216
Instrucciones Para El Manejo Originales Para
217
Acerca De Este Documento
221
Uso De Estas Instrucciones
221
Documentos Convalidados
221
Símbolos Y Medios De Representación
221
Seguridad
223
Utilización Según Prescripción
223
Posible Mal Uso
223
Cualificación Del Personal
223
Prescripciones De Seguridad
224
Dispositivos De Protección
224
Modificaciones Estructurales Y Piezas De Recambio
224
Letreros
224
Riesgos Residuales
225
Caída De Componentes
225
Componentes Giratorios
225
Energía Eléctrica
225
Superficies Calientes
226
Peligro Por Aspiración
226
Peligro De Lesiones En Las Boquillas De Entrada
226
Averías
226
Prevención De Daños Materiales
227
Inestanqueidad Y Rotura De Tuberías
227
Funcionamiento En Seco
227
Cavitación
227
Sobrecalentamiento
228
Impulsos De Presión
228
Bloqueo De La Bomba
228
Flujo De Escape
228
Peligro De Heladas
228
Descripción
229
Componentes
229
Funcionamiento
229
Transporte Y Almacenamiento Intermedio
230
Levantar La Bomba
230
Instalación
231
Lugar De Instalación
231
Instalación Al Aire Libre
231
Drenaje De Fondo (Debe Estar Disponible)
231
Ventilación Y Purga De Aire
231
Transmisión De Sonido Del Cuerpo Y Del Aire
231
Reserva De Espacio
231
Elementos De Fijación
231
Instalación
232
Montaje De La Carcasa Para Montaje Empotrado En Una Piscina De Hormigón
234
Montaje De La Carcasa Para Montaje Empotrado En Piscinas De Poliéster, De Acero O De Aluminio
236
Alineación Del Anillo Tensor
238
Tubo Protector Y Tubo Para La Regulación Del Aire
238
Dimensionamiento De La Tubería
238
Montaje De La Tubería
239
Válvula De Compuerta
239
Pozo De La Bomba
239
Mando Eléctrico
239
Montaje Acabado
240
Instalación De La Bomba Y Conexión De La Tubería
248
Conexión Eléctrica
249
Conexión Eléctrica Del BADU ® Jet Primavera
249
Esquema De Conexiones 3 ~ 400/230 V 50 Hz
250
Esquema De Conexiones 1 ~ 230 V 50 Hz
250
Puesta En Servicio
251
Comprobar La Marcha Fácil De La Bomba
251
Conexión De La Bomba
251
Funcionamiento
252
Utilización De La Manguera De Masaje
253
Averías
254
Vista General
254
Comprobar La Bomba Según Reacción De Un Contacto/Conmutador De Protección
255
Mantenimiento
256
Recomendación De Hibernación
256
Sustitución Del Reflector LED
257
Características Técnicas
259
Advertisement
Speck pumpen BADU Jet Primavera Operation Manual (78 pages)
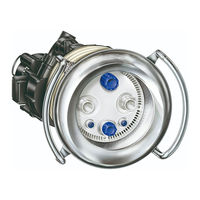
Submerged counter-current pool unit
Brand:
Speck pumpen
| Category:
Water Pump
| Size: 10 MB
Table of Contents
Deutsch
2
Table of Contents
2
1 Zu diesem Dokument
4
Umgang mit dieser Anleitung
4
Mitgeltende Dokumente
4
Symbole und Darstellungsmittel
4
2 Sicherheit
6
Bestimmungsgemäße Verwendung
6
Mögliche Fehlanwendungen
6
Personalqualifikation
6
Sicherheitsvorschriften
7
Schutzeinrichtungen
7
Bauliche Veränderungen und Ersatzteile
7
Schilder
7
Restrisiken
8
Herabfallende Teile
8
Rotierende Teile
8
Elektrische Energie
8
Heiße Oberflächen
9
Ansauggefahr
9
Verletzungsgefahr an den EinströMDüsen
9
Störungen
9
Vermeidung von Sachschäden
10
Undichtigkeit und Rohrleitungsbruch
10
Trockenlauf
10
Kavitation
10
Überhitzen
11
Druckstöße
11
Blockieren der Pumpe
11
Leckageabfluss
11
Frostgefahr
11
3 Beschreibung
12
Komponenten
12
Funktion
12
4 Transport und Zwischenlagerung
13
Pumpe Anheben
13
5 Installation
14
Einbauort
14
Aufstellung IM Freien
14
Bodenablauf (muss Vorhanden Sein)
14
Be- und Entlüftung
14
Körper- und Luftschallübertragung
14
Platzreserve
14
Befestigungselemente
14
Aufstellung
15
Montage des Einbaugehäuses in ein Betonbecken
16
Montage des Einbaugehäuses in Polyester-, Stahl- oder Alubecken
18
Ausrichtung des Spannrings
20
Schutzschlauch und Schlauch für Luftregulierung
20
Rohrleitung Dimensionieren
21
Rohrleitung Verlegen
21
Absperrschieber
21
Pumpenschacht
21
Elektrische Steuerung
21
Fertigmontage
22
Pumpe Aufstellen und an Rohrleitung Anschließen
29
Elektrischer Anschluss
30
Elektrischer Anschluss für BADU Jet Primavera
30
Schaltplan 3~ 400/230V 50Hz
31
Schaltplan 1~ 230V 50Hz
31
6 Inbetriebnahme
32
Pumpe auf Leichtgängigkeit Prüfen
32
Pumpe Einschalten
32
7 Betrieb
33
Verwendung des Massageschlauches
33
8 Störungen
34
Übersicht
34
Pumpe nach Ansprechen eines Schutzkontakts/-Schalters Prüfen
35
9 Instandhaltung
36
Überwinterungsvorschlag
36
Austausch des LED-Scheinwerfers
37
10 Technische Daten
39
English
41
1 About this Document
43
Using this Manual
43
Other Applicable Documents
43
Symbols and Means of Representation
43
2 Safety
45
Intended Use
45
Possible Misuse
45
Personnel Qualification
45
Safety Regulations
46
Protective Equipment
46
Structural Modifications and Spare Parts
46
Signs
46
Residual Risk
47
Falling Parts
47
Rotating Parts
47
Electrical Energy
47
Hot Surfaces
48
Suction Danger
48
Danger of Injury at the Inlet Nozzles
48
Defects
48
Preventing Material Damage
49
Leakage and Pipe Breakage
49
Dry Run
49
Cavitation
49
Overheating
50
Pressure Surges
50
Blockages of the Pump
50
Drain Gap
50
Chance of Frost
50
3 Description
51
Components
51
Function
51
4 Transport and Intermediate Storage
52
Lifting the Pump
52
5 Installation
53
Installation Site
53
Outdoor Installation
53
Ground Drain (Has to Exist)
53
Ventilation and Exhaust
53
Structure-Borne and Airborne Noise Transmission
53
Reserve Space
53
Fasteners
53
Installation
54
Mounting of the Main Housing in a Concrete Pool
55
Mounting of the Main Housing in a Polyester, Steel or Aluminium Pool
57
Aligning the Support Ring
59
Protective Conduit and Hose for Air Regulator
59
Pipe Sizing
60
Laying Pipes
60
Shut-Off Valves
60
Pump Shaft
60
Electrical Control Unit
60
Final Assembly
61
Installing the Pump and Connecting It to the Pipe
68
Electrical Connection
69
Electrical Connection for BADU Jet Primavera
69
Wiring Diagram 3-Phase 400/230 V 50 Hz
70
Wiring Diagram 1-Phase 230 V 50 Hz
70
6 Start-Up
71
Checking How Easily the Pump Rotates
71
Switching on the Pump
71
7 Operation
72
Using the Massage Hose
72
8 Defects
73
Overview - Trouble Shooting
73
Checking the Pump after the Overload Switch Has Tripped
74
9 Maintenance
75
Suggestion for Winter Conditions
75
Replacing the LED Floodlight
76
10 Technical Data
78
Advertisement
Related Products
Speck pumpen BADU 21-40/53 G
Speck pumpen BADU 21-40/54 HG
Speck pumpen BADU 21-40/55 HG
Speck pumpen BADU 21-40/55 H9G PU
Speck pumpen BADU 21-40/56 HG
Speck pumpen BADU TEC I-Star Series
Speck pumpen BADU TEC I-Star 17
Speck pumpen BADU 46
Speck pumpen BADU 47
Speck pumpen BADU Eco Touch-pro
Speck pumpen Categories
Water Pump
Controller
Swimming Pool Pump
Lighting Equipment
Water Filtration Systems
More Speck pumpen Manuals
Login
Sign In
OR
Sign in with Facebook
Sign in with Google
Upload manual
Upload from disk
Upload from URL