Sign In
Upload
Manuals
Brands
Rowe Manuals
Jukebox
GrandSTAR
Rowe GrandSTAR Manuals
Manuals and User Guides for Rowe GrandSTAR. We have
1
Rowe GrandSTAR manual available for free PDF download: Service Manual
Rowe GrandSTAR Service Manual (120 pages)
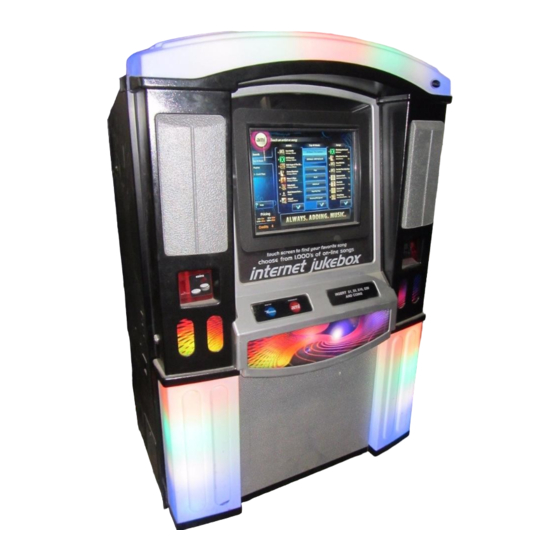
Internet Jukebox
Brand:
Rowe
| Category:
Jukebox
| Size: 19 MB
Table of Contents
Table of Contents
5
List of Figures
11
Section: 1 Unpacking & System Description
13
Introduction
13
Grandstar Jukebox Features
14
General Features
14
Service Features
14
Unpacking Instructions
15
Doors
15
Visual Inspection
15
Handy Case
15
Warranty Registration Card
15
Major Components of the Grandstar
16
Core Computer
16
Touch-Screen 19" LCD Monitor
16
System Power Supply
16
Transformer Assembly
16
Rowelink Controller
16
LED Controller
16
Router
16
Dial-Up Modem
16
Volume Control Unit
17
Channel Preamplifier
17
1000-Watt Audio Digital Power Amplifier
17
Audio Output Transformers
17
Bill Acceptor
17
Figure 1-1 - Major Components
18
Grandstar Specifications
19
Sound System
19
Fuses and Circuit Breakers
19
Lighting
19
Section: 2 Installing Hard Drive & Testing
21
Installing the Hard Drive
21
Figure 2-1 - Removing Hard Drive Housing
21
Figure 2-2 - Hard Drive Installed in Housing
22
Figure 2-3 - IDE & Power Cable
23
Figure 2-4 - Hard Drive Installed
24
Testing the Unit
25
Touchscreen
25
Figure 2-5 - Rowelink Controller
25
Figure 2-6 - Calibration Screen
25
Credit Test
26
Audio Test
26
Figure 2-7 - Jukebox User Interface
26
Music Selection and Pricing
27
Connection Rules
27
Wireless Router Reception
28
Figure 2-8 - Wireless Router Antenna in Horizontal Position
28
Figure 2-9 - Wireless Router Antenna in Vertical Position
29
Section: 3 Sound System Setup
31
Introduction
31
Extension Speaker Operation
31
70-Volt Speakers
31
Low Impedance Speakers
32
Selecting Speaker Power
33
General Instructions
33
Selection Procedures
33
Extension Speakers Connected E1 to E7
33
4-Ohm Speakers Connected to Transformer Taps E1 through E6
34
4-Ohm Speakers Connected to Channel 1 Transformer Taps
34
4-Ohm Speakers Connected to Channel 2 Transformer Taps
34
8-OHM Speakers Connected to Transformer Taps E1 through E6
35
8-Ohm Speakers Connected to Channel 1 Transformer Taps
35
8-Ohm Speakers Connected to Channel 2 Transformer Taps
35
Combine Power Consumption of All Speakers
36
Amplifier Overload Check
37
Figure 3-1 - Speaker Connections
38
Figure 3-2 - Audio Output Transformer Wiring Diagram (#40832115)
40
Speaker Synopsis
41
1000 Watts of RMS Power Per Amplifier or 500 Watts Per Channel
41
Figure 3-3 Diagrams 1 - 5 - External Speaker Connections with Jukebox Speakers Connected
42
Figure 3-4 Diagrams 1N - 3N - External Speaker Connections with Jukebox Speakers NOT Connected
47
Figure 3-5 - Volume Control Unit
50
Figure 3-6 - Volume Connections Using Existing 3-Wire or 4-Wire Cable
51
Section: 4 Adding Microphones
53
Figure 4-1 - Microphone Connections
53
Figure 4-2 - Paging Microphone Setup Screen
54
Figure 4-3 - VCU Setup Screen
55
Section: 5 Led Lighting and Bill Acceptor
57
Introduction
57
LED Control Assembly (#40931103)
57
Features of the LED Control Assembly (#40931103) (Figure 5-2)
57
Figure 5-1 - IR Remote
57
Flash Rate (Speed) of the Leds
58
Brightness of the Leds
58
Music Beat Sensitivity
58
Remote Enable/Disable Program Switch
58
Setting LED Mode
59
Adjusting Mode with the IR Remote
59
Setting Pattern
59
Adjusting Patter with the IR Remote
60
Figure 5-3 - Program DIP Switches
60
Bill Acceptor Settings
61
Coinco Vantage Setup
61
Figure 5-5 Service Mode Button and Diagnostic Indicator LED
61
Figure 5-6 Removing the Lower Housing
62
Figure 5-7 Configuration Settings
62
MEI AE2611 Setup
63
Figure 5-8 - MEI Bill Acceptor
63
Section: 6 Routine Service
65
Introduction
65
Preventive Maintenance
66
Exterior
66
Touch-Screen Calibration
66
Figure 6-1 - Calibrate Button
66
Figure 6-2 - Calibration Screen
66
Air Filter
67
Figure 6-3 - Filter Removal
67
Section: 7 Troubleshooting
69
Introduction
69
Power Supply Board
70
+9 V Led
70
Rowelink Controller
70
VDC, 12 VDC, 24 VDC Leds
70
Ir Rcv Led
70
Kid Rl Tx Led
70
Core Computer RL RX LED
70
Core Computer RL TX LED
70
Crdt Rl Tx Led
70
CRDT Status LED
70
Channel Preamplifier
71
Power LED
71
Status LED
71
Rowelink LED
71
Volume Control Unit
71
Period LED (on the 10'S Digit)
71
Period LED (on the 1'S Digit)
71
Power Amplifier
71
Yellow Clip LED
71
Red Overload LED
71
Sequence of Operation
72
Figure 7-1 - Grandstar Wiring Diagram (Sheet 1)
73
Troubleshooting
73
Figure 5-2 - LED Control Assembly
78
Troubleshooting Charts
80
Section: 8 Parts Catalog
85
Introduction
87
Catalog Description
87
Parts List Description
87
Ordering Replacement Parts
87
Figure 8-1 - Front View
88
Jukebox Assembly (Front View)
89
Figure 8-2 - Rear View
90
Jukebox Assembly (Rear View)
91
Figure 8-3 - Top Door Assembly (External View)
92
Top Door Assembly (External View)
93
Figure 8-4 - Top Door Assembly (Internal View)
94
Top Door Assembly (Internal View)
95
Figure 8-5 - Top Door Assembly (Internal - Top and Side View)
96
Top Door Assembly (Internal - Top and Side View)
97
Lower Door Assembly (External View)
98
Figure 8-6 - Lower Door Assembly (External View)
98
Lower Door Assembly (Internal View)
99
Figure 8-7 - Lower Door Assembly (Internal View)
99
Figure 8-8 - Component Identification and Location (Internal View, Left Hand Side)
100
Component Identification and Location (Internal View, Left Hand Side)
101
Figure 8-9 - Pilaster Assembly (Left Hand Shown)
102
Pilaster Assembly (Left Hand Shown)
103
Figure 8-10 - Component Identification and Location (Internal View, Right Hand Side)
104
Component Identification and Location (Internal View, Right Hand Side)
105
Figure 8-11 - Shell Assembly (Front View with Lower Door Removed)
106
Shell Assembly (Front View with Lower Door Removed)
107
Bill Acceptor Assembly
108
Figure 8-12 - Bill Acceptor Assembly
108
Figure 8-13 - Core Computer Assembly - Exploded View
110
Core Computer Assembly - Exploded View
111
LED Controller Assembly
112
Figure 8-14 - LED Controller Assembly
112
Transformer Assembly
113
Figure 8-15 - Power Transformer Assembly
113
Power Supply Assembly
114
Figure 8-16 - Power Supply Assembly
114
Channel Preamplifier
115
Figure 8-17 - 4 Channel Preamplifier
115
Output Transformer Assembly
116
Figure 8-18 - Output Transformer Assembly
116
Rowelink Controller Assembly
117
Figure 8-19 - Rowelink Controller Assembly
117
19" Touchscreen and Panel Assembly
118
Figure 8-20 - 19" Touchscreen and Panel Assembly
118
Accessory Equipment
119
Advertisement
Advertisement
Related Products
Rowe NiteHAWK
Rowe StarLink DLW-1
Rowe Categories
Bank Note Validator
Cash Counters & Coin Sorters
Jukebox
Scanner
Control Systems
More Rowe Manuals
Login
Sign In
OR
Sign in with Facebook
Sign in with Google
Upload manual
Upload from disk
Upload from URL