Sign In
Upload
Manuals
Brands
Ross Manuals
Server
Abekas Mira
Ross Abekas Mira Manuals
Manuals and User Guides for Ross Abekas Mira. We have
2
Ross Abekas Mira manuals available for free PDF download: User Manual, Manual
Ross Abekas Mira User Manual (138 pages)
Brand:
Ross
| Category:
Audio & Video Accessories
| Size: 14 MB
Table of Contents
Table of Contents
7
Getting Started
11
Power On/Off
11
Windows ® Login
11
Software
11
Server Configuration
12
Channel Setup
12
To Configure the Hardware Channels
14
Video Formats
15
UHDTV1 Support
15
To Configure the Video Format
15
Video Router Setup
16
To Connect to a Video Router
17
Audio Setup
17
To Configure the Audio Setup
17
Audio Router Setup
18
To Configure the Audio Router
19
Timecode Setup
21
To Configure the Timecode
21
Compression Setup
23
To Configure Video Compression
23
Channel Label Setup
24
To Assign Labels to Channel Transports
24
Quad Viewer Setup
24
Quad Viewer Display
24
Count down Display
25
To Configure the Quad Viewer
25
TSL Tally Setup
26
To Configure the TSL Tally Input
27
Replay Setup
28
Control Surface Connection
28
Server Setup for Replay
28
To Configure the Server for Replay
28
User Setup
30
To Set the Audio Tracks for the Headphones
30
To Set the Play List Auto-Fill
30
To Set the Pre-Roll Time
31
To Set the Auto Jog Feature
31
To Set the Default Fast Forward and Rewind Speeds
32
To Set the Max Jog Speed
32
To Set the Max Fast Jog Speed
32
To Set the Max Cruise Speed
33
To Set the Max Fast Cruise Speed
33
To Set the Max T-Bar Speed (VAR 2)
34
To Set the Min T-Bar Speed (VAR 2)
34
To Set the Max T-Bar Speed (VAR 3)
34
To Set the Min T-Bar Speed (VAR 3)
35
To Set the Auto-Mark In-Point Offset
35
To Set the Auto-Mark Out-Point Offset
36
To Set the Action of Camera Softkeys in CP Mode
36
To Set the Transition Type for Two Replay Channels
36
To Set the Duration of a MIX Transition
37
To Set Whether Gang Mode Is Selected for Live EE Record
37
To Set Whether Gang Mode Is Deselected if a Playout Channel Is Selected
38
To Set Whether Preferred Camera Angles Are Used for Live EE Record
38
To Set the Preferred Camera Angles
38
To Set the Preferred Play List
39
To Set Whether a Clip Is Automatically Loaded in CP Mode
39
To Set Whether the Out-Point of a Clip Is Used in CP Mode
39
To Set Whether Play List Uses PGM/PVW
40
To Set Whether a Mark Point Is Saved to the Clip Register
40
To Set the Amount Inactive Lists Are Dimmed
41
To Set Control Surface Brightness
41
To Set Control Surface Contrast
41
To Set Playout Channel Color
42
To Set the Saturation of the Playout Channel Borders
42
To Set the Source of the Name that Is Applied to New Clips
43
To Set the Initial Clip Name Options
43
To Set the Clip Name Options
44
User Setup Files
44
To Save a User Setup File
44
To Load a User Setup File
44
To Name a Camera Input
45
Import
46
Supported Media Files for Hardware Import
46
Supported Transcode Import
47
To Import Media Files
58
To Add a Watch Folder
59
To Configure Mira Import
60
Mira Explorer
63
Mira Explorer Login
63
To Log in to Mira Explorer
64
Managing Accounts
64
To Set Account Permissions
64
To Set Account Passwords
65
Physical Channel Setup
65
To Assign Channel Transports to Physical Channels
65
Installing Mira Explorer on a Remote PC
66
To Install Mira Explorer on a Remote PC
66
To Disable Abekas Services
67
Channel Transport Control
68
To Load a Clip
69
To Trim a Clip
70
To Play a Clip
70
To Eject a Clip
70
Clip Repeat Modes
70
Normal (Off)
71
Loop
71
Ping-Pong
71
Loop to Play
71
Recording a Clip
71
To Record a New Clip
71
To Overwrite/Append to a Clip
73
Locking Channel Transport Control
74
To Lock/Unlock a Channel Transport
74
Keyboard Shortcuts
74
Clip Library
78
Search
78
Play Lists
79
To Create/Edit a Play List
79
To Air a Play List
80
Play List Commands
81
Timecode Chase
81
To Create a TC Chase List
81
To Air a TC Chase List
83
Folders
83
Clip Library Columns
83
Clip Metadata
83
To Edit the Label Metadata of a Clip
84
To Edit the Attributes Metadata of a Clip
84
To Edit the Timecode Metadata of a Clip
85
To Edit the Trim Metadata of a Clip
86
Parent/Child Clips
87
To Create a Child Clip
87
Deleting a Clip
87
To Delete a Clip
87
Lock/Unlock Clips
87
To Lock/Unlock a Clip
87
Replay Overview
89
Required Equipment
89
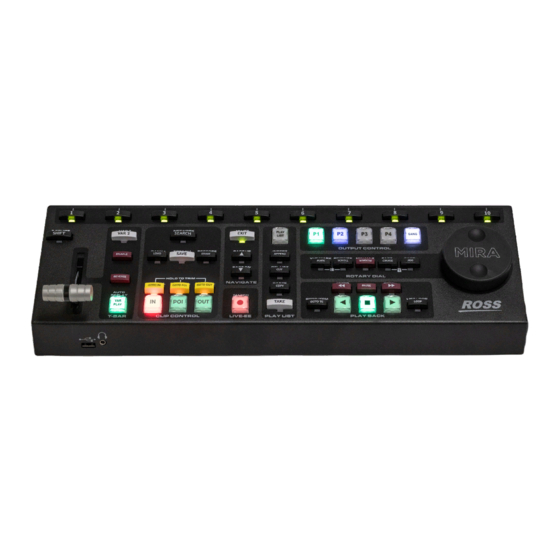
Control Surface
89
Softkey Buttons and Shift
90
T-Bar Area
91
Clip Control Area
91
Navigate Area
92
Live EE Area
92
Play List Area
93
Output Control Area
93
Rotary Dial Area
94
Play Back Area
94
Replay Window
95
Playout Channels
96
Camera Inputs
96
Lists and Menu
96
Softkeys
96
Modes of Operation
97
Live EE Mode
97
Playback Mode
97
Clip Play Mode
98
Play List Mode
98
Vue Mark Mode
99
Replay Events
100
To Create/Edit a Replay Event
100
To Open a Replay Event on a Control Surface
102
To Open a Replay Event on Two Control Surfaces
103
To Open an Existing Replay Event from a Control Surface
103
To Create/Edit a Replay Event Template
103
Replay Operation
104
Loading Server Clips
104
To Import a Clip from the Clip Library
104
Capture a Replay Event
104
To Put a Playout Channel in Live Record (EE) Mode
104
To Capture an Event for Live Replay
105
Playback
106
To Playback an Event from Live Record
106
Clipping
107
To Save a Clip to the Clip Register
107
To Name a Clip
108
To Load a Clip from the Clip Register
108
To Trim a Clip
109
Play List
110
To Create a Play List
110
To Name a Play List
110
To Edit a Play List
111
To Copy and Paste Play List Items
112
To Enable Aux Audio for a Play List
112
To Air a Play List
113
Export/Melt
115
To Export/Melt a Play List
115
Mark
116
To Create a Mark Point
116
To View and Edit Marks
116
Export
118
Supported Media Files for Export
118
To Select an Export Destination
119
To Export Media Files
120
Growing File Export
121
To Set NAS Permissions for Growing File Export
121
To Create Growing Export Files
121
Remote Control Support
123
Remote Communications (RS-422)
123
To Configure a Room for the BVW-75 Protocol
123
To Configure a Room for the Odetics Protocol
124
To Configure a Room for the VDCP Protocol
126
To Configure a Room for the AMP Protocol
127
Dashboard
129
Clip ID Support
129
Sony ® MVS Series Switcher
129
Maintenance
130
Media Drives
130
Disk Space
130
Troubleshooting
131
Specifications
133
Resources
133
Operating Temperature
133
Ports
134
Serial (RS422) Port
134
LTC Port
134
AES Audio Port
134
Index
136
Advertisement
Ross Abekas Mira Manual (73 pages)
Brand:
Ross
| Category:
Server
| Size: 12 MB
Table of Contents
Technical Support
5
Table of Contents
6
Replay Overview
8
Required Equipment
8
Control Surface
8
Softkey Buttons and Shift
8
T-Bar Area
8
Clip Control Area
9
Navigate Area
9
Live EE Area
9
Play List Area
9
Output Control Area
10
Rotary Dial Area
10
Play Back Area
10
Replay Window
11
Playout Channels
11
Camera Inputs
11
Lists and Menu
11
Softkeys
11
Modes of Operation
12
Live EE Mode
12
Playback Mode
12
Clip Play Mode
12
Play List Mode
12
Vue Mark Mode
12
Getting Started
13
Power On/Off
13
Windows Login
13
Software
13
Mira Explorer
14
Mira Explorer Login
14
To Log in to Mira Explorer
14
Managing Accounts
14
To Set Account Permissions
14
To Set Account Passwords
14
Installing Mira Explorer on a Remote PC
15
To Install Mira Explorer on a Remote PC
15
To Disable Abekas Services
15
Replay
16
Replay Events
16
To Create/Edit a Replay Event
16
To Open a Replay Event on a Control Surface
17
To Open a Replay Event on Two Control Surfaces
17
To Open an Existing Replay Event from a Control Surface
17
To Create/Edit a Replay Event Template
17
Replay
18
To Put a Playout Channel in Live Record (EE) Mode
18
To Replay from Live Record
18
To Define and Save a Clip to the Clip Register
19
To Name a Clip
19
To Load a Clip from the Clip Register
19
To Import a Clip from the Clip Library
20
To Trim a Clip
20
Play List
20
To Create a Play List
20
To Name a Play List
21
To Edit a Play List
21
To Copy and Paste Play List Items
22
To Enable Aux Audio for a Play List
22
To Air a Play List
23
To Export/Melt a Play List
24
Vue Marks
24
To Create a Mark Point
24
To View and Edit Marks
24
Channel Transport Control
26
To Load a Clip
27
To Trim a Clip
27
To Play a Clip
28
To Eject a Clip
28
Clip Repeat Modes (Looping)
28
Normal (Off)
28
Loop
28
Ping-Pong
28
Loop to Play
28
Recording a Clip
29
To Record a New Clip
29
To Overwrite/Append to a Clip
30
Locking Channel Transport Control
30
To Lock/Unlock a Channel Transport
30
Keyboard Shortcuts
31
Clip Library
34
Play Lists
34
To Create/Edit a Play List
34
To Air a Play List
35
Play List Commands
35
Folders
36
Clip Library Columns
36
Clip Metadata
36
To Edit the Label Metadata of a Clip
36
To Edit the Attributes Metadata of a Clip
36
To Edit the Timecode Metadata of a Clip
37
To Edit the Trim Metadata of a Clip
38
Parent/Child Clips
38
To Create a Child Clip
38
Deleting a Clip
38
To Delete a Clip
38
Lock/Unlock Clips
38
To Lock/Unlock a Clip
38
Importing Clips
40
Supported Media Files for Import
40
To Import Media Files
41
To Add a Watch Folder
41
To Configure Mira Import
42
Exporting Clips
44
Supported Media Files for Export
44
To Select an Export Destination
44
To Export a Clip
45
Server Configuration
46
To Assign Channel Transports to Physical Channels
46
Channel Setup
46
To Configure the Hardware Channels
47
Video Formats
48
UHDTV1 Support
48
To Configure the Video Format
48
Video Router Setup
49
To Connect to a Video Router
49
Audio Setup
49
To Configure the Audio Setup
49
Audio Router Setup
50
To Configure the Audio Router
50
Timecode Setup
51
To Configure the Timecode
51
Compression Setup
52
To Configure Video Compression
52
Channel Label Setup
52
To Assign Labels to Channel Transports
52
Quad Viewer Setup
52
Quad Viewer Display
52
Count down Display
53
To Configure the Quad Viewer
53
TSL Tally Setup
53
To Configure the TSL Tally Input
53
Replay Setup
55
Control Surface Connection
55
Server Setup for Replay
55
To Configure the Server for Replay
55
User Setup
56
To Set the Audio Tracks for the Headphones
56
To Set the Play List Auto-Fill
56
To Set the Pre-Roll Time
56
To Set the Auto Jog Feature
57
To Set the Default Fast Forward and Rewind Speeds
57
To Set the Max Jog Speed
57
To Set the Max Fast Jog Speed
57
To Set the Max Cruise Speed
57
To Set the Max Fast Cruise Speed
57
To Set the Max T-Bar Speed (VAR 2)
58
To Set the Min T-Bar Speed (VAR 2)
58
To Set the Max T-Bar Speed (VAR 3)
58
To Set the Min T-Bar Speed (VAR 3)
58
To Set the Auto-Mark In-Point Offset
58
To Set the Auto-Mark Out-Point Offset
59
To Set the Action of Camera Softkeys in CP Mode
59
To Set the Transition Type for Two Replay Channels
59
To Set the Duration of a MIX Transition
59
To Set Whether Gang Mode Is Selected for Live EE Record
59
To Set Whether Gang Mode Is Deselected if a Playout Channel Is Selected
60
To Set Whether Preferred Camera Angles Are Used for Live EE Record
60
To Set the Preferred Camera Angles
60
To Set the Preferred Play List
60
To Set Whether a Clip Is Automatically Loaded in CP Mode
60
To Set Whether the Out-Point of a Clip Is Used in CP Mode
60
To Set Whether Play List Uses PGM/PVW
61
To Set Whether a Mark Point Is Saved to the Clip Register
61
To Set the Amount Inactive Lists Are Dimmed
61
To Set Control Surface Brightness
61
To Set Control Surface Contrast
61
To Set Playout Channel Color
62
To Set the Saturation of the Playout Channel Borders
62
To Set the Source of the Name that Is Applied to New Clips
62
To Set the Initial Clip Name Options
62
To Set the Clip Name Options
63
User Setup Files
63
To Save a User Setup File
63
To Load a User Setup File
63
To Name a Camera Input
63
Remote Control Support
64
Remote Communications (RS-422)
64
To Configure Remote Communications
64
Dashboard
65
Clip ID Support
65
Sony MVS Series Switcher
65
Maintenance
66
Media Drive
66
Disk Space
66
Troubleshooting
67
Specifications
69
Resources
69
Operating Temperature
69
Ports
70
Serial (RS422) Port
70
LTC Port
70
AES Audio Port
70
Advertisement
Related Products
Ross Abekas Tria+ UHD
Ross Abekas Tria News
Ross Abekas Mira+
Ross Abekas Mira Express
Ross Abekas AirCleaner ACL-A
Ross Abekas AirCleaner ACL-B
Ross Abekas AirCleaner ACL-C
Ross Abekas AirCleaner ACL-D
Ross ADA-7802-600
Ross ADC-8032B
Ross Categories
Switch
Media Converter
Amplifier
Control Unit
TV Mount
More Ross Manuals
Login
Sign In
OR
Sign in with Facebook
Sign in with Google
Upload manual
Upload from disk
Upload from URL