Sign In
Upload
Manuals
Brands
Roland Manuals
Synthesizer
Jupiter-50
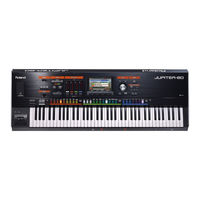
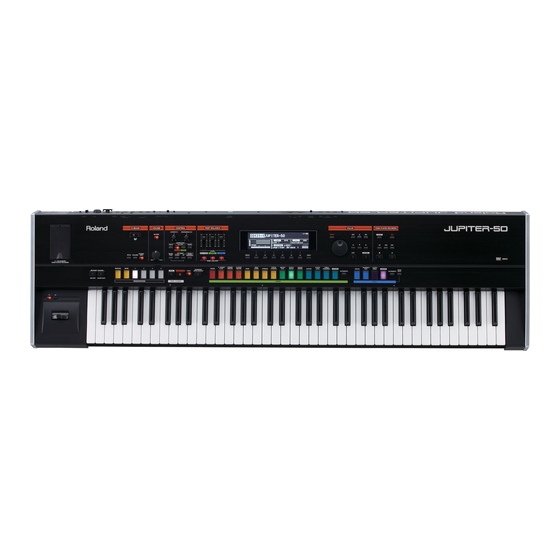
Roland Jupiter-50 Digital Synthesizer Manuals
Manuals and User Guides for Roland Jupiter-50 Digital Synthesizer. We have
4
Roland Jupiter-50 Digital Synthesizer manuals available for free PDF download: Owner's Manual, Release Note, Information Sheet, Supplementary Manual
Roland Jupiter-50 Owner's Manual (108 pages)
Sound Generator
Brand:
Roland
| Category:
Synthesizer
| Size: 26 MB
Table of Contents
Table of Contents
6
Using the Unit Safely
2
Important Notes
4
Table of Contents
6
Quick Guide
8
How the JUPITER-50'S Sound Generator Is Structured
8
About the JUPITER-50'S Sounds
10
Using Controllers to Modify the Sound
13
Registrations Are Convenient for Live Performance
14
Example of Creating a Registration
17
Introduction
18
Main Features
18
Getting Acquainted with the JUPITER-50
20
How the Sound Generator Is Organized
20
Tones
21
Live Sets
22
Parts
22
Registrations
23
About Memory
24
Temporary Memory (the Temporary Area)
24
Rewritable Memory
24
Non-Rewritable Memory
24
USB Flash Drive
24
USB Memory Song Player/Recorder
25
Audio Files that Can be Played
25
Audio Files that will be Saved
25
Panel Descriptions
26
Top Panel
26
Rear Panel Connections
28
Placing the JUPITER-50 on a Stand
30
Turning the Power on
31
Basic Operation
32
How the Function Buttons Work
32
Moving the Cursor
32
Editing a Value
33
[SHIFT] Button Operations
33
What the [WRITE] Button Does
34
Assigning a Name
34
Navigating between Screens
35
Menu Screen
35
Top Screen
35
([SHIFT] + [F1](REG) Button)
36
LIVE SET (UPPER) Screen
36
REGISTRATION EFFECT Screen
36
SONG Screen
37
VISUAL CONTROL Screen
37
SYSTEM MENU Screen
37
UTILITY MENU Screen
37
REGISTRATION PERC/LOWER EDIT Screen
36
REGISTRATION Screen
36
REGISTRATION solo EDIT Screen
36
Press the [MENU] Button
37
Playing Sounds
38
Switching Registrations
38
Switching Banks
38
Registration
38
Switching Registration Sets
39
Using the [MANUAL] Button
39
Single Part Play
39
Selecting the Sound for each Part (Selecting Live Sets / Tones)
40
Using the Part Sound Buttons to Switch Live Sets
40
Live Set (UPPER)
40
Using the Part Sound Buttons to Switch the solo Part's Tone
41
Switching the Tone of the Percussion/Lower Part
41
Button)
42
Turning each Part On/Off and Adjusting Its Volume
42
Playing Drum Sounds and Sound Effects (Percussion/Lower)
43
Playing Percussion Sounds and Voice Phrases
43
Percussion)
43
Playing Drum Sounds on the Entire Keyboard (Drums/Sfx)
43
Split Performance
44
Turning Split on
44
How Split and Parts Are Related
45
Changing the Split Point
45
Changing the Keyboard Settings
46
Changing the Pitch by Octaves
46
Transposing
46
Registration
46
Using the Arpeggiator
47
Turning the Arpeggiator on
47
Setting the Arpeggiator Tempo
47
Holding the Arpeggio (HOLD)
47
Editing the Arpeggiator Settings
48
Arpeggio Parameters
48
Creating an Arpeggio Style from a MIDI File (Import)
49
Erasing an Original Arpeggio Style
49
Performing with Added Harmony
50
Changing the Harmony Intelligence Type
50
Controlling the Performance
51
Moving Your Hand to Modify the Pitch or Volume
51
Controller)
51
Changing the Pitch/Applying Vibrato
51
Lever)
51
Using the Buttons and Knobs to Modify the Sound ([S1] [S2] Buttons / [C1] [C2] Knobs)
52
Using Pedals
52
Sustaining the Notes (Hold Pedal)
52
Adding Expression to Your Performance (Control Pedal)
52
Controlling the Rotary Effect and Reverb
53
Controlling the Rotary Effect
53
Controlling Reverb
53
Live Set (UPPER)
53
Editing Sounds
54
Editing a Registration
54
Saving a Registration
55
Cancelling the Save of a Registration
55
Initializing a Registration
56
Editing a Live Set
57
Changing a Live Set's Tones
58
Layer On/Off and Volume Adjustment
58
Switching the MFX (Multi-Effects)
58
Turning MFX On/Off
58
Adjusting the Effect Send Levels and Effect Output Levels
59
Editing the MFX
59
Editing the Reverb
59
Editing the Tones Assigned to a Layer (Tone Modify)
60
Simultaneously Adjusting Multiple Live Set Parameters
60
Blender)
60
Convenient Ways to Use the Tone Blender
61
Saving a Live Set
62
Cancelling the Save of a Live Set
62
Initializing a Live Set
63
Copying a Layer
63
Using the USB Memory Song Player/Recorder
64
Basic Operations in the SONG Screen
64
Playback
64
Changing the Playback Speed or Pitch
65
Looping a Specific Region of Time
65
Playing Audio Files Consecutively (Chain Play)
66
Creating a Folder
66
Deleting an Audio File or Folder
67
Renaming an Audio File or Folder
67
Moving an Audio File or Folder
67
Basic Operations in the Audio Rec Standby Screen
68
Recording
68
Audio Signal Flow
69
Using the Included USB Memory Protector
69
Other Convenient Functions
64
Settings and Convenient Functions
70
Basic Procedure for Utility Operations
70
Initializing a USB Flash Drive (Format)
70
Backing up All Settings
70
Backing up to a USB Flash Drive
70
Restoring Backed-Up Settings from a USB Flash Drive
70
Backing up USB Flash Drive Data to a Computer
71
Restoring Backed-Up Data from a Computer to a USB Flash Drive
71
Exchanging Registration Sets
71
Exporting/Importing Sound Data
72
Exporting Sound Data
72
Importing Sound Data
72
Viewing Sound Data You've Marked
73
Marking Multiple Items of Data
73
Deleting an Exported File
73
Renaming an Exported File
73
Moving a Registration
73
Exchanging Registrations
74
The JUPITER-50'S System Settings
75
Making System Settings
75
Saving the System Settings
75
System Parameters
75
Setup
75
Live Set/Tone Buttons
78
Information
78
Restoring the Factory Settings (Factory Reset)
79
Making the Power Automatically Turn off after a Time (Auto Off)
79
Connecting Other Equipment
80
Connecting to Your Computer Via USB
80
Connecting the JUPITER-50 to Your Computer
80
USB Driver
80
Connecting an External MIDI Device
81
About MIDI
81
About MIDI Connectors
81
Using the JUPITER-50 as a Master Keyboard
81
Settings)
81
Enabling the External Part Settings
81
Specifying the Transmit Channel
82
Specifying the Sound for each Channel
82
Detailed Settings for External Parts
82
Playing the JUPITER-50 from an External MIDI Device
83
Setting the Receive Channel
83
Setting the Program Change Receive Switch
83
Synchronizing with an External MIDI Device
84
Controlling Visuals
85
What Is Visual Control
85
Turning Visual Control On/Off
85
Visual Control Settings
86
Controlling SONAR (ACT)
87
Turning ACT On/Off
87
Making Settings for ACT
87
Appendix
88
Parameter List
88
LIVE SET TONE MODIFY Screen (Supernatural Acoustic Tones)
88
Control Change Assign List
92
Performance Variations for Supernatural Acoustic Tones
98
Error Message List
99
Troubleshooting
100
Specifications
102
MIDI Implementation Chart
103
Index
104
Declaration of Conformity
107
Advertisement
Roland Jupiter-50 Information Sheet (5 pages)
Jupiter Roland
Brand:
Roland
| Category:
Synthesizer
| Size: 6 MB
Table of Contents
Behavior Modeling Technology
2
Supernatural
2
New Possibilities with Live Sets and Registrations
2
Authentic Synth Sounds — from Classic Vintage Analog to Modern Digital
3
Supernatural Sound — Ultimate Expression and Authenticity
3
Enhanced Supernatural Synthesizer Tones
3
Supernatural Acoustic Tones
3
JUPITER-80 Version 2 Configuration
4
JUPITER-50 Configuration
4
Five Types of Multi-Effect Structures
4
JUPITER-80 Version 2 Specifications
5
JUPITER-50 Specifications
5
Options
5
Roland Jupiter-50 Release Note (7 pages)
Brand:
Roland
| Category:
Synthesizer
| Size: 0 MB
Advertisement
Roland Jupiter-50 Supplementary Manual (4 pages)
JUPITER-50
Brand:
Roland
| Category:
Synthesizer
| Size: 1 MB
Advertisement
Related Products
Roland GAIA JUPITER-81981
Roland Jupiter-80
Roland Jupiter-6
Roland JUPITER-8
Roland Jupiter-Xm
Roland JUPITER-X
Roland JUPITER-4
Roland JUNO-G
Roland JUNIO-Gi
Roland JUNO-DS
Roland Categories
Musical Instrument
Synthesizer
Recording Equipment
Drums
Electronic Keyboard
More Roland Manuals
Login
Sign In
OR
Sign in with Facebook
Sign in with Google
Upload manual
Upload from disk
Upload from URL