Sign In
Upload
Manuals
Brands
Rohde Manuals
Other
TE 130 MCC+
User Manuals: Rohde TE 130 MCC+ Pottery Kiln
Manuals and User Guides for Rohde TE 130 MCC+ Pottery Kiln. We have
4
Rohde TE 130 MCC+ Pottery Kiln manuals available for free PDF download: Operating Manual, Operating Instructions Manual, Instruction Manual
Rohde TE 130 MCC+ Operating Manual (390 pages)
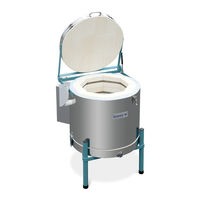
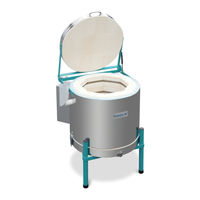
Toploader
Brand:
Rohde
| Category:
Industrial Equipment
| Size: 17 MB
Table of Contents
Table of Contents
58
Preface
60
Product Family
61
Ecotop
61
Te MCC
61
TE S (with Extension Ring)
62
TE XS (Without Extension Ring)
62
Models with Extension Ring
63
TE MCC+ with Extension Ring
63
TE S with Extension Ring
63
Product Overview
64
Safety Information
65
General Notes on the Operating Instructions
65
General Notes on Safety
65
General Safety Information
65
Special Safety Information for Exhaust Air Opening & (Optional) View Port
66
General Safety Information
66
General Information
66
Additional Safety Information
67
Training the Operating Personnel
67
Monitored Operation
67
Checking the Kiln
67
Work on Electrical Components
67
Residual Risks
67
Use
67
Intended Use
67
Reasonably Foreseeable Misuse
68
Protective Equipment: Safety Switch
68
Delivery
69
Checking the Delivery
69
Unpacking the Kiln
69
Disposal of Packaging
69
Transport
69
Transport by Pallet
69
Transport Without Pallet
69
Kilns up to 100 Litres Inner Volume
69
Kilns over 100 Litres Inner Volume
70
Disassembling Kiln for Transport
70
General Safety Information
70
Removing and Fitting the Lid
70
Aligning the Lid
71
Removing & Fitting the Main & Extension Rings (Not Ecotop)
72
Main Ring (Not Ecotop)
72
Extension Ring (Not Ecotop)
74
Regrinding the Main/Extension Ring after Assembly (Not Ecotop)
76
Installation & Assembly
76
Operating Environment & Location
76
Accessories Included
77
Installation of Ventilation System
77
Installing the (Optional) View Port
78
Turning the Reversible Stand
78
General Description
78
All Models Except Ecotop
79
Ecotop
80
Regrinding the Main/Extension Ring after Assembly (Not Ecotop)
82
Mounting the Controller Bracket
82
Fitting the Controller Mounting Plate
82
Mounting the Controller Bracket
83
Mounting the Controller Bracket on a Wall
83
Connecting the Control Unit
84
Overview of the Plug Connection
84
Establishing the Plug Connection
85
Connecting the Extension Ring/Floor Heating
85
Power Connection
86
Notes on the Power Connection
86
Connecting the Kiln to the Mains
86
Installation
87
Testing before Commissioning
87
Initial Firing of the Kiln & Furniture
87
General Safety Information
87
Description
87
Tightening the Tensioning Straps
88
10. Operation
88
The Proper Way of Firing
88
General Operation
88
Switching the Kiln on & off
88
Control Unit
89
Opening & Closing the Lid
89
General Safety Information
89
Opening & Closing
89
Supply & Exhaust Air
90
Exhaust Air
91
11. Operation
91
Typical Firing Curve & Program Examples
91
Stacking the Kiln
92
General Notes on Charging
92
Charging Examples
92
Stacking the Kiln
93
12. Notes on Operation & Use
93
Operational Incident/Emergency
93
Emergency Shutdown (Emergency Stop)
93
Incident/Emergency
94
Notes on the Firing Behaviour
94
Reducing Firing
94
Heating Rates
94
Rapid Cooling
94
Do Not Dry Wet Ceramics in the Kiln
94
Notes on the Kiln
94
Lid
94
Pressure Spring
95
Tightening the Tensioning Straps
95
Empty Firing
95
General Information
95
Description
96
Room Ventilation at the Operating Location
96
Supply Air at the Operating Location
96
Exhaust Air at the Operating Location
96
Connection of a Flue Pipe
97
13. Cleaning
97
General Safety Information
97
Cleaning the Kiln
98
Cleaning the Outside of the Kiln
98
Cleaning the Inside of the Kiln
98
14. Maintenance
98
General Safety Information
98
General Information
98
Maintenance Intervals
99
Mechanical Components
99
Electrical Components
100
Customer Service
100
Factory Service Centre
100
Maintenance Contract
100
15. Repairs
101
General Safety Information
101
General Information
101
Tightening the Tensioning Straps
101
Replacing the Safety Contacts
101
Spare Parts
102
General Information
102
Wear Parts
102
Tightening Torques
102
Replacing Heating Elements
103
General Safety Information
103
General Information
103
Position of the Electrical Connections
104
16. Faults
104
General Safety Information
104
Kiln
104
Controller
106
Replacing the Micro-Fuse
107
General Description
107
Required Spare Part
107
Replacing the Fuse
107
17. Disposal
108
18. Additional Information
108
Notice of Liability
108
Warranty Provisions
109
Warranty Claims
109
Property Rights/Brand Names/Disclaimer
109
Imprint
110
Contact/Service
110
19. Declaration of Conformity
111
Avant-Propos
114
Famille de Produits
115
Ecotop
115
Te-MCC
115
TE S (Volume Extensible Par Anneau de Rehausse)
116
TE SX (Volume Non Extensible Par Anneau de Rehausse)
116
Modèles Avec Extension Par Anneau de Rehausse
117
TE MCC+ Avec Anneau de Rehausse
117
TE S Avec Anneau de Rehausse
117
Vue D'ensemble du Produit
118
Consignes de Sécurité
119
Remarques D'ordre Général Concernant la Notice D'utilisation
119
Remarques D'ordre Général Concernant la Sécurité
119
Consignes de Sécurité Générales
119
Consignes de Sécurité Particulières pour L'ouverture D'évacuation D'air et le Trou de Regard (en Option)
120
Consigne de Sécurité Générale
120
Remarques D'ordre Général
120
Consignes de Sécurité Complémentaires
121
Formation à la Sécurité au Travail du Personnel Utilisateur
121
Service Surveillé
121
Contrôle du Four
121
Opérations Sur les Composants Électriques
121
Risques Résiduels
121
Utilisation
121
Utilisation Conforme
121
Mauvaises Utilisations Raisonnablement Prévisibles
122
Dispositif de Protection : Interrupteur de Protection des Personnes
122
Livraison
123
Contrôle de la Fourniture
123
Déballage du Four
123
Élimination de L'emballage
123
Transport
123
Transport Avec Palette
123
Transport Sans Palette
123
Fours Jusqu'à 100 Litres de Volume Intérieur
123
Fours à Partir de 100 Litres de Volume Intérieur
124
Désassemblage du Four pour le Transport
124
Consigne de Sécurité Générale
124
Démontage et Montage du Couvercle
124
Alignement du Couvercle du Four
125
Démontage et Montage de L'anneau Principal et de L'anneau de Rehausse (Pas Sur Ecotop)
127
Anneau Principal (Pas Sur Ecotop)
127
Anneau de Rehausse (Pas Sur Ecotop)
129
Limage de L'anneau Principal/De Rehausse après le Montage (Pas Sur Ecotop)
130
Mise en Place et Montage
131
Environnement de Service et Lieu D'installation
131
Accessoires Fournis Avec L'équipement
131
Installation de L'évacuation D'air
132
Installation du Trou de Regard (en Option)
133
Retournement du Piétement Réversible
133
Description Générale
133
Tous les Modèles, sauf Ecotop
133
Ecotop
135
Limage de L'anneau Principal/De Rehausse après le Montage (Pas Sur Ecotop)
137
Montage du Support du Régulateur
137
Montage de la Plaque de Fixation du Régulateur
137
Montage du Support du Régulateur
138
Montage Mural du Support du Régulateur
138
Branchement du Système de Régulation
138
Vue D'ensemble de la Connexion Enfichable
138
Branchement du Connecteur Dans la Prise
139
Branchement de L'anneau de Rehausse/De la Sole Chauffante
139
Branchement Électrique
140
Remarques Concernant le Branchement Électrique
140
Branchement du Four au Réseau Électrique
141
Mise en Service
141
Contrôle Avant la Mise en Service
141
Cuisson de Rodage du Four et du Matériel D'enfournement
141
Consigne de Sécurité Générale
141
Description
141
Resserrage des Bandes de Serrage
142
10. Fonctionnement
142
Maniement Correct pour et pendant la Cuisson
142
Généralités Concernant le Fonctionnement
143
Mise en Marche et Arrêt du Four
143
Système de Régulation
143
Ouverture et Fermeture du Couvercle du Four
143
Consignes de Sécurité Générales
143
Ouverture et Fermeture
144
Admission et Évacuation D'air
144
Évacuation D'air
145
11. Utilisation
146
Courbe de Cuisson Typique et Exemples de Programme
146
Structure D'enfournement
146
Remarques D'ordre Général Concernant L'enfournement
146
Exemples D'enfournement
147
Structure D'enfournement
147
12. Remarques Concernant le Fonctionnement et L'utilisation
148
Incident/Cas D'urgence pendant L'utilisation
148
Coupure D'urgence (ARRÊT D'URGENCE)
148
Incident/Cas D'urgence
148
Remarques Concernant le Comportement de Cuisson
148
Cuisson Réductrice
148
Vitesses de Chauffe
148
Refroidissement Instantané
149
Ne Pas Sécher des Pièces de Céramique Humide Dans le Four
149
Remarques Concernant le Four
149
Couvercle du Four
149
Vérin à Gaz
149
Resserrage des Bandes de Serrage
150
Cuisson à Vide
150
Remarque Générale
150
Description
150
Ventilation du Local au Lieu D'installation
151
Admission D'air au Lieu D'installation
151
Évacuation D'air au Lieu D'installation
151
Raccordement D'une Conduite de Gaz D'échappement
152
13. Nettoyage
152
Consignes de Sécurité Générales
152
Nettoyage du Four
153
Nettoyage Extérieur du Four
153
Nettoyage Intérieur du Four
153
14. Maintenance
153
Consigne de Sécurité Générale
153
Remarque Générale
153
Intervalles de Maintenance
154
Composants Mécaniques
154
Composants Électriques
155
Service Après-Vente
155
Service Après-Vente Usine
155
Contrat de Maintenance
156
15. Entretien
156
Consigne de Sécurité Générale
156
Remarque Générale
156
Resserrage des Bandes de Serrage
156
Remplacement des Contacteurs de Sécurité
157
Pièces de Rechange
157
Remarque Générale
157
Pièces D'usure
157
Couples de Serrage
157
Remplacement des Résistances
158
Consignes de Sécurité Générales
158
Information D'ordre Général
158
Emplacement des Connexions Électriques
159
16. Dérangement
159
Consigne de Sécurité Générale
159
Four
159
Régulateur
162
Remplacement du Fusible Fin
162
Description Générale
162
Pièce de Rechange Requise
162
Remplacement du Fusible
163
17. Élimination
163
18. Informations Supplémentaires
164
Remarques Concernant la Responsabilité
164
Conditions de Garantie
165
Dommage et Recours en Garantie
165
Droits de Propriété Industrielle / Marques / Exclusion de Responsabilité
165
Mentions Légales
166
Contact et Service Après-Vente
166
19. Déclaration de Conformité
167
Prefacio
170
Gama de Productos
171
Ecotop
171
Te MCC
172
TE S (Ampliable con Anillo Intermedio)
173
TE SX (no Ampliable con Anillo Intermedio)
173
Modelos con Ampliación por Anillo Intermedio
174
TE MCC+ con Anillo Intermedio
174
TE S con Anillo Intermedio
174
Descripción General del Producto
175
Señales de Seguridad
176
Notas Generales sobre el Manual de Instrucciones
176
Indicaciones Generales de Seguridad
176
Indicaciones Especiales de Seguridad para el Orificio de Salida del Aire y la Mirilla (Opcional)
177
Indicación General de Seguridad
177
Indicaciones Generales
177
Indicaciones Complementarias de Seguridad
178
Formación de Los Operadores
178
Funcionamiento Supervisado
178
Comprobación del Horno
178
Actividades en Los Componentes Eléctricos
178
Riesgos Residuales
178
Uso
178
Uso Previsto
178
Usos Indebidos Previsibles
179
Dispositivo de Protección: Interruptor de Protección para Personas
179
Entrega
180
Comprobación del Volumen de Entrega
180
Desembalaje del Horno
180
Desechar el Embalaje
180
Transporte
180
Transporte con Palé
180
Transporte sin Palé
180
Hornos de hasta 100 Litros de Volumen Interno
180
Hornos a Partir de 100 Litros de Volumen Interior
180
Desmontaje del Horno para Su Transporte
181
Indicación General de Seguridad
181
Desmontaje y Montaje de la Tapa
181
Nivelar la Tapa del Horno
182
Desmontaje y Montaje de Los Anillos Principal E Intermedio (no Ecotop)
183
Anillo Principal (no Ecotop)
183
Anillo Intermedio (no Ecotop)
185
Volver a Rectificar el Anillo Principal/Intermedio Después del Montaje (no Ecotop)
187
Instalación y Montaje
187
Condiciones de Funcionamiento y Lugar de Emplazamiento
187
Accesorios Entregados
188
Instalación de la Salida del Aire
188
Instalación de la Mirilla (Opcional)
189
Girar el Bastidor
189
Descripción General
189
Todos Los Modelos Excepto Ecotop
190
Ecotop
191
Volver a Rectificar el Anillo Principal/Intermedio Después del Montaje (no Ecotop)
193
Montaje del Soporte del Controlador
194
Montaje de la Placa de Montaje del Controlador
194
Montaje del Soporte del Controlador en la Pared
195
Conexión del Controlador
195
Vista General de la Conexión
195
Conexión
196
Conexión Anillo Intermedio/Solera Calefactada
196
Conexión Eléctrica
197
Indicaciones sobre la Conexión a la Red Eléctrica
197
Conexión del Horno a la Red Eléctrica
197
Puesta en Marcha
198
Comprobación Antes de la Puesta en Marcha
198
Primera Cocción del Horno y del Material de Apilado
198
Indicación General de Seguridad
198
Descripción
198
Reapretar las Cintas de Sujeción
199
10. Funcionamiento
199
Actuación Correcta Durante la Cocción
199
Funcionamiento General
200
Encender y Apagar el Horno
200
Controlador
200
Abrir y Cerrar la Tapa del Horno
200
Indicaciones Generales de Seguridad
200
Abrir y Cerrar
201
Entrada y Salida de Aire
201
Salida de Aire
202
11. Operación
203
Curva de Cocción Típica y Ejemplos de Programas
203
Estructura de Apilado
203
Indicaciones Generales de Apilado
203
Ejemplos de Apilado
204
Estructura de Apilado
204
12. Notas sobre el Funcionamiento y la Operación
205
Incidente O Emergencia Durante el Funcionamiento
205
Parada de Emergencia
205
Incidente O Emergencia
205
Indicaciones sobre el Proceso de Cocción
205
Cocción Acortada
205
Velocidades de Calentamiento
206
Enfriamiento Rápido
206
No Secar Cerámica Húmeda en el Horno
206
Notas sobre el Horno
206
Tapa del Horno
206
Amortiguador de Gas a Presión
206
Reapretar las Cintas de Sujeción
207
Cocción en Vacío
207
Información General
207
Descripción
207
Ventilación en el Lugar de Instalación
208
Entrada de Aire en el Lugar de Instalación
208
Salida de Aire en el Lugar de Instalación
208
Conexión de un Tubo de Escape
209
13. Limpieza
209
Indicaciones Generales de Seguridad
209
Limpiar el Horno
210
Limpieza del Exterior del Horno
210
Limpieza del Interior del Horno
210
14. Mantenimiento
210
Indicación General de Seguridad
210
Información General
210
Intervalos de Mantenimiento
211
Componentes Mecánicos
211
Componentes Eléctricos
212
Servicio de Atención al Cliente
213
Servicio Técnico de Fábrica
213
Contrato de Mantenimiento
213
15. Conservación
213
Indicación General de Seguridad
213
Información General
213
Reapretar las Cintas de Sujeción
214
Sustitución de Los Contactores de Seguridad
214
Recambios
214
Información General
214
Recambios
215
Piezas de Desgaste
215
Pares de Apriete
215
Sustituir las Resistencias
215
Indicaciones Generales de Seguridad
215
Información General
216
Sustituir las Resistencias
216
Posición de las Conexiones Eléctricas
216
16. Avería
217
Indicación General de Seguridad
217
Horno
217
Controlador
219
Sustituir el Microfusible
220
Descripción General
220
Pieza de Recambio Necesaria
220
Cambiar el Fusible
220
17. Eliminación de Residuos
221
18. Información Adicional
221
Nota sobre la Responsabilidad
221
Disposiciones de la Garantía
222
Reclamo de Garantía / Siniestro
222
Derechos de Propiedad, Marcas Registradas y Exoneración de Responsabilidad
223
Aviso Legal
223
Contacto/Servicio Técnico
223
19. Declaración de Conformidad
224
Premessa
227
Serie DI Prodotti
228
Advertisement
Rohde TE 130 MCC+ Operating Instructions Manual (164 pages)
Toploader
Brand:
Rohde
| Category:
Industrial Equipment
| Size: 6 MB
Table of Contents
Deutsch
3
Table of Contents
3
Vorwort
4
Produktfamilie
5
Ecotop
5
TE S (mit ZWR)
5
Te MCC
6
TE S (ohne ZWR)
6
Produktübersicht
7
Sicherheitshinweise
8
Allgemeine Anmerkungen
8
Allgemeine Sicherheitshinweise
8
Sicherheitshinweise für den Einsatz
8
Inbetriebnahme
9
Anlieferung & Ofen Auspacken
9
Verpackung Entsorgen
9
Hinweise
9
Sicherheitshinweis
9
Besondere Sicherheitshinweise für Abluftöffnung & Schauloch (Optional)
9
Betriebsumgebung & Aufstellort
10
Aufbau des Brennofens
10
Zu- & Abluft
11
Zuluftschieber
11
Alle Modelle Außer Ecotop
11
Ecotop
11
Netzanschluss
12
Netzanschluss/Regelanlage & Zwischenring Anschließen
12
Abluft Installieren
12
Regelanlage Anschließen
13
Zwischenring Anschließen
13
Wandmontage der Regelanlage
13
Montage der Regelanlage TC 304
13
Montage der anderen Modelle
13
Spannbänder Nachziehen
14
Ecotop
14
Alle Modelle Außer Ecotop
14
Ofen Einbrennen & Besatzmaterial Einbrennen
14
Hinweise
14
Sicherheitshinweis
14
Beschreibung
14
Hinweise Stromanschluss (RCD-Schutzschalter)
15
Allgemeine Bedienhinweise
15
Bedienung der Regelanlage
15
Richtiger Umgang Beim Brand
16
Besatzbeispiel
16
Weitere Funktionen
17
Allgemeine Hinweise zu Transport & Verbringung
17
Deckel Abmontieren & Montieren
17
Haupt- & Zwischenring Demontieren (nicht Ecotop)
18
Hauptring Demontieren (nicht Ecotop)
18
Fußgestell Demontieren
19
Alle Modelle Außer Ecotop
19
Hinweis zu Haupt-/Zwischenring Montieren (nicht Ecotop)
19
Wende-Fußgestell Umdrehen
19
Zwischenring Demontieren (nicht Ecotop)
19
Ecotop
20
Fußgestell Umdrehen
21
Hinweis zu Fußgestell Montieren (nicht Ecotop)
22
Wartung & Reinigung
22
Wartung
22
Spannbänder Nachziehen
22
Alle Modelle Außer Ecotop
22
Ecotop
22
Die Regelanlage Zeigt eine Fehlermeldung
23
Die Regelanlage kann nicht Eingeschalten werden
23
Störungssuche
23
Ersatzteile
23
Reinigung
23
Leerbrand
23
Heizelemente
23
Der Brennraum Erwärmt sich nicht
24
Der Brennofen Heizt nur sehr Langsam
24
10. Zusätzliche Informationen
24
Garantiebestimmungen
24
Was Tun IM Garantie-/Schadensfall
24
Schutzrechte/Markennamen & Haftungsausschluss
24
Service
24
11. Konformitätserklärung
25
English
26
Preface
27
Ecotop
28
Product Family
28
TE S (with ZWR)
28
Te MCC
29
TE S (Without ZWR)
29
Product Overview
30
General Information
31
General Safety Instructions
31
Safety Instructions
31
Safety Instructions for the Operation
31
Delivery & Unpacking of the Kiln
32
Disposal of the Packing Material
32
Notes
32
Safety Note
32
Special Safety Instructions for Exhaust Air Opening and Inspection Hole (Optional)
32
Start-Up
32
Assembly of Kiln
33
Installation Environment & Operating Location
33
All Models Except Ecotop
34
Ecotop
34
Supply & Exhaust Air
34
Supply Air Handle
34
Connection of Power Supply/Controller & Supplementary Ring for Extension
35
Installation of the Exhaust Air
35
Power Supply
35
Connection of the Controller
36
Connection of the Supplementary Ring for Extension
36
Mounting Other Controllers
36
Mounting the Controller on the Wall
36
Mounting the Controller TC 304
36
All Models Except Ecotop
37
Description
37
Ecotop
37
Kiln & Furniture Initial Firing
37
Notes
37
Re-Tighten the Tensioning Belts
37
Safety Note
37
Correct Operation During Firing
38
General Notes on Operation
38
Notes on Power Connection (Residual Current Protective Device [RCD])
38
Operation of the Controller
38
Example for Positioning Furniture Plates
39
Dismantle & Assemble the Kiln Lid
40
General Notes on Transport
40
Other Features
40
Dismantle the Main & Supplementary Ring (Applies Not to Ecotop)
41
Dismantle the Main Ring (Applies Not to Ecotop)
41
All Models Except Ecotop
42
Assembly Note on Main/Supplementary Ring (Applies Not to Ecotop)
42
Dismantle the Kiln Stand
42
Dismantle the Supplementary Ring for Extension (Applies Not to Ecotop)
42
Swivel the Kiln Stand
42
Ecotop
43
Swivel Kiln Stand
44
All Models Except Ecotop
45
Assembly Note on Swivel Kiln Stand (Applies Not to Ecotop)
45
Ecotop
45
Maintenance
45
Maintenance & Cleaning
45
Re-Tighten the Tensioning Belts
45
Cleaning
46
Empty Firing
46
Heating Elements
46
Spare Parts
46
The Controller Cannot be Switched on
46
The Controller Displays an Error Message
46
Troubleshooting
46
10. Additional Information
47
Property Rights/Trade Names & Disclaimer
47
Service
47
The Firing Chamber Does Not Heat up
47
The Kiln Heats up very Slowly
47
Warranty
47
What to Do in the Case of Warranty / Damage
47
11. Declaration of Conformity
48
Français
49
Avant Propos
50
Ecotop
51
Famille de Produits
51
TE S (Avec ZWR)
51
Te MCC
52
TE S (Sans ZWR)
52
Vue D'ensemble
53
Consignes de Sécurité
54
Consignes de Sécurité pour la Mise en Oeuvre
54
Remarques Générales
54
Avis de Sécurité
55
Consignes de Sécurité Spéciales pour L'ouverture D'évacuation D'air et le Trou D'inspection (en Option)
55
Indices
55
Livraison et Déballage du Four
55
Mise en Service
55
Élimination de L'emballage
55
Environnement de Service et Lieu D'installation
56
Installation du Four
56
D'admission D'air & D'évacuation D'air
57
Ecotop
57
Tous les Modèles sauf Ecotop
57
Trappe D'aération
57
Branchement au Réseau
58
Branchement au Réseau et Connexion du Système de Régulation et Anneau Intermédiaire pour Extension
58
Installation de L'évacuation D'air
58
Branchement du Anneau Intermédiaire pour Extension
59
Branchement du Système de Régulation
59
Montage des Autres Modèles
59
Montage du Système de Régulation TC 304
59
Montage Mural du Système de Régulation
59
Avis de Sécurité
60
Cuisson de Rodage du Four et du Matériel D'enfournement
60
Description
60
Ecotop
60
Nota
60
Serrer les Sangles
60
Tous les Modèles sauf Ecotop
60
Indications Relatives au Branchement Électrique et au Disjoncteur à Courant Résiduel (RCD)
61
Instructions Générales D'utilisation
61
Utilisation du Système de Régulation
61
Exemple D'enfournement
62
Maniement Correct pour et pendant la Cuisson
62
Autres Functions
63
Démonter et Assembler le Couvercle
63
Informations Générales Sur Transport Sur le Lieu D'installation
63
Démontage de L'anneau Principal & Démontage de L'anneau Intermédiaire (Pas Ecotop)
64
Démontage de L'anneau Principal (Pas Ecotop)
64
Assembler la Note Sur L'anneau Principal/Intermédiaire (Pas Ecotop)
65
Démontage de L'anneau Intermédiaire (Pas Ecotop)
65
Démontage du Piètement
65
Piètement Réversible
65
Tous les Modèles sauf Ecotop
65
Ecotop
66
Piètement Réversible
67
Ecotop
68
Maintenance
68
Maintenance & Nettoyage
68
Remarque Sur le Montage de la Base (Pas Ecotop)
68
Serrer les Sangles
68
Tous les Modèles sauf Ecotop
68
Des Pièces de Rechange
69
Dysfonctionnements
69
La Chambre de Cuisson du Four Ne Chauffe Pas
69
Le Système de Régulation Affiche un Message D'erreur
69
Les Résistances
69
Nettoyage
69
On Ne Peut Pas Mettre le Système de Régulation en Marche
69
Une Cuisson à Vide
69
10. Informations Supplémentaires
70
Conditions de Garantie
70
Droits de Propriété Industrielle / Marques / Exclusion de Responsabilité
70
Le Four Ne Chauffe que Très Lentement
70
Que Faire en cas de Dommage et de Recours en Garantie
70
Service
70
11. Déclaration de Conformité
71
Rohde TE 130 MCC+ Instruction Manual (80 pages)
Electric Toploaders for Ceramics
Brand:
Rohde
| Category:
Furnace
| Size: 4 MB
Table of Contents
Deutsch
2
Table of Contents
2
Vorwort
3
Inhaltsverzeichnis
3
Produktfamilie
3
3 Übersicht � � � � � � � � � � � � � � � � � � � � � � � � � � � � � � � � � � � � � � � � � � � � � � � � � � � � � � � � � � � � � � � � � � � � � � � � � � 4
5
Wichtige Sicherheitshinweise
5
Allgemeine Anmerkungen
5
Sicherheitshinweise
5
Sicherheitshinweise für den Einsatz
5
Inbetriebnahme
6
Anlieferung / Ofen Auspacken
6
Verpackung Entsorgen
6
Betriebsumgebung / Aufstellort
6
Aufbau des Brennofens
6
Abluft Installieren
7
Zuluftschieber
7
Netzanschluss / Regelanlage Anschließen
7
Wandmontage der Regelanlage
8
5�10� Hinweise Stromanschluss / RCD-Schutzschalter
8
6 Allgemeine Bedienungshinweise � � � � � � � � � � � � � � � � � � � � � � � � � � � � � � � � � � � � � � � � � � � � � � � � � � � � � �
9
Richtiger Umgang Beim Brand
9
Weitere Funktionen
10
Transport / Verbringung
10
7�1�1� Deckel Abmontieren
10
7�1�2� Hauptring Demontieren
10
7�1�3� Zwischenring Demontieren
10
Wende-Fußgestell
11
Besatzbeispiel
11
Wartung / Pflege / Reinigung
12
Tipps zur Störungssuche
12
Garantiebestimmungen
13
Schutzrechte / Markennamen / Haftungsausschluss
13
Konformitätserklärung
14
Ersatzteile
15
Service-Adressen
15
English
18
Product Family
19
Preface
19
Overview
20
Important Safety Instructions
21
General Information
21
General Safety Instructions
21
Operating Safety Instructions
21
Start-Up
22
5�1� Delivery / Unpacking the Kiln
22
Disposal of Packing Material
22
Installation Environment / Location
22
Assembly of Kiln
22
Installation of Ventilation System
23
Air Supply Handle
23
Connecting to Power Supply / Controller
23
Mounting the Controller on the Wall
24
Kiln and Furniture Initial Firing
24
5�10� Instructions Power Connection / Residual Current Protective Device (RCD)
24
6 General Operating Instructions � � � � � � � � � � � � � � � � � � � � � � � � � � � � � � � � � � � � � � � � � � � � � � � � � � � � � �
25
Operating Instructions Controller
25
Correct Operation During Firing
25
Other Features
26
Transport / Delivery
26
7�1�1� Dismounting Kiln Cover
26
7�1�2� Dismounting Kiln Main Ring
26
7�1�3� Dismounting Supplementary Ring
26
Swivel Kiln Stand
27
Example for Positioning Furniture Plates
27
Maintenance / Care and Cleaning
28
Troubleshooting Tips
28
Warranty
29
Property Rights / Trade Names and Disclaimer
29
Declaration of Conformity
30
Spare Parts
31
Contacts / Assistance
31
Advertisement
Rohde TE 130 MCC+ Instruction Manual (41 pages)
Electric Toploaders for Ceramics up to 1320 C
Brand:
Rohde
| Category:
Other
| Size: 1 MB
Table of Contents
Deutsch
2
Vorwort
2
Produktfamilie
2
Anschluss-Besatz-Gewicht Stecker Platten Netto MM Kg
2
Table of Contents
2
Allgemeine Anmerkungen
3
Sicherheitshinweise
3
Sicherheitshinweise für den Einsatz
3
Wichtige Sicherheitshinweise
3
Abluft Installieren
4
Anlieferung / Ofen Auspacken
4
Aufbau des Brennofens
4
Betriebsumgebung / Aufstellort
4
Inbetriebnahme
4
Netzanschluss / Regelanlage Anschließen
4
Verpackung Entsorgen
4
Zuluftschieber
4
Hinweise Stromanschluss / RCD-Schutzschalter
5
Richtiger Umgang Beim Brand
5
Wandmontage der Regelanlage
5
Besatzbeispiel
6
Deckel Abmontieren
6
Fußgestell Demontieren
6
Hauptring Demontieren
6
Transport / Verbringung
6
Weitere Funktionen
6
Wende-Fußgestell
6
Zwischenring Demontieren
6
Wartung / Pflege / Reinigung
7
Tipps zur Störungssuche
7
Garantiebestimmungen
7
Schutzrechte / Markennamen / Haftungsausschluss
7
Konformitätserklärung
8
Ersatzteile
8
Service-Adressen
8
English
10
MM Kg
10
Cee 16
10
CEE 16 a Ø 350
10
CEE 16 Ø 420 101
10
Schuko Ø 350
10
ZWR 100 MCC+ Ø 520 230 800 830 230
10
ZWR 130 MCC+ Ø 590 230 830 880 230
10
ZWR 75 MCC+ Ø 470 230 650 700 230
10
General Information
11
General Safety Instructions
11
3 Overview
11
Air Supply Handle
12
Assembly of Kiln
12
Connecting to Power Supply / Controller
12
Delivery / Unpacking the Kiln
12
Disposal of Packing Material
12
Installation Environment / Location
12
Installation of Ventilation System
12
4 Important Safety Instructions
11
Operating Safety Instructions
11
5 Start-Up
12
Correct Operation During Firing
13
Instructions Power Connection / Residual Current Protective Device (RCD)
13
Kiln and Furniture Initial Firing
13
Mounting the Controller on the Wall
13
Operating Instructions Controller
13
Dismounting Kiln Cover
14
Dismounting Kiln Main Ring
14
Dismounting Kiln Stand
14
Dismounting Supplementary Ring
14
Example for Positioning Furniture Plates
14
7 Other Features
14
Swivel Kiln Stand
14
Transport / Delivery
14
8 Maintenance / Care and Cleaning
15
9 Troubleshooting Tips
15
10 Warranty
15
11 Property Rights / Trade Names and Disclaimer
15
12 Declaration of Conformity
16
13 Spare Parts
16
14 Contacts / Assistance
16
Advertisement
Related Products
Rohde TE 130 S
Rohde TE 110 MCC+
Rohde TE 100 MCC+
Rohde TE 150 MCC+
Rohde TE 190 MCC+
Rohde TE 100 S
Rohde TE 145 S
Rohde TE 165 S
Rohde TE Series
Rohde TE 95 S
Rohde Categories
Industrial Equipment
Controller
Control Unit
Furnace
Security Sensors
More Rohde Manuals
Login
Sign In
OR
Sign in with Facebook
Sign in with Google
Upload manual
Upload from disk
Upload from URL