Sign In
Upload
Manuals
Brands
Ricoh Manuals
Projector
PJ WX5361N
Ricoh PJ WX5361N Manuals
Manuals and User Guides for Ricoh PJ WX5361N. We have
3
Ricoh PJ WX5361N manuals available for free PDF download: User Manual, Important Information Manual, Quick Setup Manual
Ricoh PJ WX5361N User Manual (206 pages)
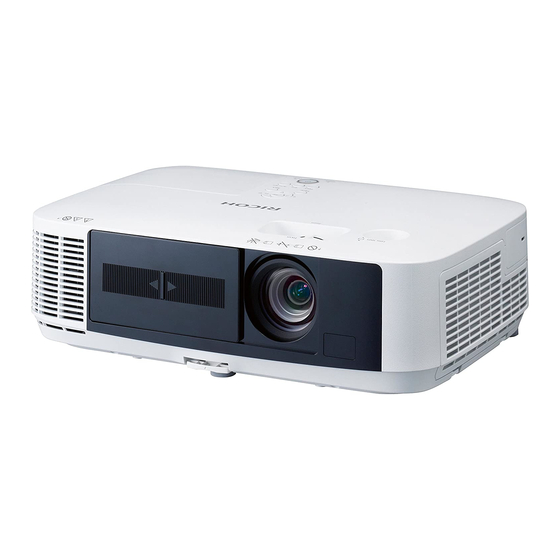
RICOH projector
Brand:
Ricoh
| Category:
Projector
| Size: 21 MB
Table of Contents
Important Information
3
Safety Cautions
3
User Information on Electrical and Electronic Equipment
3
Important Safeguards
5
Lamp Replacement
8
Power Management Function
9
Safety Labels of this Machine
10
Table of Contents
11
1 Introduction
15
❶ What's In The Box
15
❷ Introduction To The Projector
16
Congratulations On Your Purchase Of The Projector
16
Features You'll Enjoy
16
About This User's Manual
17
❸ Part Names Of The Projector
18
Front/Top
18
Rear
19
Top Features
20
Terminal Panel Features
21
❹ Part Names Of The Remote Control
22
Battery Installation
23
Remote Control Precautions
23
Operating Range For Wireless Remote Control
23
❺ Operating Environment For Software Included On CD-ROM
24
Operating Environment
25
2 Projecting an Image (Basic Operation)
27
❶ Flow Of Projecting An Image
27
❷ Connecting Your Computer/Connecting The Power Cord
28
❸ Turning On The Projector
29
Note On Startup Screen (Menu Language Select Screen)
30
❹ Selecting A Source
31
Selecting The Computer Or Video Source
31
❺ Adjusting The Picture Size And Position
33
Adjusting The Vertical Position Of A Projected Image (Lens Shift)
34
Focus
35
Zoom
36
Adjust The Tilt Foot
37
❻ Correcting Keystone Distortion [Keystone]
38
❼ Optimizing Computer Signal Automatically
40
Adjusting The Image Using Auto Adjust
40
❽ Turning Up Or Down Volume
40
❾ Turning Off The Projector
41
❿ After Use
42
3 Convenient Features
43
❶ Turning Off The Image And Sound
43
❷ Freezing A Picture
43
❸ Enlarging A Picture
43
❹ Changing Eco Mode/Checking Energy-Saving Effect
44
Using Eco Mode [Lamp Power]
44
Checking Energy-Saving Effect [Carbon Meter]
45
❺ Preventing The Unauthorized Use Of The Projector [Security]
47
❻ Using 4-Point Corner To Correct Keystone Distortion [Cornerstone]
50
Cornerstone
50
❼ Operating Your Computer's Mouse Functions from the Projector's Remote Control Via the USB Cable (Remote Mouse Function)
53
❽ Projecting Your Computer's Screen Image from the Projector Via the USB Cable (USB Display)
54
❾ Controlling The Projector By Using An Http Browser
56
Handling of the Address for Operation Via a Browser
57
Projector Adjustment
57
❿ Projecting Your Computer's Screen Image from the Projector Via a Network [NETWORK PROJECTOR]
63
⓫ Using The Projector To Operate Your Computer Via A Network
67
[Remote Desktop]
67
⓬ Connecting Your Microphone
72
4 Using the Viewer
73
❶ What You Can Do With The Viewer
73
Supported Usb Memory Devices
74
❷ Preparing Presentation Materials
76
❸ Projecting Images Stored In A Usb Memory Device
77
Starting The Viewer
77
Exiting The Viewer
79
Names And Functions Of Viewer Screen
80
Viewer Option Settings
85
❹ Projecting Data From Shared Folder
88
Connecting The Projector To The Shared Folder
88
Disconnecting The Shared Folder From The Projector
91
❺ Projecting Data From Media Server
92
Setting Up "Media Sharing" In Windows Media Player 11
92
Setting Up "Media Sharing" In Windows Media Player 12
94
Connecting The Projector To The Media Server
95
Disconnecting The Projector From The Media Server
96
5 Using On-Screen Menu
97
❶ Using The Menus
97
❷ Menu Elements
98
❸ List Of Menu Items
99
❹ Menu Descriptions & Functions [Input]
102
Computer
102
Hdmi1 And 2
102
Video
102
S-Video
102
Viewer
102
Network
102
Usb Display
102
❺ Menu Descriptions & Functions [Adjust]
103
[Picture]
103
Color Saturation
105
[Image Options]
106
[Audio]
110
❻ Menu Descriptions & Functions [Setup]
111
[General]
111
[Menu]
113
[Installation]
115
[Options(1)]
117
[Options(2)]
120
❼ Menu Descriptions & Functions [Info.]
123
[Usage Time]
123
[Source(1)]
124
[Source(2)]
124
[Wired Lan]
124
[Wireless Lan]
125
[Version(1)]
125
[Version(2)]
125
[Others]
126
❽ Menu Descriptions & Functions [Reset]
127
Returning To Factory Default [Reset]
127
❾ Application Menu
128
Advanced Network / Projection Utility
128
Network Projector
129
Remote Desktop Connection
129
Network Settings
130
Tools
146
Date and Time
150
6 Installation and Connections
151
❶ Setting Up The Screen And The Projector
151
Selecting A Location
151
Throw Distance And Screen Size
153
Reflecting the Image
154
❷ Making Connections
155
Connecting Your Computer
155
Connecting An External Monitor
157
Connecting Your DVD Player Or Other Av Equipment
158
Connecting Component Input
159
Connecting Hdmi Input
160
Connecting To A Wired Lan
161
Connecting To A Wireless Lan (Sold Separately)
162
7 Maintenance
165
❶ Cleaning The Filters
165
❷ Cleaning The Lens
168
❸ Cleaning The Cabinet
168
❹ Replacing The Lamp And The Filters
169
8 User Supportware
175
❶ Installing Software Program
175
Installation For Windows Software
175
❷ Projecting Your Computer's Screen Image or Video from the Projector over a LAN (Projection Utility)
178
Starting Projection Utility From A Usb Memory Or Sd Card
183
❸ Projecting An Image From An Angle
185
(Geometric Correction Tool In Projection Utility)
185
What You Can Do With Gct
185
Projecting An Image From An Angle (Gct)
185
❹ Projecting Images From The Projector Over A Lan (Advanced Network Utility)
187
What You Can Do With Advanced Network Utility
187
Connecting The Projector To A Lan
188
Basic Operation Of Advanced Network Utility
189
Holding Conferences
191
Participating in Conference
191
❺ Converting Presentation Files To Jpeg Files Using Jpeg Conversion Tool
193
Operating Environment
193
Installing Jpeg Conversion Tool
193
❻ Managing The Projector Using Projector Management Utility
195
Operating Environment
195
Installing Projector Management Utility
195
9 Appendix
196
❶ Troubleshooting
196
Indicator Messages
196
Common Problems & Solutions
197
If There Is No Picture, Or The Picture Is Not Displayed Correctly
198
❷ Specifications
199
❸ Cabinet Dimensions
201
❹ Pin Assignments Of D-Sub Computer Input Connector
202
❺ Compatible Input Signal List
203
❻ Pc Control Codes And Cable Connection
204
Advertisement
Ricoh PJ WX5361N Important Information Manual (70 pages)
Brand:
Ricoh
| Category:
Projector
| Size: 6 MB
Table of Contents
What's in the Box
5
Safety Cautions
6
Important Safeguards
8
Installation
8
Remote Control Precautions
10
Safety Labels of this Machine
12
Que Contient la Boîte
19
Consignes de Sécurité
20
Mesures de Sécurité Importantes
22
Remplacement de la Lampe
25
Importante para Su Seguridad
36
Instalación
36
Sustitución de la Lámpara
39
O que Há Na Caixa
47
Precauções de Segurança
48
Ricoh PJ WX5361N Quick Setup Manual (7 pages)
Brand:
Ricoh
| Category:
Projector
| Size: 1 MB
Table of Contents
Connect Your Computer to the Projector
1
Slide the Lens Cover to the Left to Uncover the Lens
2
Turn on the Projector
2
TIP: Press the Auto Set Button to Optimize an RGB Image Automatically
3
Adjust the Picture Size and Position
4
Rotate the Lens Shift Dial (Lens Shift)
4
Adjust the Tilt Foot (Rear)
4
Adjust the Tilt Foot (Front)
4
Zoom
5
Focus
5
You Can Use the ▲ or ▼ Button to Perform Keystone Correction Manually with no Menu Displayed
5
1. Press the Power Button Twice
6
2. Slide the Lens Cover to the Right to Cover the Lens
6
3. Disconnect All the Cables
6
Advertisement
Advertisement
Related Products
Ricoh PJ WX5252nl
Ricoh PJ WX5350N
Ricoh PJ WX4130n
Ricoh PJ WX3340N
Ricoh PJ WX4240N
Ricoh PJ WX6170N
Ricoh PJ WX3231N
Ricoh PJ WX3240N
Ricoh PJ WX4241N
Ricoh PJ WX4152NI
Ricoh Categories
All in One Printer
Printer
Digital Camera
Copier
Printer Accessories
More Ricoh Manuals
Login
Sign In
OR
Sign in with Facebook
Sign in with Google
Upload manual
Upload from disk
Upload from URL