Sign In
Upload
Manuals
Brands
Renogy Manuals
Power Supply
Smart Shunt 300
Renogy Smart Shunt 300 Manuals
Manuals and User Guides for Renogy Smart Shunt 300. We have
3
Renogy Smart Shunt 300 manuals available for free PDF download: User Manual, Quick Manual
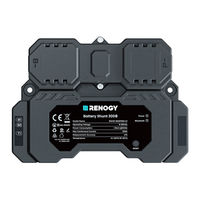
Renogy Battery Shunt 300 (RSHST-B02P300-G1) Manual
Brand:
Renogy
| Category:
Measuring Instruments
| Size: 9 MB
Table of Contents
General Information
Symbols Used
Introduction
Key Features
SKU
Get to Know Renogy Battery Shunt 300
What's In the Box
Required Tools & Accessories
Product Overview
System Setup
Connecting to a Auxiliary Battery Only
Connecting to Both a Auxiliary Battery and a Starter Battery
Connecting to Multiple Auxiliary Batteries
Preparation
Plan a Mounting Site
Check Renogy Battery Shunt 300
Check System Voltage and Current
Size Bare Wires
How to Install 3/8 in Lugs
Installation
Remove the Covers
Connect the Shunt to the Auxiliary Battery Negative
Connect the Shunt to the Device AUX BAT-
Connect the Shunt to the Auxiliary Battery Positive
Install a Battery Temperature Sensor
Connect the Shunt to the Starter Battery Positive
Mount the Shunt
Install the Covers
Configuration
Power On
Pairing with DC Home or Renogy ONE
Initial Paring
Energy Monitoring
Short-Range Monitoring via DC Home App
Wireless Long-Range Monitoring
SOC Synchronization
DC Home app
Renogy ONE
Essential Alarm Settings
Historical Data
Device Info
LED Indicators
Troubleshooting
FAQ
Dimensions and Specifications
Dimensions
Technical Specifications
Maintenance
Inspection
Cleaning
Storage
Emergency Responses
Renogy Support
Documents / Resources
References
Advertisement
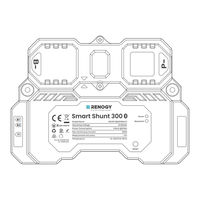
Renogy Smart Shunt 300 User Manual (34 pages)
Brand:
Renogy
| Category:
Battery Pack
| Size: 10 MB
Table of Contents
Table of Contents
3
General Information
5
Symbols Used
5
Introduction
5
Key Features
5
Sku
5
Get to Know Renogy Smart Shunt 300
6
What's in the Box
6
Required Tools & Accessories
6
Product Overview
7
System Setup
7
Preparation
10
Plan a Mounting Site
10
Check Renogy Smart Shunt 300
10
Check System Voltage and Current
11
Size Bare Wires
11
How to Install 3/8 in Lugs
11
Installation
13
Remove the Covers
13
Connect the Shunt to the Main Battery Negative
14
Connect the Shunt to the Device BAT
14
Connect the Shunt to the Main Battery Positive
15
Install a Battery Temperature Sensor
15
Connect the Shunt to the Starter Battery Positive (Optional)
16
Mount the Shunt (Optional)
16
Install the Covers
17
Configuration
18
Power on
18
Pairing with DC Home or Renogy ONE
18
Energy Monitoring
20
SOC Synchronization
22
LED Indicators
25
Troubleshooting
26
Faq
27
Dimensions and Specifications
28
Dimensions
28
Technical Specifications
28
Maintenance
30
Inspection
30
Cleaning
30
Storage
30
Emergency Responses
31
Renogy Support
32
Fcc & Rss
33
FCC Statement
33
FCC Radiation Exposure Statement
33
RSS Standard
33
Renogy Smart Shunt 300 Quick Manual (27 pages)
Brand:
Renogy
| Category:
Power Supply
| Size: 7 MB
Table of Contents
Table of Contents
3
What's in the Box
4
Dimensions
4
Get to Know Renogy Smart Shunt 300
5
Renogy Smart Shunt 300 System Setup
6
Required Tools & Accessories
7
How to Size Bare Wires
8
Check System Voltage and Current
8
Step 1. Plan a Mounting Site
9
Step 2. Wear Insulating Gloves
9
Step 3. Remove the Covers
10
Step 4. Connect the Shunt to the Main Battery Negative
11
Step 5. Connect the Shunt to the Device BAT
12
Step 6. Connect the Shunt to the Main Battery Positive
13
Step 7. Connect the Shunt to the Starter Battery Positive (Optional)
14
Step 8. Install a Battery Temperature Sensor
15
Step 9. Mount the Shunt (Optional)
15
Step 10. Install the Covers
16
Step 11. Power on
17
LED Indicators
17
Bluetooth Pairing
18
Energy Monitoring
19
Troubleshooting
22
Important Safety Instructions
23
Advertisement
Advertisement
Related Products
Renogy E.Tunes SBS-25
Renogy SNZB-04
Renogy Core Series
Renogy PHOENIX 1000
Renogy REC500CB-98
Renogy RSHST-B02P300-G1
Renogy Categories
Battery Charger
Controller
Inverter
Solar panel
Measuring Instruments
More Renogy Manuals
Login
Sign In
OR
Sign in with Facebook
Sign in with Google
Upload manual
Upload from disk
Upload from URL