Sign In
Upload
Manuals
Brands
Quasonix Manuals
Data Loggers
Compact RDMS Telemetry Receiver-Combiner
Quasonix Compact RDMS Telemetry Receiver-Combiner Manuals
Manuals and User Guides for Quasonix Compact RDMS Telemetry Receiver-Combiner. We have
1
Quasonix Compact RDMS Telemetry Receiver-Combiner manual available for free PDF download: Installation And Operation Manual
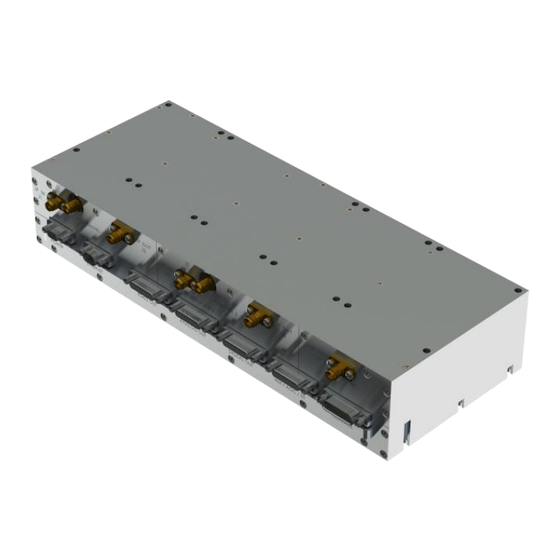
Quasonix Compact RDMS Telemetry Receiver-Combiner Installation And Operation Manual (152 pages)
Brand:
Quasonix
| Category:
Data Loggers
| Size: 9.45 MB
Table of Contents
Table of Contents
2
Introduction
13
Description
13
Nomenclature
14
Options
14
Figure 1: Compact RDMS™ Telemetry Receiver-Combiner Part Number Construction
14
Table 1: Model Configuration Example
14
Detailed Option Descriptions
15
SAW Filter Option - 14
15
Cybersecurity - CS, CS1, CS2
15
Adaptive Equalizer - EQ
15
Viterbi Decoder (for Legacy PSK Only) - K7
15
Band Configurations
17
Table 2: Band Configuration Codes
17
Additional Band Codes
18
Package Contents
18
Specifications
19
Installation Instructions
22
Mechanical
22
Figure 2: Mechanical Drawing - Top View (Dual-Channel Connectors Shown)
22
Figure 3: Dual Channel Compact RDMS Receiver-Combiner (CRC)
22
Figure 4: 3Rd Generation Compact RDMS™ Receiver-Combiner
23
Thermal
24
Electrical
24
CRC Front Panel Connections
24
Figure 5: CRC Front Panel
24
Table 3: Connector Descriptions
24
Front Panel Connections
25
Table 4: Front Panel Connector Specifications
25
Electrical Signals
27
Figure 6: Baseband Signal Timing
27
Operating Instructions
29
Power-On Operation
29
Reset IP Address to Default
29
Figure 7: Custom MDM-25 IP Reset Connector
30
Browser Interface
31
Network Screen
31
Figure 8: RDMS™ Browser Interface Header Tool Bar
31
Figure 9: Network Screen with Multiple Receivers and Active Channels
32
Figure 10: Network Screen, Closeup of Left Side, Combiners Only
32
Monitor Screen
33
Figure 11: Network Screen, Closeup of Right Side
33
Figure 12: RDMS™ Browser Interface Tool Bar
33
Figure 13: Browser Interface Monitor Screen
34
Figure 14: Monitor Screen for RDMS™ with Only One Channel Available
35
Figure 15: Monitor Screen Partial Status Information Block When Combiner on
35
Figure 16: Monitor Screen Partial Status Information Block When Combiner off
35
Signal Graph and Signal Indicators
36
Figure 17: Signal Graph and Signal Indicators Windows
36
Figure 18: Example PCM/FM Eye Pattern
36
Figure 19: Example SOQPSK Constellation
36
Figure 20: Waveform Graphics with Locked SOQPSK Signal
37
Figure 21: Signal Graph and Signal Indicators Windows, Zero AGC RSSI Display "Relative
38
Figure 22: Power Spectral Density Plot Window
39
Figure 23: Diversity Combiner Link with Locked Signal
39
Figure 24: Best Channel Indicator Example
40
Figure 25: Best Channel Indicator-Combiner
41
Figure 26: Best Channel Indicator-Ch 1
42
Figure 27: Best Channel Indicator-Ch 2
42
Figure 28: Best Channel Data Quality Better than Combiner Data Quality
42
Figure 29: Best Channel Indicator off (Grey)
43
Figure 30: Monitor Display Menu
43
Figure 31: Monitor Full Display (Default)
44
Figure 32: Monitor Eye Pattern/Constellation Display Only
44
Figure 33: Monitor PSD (Spectrum) Only
45
Figure 34: Monitor Combiner Display Only
45
Figure 35: Monitor Combiner Display Only
46
Figure 36: RDMS™ Browser Interface Header Tool Bar
46
Figure 37: Configure Screen, Combiner Section
46
Figure 38: Configuration Screen with Combiner On, Channel 1 Displays
47
Figure 39: Configuration Screen with Combiner Off, Channel 1 and Channel 2 Display
48
Figure 40: Configure Basic Settings Window-PCM/FM Mode
48
Figure 41: Configure Screen, Messages and Alerts
49
Figure 42: Configure Basic Settings Window AQPSK Mode, Two Bit Rates
50
Figure 43: Settings Window, Data Polarity Selection
51
Figure 44: DQM Calibration Fixture Process
51
Figure 45: DQE Format
52
Figure 46: Configure Basic Settings Window, DQ Encapsulation Checked
53
Figure 47: Settings Window, Derandomizer Drop down Menu
53
Figure 48: Configure Basic Settings Window-SOQPSK Mode
54
Figure 49: Advanced Settings Window
55
Figure 50: Advanced Settings Window, if Filter Menu
56
Figure 51: Advanced Settings Window, AFC Mode Menu
57
Figure 52: Advanced Settings Window, Best Channel Selector Checked
58
Figure 53: System Block Diagram with Best Channel Selector
59
Figure 54: Advanced Settings Window, Time Aligner Selection Checked
60
Figure 55: Advanced Settings Window, PCM Encoding Drop down Menu
61
Figure 56: Advanced Settings Window, Channel a Video Output Drop down Menu
61
Figure 57: Advanced Settings Window, Channel B Video Output Drop down Menu
62
Figure 58: Advanced Settings Window, Channel a Video Scale
62
Table 5: Normal (Default) Video Output Signals
62
Channel B Video Scale
63
Tape Output Frequency
63
FM De-Emphasis (PCM/FM Mode Only)
63
Forward Error Correction
63
Figure 59: Advanced Settings Window, Channel B Video Scale
63
Figure 60: Advanced Settings Window, Tape Output Frequency
63
Figure 61: Advanced Settings Window, FM De-Emphasis
63
LDPC Mode (SOQPSKLDPC or STCLDPC Modes Only)
64
Figure 62: Forward Error Correction Window When in a PSK Mode
64
Figure 63: Forward Error Correction Window, When in SOQPSKLDPC or SOQPSKSTC Mode
65
Figure 64: Forward Error Correction Window, LDPC Mode Drop down Menu
65
Viterbi Decoder (K7 Option Required) (Legacy PSK Modes Only)
66
Convolutional Symbol
66
Figure 65: Forward Error Correction Window
66
Figure 66: I and Q Data Streams Independently Encoded
67
Figure 67: I and Q Data from Single Convolutional Encoder
67
Reed-Solomon Decoder (K7 Option Required) (Legacy PSK Modes Only)
68
Figure 68: Forward Error Correction Window, Convolutional Symbol Enabled (Checked)
68
Interleave Depth (K7 Option Required) (Legacy PSK Modes Only)
69
Advanced PCM/FM Settings
69
Modulation Index Scaling Mode
69
Figure 69: Forward Error Correction Window, Reed-Solomon Decoder Enabled (Checked)
69
Figure 70: Advanced PCMFM Settings Window
69
Modulation Scaling - Track
70
Figure 71: Advanced PCMFM Settings Window, Modulation Index Scaling Mode Menu
70
Figure 72: Advanced PCMFM Settings Menu, Modulation Scaling - Track
70
Modulation Scaling - Hold
71
Figure 73: Monitor Screen, Mod Scaling Set to Track
71
Figure 74: Advanced PCMFM Settings Menu, Modulation Scaling - Hold
71
Modulation Scaling - off
72
Figure 75: Monitor Screen, Mod Scaling Set to Hold
72
Figure 76: Advanced PCMFM Settings Menu, Modulation Scaling - off
72
Figure 77: Monitor Screen, Mod Scaling Set to off
72
Modulation Scaling - Acquire
73
Modulation Persistence
73
Figure 78: Advanced PCMFM Settings Menu, Modulation Scaling - Acquire
73
Figure 79: Monitor Screen, Mod Scaling Set to Acquire
73
Mod Scale Index
74
Figure 80: Advanced PCMFM Settings Window, Modulation Persistence Not Checked
74
Phase Noise Compensation
75
Figure 81: Advanced PCMFM Settings Window, Modulation Scale Index Current Value, Read Only
75
Figure 82: Mod Index Scaling Mode/Hold, Modulation Scale Index with Edit Field
75
Figure 83: Advanced PCMFM Settings Window, Phase Noise Compensation Drop down Menu
75
System Settings
76
Antenna Controls
76
Figure 84: System Settings Window
76
Hypertrack
77
Figure 85: System Settings, Antenna Controls
77
AGC Polarity
78
AGC Scale
78
Figure 86: Antenna Controls Window, Hypertrack Selection
78
Figure 87: Antenna Controls Window, AGC Polarity Selection
78
Figure 88: Antenna Controls Window, AGC Scale Selection
78
AGC Time Constant
79
AGC Freeze
79
Figure 89: Antenna Controls Window, AGC Time Constant Selection
79
Figure 90: Antenna Controls Window, AGC Freeze Selection
79
AGC Zero Mode
80
AGC Compensate
80
AM Bandwidth
80
AM Polarity
80
Figure 91: Antenna Controls Window, AGC Zero Hold Drop down Menu
80
AM Scale
81
Downconvert Antenna
81
Figure 92: Antenna Controls Window, am Polarity Drop down Menu Selections
81
Figure 93: Antenna Controls Window, D/C Antenna Selection Checked
81
Figure 94: Output Controls Window
82
Figure 95: Output Controls, Clock/Data Output Channel a
82
Figure 96: Output Controls, Clock/Data Output Channel B
83
Figure 97: System Settings, Test Utilities
84
Figure 98: Test Utilities, Noise Generator-Test Noise Drop down Menu
84
Figure 99: Test Utilities, Noise Generator-Noise Level Selection
85
Figure 100: Test Utilities, Data Generator
85
Figure 101: Data Generator, Test Data Drop down Menu
85
Figure 102: Data Generator, Data Rate Selection
86
Figure 103: Data Generator, Pattern Selection
86
Figure 104: Data Generator, Inversion Drop down Menu
86
Figure 105: Data Generator, Randomization Drop down Menu
87
Figure 106: Test Utilities, BERT
87
Figure 107: BERT, BERT Measurement Drop down Menu
88
Figure 108: BERT, Restart BERT Button
88
Figure 109: BERT, Pattern Drop down Menu
89
Figure 110: BERT, Type Drop down Menu
89
Figure 111: BERT-Time, Bit, and Error Limit Selections
89
Figure 112: BERT, Gating Drop down Menu
90
Figure 113: BERT, Restart on Resync Drop down Menu
90
Figure 114: Test Utilities, BERT Status
90
Figure 115: Test Utilities, Status During BER Test
91
Figure 116: Advanced Buttons, Zero AGC Button, Separate Channels or Combiner Active
92
Figure 117: Monitor Screen, Signal Strength Grey - AGC Not Zero
92
Figure 118: Monitor Screen, Signal Strength Not Grey - AGC Zero Value Displayed
93
Figure 119: Signal Graph and Signal Indicators Windows, Zero AGC RSSI Display "Relative
94
Figure 120: Advanced Buttons, Reset to Factory Defaults Button
94
Figure 121: Advanced Buttons, Shutdown Hardware Button
95
Figure 122: Advanced Buttons, Reboot System Button
95
Figure 123: Advanced Buttons, Save Receiver Settings Button
96
Figure 124: Presets Option on Tool Bar
96
Figure 125: Presets Screen
96
Figure 126: Presets Screen, Closeup of Left Side
97
Figure 127: Presets Screen, Closeup of Right Side
97
Figure 128: Preset: View or Modify Preset Screen
98
Figure 129: Preset: View or Modify Preset Screen, Preset Name and Description Fields
98
Figure 130: Preset: View or Modify Preset Screen, Information Successfully Saved Message
99
Figure 131: Saved Presets Screen with New Preset Added
100
Figure 132: Preset: View or Modify Preset Screen, Preset Name Set to Default
100
Figure 133: Presets Option on Tool Bar
101
Figure 134: Presets Screen
101
Figure 135: about Option on Tool Bar
101
Figure 136: System Information Screen
102
Figure 137: System Information Screen, Additional Information
102
Figure 138: Browser Interface, about
103
Figure 139: About, System Version, Firmware Update Link
103
Figure 140: Firmware Update, Procedure and Notes
104
Figure 141: Firmware Update, Upload Status
105
Figure 142: Firmware Update, File Selected-Ready to Update
106
Figure 143: Firmware Update in Progress, Status
106
Figure 144: Firmware Update Complete
107
Figure 145: about Screen, System Information
108
Figure 146: Firmware Update Failed Information Screen
108
Figure 147: System Information Screen, Modify Network Settings Button
109
Figure 148: Network Settings Page
109
Figure 149: System Information Screen, Monitor Page Default Update Rate Field
110
Figure 150: Browser Interface Footer Tool Bar
110
Figure 151: Help Screen
111
Figure 152: Page Access Management Screen
111
Figure 153: Page Access Error Message
112
Figure 154: Export Configuration Screen
112
Figure 155: Import Configuration Screen
113
Figure 156: Import Configuration Selection Window
114
Table 6: RDMS BER Specifications
115
Figure 157: BER Performance for Tier 0, I, and II
116
Figure 158: Synchronization Time at Various Signal-To-Noise Ratios
117
Table 7: Band Configuration Codes
118
Figure 159: 70 Mhz if Module in 2" X 3" Chassis
120
Figure 160: 70 Mhz if Module in 2" X 3" Chassis SAW Filter Responses, Narrow Group (10 Mhz Span)
121
Figure 161: SAW Filter Responses, Wide Group (Plotted on 100 Mhz Span)
122
Figure 162: Optional SAW Filter Responses for 70 Khz to 6 Mhz
123
Figure 163: Optional SAW Filter Responses for 14 Mhz and 28 Mhz
124
Table 8: Recommended AM/AGC Settings
129
Figure 164: Ideal PCM/FM Phase Tree (H = 0.7)
131
Figure 165: Phase Trajectory Never Forgets
132
Figure 166: Trellis Detection Gain with Zero to Minimum Phase Noise
132
Figure 167: Trellis Detection Gain with Significant to Severe Phase Noise
133
Figure 168: "Clean" Eye Pattern
134
Figure 169: Frame Format with SFIC Insertion Enabled
135
Table 9: PCM/FM Factory Reset Values
137
Table 10: SOQPSK Factory Reset Values
138
Table 11: Multi-H CPM Factory Reset Values
139
Table 12: QPSK Factory Reset Values
140
Table 13: Multi-H CPM Factory Reset Values
141
Figure 170: Firefox Options Interface
142
Figure 171: Firefox Certificate Manager
143
Figure 172: Firefox Downloading Certificate Window
143
Figure 173: Firefox Certificate Viewer-Quasonix Root CA
144
Edge, Internet Explorer, and Chrome
145
Figure 174: Firefox Certificate Manager with Quasonix Root CA Added
145
Figure 175: Internet Properties, Content Tab
146
Figure 176: Certificates Screen
147
Figure 177: Windows Certificate Import Wizard
147
Figure 178: Windows Certificate Import Wizard-Browse
148
Figure 179: Windows Certificate Import Wizard-Choose Certificate Store
149
Figure 180: Certificates, Quasonix Certificate Imported
150
Appendix F - Acronym List
151
Advertisement
Advertisement
Related Products
Quasonix Compact RDMS
Quasonix QSX-RDMS-3RCD-Q0-1110-00-EQ
Quasonix Categories
Receiver
Transmitter
Data Loggers
Recording Equipment
Antenna
More Quasonix Manuals
Login
Sign In
OR
Sign in with Facebook
Sign in with Google
Upload manual
Upload from disk
Upload from URL