Sign In
Upload
Manuals
Brands
QUANTA Manuals
Switch
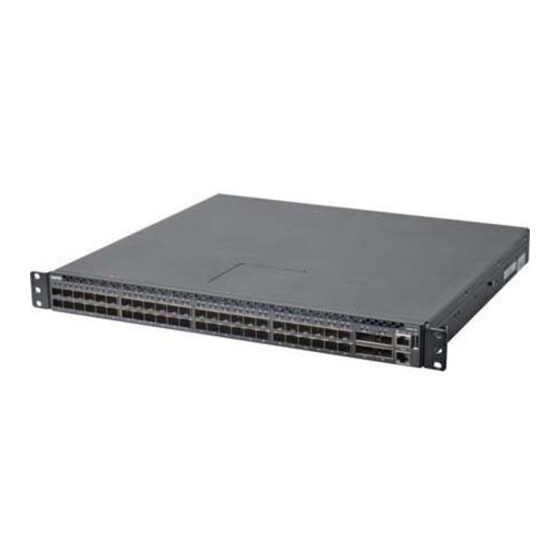
QuantaMesh T3048-LY2R
User Manuals: QUANTA QuantaMesh T3048-LY2R Switch
Manuals and User Guides for QUANTA QuantaMesh T3048-LY2R Switch. We have
1
QUANTA QuantaMesh T3048-LY2R Switch manual available for free PDF download: Installation Manual
QUANTA QuantaMesh T3048-LY2R Installation Manual (44 pages)
Layer 2/3 Managed 10G/40G Switch
Brand:
QUANTA
| Category:
Switch
| Size: 5 MB
Table of Contents
Table of Contents
2
Chapter 1: Safety and Regulatory Information
6
Copyright
7
About the Manual
7
Intended Application Uses
7
Safety Information
7
Switch Safety Information
7
Table 1-1: Manual Conventions Icon
7
Installation Assembly Safety Instructions
9
Site Selection
9
Equipment Handling Practices
10
Power and Electrical Warnings
10
Power Cord Warnings
11
System Access Warnings
11
Rack Mount Warnings
12
Other Hazards
13
Regulatory and Compliance Information
14
Electromagnetic Compatibility Notices
14
Product Regulatory Compliance Markings
16
Table 1-2: Product Regulatory Compliance Markings
16
Chapter 2: Introduction
17
Front Panel
18
LED Description
18
Figure 2-1: Front Panel View
18
Figure 2-2: SFP+ and QSFP+ Port Leds
18
Table 2-1: SFP+ and QSFP+ Port Leds
18
Figure 2-3: Console and Management Port Leds
19
Table 2-2: Console and Management Port Leds
19
Rear Panel
20
Package Contents
20
Figure 2-4: Rear Panel View
20
Table 2-3: Power Supply and Fan Speed Leds
20
Chapter 3: Hardware Installation
21
Unpack the Hardware
22
Install the Switch
22
Select the Location
22
Install the Switch
23
Figure 3-1: Install Switch on Rack (Without Rail)
23
Figure 3-2: Holes Alignment
23
Figure 3-3: Secure Position
23
Figure 3-4: Pull out Rack Rail
24
Figure 3-5: Install Switch on Rail
24
Connect to Power
25
Check the Installation
25
Connect Equipment
25
SFP+ Port
25
Figure 3-6: SFP+ Port Numbering
25
QSFP+ Port
26
Figure 3-7: Connect SFP+ Module
26
Figure 3-8: QSFP+ Port Numbering
26
Connect to Console Port
27
Figure 3-9: Connect QSFP+ Module
27
Connect to Management Port
28
Figure 3-10: Connect to Console Port
28
Figure 3-11: Connect to Management Port
28
Connect to USB Port
29
Figure 3-12: Connect to USB Port
29
Chapter 4: Initial Configuration
30
Initial Configuration Process
31
Configure The Ip Address
31
Set IP Address Manually
31
Figure 4-1: Boot up Console Screen
31
Obtain IP Address by DHCP
32
Figure 4-2: General Mode CLI Command List Screen
32
Figure 4-3: Set Service Port IP Screen
32
Manage the Switch
33
CLI Management
33
SNMP Management
33
Web Management
34
Figure 4-4: Address Bar
34
Figure 4-5: Login Screen
34
Figure 4-6: the Web Browser Utility Screen
35
Table 4-1: Web Browser Utility Screen
35
Upgrade the Firmware
36
Upgrade the Firmware Image File
36
Figure 4-7: Set Service Port IP Screen
36
Figure 4-8: Example of TFTP Server Screen
37
Figure 4-9: Delete Image Screen Sample
37
Figure 4-10: Update Image Screen Sample
37
Figure 4-11: Set Boot Image Success Screen Sample
37
Upgrade Kernel, Uboot and Rootfs
38
Figure 4-12: Check Version Screen Sample
38
Figure 4-13: Set Service Port IP Screen
38
Figure 4-14: Example of TFTP Server Screen
39
Figure 4-16: Copy Kernel Image Screen Sample
39
Chapter 5: Troubleshooting
40
Troubleshooting
41
Diagnostic Switch Indicator
41
Power and Cooling Problems
41
Table 5-1: Troubleshooting Tips
41
Installation
42
In-Band Access
42
Replace the Power Supply Unit
42
Figure 5-1: Access PSU Info on Web Utility
42
Figure 5-2: Remove Power Supply Unit
43
Remove the Power Supply Unit
43
Replace the Power Supply Unit
43
Replace the Hot-Swappable Fan Module
44
Remove the Fan Module
44
Replace the Fan Module
44
Customer Support
44
Figure 5-3: Remove Hot-Swappable Fan Module
44
Advertisement
Advertisement
Related Products
QUANTA T3048-LY2
QUANTA LB4M
QUANTA Categories
Server
Switch
Motherboard
Headphone
Laptop
More QUANTA Manuals
Login
Sign In
OR
Sign in with Facebook
Sign in with Google
Upload manual
Upload from disk
Upload from URL