Sign In
Upload
Manuals
Brands
Promise Technology Manuals
Computer Hardware
SuperTrak66 Pro 66 Pro
Promise Technology SuperTrak66 Pro 66 Pro Manuals
Manuals and User Guides for Promise Technology SuperTrak66 Pro 66 Pro. We have
1
Promise Technology SuperTrak66 Pro 66 Pro manual available for free PDF download: User Manual
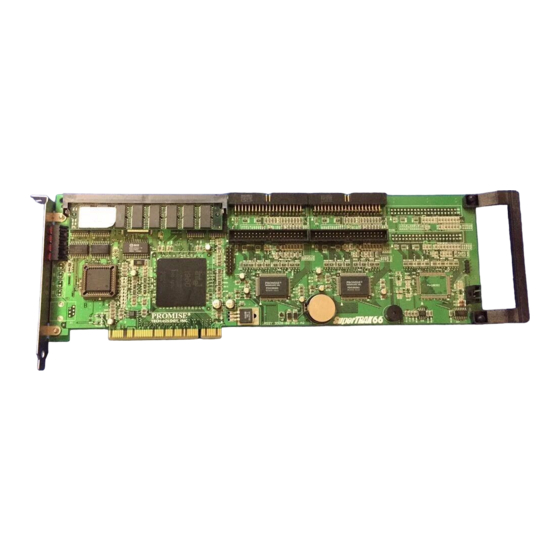
Promise Technology SuperTrak66 Pro 66 Pro User Manual (159 pages)
Promise Technology SuperTrak66 Pro User's Manual
Brand:
Promise Technology
| Category:
Computer Hardware
| Size: 1.56 MB
Table of Contents
Table of Contents
3
Introduction
12
Promise Technology, Inc
12
What Is Supertrak66
12
Key Features
13
System Requirements
14
Operating System Support
14
Getting Started
16
Unpacking Supertrak66
16
Supertrak66 Controller Card
17
Cables
17
Quick Installation Checklist
18
Hardware Installation
18
Software Installation
18
Appendix H
19
Figure 2: Typical Controller Card Installation
19
Appendix G
19
Appendix F
19
Appendix D
19
Appendix E
19
Appendix C
19
Appendix B
19
Appendix A
19
Hardware Installation
19
Software Installation
20
BIOS Utility
20
Network Connections
20
Driver Installation for Existing Windows NT 4.0 System
22
Figure 3: Driver Installed Screen in Existing NT
22
Driver Installation During New Install of Windows NT 4.0
23
Figure 4: Driver Installed Screen in New NT
23
Supercheck Installation
24
Superbuild
26
Setup Task Quick Reference
26
Setup Checklist
26
Common Tasks
26
Entering the BIOS Superbuild Utility
27
Creating a Disk Array from the Auto Setup Screen
27
Creating an Array from the View / Define Array Screen
27
Deleting an Array from the Delete Array Screen
27
Setting the Halt on Error Option
27
3.2 Supertrak BIOS Reference
28
Figure 5: Supertrak66 BIOS Startup
28
Main Menu
29
Figure 6: Superbuild Array Utility Main Menu
29
3.3 Auto Setup
30
Auto Setup Options Menu
30
Figure 7: Auto Setup Screen
30
Auto Setup Configuration
31
3.4 View Drive Assignments
32
Figure 8: View Drive Assignments Screen
32
3.5 View / Define Array
33
Figure 9: Define Array Menu Screen
33
Define Array Definition Menu
34
Figure 10: Define Array Definition Menu Screen
34
Creating a RAID 0 Array
35
Creating a RAID 1 Array
35
Figure 11: Two-Drive Mirroring Dialogue Window
36
Figure 12: Source Disk Window for Mirroring Existing Data
36
Creating a RAID 3 Array
37
Creating a RAID 5 Array
38
Creating a Spanning Array
38
Hot" Spare Drives
39
Setting a Disk Array as Bootable
39
Disk Array Recognition Order
40
Saved Disk Array Information
40
3.6 Delete Array
40
Figure 13: Assigning Bootable Array
40
3.7 Controller Configuration
41
Figure 14: Delete Array Menu
41
Figure 15: Delete Array Dialogue Box
41
Figure 16: Controller Configuration Screen
42
Supercheck™ Setup
43
Figure 17: Typical Supercheck Component Installation
43
4.1 Supercheck Installation
45
Installation Scenarios
45
Common Component Installation
47
Figure 18: Supercheck Component Installation Menu
47
Figure 19: "Choose Destination Location" Window
48
Figure 20: "Select Program Folder" Window
49
Figure 21: "Start Copying Files" Window
50
Figure 22: "Setup Needs the Next Disk" Pop-Up Window
51
Supercheck Administration
52
Creating Message Servers & Agents
52
Adding/Deleting New Users
52
Setting up a New Array
52
Array Administration
53
Setting up Email Notification
53
Identifying Problems
54
4.3 Supercheck Quick Reference
55
To Create a New Message Server
55
Creating a New User
55
Deleting an Existing User
56
Accessing Message Agent
56
Creating a New Array
56
Deleting an Existing Array
57
Setting up E-Mail Alert Notification
57
Adding an User to an Email Receiver List
57
Removing an User from an Email Receiver List
58
Adding/Removing Events To/From Email Alert Notification
58
Using Supercheck
59
5.1 Main Window
59
Figure 23: Supercheck Utility Main Window
59
Using Tree View
60
Figure 24: Using Tree View
60
Using Object View
62
Using Information View
62
Figure 25: Using Object View
62
Figure 26: Using Information View
62
Using Status Bar
63
5.2 Supercheck Pull-Down Menu/Toolbar
63
Using Pull-Down Menu Items
63
Figure 27: Using Status Bar
63
Figure 28: Array Pull-Down Menu
63
Using View Pull-Down Menu
64
Using Connection Pull-Down Menu
64
Figure 29: Using View Pull-Down Menu
64
Figure 30: Using Connection Pull-Down Menu
64
Using Preference Pull-Down Menu
65
Using Help Pull-Down Menu
65
Figure 31: Using Preference Pull-Down Menu
65
Figure 32: Using Help Pull-Down Menu
65
Using Help Topics
66
Figure 33: Using Help Contents Window
66
Figure 34: Using Help Find Window
67
Using Supercheck Toolbar
68
Figure 35: Toolbar Icons
68
5.3 Console Functions
70
Creating a New Message Server
70
Figure 36: Creating New Message Server Pull-Downs
70
Viewing Console Object Icons
71
Figure 37: Labeling New Message Server
71
Figure 38: Console Object View
71
5.4 Message Server Functions
72
Deleting a Message Server
72
Disconnecting a Message Server
72
Figure 39: Deleting Message Server Pull-Down
72
Connecting the Message Server
73
Figure 40: Disconnecting Message Server Pull-Down
73
Switching to Another Server
74
Figure 41: Connecting Message Server Pull-Down
74
Viewing Message Server Object Icons
75
Viewing Message Server Information
75
Figure 42: Message Server Information View
75
5.5 Message Agent Functions
77
Accessing Message Agent
77
Creating a New User
77
Figure 43: Setting Password Screen
77
Figure 44: Creating New User Screen
78
Setting up E-Mail Alert Notification
79
Adding an User to an Email Receiver List
79
Figure 45: Setting E-Mail Alert Box
79
Figure 46: Setting Email ID Window
79
Removing an User from an Email Receiver List
80
Adding/Removing Events To/From Email Alert Notification
80
Figure 47: Setting Email Address Window
80
Figure 48: Removing User from E-Mail Alert
80
Figure 49: Adding/Removing Events for Email Alert
81
Figure 50: Scheduling Array Synchronization
81
Message Agent Information View
82
Figure 51: Message Agent Console Icons
82
Figure 52: Message Agent Information View
83
Figure 53: Alert Events & Schedule Synchronization Screen
85
5.6 User Management Functions
86
Creating a New User
86
Deleting an Existing User
86
Figure 54: Creating New User Pull-Down
86
Changing Passwords
87
Assigning User Rights
87
Viewing User/Admin Object Icons
87
Figure 55: Deleting User Menu
87
User Information View
88
Figure 56: User Icons in Object View
88
Figure 57: User Information View
89
I 2 O RAID Functions
90
Viewing I O RAID Object Icons
90
Information View
90
Figure 58: I 2 O RAID Object View
90
Figure 59: I 2 O RAID Information View
90
5.8 Iopx Functions
91
Creating a New Array
91
Figure 60: Creating New Array Pull-Down
91
Figure 61: Labeling New Array Window
91
Reading/Clearing Events from Supertrak Memory Buffer
92
Figure 62: Read/Clear Events Pull-Down
92
Using the Event Viewer
93
Changing Flush Memory Timing
93
Figure 63: Events Viewer Screen
93
Changing Dirty Threshold Flush Start Setting
94
Changing Dirty Threshold Flush Stop Setting
94
Viewing Iopx Object Icons
94
Figure 64: Iopx Object View Icons
94
Iopx Information View
95
Figure 65: Iopx Information View
95
5.9 Channel (Chx) Functions
97
Viewing Channel Object Icons
97
Figure 66: Channelx's Object View
97
5.10 Hard Drive Functions
98
Hard Drive Information View
98
Figure 67: Hard Drive Information View
98
5.11 Enclosure Functions
99
Enabling Rebuild/Synchronization Beeper
99
Viewing Enclosure Object Icons
99
Figure 68: Enclosure Object View
99
Enclosure Information View
100
Figure 69: Enclosure Information View
100
5.12 Array Functions
101
Deleting an Existing Array
101
Figure 70: Deleting Array Pop-Up Menu
101
Rebuilding an Array
102
Figure 71: Array Pull-Down Menu
102
Using Rebuild Wizard
103
Figure 72: Rebuild Wizard Step 1
103
Figure 73: Rebuild Wizard Step 2
104
Figure 74: Array Rebuild Progress Bar
104
To Stop Rebuild
105
Array Synchronization
105
Figure 75: Stop Rebuild Pull-Down
105
Halting Synchronization
106
Figure 76: Array Synchronization Pull-Down
106
Figure 77: Halt Synchronization Pull-Down
106
Turning on Read Cache
107
Turning off Caching
107
Turning On/Off Write Back Cache
107
Viewing Cache Memory Statistics
108
Figure 78: Array Object View
108
Information View
109
Figure 79: Array Information View
109
RAID Setup
113
6.1 Application Scenarios
114
High Performance Desktop Pcs Working with Large Files
114
Corporate Desktop PC Requiring Data Protection
114
Windows NT File Server
114
MID-Sized Windows NT Application Server
115
Largest Storage Capacity Required
116
RAID Implementation
116
Striping (RAID 0)
116
Mirroring (RAID 1)
117
Striping/Mirroring (RAID 0+1)
117
Data Striping with Dedicated Parity Drive (RAID 3)
117
Block and Parity Striping (RAID 5)
118
Spanning
118
RAID Management & Operation
119
Critical & Offline Arrays
119
Rebuilding/Synchronizing Fault Tolerant Arrays
119
Partitioning & Formatting Arrays
119
Configuration Ideas
120
Fault Tolerance
120
Hot Spare Drive(S)
120
Troubleshooting
121
Buzzer Alarms
121
LED Display Codes
122
Supertrak66 BIOS Error Messages
123
Installation & Runtime Problems
124
Introduction to Raid
125
Figure A1: RAID 0 Striping Interleaves Data Across Multiple Drives
126
Figure A2: RAID 1 Mirrors Identical Data to Two Drives
127
Figure A3: RAID 0+1 Striping and Mirroring of Two Drive Pairs
128
Figure A4: RAID 3 Multiple Drives Stripe Data W/ One Dedicated Parity Drive
130
Figure A5: RAID 5 Stripes All Drives with Data and Parity Info
131
Figure A6: Spanning Uses Full Capacity of Drives
132
Frequently Asked Questions
137
Drive Issues
138
Installation Issues
139
Contacting Technical Support
143
Limited Warranty
146
Returning Product for Repair
148
Glossary of Terms
150
Advertisement
Advertisement
Related Products
Promise Technology SuperSwap
Promise Technology FastTrak SX8300
Promise Technology FASTTRAK SX4300
Promise Technology SuperTrak SX6000
Promise Technology FastTrak S150 SX4
Promise Technology FastTrak SX4100
Promise Technology SATA300 TX4302
Promise Technology FastTrak S150 SX4000
Promise Technology SmartStor NAS
Promise Technology ultratrak SX8000
Promise Technology Categories
Storage
Computer Hardware
Network Storage Server
Controller
Disk array system
More Promise Technology Manuals
Login
Sign In
OR
Sign in with Facebook
Sign in with Google
Upload manual
Upload from disk
Upload from URL