Sign In
Upload
Manuals
Brands
Pioneer Manuals
Receiver
AVH-X7800BT
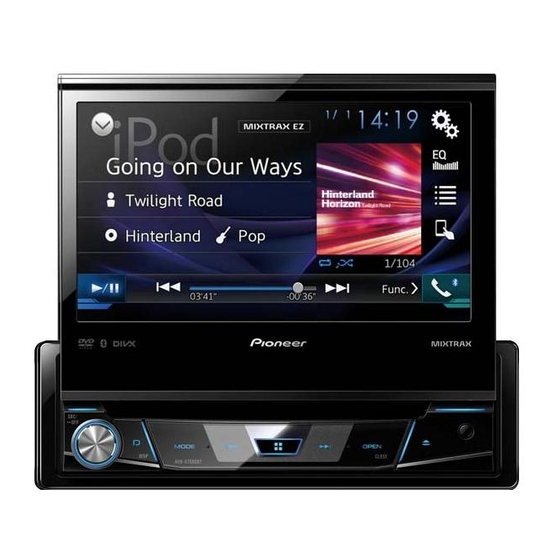
Pioneer AVH-X7800BT DVD Receiver Manuals
Manuals and User Guides for Pioneer AVH-X7800BT DVD Receiver. We have
3
Pioneer AVH-X7800BT DVD Receiver manuals available for free PDF download: Owner's Manual, Operation Manual, Installation Manual
Pioneer AVH-X7800BT Owner's Manual (204 pages)
Brand:
Pioneer
| Category:
Receiver
| Size: 57.46 MB
Table of Contents
English
2
Table of Contents
2
Precaution
4
Information to User
4
Important Safety Information
5
License, Warranty Disclaimer & Limitation of Liability
5
Parking Brake Interlock
5
Failure to Operate
6
Handling the USB Connector
6
Notes on Internal Memory
6
Protecting the LCD Panel and Screen
6
Rear View Camera
6
To Avoid Battery Exhaustion
6
Visit Our Website
6
When Using a Display Connected to Rear Monitor Output
6
About this Manual
7
Protecting Your Unit from Theft
7
Use and Care of the Remote Control
7
Basic Operation
8
Checking Part Names and Functions
8
Remote Control
8
Adjusting the LCD Panel Slide Position
9
Notes on Using the LCD Panel
9
Opening and Closing the LCD Panel
9
Turning the LCD Panel Horizontally
9
Adjusting the LCD Panel Angle
10
Inserting/Ejecting/Connecting Media
10
On First-Time Startup
10
Inserting and Ejecting a Disc
10
Inserting a Disc
10
How to Use the Screens
12
Changing the Display Order of Sources
13
Displaying the AV Operation Screen
13
Selecting a Source
13
Supported AV Source
13
Using the Touch Panel
13
Registration and
14
Connecting a Registered Bluetooth Device Manually
14
Operating the Time Bar
14
Device
14
Displaying the "Bluetooth" Screen
14
Operating List Screens
14
Registering Your Bluetooth Devices
14
Connecting Registered Bluetooth Device Manually
14
Clearing the Bluetooth Memory
15
Displaying the Bluetooth Software Version
15
Displaying the Device Information
15
Entering the PIN Code for Bluetooth Wireless Connection
15
Switching the Connected Bluetooth Device
15
Hands-Free Phoning
16
Switching Visibility
15
Updating Bluetooth Software
15
Displaying the Phone Menu Screen
16
Calling a Number in the Phone Book
16
Dialing from the History
16
Making a Phone Call
16
Direct Dialing
16
Using the Preset Dial Lists
16
Switching the Ring Tone
17
Changing the Phone Settings
17
Minimizing the Dial Confirmation Screen
17
Receiving a Phone Call
17
Setting Phone Book Auto Synchronization
17
Using the Voice Recognition Function (for Iphone)
17
Setting the Private Mode
17
Notes for Hands-Free Phoning
18
Setup for Ipod / Iphone or Smartphone
18
Setting the Device Connection Method
18
The Basic Flow of Ipod / Iphone or Smartphone Setup
18
Android ™ Device Compatibility
19
Ipod Compatibility
19
Information on the Connections and Functions for each Device
20
Radio
21
Starting Procedure
21
Storing the Strongest Broadcast Frequencies
21
Tuning into Strong Frequencies
21
Disc
22
Operating the DVD Menu
23
Operating the DVD Menu Using Touch Panel Keys
23
Compressed Files
24
Searching for the Part You Want to Play
23
Selecting Files from the File Name List
23
Starting Procedure
23
Switching the Media File Type
23
Switching the Subtitle/Audio Language
23
Audio File Operations
26
Operations Common to All File Types
26
Starting Procedure (for Disc)
26
Starting Procedure (for USB)
26
Still Image File Operations
27
Ipod
27
Connecting Your Ipod
28
Selecting Song or Video Sources from the Playlist Screen
28
Starting Procedure
28
Selecting a Song from the List Related to the Song Currently Playing (Link Search)
29
Appradioone
29
Using Appradioone
29
Using this Product's Ipod Function from Your Ipod
29
Using the Audio MIX Function
30
Pandora
30
Adding a Station
31
Pandora Operations
31
Selecting a Pandora Station from the List
31
Starting Procedure
31
Storing the Preset Stations
32
Spotify
32
Starting Procedure
33
Using Spotify with Your Pioneer Car Audio/Video
33
Selecting a Track or Station from the List
34
Bluetooth Audio Player
34
Starting Procedure
34
Selecting Files from the File Name List
35
AUX Source
35
Setting the Video Signal
35
AV Input
36
Starting Procedure
35
MIXTRAX EZ Operation
36
MIXTRAX Operation
36
Setting the Video Signal
36
Mixtrax
36
Starting Procedure
36
Displaying the "MIXTRAX Settings" Screen
37
Setting Bluetooth Audio Source Activation
37
Setting Spotify Source Activation
37
Setting the Ever Scroll
37
Setting the Flash Pattern
37
System Settings
37
Displaying the "System" Setting Screen
37
Adjusting the Response Positions of the Touch Panel (Touch Panel Calibration)
38
Selecting the System Language
38
Setting the Auto Audio MIX Function
38
Setting the Beep Tone
38
Setting the Demo Mode
38
Setting the Keyboard Language with the Application for Iphone
38
Setting the Rear View Camera
38
Adjusting the Picture
39
Setting the Dimmer
39
Displaying the Firmware Version
40
Displaying the Open Source Licenses
40
Switching Sound Muting/Attenuation
40
Updating Firmware
40
Audio Adjustments
40
Displaying the "Audio" Setting Screen
40
Using Fader/Balance Adjustment
40
Adjusting Loudness
41
Adjusting Source Levels
41
Adjusting the Cutoff Frequency Value
41
Selecting the Listening Position
41
Setting the Subwoofer Output
41
Switching the Rear Speaker Output
41
Using BASS Boost
41
Using the Auto Level Control
41
Adjusting the Speaker Output Levels Finely
42
Adjusting the Time Alignment
42
Switching the Time Alignment Preset
42
Using the Equalizer
42
Adjusting the Equalizer Curve Automatically (Auto EQ)
43
Performing Auto Eq
43
Loading the Sound Settings
44
Theme Menu
44
Saving the Sound Settings
44
Selecting the Background Display
44
Setting the Illumination Color
44
Selecting the Clock Image
45
Setting up the Video Player
45
Selecting the Theme Color
45
Setting the Angle Icon Display
45
Setting the Aspect Ratio
45
Setting the Top-Priority Languages
45
Automatic Playback of Dvds
46
Displaying Your DIVX VOD Deregistration Code
46
Displaying Your DIVX VOD Registration Code
46
Setting Parental Lock
46
Setting the Video Signal for the Rear View Camera
46
Favorite Menu
47
Creating a Shortcut
47
Removing a Shortcut
47
Common Operations
47
Selecting a Shortcut
47
Changing the Wide Screen Mode
48
Other Functions
49
Setting the "Sound Retriever" Function
48
Setting the Time and Date
48
Storing Song Information to an Ipod (Itunes Tagging)
48
Before Installing this Product
49
Precautions
49
Precautions before Connecting the System
49
Restoring this Product to the Default Settings
49
Connection
49
To Prevent Damage
49
Notice for the Blue/White Lead
50
Power Cord
50
This Product
50
Power Amp (Sold Separately)
51
Speaker Leads
51
Android Device
52
Camera
52
Iphone and Smartphone
52
Iphone with 30-Pin Connector
52
Iphone with Lightning Connector
52
External Video Component and the Display
53
Installation
54
Before Installing
54
DIN Front/Rear-Mount
54
Installation Notes
54
Precautions before Installation
54
Installing the Microphone
55
Mounting on the Sun Visor
55
Adjusting the Microphone Angle
56
Appendix
56
Installation on the Steering Column
56
Troubleshooting
56
Error Messages
57
Usb Storage Device
58
Handling and Care of Discs
59
Playable Discs
59
Detailed Information for Playable Media
60
Media Compatibility Chart
61
Bluetooth
62
Aac
63
Android
63
Detailed Information Regarding Connected Ipod Devices
63
DIVX
63
Flac
63
Wma
63
Notice Regarding DVD-Video Viewing
64
Notice Regarding MP3 File Usage
64
Notice Regarding Video Viewing
64
Pandora
64
Spotify
64
Using App-Based Connected Content
64
Using the LCD Screen Correctly
64
Specifications
65
Français
67
Précautions
69
Importantes Informations de Sécurité
69
Informations Pour L'utilisateur
69
Licence, Exclusion de Garantie Et Limitation de Responsabilité
69
Caméra de Recul
70
Interverrouillage du Frein de Stationnement
70
Lors de L'utilisation D'un Afficheur Connecté À Rear Monitor Output
70
Pour Éviter L'épuisement de la Batterie
70
Manipuler Le Connecteur USB
71
Non-Fonctionnement
71
Protéger L'appareil Contre Le Vol
71
Insertion de la Pile
72
Protéger Le Panneau ACL Et L'écran
71
Remarques Sur la Mémoire Interne
71
Visitez Notre Site Web
71
À Propos de Ce Mode D'emploi
71
Utilisation Et Entretien de la Télécommande
72
Utilisation de Base
73
Télécommande
73
Vérifier Les Noms Et Fonctions des Pièces
73
Mettre Le Panneau ACL À L'horizontale
74
Ouvrir Et Fermer Le Panneau ACL
74
Remarques Sur L'utilisation du Panneau ACL
74
Régler la Position de Glissement du Panneau ACL
74
Insérer/Éjecter/Connecter un Support
75
Lors du Premier Démarrage
75
Régler L'angle du Panneau ACL
75
Comment Utiliser Les Écrans
77
Afficher L'écran de Commande AV
78
Changer L'ordre D'affichage des Sources
78
Sources AV Prises en Charge
78
Sélectionner Une Source
78
Utiliser Le Panneau Tactile
78
Enregistrer Et Connecter un Appareil Bluetooth
79
Afficher L'écran « Bluetooth
79
Connecter Manuellement un Appareil Bluetooth Enregistré
79
Enregistrer des Appareils Bluetooth
79
Afficher la Version du Logiciel Bluetooth
80
Afficher Les Informations D'appareil
80
Effacer la Mémoire Bluetooth
80
Mettre À Jour Le Logiciel Bluetooth
80
Permuter entre Les Appareils Bluetooth Connectés
80
Téléphonie Mains Libres
81
Permuter la Visibilité
80
Saisir Le Code PIN Pour la Connexion Sans Fil Bluetooth
80
Afficher L'écran de Menu de Téléphone
81
Faire un Appel Téléphonique
81
Modifier Les Réglages de Téléphone
82
Recevoir un Appel Téléphonique
82
Réduire L'écran de Confirmation du Numéro Composé
82
Utiliser la Fonction de Reconnaissance Vocale (Pour Iphone)
82
Procédure de Base Pour la Configuration D'un Ipod/Iphone Ou D'un Téléphone Intelligent
83
Remarques Sur la Téléphonie Mains Libres
83
C Onfiguration Pour Ipod/ Iphone Ou Téléphone Intelligent
83
Régler la Méthode de Connexion de L'appareil
83
Régler la Synchronisation Automatique du Bottin Téléphonique
83
Compatibilité Avec Les Appareils Android
84
Compatibilité Ipod
84
Information Sur Les Connexions Et Les Fonctions Pour Chaque Appareil
85
Radio
86
Mettre en Mémoire Les Fréquences de Radiodiffusion Les Plus Puissantes
86
Procédure de Démarrage
86
Syntonisation des Fréquences Puissantes
86
Disque
87
Permuter la Langue des Sous-Titres Ou la Langue Audio
88
Permuter Le Type de Fichier Multimédia
88
Procédure de Démarrage
88
Rechercher la Partie Désirée Pour la Lecture
88
Sélectionner Les Fichiers Dans la Liste des Noms de Fichier
88
Utiliser Le Menu DVD
88
Utiliser Le Menu DVD À L'aide des Touches de Panneau Tactile
89
Fichiers Comprimés
89
Opérations Communes À Tous Les Types de Fichier
91
Procédure de Démarrage (Pour Disque)
91
Procédure de Démarrage (Pour USB)
91
Opérations Sur Fichier Audio
92
Opérations Sur Fichier D'image Fixe
92
Ipod
93
Connecter un Ipod
94
Procédure de Démarrage
94
Sélectionner Les Morceaux Ou Les Sources VIDéo Dans L'écran de Liste de Lecture
94
Sélectionner un Morceau À Partir de la Liste Liée Au Morceau en Cours de Lecture (Recherche de Liaison)
94
Appradioone
95
Utiliser la Fonction Ipod de Ce Produit Depuis L'ipod
94
Utiliser Appradioone
95
Utiliser la Fonction de Mélange Audio
96
Pandora
96
Ajouter Une Station
97
Commandes Pandora
97
Mettre en Mémoire Les Stations PréDéfinies
97
Spotify
98
Procédure de Démarrage
97
Sélectionner Une Station Pandora Dans la Liste
97
Procédure de Démarrage
99
Utiliser Spotify Avec Le Système Audio/VIDéo Pour Automobile de Pioneer
99
Procédure de Démarrage
100
Sélectionner Une Plage Ou Une Station Dans la Liste
100
Lecteur Audio Bluetooth
100
Procédure de Démarrage
101
Régler Le Signal VIDéo
101
Source AUX
101
Procédure de Démarrage
102
Régler Le Signal VIDéo
102
Entrée AV
102
Sélectionner Les Fichiers Dans la Liste des Noms de Fichier
101
Mixtrax
102
Utilisation de MIXTRAX
102
Utilisation de MIXTRAX EZ
102
Afficher L'écran de Réglage « Système
103
Afficher L'écran « Réglages MIXTRAX
103
Régler L'activation de la Source Audio Bluetooth
103
Régler L'activation de la Source Spotify
103
Régler Le Défilement Continu
103
Régler Le Motif de Clignotement
103
Réglages Système
103
Régler la Caméra de Recul
104
Régler la Tonalité du Bip
104
Régler Le Mode de Démonstration
104
Réglez la Langue du Clavier Avec L'application Pour Iphone
104
Sélectionner la Langue du Système
104
Utiliser la Fonction de Mélange Audio Automatique
104
Régler L'image
105
Régler Le Gradateur
105
Régler Les Positions de Réponse du Panneau
105
Tactile (Étalonnage du Panneau Tactile)
105
Afficher la Version du Micrologiciel
106
Afficher Les Licences de Logiciels Ouverts
106
Mettre À Jour Le Micrologiciel
106
Réglages Audio
107
Afficher L'écran de Réglage « Audio
107
Permuter la Coupure/Atténuation du Son
107
Régler la Sonie
107
Régler la Sortie du Caisson D'extrêmes Graves
107
Régler la Valeur de Fréquence de Coupure
107
Régler Les Niveaux de Source
107
Utiliser la Commande de Niveau Automatique
107
Utiliser Le Réglage de Gradateur/Balance
107
Permuter la Sortie de Haut-Parleur Arrière
108
Régler Finement Les Niveaux de Sortie des Haut-Parleurs
108
Régler L'alignement Temporel
108
Sélectionner la Position D'écoute
108
Utiliser L'amplification des Graves
108
Permuter Le Réglage PréDéfini D'alignement Temporel
109
Régler Automatiquement la Courbe D'égalisation (Auto EQ)
109
Utiliser L'égalisateur
109
Charger Les Réglages Sonores
110
Menu de Thème
111
Sauvegarder Les Réglages Sonores
110
Régler la Couleur D'illumination
111
Sélectionner L'affichage D'arrière-Plan
111
Régler L'affichage de L'ICône D'angle
112
Régler Le Rapport D'aspect
112
Régler Les Langues Prioritaires
112
Sélectionner L'image D'horloge
112
Configurer Le Lecteur VIDéo
112
Sélectionner la Couleur de Thème
112
Afficher Le Code D'annulation D'enregistrement DIVX VOD
113
Afficher Le Code D'enregistrement DIVX VOD
113
Lecture Automatique des DVD
113
Régler Le Verrouillage Parental
113
Créer un Raccourci
114
Retirer un Raccourci
114
Menu de Favoris
114
Sélectionner un Raccourci
114
Changer Le Mode Grand Écran
115
Opérations Communes
114
Régler Le Signal VIDéo Pour la Caméra de Recul
114
Autres Fonctions
116
Mettre en Mémoire Les Informations de Morceau Sur un Ipod (Marquage Itunes)
115
Régler L'heure Et la Date
115
Régler la Fonction « Sound Retriever
115
Avant D'installer Ce Produit
116
Précautions
116
Précautions À Prendre Avant de Connecter Le Système
116
Rétablir Les Réglages D'usine de Ce Produit
116
Connexion
116
Votre Nouveau Produit Et Ce Manuel
116
Ce Produit
117
Pour Éviter Les Dommages
117
Remarque Sur Le Fil Bleu/Blanc
117
Cordon D'alimentation
118
Fils de Haut-Parleurs
118
Amplificateur de Puissance (Vendu Séparément)
119
Iphone Avec Connecteur 30 Broches
119
Iphone Avec Connecteur Lightning
119
Iphone Et Téléphone Intelligent
119
Appareil Android
120
Caméra
120
Le Composant VIDéo Externe Et L'afficheur
120
Installation
121
Avant L'installation
121
Précautions À Prendre Avant L'installation
121
Remarques Sur L'installation
121
Dispositif de Montage Avant/Arrière DIN
122
Installation Sur la Colonne de Direction
123
Installer Le Microphone
123
Monter Le Pare-Soleil
123
Dépannage
124
Annexe
125
Régler L'angle du Microphone
124
Messages D'erreur
125
Manipulation Et Entretien des Disques
127
Dolby Digital
128
Disques Dont la Lecture Est Possible
128
Informations Détaillées Sur Les Supports Dont la Lecture Est Possible
128
Aac
131
Android
131
Bluetooth
131
DIVX
131
Flac
131
Informations Détaillées Sur Les Appareils Ipod Connectés
131
Wma
131
Avis Concernant Le Visionnement des DVD-VIDéo
132
Avis Concernant Le Visionnement VIDéo
132
Avis Sur L'utilisation des Fichiers MP3
132
App Store
132
Pandora
132
Spotify
132
Utiliser Le Contenu Connecté Pour Application
132
Spécifications
133
Español
135
Dispositivo Bluetooth
135
Precauciones
137
Utiliser Correctement L'écran ACL
133
Información Importante sobre Seguridad
137
Información para el Usuario
137
Licencia, Exclusión de Garantía y Limitación de Responsabilidad
137
Bloqueo Mediante el Freno de Mano
138
Cuando Utilice una Pantalla Conectada a Rear Monitor Output
138
Cámara de Visión Trasera
138
Fallas de Funcionamiento
138
Para Evitar la Descarga de la Batería
138
Uso del Conector USB
138
Visite Nuestro Sitio Web
138
Acerca de Este Manual
139
La Protección de Su Unidad contra Robo
139
Notas sobre la Memoria Interna
139
Protección del Panel y la Pantalla LCD
139
Revisión de Los Nombres y las Funciones de las Piezas
140
Uso y Cuidado del Control Remoto
140
Funcionamiento Básico
140
Apertura y Cierre del Panel LCD
141
Control Remoto
141
Notas sobre el Uso del Panel LCD
141
Ajuste de la Posición de Deslizamiento del Panel LCD
142
Ajuste del Ángulo del Panel LCD
142
Colocación Horizontal del Panel LCD
142
Al Arrancar por Primera Vez
143
Inserción/Expulsión/Conexión de Soportes
143
Cómo Utilizar las Pantallas
144
Cambio del Orden de Visualización de las Fuentes
145
Fuente AV Compatible
145
Selección de una Fuente
145
Uso del Panel Táctil
145
Registro y Conexión de Dispositivo Bluetooth
146
Visualización de la Pantalla de Operación AV
145
Registro de Sus Dispositivos Bluetooth
146
Visualización de la Pantalla "Bluetooth
146
Actualización del Software Bluetooth
147
Cambio de la Visibilidad
147
Cambio del Dispositivo Bluetooth Conectado
147
Telefonía Manos Libres
148
Conexión Manual de un Dispositivo Bluetooth Registrado
147
Eliminación del Contenido de la Memoria Bluetooth
147
Introducción del Código PIN para la Conexión Inalámbrica Bluetooth
147
Visualización de la Información del Dispositivo
147
Visualización de la Versión del Software Bluetooth
147
Hacer una Llamada Telefónica
148
Cambio del Tono de Llamada
149
Visualización de la Pantalla del Menú del Teléfono
148
Cambio de Los Ajustes Telefónicos
149
Minimizar la Pantalla de Confirmación de Marcado
149
Recepción de una Llamada Telefónica
149
Ajuste de la Sincronización Automática de la Agenda Telefónica
150
Notas sobre la Telefonía Manos Libres
150
Ajuste del Modo Privado
150
Configuración para Ipod/Iphone O Teléfono Inteligente
151
Uso de la Función de Reconocimiento de Voz (para Iphone)
150
Compatibilidad con Dispositivo Android
151
Compatibilidad con Ipod
151
Cómo Establecer el Método de Conexión del Dispositivo
151
El Flujo Básico de Configuración de Ipod/Iphone O Teléfono Inteligente
151
Información sobre las Conexiones y las Funciones para cada Dispositivo
152
Radio
153
Almacenamiento de las Frecuencias de Transmisión Más Potentes
153
Procedimiento de Inicio
153
Sintonización de las Frecuencias Más Potentes
153
Disco
154
Cambio del Tipo de Archivo Multimedia
155
Procedimiento de Inicio
155
Selección de Archivos desde la Lista de Nombres de Archivos
155
Búsqueda de la Parte que Usted Desea Reproducir
156
Cambio del Idioma de Los Subtítulos O el Audio
156
Control del Menú del DVD
156
Control del Menú del DVD Mediante las Teclas del Panel Táctil
156
Archivos Comprimidos
156
Procedimiento de Inicio (para el Disco)
158
Procedimiento de Inicio (para el Dispositivo USB)
158
Funcionamiento Común de todos Los Tipos de Archivos
159
Funcionamiento de Archivos de Audio
159
Funcionamiento de Los Archivos de IMágenes Estáticas
159
Ipod
160
Conexión de Su Ipod
161
Procedimiento de Inicio
161
Selección de Fuentes de Canciones O Video a Partir de la Pantalla de la Lista de Reproducción
161
Selección de una Canción a Partir de la Lista Relacionada con la Canción Reproducida en Ese Momento (Búsqueda de Vínculos)
161
Appradioone
162
Uso de la Función para Ipod de Este Producto desde Su Ipod
161
Uso de Appradioone
162
Uso de la Función de Mezcla de Audio
163
Pandora
163
Uso del Teclado
163
Funcionamiento de Pandora
164
Procedimiento de Inicio
164
Selección de una Emisora de Pandora a Partir de la Lista
164
Almacenamiento de las Emisoras Preestablecidas
165
Spotify
165
Añadir una Emisora
165
Usar Spotify con el Audio/Video para Vehículos de Pioneer
166
Procedimiento de Inicio
167
Selección de una Pista O una Emisora a Partir de la Lista
167
Reproductor de Audio Bluetooth
167
Ajuste de la Señal de Video
168
Fuente AUX
168
Ajuste de la Señal de Video
169
Entrada AV
169
Procedimiento de Inicio
168
Selección de Archivos desde la Lista de Nombres de Archivos
168
Mixtrax
169
Operación MIXTRAX
169
Operación MIXTRAX EZ
169
Procedimiento de Inicio
169
Ajuste de la Activación de la Fuente de Audio Bluetooth
170
Ajuste de la Activación de la Fuente Spotify
170
Ajuste del Desplazamiento Continuo
170
Ajuste del Patrón de Parpadeo
170
Ajustes del Sistema
170
Visualización de la Pantalla "Ajustes de MIXTRAX
170
Visualización de la Pantalla de Ajustes "Sistema
170
Ajuste de la Cámara de Visión Trasera
171
Ajuste de la Función de Mezcla Automática de Audio
171
Ajuste del Idioma del Teclado con la Aplicación para Iphone
171
Ajuste del Modo de Demostración
171
Ajuste del Tono de Pitido
171
Selección del Idioma del Sistema
171
Ajuste de la Atenuación
172
Ajuste de la Imagen
172
Ajuste de las Posiciones de Respuesta del Panel Táctil (Calibración del Panel Táctil)
172
Actualización del Firmware
173
Ajustes de Audio
174
Visualización de la Versión del Firmware
173
Visualización de las Licencias de Código Abierto
173
Ajuste de la Salida del Subwoofer
174
Ajuste de la Sonoridad
174
Ajuste de Los Niveles de la Fuente
174
Ajuste del Valor de Frecuencia de Corte
174
Cambio de la Supresión/Atenuación del Sonido
174
Uso del Ajuste de Desvanecimiento/Balance
174
Uso del Control Automático del Nivel
174
Visualización de la Pantalla de Ajustes "Audio
174
Ajuste del Alineamiento de Tiempo
175
Ajuste Preciso de Los Niveles de Salida de las Bocinas
175
Cambio de la Salida de la Bocina Trasera
175
Selección de la Posición de Escucha
175
Uso del Realce de BAJOS
175
Ajuste Automático de la Curva del Ecualizador (Auto EQ)
176
Cambio del Alineamiento de Tiempo Preestablecido
176
Uso del Ecualizador
176
Ajustes de Sonido Guardados
177
Carga de Los Ajustes de Sonido
177
Menú de Temas
178
Ajuste del Color de Iluminación
178
Selección de la Imagen de Reloj
178
Configuración del Reproductor de Video
179
Selección de la Visualización de Fondo
178
Selección del Color de Tema
178
Ajuste de la Relación de Aspecto
179
Ajuste de la Visualización del Icono de Ángulo
179
Ajuste de Los Idiomas de Mayor Prioridad
179
Ajuste del Bloqueo Paterno
179
Ajuste de la Señal de Video para la Cámara de Visión Trasera
180
Menú Favorito
181
Reproducción Automática de DVD
180
Visualización de Su Código de Cancelación de Registro DIVX VOD
180
Visualización de Su Código de Registro DIVX VOD
180
Ajuste de la Hora y la Fecha
181
Almacenamiento de Información de las Canciones en un Ipod (Itunes Tagging)
181
Creación de un Acceso Directo
181
Eliminación de un Acceso Directo
181
Operaciones Comunes
181
Selección de un Acceso Directo
181
Ajuste de la Función "Sound Retriever
182
Cambio del Modo de Pantalla Panorámica
182
Otras Funciones
182
Restablecimiento de Este Producto a Los Ajustes Predeterminados
182
Conexión
183
Antes de Instalar Este Producto
183
Para Evitar Daños
183
Precauciones
183
Precauciones Importantes
183
Precauciones Antes de Conectar el Sistema
183
Aviso para el Cable Azul/Blanco
184
Cable de Alimentación
184
Este Producto
184
Amplificador de Potencia (de Venta por Separado)
185
Cables de Bocina
185
Dispositivo Android
186
Iphone con Conector de 30 Clavijas
186
Iphone con Conector Lightning
186
Iphone y Teléfono Inteligente
186
Componente de Video Externo y la Visualización
187
Instalación
188
Cámara
187
Antes de la Instalación
188
Montaje Delantero/Posterior DIN
188
Montaje Delantero Din
188
Notas Acerca de la Instalación
188
Precauciones Antes de la Instalación
188
Instalación del Micrófono
189
Problemas Comunes
190
Ajuste del Ángulo del Micrófono
190
Apéndice
190
Instalación en la Columna de Dirección
190
Montaje en el Parasol
190
Solución de Problemas
190
Mensajes de Error
191
Itunes Tagging
193
Lector Integrado y Su Cuidado
194
Discos que Pueden Reproducirse
194
Manipulación y Cuidado de Los Discos
194
Información Detallada de Los Soportes que Se Pueden Reproducir
195
Bluetooth
197
Flac
197
Wma
197
Aac
198
Android
198
DIVX
198
Información Detallada sobre Los Dispositivos Ipod Conectados
198
Uso del Contenido con Conexión Basado en Aplicaciones
198
Aviso Acerca de la Visualización de DVD-Video
199
Aviso Acerca de la Visualización de Video
199
Aviso Acerca del Uso de Archivos MP3
199
Pandora
199
Spotify
199
Uso Correcto de la Pantalla LCD
199
Especificaciones
200
Advertisement
Pioneer AVH-X7800BT Operation Manual (55 pages)
DVD RDS AV RECEIVER
Brand:
Pioneer
| Category:
Stereo Receiver
| Size: 12.36 MB
Table of Contents
Table of Contents
2
Precaution
4
Important Safety Information
4
To Ensure Safe Driving
4
When Using a Display Connected to Rear Monitor Output
4
To Avoid Battery Exhaustion
5
Rear View Camera
5
Handling the USB Connector
5
In Case of Trouble
5
Visit Our Website
5
About this Product
5
Protecting the LCD Panel and Screen
5
Notes on Internal Memory
5
About this Manual
5
Protecting Your Unit from Theft
6
Basic Operation
6
Checking Part Names and Functions
6
Remote Control
7
Notes on Using the LCD Panel
7
Opening and Closing the LCD Panel
7
Turning the LCD Panel Horizontally
7
Adjusting the LCD Panel Slide Position
7
Adjusting the LCD Panel Angle
8
Inserting/Ejecting/Connecting Media
8
On First-Time Startup
8
How to Use the Screens
10
Supported AV Source
11
Displaying the AV Operation Screen
11
Selecting a Source
11
Changing the Display Order of Sources
11
Using the Touch Panel
11
Device
12
Displaying the "Bluetooth" Screen
12
Registering Your Bluetooth Devices
12
Connecting a Registered Bluetooth Device Manually
12
Switching Visibility
13
Entering the PIN Code for Bluetooth Wireless Connection
13
Displaying the Device Information
13
Clearing the Bluetooth Memory
13
Updating Bluetooth Software
13
Displaying the Bluetooth Software Version
13
Switching the Connected Bluetooth Device
13
Hands-Free Phoning
14
Displaying the Phone Menu Screen
14
Making a Phone Call
14
Receiving a Phone Call
15
Minimising the Dial Confirmation Screen
15
Changing the Phone Settings
15
Using the Voice Recognition Function (for Iphone)
15
Setting Phone Book Auto Synchronisation
15
Notes for Hands-Free Phoning
15
Setup for Ipod / Iphone or Smartphone
16
The Basic Flow of Ipod / Iphone or Smartphone Setup
16
Setting the Device Connection Method
16
Ipod Compatibility
16
Android ™ Device Compatibility
16
Information on the Connections and Functions for each Device
17
Radio
18
Starting Procedure
18
Storing the Strongest Broadcast Frequencies
18
Displaying the "Radio Settings" Screen
18
Tuning into Strong Frequencies
18
Setting the FM Tuning Step
18
Switching the Sound Quality of the FM Tuner
18
Setting the Alternative Frequency Search
19
Setting the Auto PI Search
19
Limiting Stations to Regional Programming
19
Receiving Traffic Announcements (TA)
19
Receiving News Announcements
19
Disc
19
Starting Procedure
21
Selecting Files from the File Name List
21
Switching the Media File Type
21
Searching for the Part You Want to Play
21
Operating the DVD Menu
21
Switching the Subtitle/Audio Language
21
Operating the DVD Menu Using Touch Panel Keys
21
Compressed Files
22
Starting Procedure (for Disc)
24
Starting Procedure (for USB)
24
Operations Common to All File Types
24
Audio File Operations
24
Still Image File Operations
24
Ipod
25
Connecting Your Ipod
26
Starting Procedure
26
Selecting Song or Video Sources from the Playlist Screen
26
Using this Product's Ipod Function from Your Ipod
26
Selecting a Song from the List Related to the Song Currently Playing (Link Search)
26
Appradiomode
27
Using Appradiomode
27
Using the Audio MIX Function
27
Spotify
28
Using Spotify with Your Pioneer Car Audio/Video
29
Starting Procedure
29
Selecting a Track or Station from the List
30
Bluetooth Audio Player
30
Starting Procedure
30
Selecting Files from the File Name List
31
AUX Source
31
Starting Procedure
31
Setting the Video Signal
31
AV Input
32
Starting Procedure (for AV Source)
32
Starting Procedure (for Camera)
32
Setting the Video Signal
32
Mixtrax
32
MIXTRAX Operation
32
MIXTRAX EZ Operation
32
Displaying the "MIXTRAX Settings" Screen
33
Setting the Flash Pattern
33
System Settings
33
Displaying the "System" Setting Screen
33
Setting Bluetooth Audio Source Activation
33
Setting Spotify Source Activation
33
Setting the Ever Scroll
33
Setting the Beep Tone
33
Setting the Auto Audio MIX Function
34
Setting Appradiomode Sound
34
Setting the Rear View Camera
34
Setting the Safe Mode
34
Setting the Demo Mode
34
Selecting the System Language
34
Setting the Keyboard Language with the Application for Iphone
35
Adjusting the Response Positions of the Touch Panel (Touch Panel Calibration)
35
Setting the Dimmer
35
Adjusting the Picture
35
Displaying the Firmware Version
36
Displaying the Open Source Licences
36
Updating Firmware
36
Audio Adjustments
37
Displaying the "Audio" Setting Screen
37
Using Fader/Balance Adjustment
37
Switching Sound Muting/Attenuation
37
Adjusting Source Levels
37
Using the Auto Level Control
37
Adjusting Loudness
37
Setting the Subwoofer Output
37
Adjusting the Cutoff Frequency Value
37
Switching the Rear Speaker Output
38
Using BASS Boost
38
Selecting the Listening Position
38
Adjusting the Speaker Output Levels Finely
38
Adjusting the Time Alignment
38
Switching the Time Alignment Preset
38
Using the Equaliser
39
Adjusting the Equaliser Curve Automatically (Auto EQ)
39
Saving the Sound Settings
40
Loading the Sound Settings
40
Theme Menu
40
Selecting the Background Display
40
Setting the Illumination Colour
40
Selecting the Theme Colour
41
Selecting the Clock Image
41
Setting up the Video Player
41
Setting the Top-Priority Languages
41
Setting the Angle Icon Display
41
Setting the Aspect Ratio
42
Setting Parental Lock
42
Displaying Your DIVX VOD Registration Code
42
Displaying Your DIVX VOD Deregistration Code
42
Automatic Playback of Dvds
43
Setting the Video Signal for the Rear View Camera
43
Favourite Menu
43
Creating a Shortcut
43
Selecting a Shortcut
43
Removing a Shortcut
43
Common Operations
44
Setting the Time and Date
44
Storing Song Information to an Ipod (Itunes Tagging)
44
Setting the "Sound Retriever" Function
44
Changing the Wide Screen Mode
44
Other Functions
45
Restoring this Product to the Default Settings
45
Appendix
45
Troubleshooting
45
Error Messages
46
Handling and Care of Discs
48
Playable Discs
48
Detailed Information for Playable Media
49
Bluetooth
51
Wma
51
Flac
51
DIVX
52
Pioneer AVH-X7800BT Installation Manual (53 pages)
DVD RDS AV Receiver
Brand:
Pioneer
| Category:
Car Stereo System
| Size: 8.75 MB
Table of Contents
Precautions before Connecting the System
2
Before Installing this Product
2
Power Cord
3
Iphone with Lightning Connector
4
Android Device
5
External Video Component and the Display
5
Precautions before Installation
6
Before Installing
6
Installation Notes
6
Din Front/Rear-Mount
7
Installing the Microphone
8
Installation on the Steering Column
8
Adjusting the Microphone Angle
8
Précautions à Prendre Avant de Brancher le Système
9
Avant D'installer Ce Produit
9
Pour Éviter Toute Détérioration
9
Remarque Concernant le Fil Bleu/Blanc
10
Cordon D'alimentation
10
Amplificateur de Puissance (Vendu Séparément)
11
Appareil Android
12
Iphone Avec Connecteur Lightning
12
Précautions à Prendre Avant L'installation
14
Montage Avant/Arrière DIN
14
Avant de Procéder à L'installation
14
Installation du Microphone
15
Installation Sur le Pare-Soleil
15
Installation Sur la Colonne de Direction
16
Prima DI Installare Questo Prodotto
17
Per Evitare Danni
17
Informazione Sul Cavetto Blu/ Bianco
18
Cavo DI Alimentazione
18
Dispositivo Android
20
Precauzioni Prima Dell'installazione
22
Note Sull'installazione
22
Installazione del Microfono
23
Montaggio Sul Parasole
23
Installazione Sulla Colonna DI Sterzo
24
Regolazione Dell'angolazione del Microfono
24
Precauciones Antes de Conectar el Sistema
25
Antes de Instalar Este Producto
25
Para Impedir Daños
25
Aviso para el Cable Azul/Blanco
26
Cable de Alimentación
26
Amplificador de Potencia (Se Vende por Separado)
27
Iphone y Smartphone
27
Iphone con Conector Lightning
27
Componente de Vídeo Externo y Pantalla
29
Antes de la Instalación
29
Instalación del Micrófono
31
Montaje en el Parasol
31
Instalación en la Columna de Dirección
31
Ajuste del Ángulo del Micrófono
32
Vor dem Anschließen des Systems zu Beachten
33
Vor dem Einbau dieses Produkts
33
Zur Vermeidung von Schäden
33
Anmerkung zum Blau/Weißen Kabel
34
Vor der Installation zu Beachten
38
Vor dem Einbau
38
Hinweise zur Befestigung
38
Einbau des Mikrofons
39
Montage an der Sonnenblende
39
Anpassen des Mikrofonwinkels
40
Befestigung auf der Lenksäule
40
Voorzorgen Voor Het Aansluiten Van Het Systeem
41
Voor U Dit Product Inbouwt
41
Voorkomen Van Beschadigingen
41
Voorzorgen Voor Installatie
46
Voor de Installatie
46
Opmerkingen Betreffende de Installatie
46
Advertisement
Advertisement
Related Products
Pioneer AVH-X7500BT
Pioneer AVH-X5700BHS
Pioneer AVH-X1700S
Pioneer AVH-X4700BS
Pioneer AVH-X6800DVD
Pioneer AVH-X2800BT
Pioneer AVH-X3800DAB
Pioneer AVH-X8690BT
Pioneer AVH-X1800S
Pioneer AVH-X4800BS
Pioneer Categories
Car Receiver
Receiver
Stereo Receiver
Amplifier
CD Player
More Pioneer Manuals
Login
Sign In
OR
Sign in with Facebook
Sign in with Google
Upload manual
Upload from disk
Upload from URL