Table of Contents
Advertisement
Quick Links
Advertisement
Table of Contents

Related Manuals for Pioneer AVH-X7800BT


Summary of Contents for Pioneer AVH-X7800BT
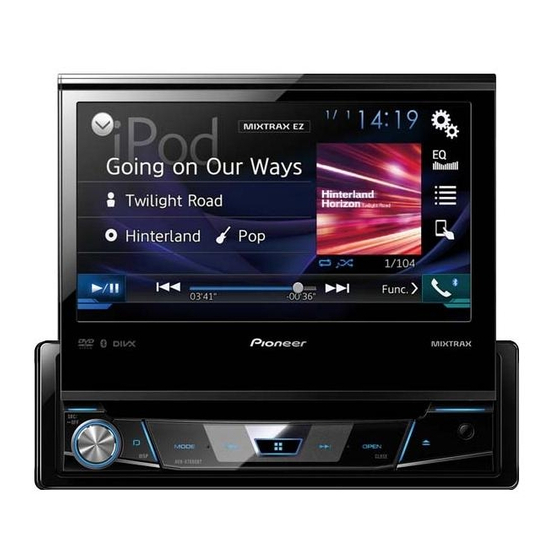
- Page 1 AVH-X7800BT DVD RDS AV RECEIVER Operation Manual...
-
Page 2: Table Of Contents
Contents ■ ■ Limiting stations to regional programming ..19 Thank you for buying this Pioneer product. Registration and AV input ......32 Receiving traffic announcements (TA) ....19 Please read through these instructions so you connection of Bluetooth ® Receiving news announcements....19 Starting procedure (for AV source) ....32... - Page 3 Contents Adjusting the equaliser curve automatically FLAC ..............51 (Auto EQ) ..........39 DivX ...............52 Saving the sound settings ......40 AAC ...............52 Loading the sound settings ......40 Android ™ ............52 ■ Detailed information regarding connected iPod Theme menu ....40 devices ............52 Using app-based connected content ....52 Selecting the background display ....40 Spotify ®...
-
Page 4: Precaution
(ACC OFF) immediately and consult your dealer or the legislation that requires proper treatment, recovery and IMPROPER CONNECTION OR USE OF THIS LEAD nearest authorised Pioneer Service Station. Do not use this recycling. MAY VIOLATE APPLICABLE LAW AND MAY RESULT product in this condition because doing so may result in a IN SERIOUS INJURY OR DAMAGE. -
Page 5: To Avoid Battery Exhaustion
Settings and recorded contents are reset to the factory settings. The Pioneer CarStereo-Pass is for use only in Germany. tight parking spot. About this manual... -
Page 6: Protecting Your Unit From Theft
Precaution Basic operation Protecting your unit from theft Re-attaching the front panel Checking part names and functions The front panel can be detached to deter theft. 1 Slide the front panel to the left. The front panel and the head unit are connected on the left side. Important Make sure that the front panel has been properly connected to the head unit. -
Page 7: Remote Control
Basic operation Opening and closing the LCD Turning the LCD panel Press to return to the previous track (chapter) TRK ( or go to the next track (chapter). panel horizontally Press and hold to perform fast reverse or fast button forwards. -
Page 8: Adjusting The Lcd Panel Angle
Basic operation 2 USB storage device Adjusting the LCD panel angle Check that no data is being accessed before pulling out the Returning the panel to the upright position. USB storage device. Important On first-time startup If you can hear the LCD panel knocking against your ... - Page 9 Basic operation Switching the speaker mode To change the speaker mode, you need to restore this product to the default settings. 1 Restore the default setting. Refer to Restoring the default settings on page 45...
-
Page 10: How To Use The Screens
Basic operation How to use the screens Application menu screen Time and date setting screen 2016 Setting menu screen Abcdefg Abcdefg Abcdefg Abcdefg Abcdefg System Month/Date d / m / y m / d / y y / m / d Time Format 12hour 24hour... -
Page 11: Supported Av Source
Basic operation The AV operation screen appears. The top menu screen of this manual is the screen when using the AppRadioMode. The items dis- played on the screen may vary depending on the iPod 6/10 connecting device or mode. When you connect an iPhone via Bluetooth wireless technology or a smart- 2 Touch and hold a source icon, and drag the icon Abcdefghi... -
Page 12: Device
Basic operation Registration and connection of Bluetooth device ® Drag the slider bar or the list to view any hidden items. Operating the time bar Displaying the “Bluetooth” Setting Bluetooth device auto connection screen This function connects the last connected Bluetooth device to 1 Press this product automatically as soon as the two devices are less than a few metres apart. -
Page 13: Switching Visibility
Registration and connection of Bluetooth device ® 3 Touch [Clear]. Switching visibility Switching the connected The confirmation screen appears. Bluetooth device This function sets whether or not to make this product visible to Updating Bluetooth software the other device. After registering and connecting the Bluetooth devices to this The default setting is “On”. -
Page 14: Hands-Free Phoning
Hands-free phoning Calling a number in the phone book Synchronizes the contacts on this Switches to the voice recognition function (for iPhone). product's phone book with the p The contacts on your phone will be automatically transferred Refer to Using the voice recognition function (for contacts on your phone manually. -
Page 15: Receiving A Phone Call
Hands-free phoning 1 Display the “Bluetooth” screen. Using the voice recognition 3 Touch Refer to Displaying the “Bluetooth” screen on page 12 Dialling from the preset dial list function (for iPhone) 2 Touch [Auto Answer] to switch “On” or “Off”. 1 Display the “Phone menu”... -
Page 16: Setup For Ipod / Iphone Or Smartphone
Hands-free Setup for iPod / iPhone or smartphone phoning When using an iPod / iPhone or a smartphone with this product, iPod compatibility configure the settings of this product according to the device to be connected. This product supports only the following iPod models and iPod ... -
Page 17: Information On The Connections And Functions For Each Device
Setup for iPod / iPhone or smartphone Information on the connections and functions for each device The settings and cables required for connecting each device, and the available sources are as follows. iPod / iPhone with a 30-pin connector Device connection method When connecting via Bluetooth When connecting via CD-IU201V (sold When connecting via CD-IU51 (sold... -
Page 18: Radio
Radio 2 Touch [AV Source Settings]. Displays the preset channel list. p By keeping touching and holding , you can perform non stop seek tuning. Touch again to cancel. 3 Touch [Radio settings]. Select an item on the list ("1" to "6") p The band (MW or LW) indicated on the band touch panel key to switch to the preset channel. -
Page 19: Setting The Alternative Frequency Search
Radio Disc The default setting is “Off”. Standard: Track number indicator Gives no effect. 1 Display the “Radio settings” screen. Audio source screen 1 Refer to Displaying the “Radio settings” screen on page 18 Setting the alternative fre- 6/10 2 Touch [TA Interrupt] to switch “On”... - Page 20 Disc Video source screen 2 Video source screen 2 Hides the touch panel keys. To display again the keys, 6/10 6/10 touch anywhere on the screen. Performs frame-by-frame playback. Performs slow-motion playback. Stop Stop HOLD Each time you touch it changes the speed in four steps in the following order: 1/16 →1/8 →...
-
Page 21: Starting Procedure
Disc Switches the media file type to CD (audio data (CD-DA)). 3 Touch Switches the subtitle/audio language. Refer to Switching the subtitle/audio language on p The way to display the menu differs depending on the disc. Searching for the part you page 21 ... -
Page 22: Compressed Files
Compressed files Audio source screen 1 (Example: USB) Hides the touch panel keys. Plays files in random order. To display again the keys, 6/10 : Does not play files in random order. touch anywhere on the screen. : Plays all files within the repeat Abcdefghi Video source screen (Example: Disc) range in random order. - Page 23 Compressed files Video source screen (Example: Disc) Still image screen Hides the touch panel keys. To display again the keys, 6/10 6/10 touch anywhere on the screen. Rotates the displayed picture 90° clockwise. Stop Selects the previous Abcdefghi Abcdefghi Abcdefghi Abcdefghi or next folder.
-
Page 24: Starting Procedure (For Disc)
Compressed files p Play back is performed in order of folder numbers. Folders 4 Touch the item. Switches the subtitle/audio language. are skipped if they contain no playable files. Refine the item until the desired song title or file name is dis- This function is available only for compressed video played on the list. -
Page 25: Ipod
Compressed files iPod p If you save the new image, the current wallpaper is Audio source screen 1 Changes the audiobook speed. overwritten. iPod 6/10 : Normal playback Setting the slideshow interval : Fast playback Abcdefghi JPEG files can be viewed as a slideshow on this product. In this setting, the interval between each image can be set. -
Page 26: Connecting Your Ipod
iPod Refer to Setup for iPod / iPhone or smartphone on page 16 Video source screen Using this product’s iPod func- p The available sources vary depending on the selected iPod tion from your iPod method for connecting your device. 6/10 ... -
Page 27: Appradiomode
Refer to Using app-based connected content on page 52 The AppRadio app is launched, and the AppRadioMode screen (Application menu screen) appears. Pioneer is not liable for any issues that may arise from Common operation of all device incorrect or flawed app-based content. ... -
Page 28: Spotify
AppRadioMode Spotify ® 1 Start up the AppRadioMode. Playback screen 1 (Track) Plays tracks in random order. 2 Press the Volume (+/–) button. Spotify 6/10 Spotify The audio mix menu will be displayed on the screen. Playback screen 2 (Track) Abcdefghi Spotify 6/10... -
Page 29: Using Spotify With Your Pioneer Car Audio/Video
Pioneer car audio/ p By pressing the button, you can also skip video products. Spotify is a music service not affiliated with Pioneer. More songs forwards or backwards. information is available at WARNING https://support.spotify.com/ Certain uses of an iPhone or a smartphone may not be ... -
Page 30: Selecting A Track Or Station From The List
Spotify Bluetooth audio player ® p You can use the Spotify service by connecting an iPhone via Playback screen 1 Selects a file from the list. USB or Bluetooth. Refer to Selecting files from the file name list on Bluetooth p When using a smartphone, connect via Bluetooth. -
Page 31: Selecting Files From The File Name List
Bluetooth audio AUX source player Setting the video signal 6/10 When you connect this product to an AUX equipment, select the suitable video signal setting. The default setting is “Auto”. p You can operate this function only for the video signal input into the AUX input. -
Page 32: Av Input
AV input MIXTRAX You can display the video image output by the device connected Activates the MIXTRAX mode. to this product. For details on how to connect the external video component, (Example: iPod) refer to the installation manual. iPod CAUTION 5 Touch [Camera View]. -
Page 33: Displaying The "Mixtrax Settings" Screen
MIXTRAX System settings Refer to Displaying the “MIXTRAX Settings” screen on page Displaying the “MIXTRAX Displaying the “System” set- Settings” screen ting screen 2 Touch [Effect Setting]. 3 Touch the item. 1 Press 1 Press The following items are available: 2 Touch , and then [AV Source Settings]. -
Page 34: Setting The Auto Audio Mix Function
CAUTION The default setting is “On”. Setting AppRadioMode Sound Pioneer recommends the use of a camera which outputs 1 Display the “System” setting screen. mirror reversed images, otherwise the screen image may Refer to Displaying the “System” setting screen on page You can set where the sound for AppRadioMode is output when appear reversed. -
Page 35: Setting The Keyboard Language With The Application For Iphone
System settings 3 Touch the language. 7 Gently touch the centre of the “+” mark dis- Day (default): Turns the dimmer manually to off. After the language is selected, the previous screen returns. played on the screen. Night: The target indicates the order. -
Page 36: Displaying The Firmware Version
System settings 2 Display the “System” setting screen. The “Firmware Information” screen appears. p If an error message appears on the screen, touch the display and perform the above steps again. Refer to Displaying the “System” setting screen on page Displaying the open source 3 Touch [Picture Adjustment]. -
Page 37: Audio Adjustments
Audio adjustments p This function is not available while you make or receive a call Displaying the “Audio” setting Adjusting source levels using the hands-free function. screen SLA (source level adjustment) lets you adjust the volume level of 1 Display the “Audio” setting screen. each source to prevent radical changes in volume when switch- ... -
Page 38: Switching The Rear Speaker Output
Audio adjustments p This function is not available when adjusting the High p “All” is not available when “Network Mode” is selected as Adjusting the speaker output speaker. the speaker mode. levels finely p If you change the listening position setting, the output levels of all the speakers will change in conjunction with the Switching the rear speaker setting. -
Page 39: Using The Equaliser
Audio adjustments remove them in advance. Surrounding sounds may prevent Using the equaliser Setting the auto-adjusted equaliser correct measurement of the vehicle’s acoustics. Be sure to use the microphone for acoustical measurement You can set the auto-adjusted equaliser to suit the vehicle’s (sold separately). -
Page 40: Saving The Sound Settings
Audio adjustments Theme menu 2 Fix the microphone for acoustical measurement Saving the sound settings Selecting the background (sold separately) in the centre of the headrest display of the driver’s seat, facing forwards. You can save to recall the following current sound settings: bass boost, slope, subwoofer phase, speaker level, Graphic EQ, The Auto EQ may differ depending on where you place the micro- The background display can be selected from 9 different preset... -
Page 41: Selecting The Theme Colour
Theme menu Setting up the video player 3 Touch the colour you want. Selecting the theme colour Coloured keys: Selects the desired preset colour. (custom): Displays the screen to customise the illumina- A theme colour can be selected from 5 different colours. Setting the top-priority tion colour. -
Page 42: Setting The Aspect Ratio
Setting up the video player p The TV aspect ratio cannot be changed for some discs. For p We recommend to keep a record of your code number in details, refer to the disc’s instructions. case you forget it. p The parental lock level is recorded on the disc. You can con- firm it by looking at the disc package, the included literature Setting parental lock or the disc itself. -
Page 43: Automatic Playback Of Dvds
Setting up the video player Favourite menu Registering your favourite menu items in shortcuts allows you to quickly jump to the registered menu screen by a simple touch on the “Favourites” screen. p Up to 12 menu items can be registered in the favourite menu. -
Page 44: Common Operations
Common operations Changes the wide screen mode p If you turn off this product or disconnect the iPod while Refer to Changing the wide screen mode on page 44 transferring song information, the transfer may not success- fully complete. Radio 6/10 p While this product is storing song information, transfer to an... -
Page 45: Other Functions
Various methods are used to clear user data. mode. be found here, contact your dealer or the nearest authorised Method 1: Remove the vehicle battery Pioneer service facility. Resets various settings registered to this product. p The settings configured on the “Theme” screen are not Common problems reset. -
Page 46: Error Messages
— Switching to a selected language is not possible if the your nearest Pioneer service centre. — When the operation on the first of the two mobile phones language selected in “DVD/DivX Setup” is not recorded is completed, use the switch devices key to switch to the on the disc. - Page 47 All the files on the connected USB storage device are disappear even after the engine is switched off/on, contact embedded with DRM. your dealer or an authorised Pioneer Service Station for TEMP — Replace the USB storage device. assistance.
-
Page 48: Handling And Care Of Discs
Frequent loading and ejecting of a DualDisc may result in above action, please contact your dealer or an authorised scratches to the disc. Pioneer Service Station. Serious scratches can lead to playback problems on this product. In some cases, a DualDisc may become stuck... -
Page 49: Detailed Information For Playable Media
Appendix in the disc-loading slot and will not eject. To prevent this, Discs which have been recorded with the Video Recording Partitioned USB storage device is not compatible with this we recommend you refrain from using DualDisc with this format (VR mode) cannot be played back. - Page 50 Appendix AAC compatibility Up to 255 subtitle files may be used. Any more subtitle files This product is not compatible with the following: MP3i (MP3 will not be recognised. interactive), mp3 PRO, m3u playlist This product plays back AAC files encoded by iTunes. ...
-
Page 51: Bluetooth
Bluetooth SIG, Inc. and any use of such marks by environment in which the file was created or on the contents .mkv PIONEER CORPORATION is under license. Other trademarks of the file. Format: MPEG-4/H.264 and trade names are those of their respective owners. -
Page 52: Divx
Cisco holds the trademark right in connected iPod devices the US and certain other countries. Pioneer accepts no responsibility for data lost from an iPod, even if that data is lost while using this product. Please back up your iPod data regularly. -
Page 53: Spotify
In that case, please consult your dealer or the marks of Spotify AB. Compatible mobile digital devices and screen may not operate normally and could be damaged. nearest authorised Pioneer Service Station. premium subscription required, where available, see http:// ... - Page 54 Appendix Gain ..............±12 dB (2 dB /step) Output level: LW tuner <Standard Mode> Video ............1.0 V p-p/75Ω (±0.2 V ) Frequency range ..........153 kHz to 281 kHz HPF: Number of channels ............2 (stereo) Usable sensitivity ..........30 µV (S/N: 20 dB ) Frequency ..
- Page 55 PIONEER ELECTRONICS (USA) INC. P .O. Box 1540, Long Beach, California 90801-1540, U.S.A. TEL: (800) 421-1404 Visit www.pioneer-car.co.uk (or www.pioneer-car.eu) to register your product. PIONEER ELECTRONICS OF CANADA, INC. 340 Ferrier Street, Unit 2, Markham, Ontario L3R 2Z5, Canada...
Need help?
Do you have a question about the AVH-X7800BT and is the answer not in the manual?
Questions and answers
I just bought a vehicle that has your radio unit in it… Pioneer AVH – X7800BT, when I got it and the radio was on, it displayed but look like a graphic equalizer and showed the radio signal playing… I set the radio back to default settings and I have lost that feature. I am wondering how to get it back? I am wondering how to get it back?