Sign In
Upload
Manuals
Brands
Phytec Manuals
Motherboard
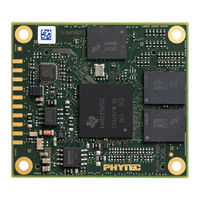
phyCORE-AM335x
Phytec phyCORE-AM335x Manuals
Manuals and User Guides for Phytec phyCORE-AM335x. We have
3
Phytec phyCORE-AM335x manuals available for free PDF download: Quick Start Instructions, Hardware Manual, Quick Start Manual
Phytec phyCORE-AM335x Hardware Manual (70 pages)
Brand:
Phytec
| Category:
Motherboard
| Size: 5 MB
Table of Contents
Table of Contents
3
1 Conventions, Abbreviations and Acronyms
10
Table 1: Abbreviations and Acronyms Used in this Manual
11
Table 2: Types of Signals
12
2 Preface
13
3 Part I: PCM-051/Phycore-Am335X System on Module
17
Introduction
17
1Block Diagram
19
Figure 1: Block Diagram of the Phycore-Am335X
19
2Component Placement Diagram
20
Figure 2: Phycore-Am335X Component Placement (Top View)
20
Figure 3: Phycore-Am335X Component Placement (Bottom View)
21
3Minimum Requirements to Operate the Phycore-Am335X
22
Pin Description
23
Figure 4: Pinout of the Phycore-Connector (Top View, with Cross Section Insert)
24
Table 3: Pinout of the Phycore-Connector X3, Row a
25
Table 4: Pinout of the Phycore-Connector X3, Row B
27
Table 5: Pinout of the Optional Phycore-Connector X1, Row a
29
Table 6: Pinout of the Optional Phycore-Connector X1, Row B
32
Jumpers
34
Figure 5: Typical Jumper Pad Numbering Scheme
34
Figure 6: SOM Jumper Locations (Top View)
35
Table 7: SOM Jumper Settings
36
Power
39
1Primary System Power (VDD_5V_IN)
39
2Backup Power (VBAT_IN_4RTC)
39
3Power Management IC (U4)
39
Power Domains
40
Table 8: External Supply Voltages
40
Table 9: PMIC Generated Voltages
40
Real Time Clock (RTC)
41
Figure 7: Power Supply Diagram
41
Power Management
42
External Battery Charging
42
4Reference Voltages
42
Table 10: Power Management Signals
42
Real-Time Clock Options (RTC)
43
1Pmic Rtc
43
2External RTC
43
3Am335X RTC
43
4Power-On Wake
43
System Configuration and Booting
44
Table 11: Boot Device Order of Am335X Module
45
System Memory
46
1Ddr3-Sdram (U7, U9)
46
2NAND Flash Memory (U10)
46
Table 12: NAND GPMC Signal Map
46
NAND Flash Lock Control (J2)
47
3I2C Eeprom (U6)
47
Table 13: NAND Flash Lock Control Via J2
47
EEPROM Write Protection Control (J9)
48
Setting the EEPROM Lower Address Bits (J7, J8)
48
Table 14: U6 EEPROM I2C Address Via J7 and J8
48
Table 15: EEPROM Write Protection States Via J9
48
4SPI Flash Memory (U5)
49
SPI Write-Protect Control (J4)
49
SPI Hold Control (J3)
49
5Memory Model
49
Table 16: SPI Flash Write-Protection Via J4
49
Table 17: SPI Hold Control Via J3
49
SD / MMC Card Interfaces
50
Table 18: SD / MMC0 Interface Signal Locations
50
Serial Interfaces
51
1Universal Asynchronous Receiver/Transmitter Interfaces (Uarts)
51
Table 19: UART Signal Locations
51
L-771E_1 © PHYTEC Messtechnik Gmbh
51
2USB OTG Interface
52
Table 20: USB OTG Signal Locations
52
3Ethernet Interfaces
53
Ethernet1
53
Table 21: Ethernet1 Signal Locations
53
Configuring the Ethernet1 Interface Mode
54
Table 22: Ethernet1 TTL Signal Locations
54
Table 23: Jumper Configurations for MII and RMII Modes
54
Ethernet 2
55
Table 24: Resistor Configurations for MII and RMII Modes
55
Table 25: Crystal Configurations for MII and RMII Modes
55
4Profibus
56
Table 26: Ethernet 2 Signal Locations
56
Table 27: Profibus Signal Location Options
56
5I2C Interface
57
6SPI Interfaces
57
Table 28: I2C Interface Signal Locations
57
Table 29: I2C Addresses in Use
57
Table 30: SPI0 Interface Signal Locations
57
7Controller Area Network (CAN) Interfaces
58
Table 31: DCAN0 and DCAN1 Signal Locations
58
8Multichannel Audio Serial Ports (Mcasp)
59
Table 32: Mcasp Signal Locations
59
General Purpose I/Os
60
Analog Inputs
61
Debug Interface (X2)
62
Figure 8: JTAG Interface at X2 (Top View)
62
Table 35: JTAG Connector X2 Signal Assignment
63
Display Interface
64
1Parallel Display Interface
64
2Touch Screen Controller
65
Technical Specifications
66
Figure 9: Physical Dimensions
66
L-771E_1 © PHYTEC Messtechnik Gmbh
67
Hints for Integrating and Handling the Phycore-Am335X
68
1Integrating the Phycore-Am335X
68
Figure 10: Footprint of the Phycore-Am335X
69
2Handling the Phycore-Am335X
70
Advertisement
Phytec phyCORE-AM335x Quick Start Instructions (92 pages)
Brand:
Phytec
| Category:
Microcontrollers
| Size: 5 MB
Table of Contents
Table of Contents
3
Conventions, Abbreviations and Acronyms
5
1 Introduction
7
Rapid Development Kit Documentation
7
Professional Support Packages Available
7
Overview of These Quickstart Instructions
8
System Requirements
8
Software Used in the Virtual Machine Hard Disk Image
8
Ubuntu
8
Eclipse
9
Qt Creator
9
Yocto Project
9
2 Getting Started
11
Preparing and Starting the Virtual Machine
11
Starting the Hardware
13
3 Working with Eclipse
19
Programming in the C/C++ Perspective
19
Work with the Demo Project
19
Creating a New Project
24
Modifying the Demo Application
31
Starting a Program out of Eclipse on the Target
33
Debugging an Example Project
35
Starting the GDB Server on the Target
36
Configuring and Starting the Debugger in Eclipse
36
Setting a Breakpoint
41
Stepping through and Watching Variable Contents
42
Stepping through and Changing Variable Contents
44
Using the Memory Monitor
45
4 Working with Qt Creator
49
Stop the Running Qt Demo on the Target
49
Importing the Demo Application
50
Work with the Demo Application
52
Compile and Run the Demo Application on the Target
55
Compile and Run the Demo Application on the Host
57
Debugging the Demo Application
59
Using Qdebug for Simple Debugging Messages
59
Using the Integrated Qt Creator Debugger
61
5 Getting Started with the BSP
65
Add New Packages to the Root Filesystem with Yocto
65
Writing the Root Filesystem into the Target's Flash
69
6 Setup Your Own Linux Host PC
73
Essential Settings
73
Installing Ubuntu
73
Installation of Software Packages
75
Set the Git Configuration
76
Build the Board Support Package and Install the SDK
76
Set up Eclipse and Integrate Plug-Ins
78
Install and Setup Qt Creator
80
Setting up a TFTP Server
87
Optional Settings
88
7 Revision History
89
Phytec phyCORE-AM335x Quick Start Manual (2 pages)
Brand:
Phytec
| Category:
Single board computers
| Size: 0 MB
Table of Contents
1) Preparing the Hardware
1
2) Preparing and Starting the Virtual Machine
2
3) Getting Connected
2
Serial Connection
2
Ethernet Connection
2
Your Possible Next Steps
2
Advertisement
Advertisement
Related Products
Phytec phyCORE-ADuC812
Phytec phyCORE-MPC565
Phytec phyCORE-TC1775
Phytec phyCORE-P87C591
Phytec phyCORE-MPC5200B tiny
Phytec phyCORE-XC161
Phytec phyCORE-OMAP44 Series
Phytec phyCORE-i.MX27
Phytec phyCORE-i.MX 6
Phytec phyCORE-PXA255
Phytec Categories
Computer Hardware
Motherboard
Single board computers
Microcontrollers
Control Unit
More Phytec Manuals
Login
Sign In
OR
Sign in with Facebook
Sign in with Google
Upload manual
Upload from disk
Upload from URL