Sign In
Upload
Manuals
Brands
Otari Manuals
Recording Equipment
RADAR
User Manuals: Otari RADAR Digital Recording System
Manuals and User Guides for Otari RADAR Digital Recording System. We have
1
Otari RADAR Digital Recording System manual available for free PDF download: Operation Manual
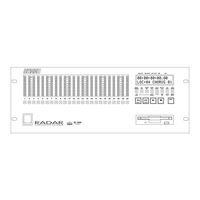
Otari RADAR Operation Manual (166 pages)
Random access digital audio recorder
Brand:
Otari
| Category:
Recording Equipment
| Size: 1 MB
Table of Contents
Safety Instructions
3
Communication with Otari
4
Certifications
5
Fcc Statement
5
Limited Warranty
6
Please Read this First
7
Thank You
8
Table of Contents
9
Section 1 Welcome to RADAR
17
Introduction
18
Radar System Features
18
An Overview of Hard Disk Recording
19
Manual Overview
20
Radar Hardware Specifications
20
AC Power
20
Audio Inputs & Outputs
21
Input & Output Reference Levels
21
Grounding
22
Controls & Indicators
23
Rear Panel Connectors
23
Front Panel Controls & Indicators
24
Important Initial Information
25
Section 2 Product Overview/Getting Started
27
Introduction
27
Before Starting-Please Read this
28
AC Power Level Setting
28
SCSI Terminator Installation
28
Audio Inputs/Outputs
29
About Audio Reference Levels
29
Audio Connections-Analog
29
Audio Connections-Digital
30
Power On/Off Procedure
31
Power up Procedure
31
Power down Procedure
31
Arming Tracks Overview
32
Recording & Playback Overview
32
Locating in the Recorded Audio
33
Locating Using Fast Wind Keys
33
Jog/Shuttle Operation (RE-8 Only)
33
Entering Jog Mode
33
Entering Shuttle Mode
34
Disk Time Available
34
Navigating Radar's Menu
35
Menus Overview
35
Moving Around in Menus
35
Menu Operation Using the
35
Front Panel Menu Operation
35
Navigating the Menu
36
Menu Structure
36
Default Project
37
Creating a New Project
37
Switching between Projects
37
Naming Projects
38
Copying Projects
38
Project Start Time
38
Project Sample Rate
38
Deleting Projects
38
Reclaiming Disk Space from Deleted Projects
39
Editing/An Overview
40
Edit Markers (MARK IN, MARK OUT)
40
Radar's Editing Clipboard
40
Section 3 Recording & Transport Operation
41
General
41
Arming Tracks for Record
41
Input Monitoring/Meters Display
41
Peak Hold Indicators
41
Arming Tracks for Record
43
Clip Indicator Leds
44
Sample Rate Selection
45
Sampling Rate Overview
45
Changing Radar's Sample Rate
45
Recording Operation
46
Entering Record
46
Punching in on Additional Tracks
46
Punch out (Dropping out of Record)
46
Record Safe Feature
48
Clear Rec-Ready (RE-8 Only)
48
Recording to Timecode
48
Playback Operation
48
Standard Playback
48
Reverse Playback
48
Playback Locked to Timecode
48
TRACK solo FEATURE (RE-8 Only)
49
Additive solo Mode Operation
49
Interlock solo Mode Operation
49
Momentary solo Mode Operation
49
Varispeed Recording/Playback
50
Varispeed Overview
50
Changing Pitch with Varispeed
50
Changing Varispeed Units
50
Auto Input Mode
51
Auto Input Overview
51
Turning Auto Input on & off
51
Auto Punch Mode
52
Setting up for an Auto Punch
52
Editing Auto Punch in and out Locations
53
Undo/Redo Functions
53
Section 3-Contents, Continued
54
Locating in the Recorded Material
54
Cueing with Fast-Forward and Rewind
54
Jog/Shuttle Mode (RE-8 Only)
54
Auto Location
56
Programming a New Auto Locate Point
56
Recalling Marked Locate Points from the Front Panel
56
Recalling a Locate Point from the RE-8
57
Auto Play after Locate
57
Recalling a Locate Point from the
57
Editing a Locate, Mark in or Mark out Point
58
Naming Locate Points from the Front Panel
59
LOCATING VIA DIRECT TIME ENTRY (RE-8 Only)
60
Cycle
61
Pre/Post Roll
62
Digital I/O Operation
63
Section 4 RADAR Menu Operation
65
General
67
Menus Overview
67
RADAR Menu-Top Level
67
Moving Around in Menus
67
Menu Operation Using the RE-8
67
Front Panel Menu Operation
68
Menu Structure
68
Entering/Exiting the Menu
69
Scrolling & Selecting Within the Menu
70
Editing Values in a Dialog Window
70
A Tour of the Menu
71
System Menu
71
System Version
71
Digital I/O
71
Sync Output
71
Configure Disks
71
Set Time & Date
72
Upgrade System
72
Project Menu
72
GOTO Project
72
Create Project
73
Name Project
73
Copy Project
73
Delete Project
73
Sample Rate
73
Start Time
73
Sync Offset
73
Reclaim Space
74
Renumber Locates
74
Erase All Disks
74
Edit Menu
75
Undo/Redo
75
Modify Edit
75
Edit Features (Cut/Copy/Paste/Move/Erase/Loop /Slide/Reverse)
75
Listen
75
Mute Tracks
75
Import *.WAV Files
76
Crossfade Time
76
Record Safe
76
Preferences Menu
77
Default SMPTE Field
77
SMPTE Lock Speed
77
Track solo Mode
77
Low Disk Warning
78
Slide Time Units
78
Record Mode
78
Fast Forward/Rewind Rate
79
Peak Hold Time
79
Clip Hold Time
79
Save State Delay
79
Diagnostics Menu
80
Scan SCSI Bus
80
Mount / Unmount (File System)
80
Disk Diagnostics
80
Show Free RAM
80
Debug/Error Logging
80
Shutdown RADAR
81
Section 5 External Synchronization Features
83
General
84
Synchronization Overview
84
SMPTE Overview
84
SMPTE Frame Rates
85
Chasing a Variable Speed Timecode Source
85
Recording to Timecode
85
MIDI Timecode Sync Overview
86
Video Reference (House Sync) Overview
86
External Word Clock Overview
86
External Sync Connections
87
Timecode Connections
87
Timecode Input
87
Timecode Generator Output
87
MIDI Timecode (MTC) Connections
87
Video Sync Connections
87
Digital Wordclock Connections
87
Setup for Timecode Operations
88
Smpte Timecode Operation
88
Recording While Locked to Timecode
89
Playback to Timecode
89
SMPTE Offset
89
Section 6 RE-8 Session Controller Features
93
Introduction
94
A Tour of the Re-8 Session Controller
94
Track Arm Keys
94
Track Function Keys
94
Rec Safe
94
Track solo
94
Auto Input
95
Text Entry Keys
95
LCD & Numeric Display
95
Lcd
95
2-Digit LED Display
95
Calculator Keys
96
Numeric Keypad
96
Plus) and - (Minus) Keys
96
MENU/PREV Key
96
ENTER Key
97
RECALL LOC Key
97
ENTER TIME Key
97
Transport Keys
97
Cursor Keys
97
Utility Keys
98
Dedicated Editing Keys
99
Jog/Shuttle Wheel
99
Entering Jog Mode
99
Entering Shuttle Mode
100
MARK in & MARK out Keys
100
Defining a Location Using MARK in
100
Defining a Location Using MARK out
100
Recalling & Editing a Marked Location Point
101
Foot Switch Features
101
Section 7 RADAR Editing Features
104
Introduction
104
RADAR V1.1 Editing Functions
104
About the Clipboard
105
Digital Crossfades on Edit Operations
105
Defining an Audio Clip Using Mark In/Mark out
106
Marking the Start and End of an Audio Clip
106
Selecting Track(S) for Editing
106
Auditioning the Clipboard
106
Undo/Redo Functions
107
Cut
108
Copy
109
Paste
110
Erase
112
Move
113
Slide
115
Loop
116
Modify Edit
117
Reverse (Reverse Clipboard Material)
118
Mute Tracks
119
Import *.Wav Translator Feature
120
Section 8 Backup & Restore Operation
121
Backup/Restore Overview
121
Exabyte Drive Installation/Hookup
123
Backup Procedure
124
Backup Operation
125
Restore Operation
126
Tape Drive Activity Indicators
127
Exabyte Drive Cleaning Procedure
128
Backup/Restore Error Messages
129
Appendix A Hardware/Software Installation
131
Introduction
131
A.1 Introduction
132
Radar Physical Installation
132
Rack Size
132
Rack Mounting
132
Airflow/Cooling
132
Rough Handling
132
AC Power Level Setting
132
Grounding
133
Controls & Indicators Overview
134
Rear Panel Connectors
134
RADAR Front Panel Controls & Indicators
136
Electrical Installation
137
Audio Inputs & Outputs Overview
137
Balanced Vs. Unbalanced Audio Signals
137
Wiring for Balanced and Unbalanced Cables
137
Audio Reference Levels (-10 Dbm/+4 Dbu
137
Audio Connections-Analog
138
Audio Connections-Digital
138
A.4.2 Audio Connections—Analog
138
A.4.3 Audio Connections—Digital
138
External Sync Connections
139
Timecode Connections
139
Timecode Input
139
Timecode Generator Output
139
MIDI Timecode (MTC) Connections
139
Video Sync Connections
139
Digital Word Clock Connections
139
External SCSI Device Installation
140
SCSI Basics
140
SCSI Terminator Installation
140
Backup Tape Drive Installation/Hookup
141
External Disk Drive Chassis Installation/Hookup
142
Software Installation
142
Initial Installation Procedure
142
Software Upgrade Installation Procedure
144
Appendix B Diagnostics
145
General
145
B.1 General
146
Diagnostics Introduction
146
Diagnostics Utilities Operational Overview
146
Radar Diagnostics Operation
147
Scan SCSI Bus Operation
147
Mount/Unmount Operating System
148
Disk Diagnostics
149
Check Disk Operation
150
Repair Disk Operation
150
Init Disk Operation
152
Show Free RAM
153
Show Debug
154
Save Debug
154
Error Logging
155
Appendix C Exploded View Drawings and Parts Lists
157
Session Controller
158
Radar (Front
160
Radar (Rear
162
Advertisement
Advertisement
Related Products
OTARI RADAR II
OTARI MTR Series
OTARI MTR-10 Series
OTARI MTR-10I Series
OTARI MTR-10II Series
OTARI MTR-12 Series
OTARI MTR-12I Series
OTARI MTR-12II Series
OTARI MTR-20 Q
OTARI MTR-20 Series
Otari Categories
Recording Equipment
VCR
Voice Recorder
Measuring Instruments
Music Mixer
More Otari Manuals
Login
Sign In
OR
Sign in with Facebook
Sign in with Google
Upload manual
Upload from disk
Upload from URL