Sign In
Upload
Manuals
Brands
Oracle Manuals
Server
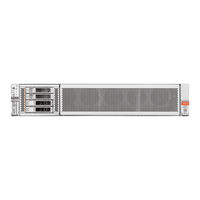
Exadata Server X11M
Oracle Exadata Server X11M Manuals
Manuals and User Guides for Oracle Exadata Server X11M. We have
1
Oracle Exadata Server X11M manual available for free PDF download: Service Manual
Oracle Exadata Server X11M Service Manual (242 pages)
Brand:
Oracle
| Category:
Server
| Size: 44 MB
Table of Contents
Table of Contents
3
Using this Documentation
10
Product Documentation Library
10
Feedback
10
About Exadata Server X11M
11
Product Description
11
Front Panel Components
14
Back Panel Components
16
Illustrated Parts Breakdown
18
Replaceable Components
21
Troubleshooting and Diagnostics
23
Diagnosing Server Component Hardware Faults
23
Troubleshoot Hardware Faults Using Oracle ILOM CLI
24
Troubleshoot Hardware Faults Using Oracle ILOM Web Interface
25
Troubleshoot Power Issues
27
Troubleshoot System Cooling Issues
28
Troubleshoot with Diagnostic Tools
29
Diagnostic Tool Selection
30
Attaching Devices to the Server
31
Attach Devices to the Server
31
Back Panel Connector Locations
31
Configuring Serial Port Sharing
32
Net 0 Gigabit Ethernet Port
33
Network Management Port
34
Serial Management Port
34
Ethernet Port Transfer Rates
34
Serial Management Port Signals
35
Default Serial Connections for Serial Port
35
RJ-45 to DB-9 Adapter Crossovers Wiring Reference
35
USB Port
36
Manually Resetting a Server's Service Processor
36
RJ-45 to DB-25 Adapter Crossovers Wiring Reference
36
Accessing Oracle ILOM
37
Service Processor Connection and Login
40
Reset the Server Using Oracle ILOM
41
Log out of Oracle ILOM
41
Monitoring Component Health and Faults Using Oracle ILOM
42
Getting Help
42
Contacting Support
43
Locating the Chassis Serial Number
43
System Configuration Information
43
Auto Service Requests
44
Preparing for Service
45
Safety Precautions
45
Safety Symbols
45
Electrostatic Discharge Safety
46
FRU Key Identity Properties (KIP) Automated Update
46
Required Service Tools
47
Preparing the Server for Component Replacement
47
Powering down the Server
48
Power down the Server Gracefully Using Oracle ILOM CLI
48
Power down the Server Gracefully Using Oracle ILOM Web Interface
49
Power down the Server Gracefully Using the On/Standby Button
49
Power down the Server for Immediate Shutdown Using Oracle ILOM CLI
50
Power down the Server for Immediate Shutdown Using Oracle ILOM Web Interface
50
Power down the Server for Immediate Shutdown Using the On/Standby Button
51
Disconnect Cables from the Server
52
Extend the Server to the Maintenance Position
52
Remove the Server from the Rack
53
Take Antistatic Measures
54
Remove the Server Top Cover
54
Servicing Storage Drives
56
Storage Drive Hot-Plug Conditions
56
Storage Drive Failure and RAID
56
Remove a Storage Drive
57
Install a Storage Drive
59
Removing and Replacing Storage Drives Using an os
60
Removing and Replacing an Nvme Storage Drive Using Oracle Linux
60
Unmount an Nvme Storage Drive
60
Remove an Nvme Storage Drive
61
Verify Removal of an Nvme Storage Drive
61
Install an Nvme Storage Drive
62
Power on an Nvme Storage Drive and Attach a Device Driver
62
Verify Operation of an Nvme Storage Drive
62
Servicing Power Supplies
63
Power Supply Overview
63
Remove a Power Supply
64
Install a Power Supply
65
Servicing Fan Modules
67
Remove a Fan Module
67
Install a Fan Module
68
Remove the Fan Tray
69
Install the Fan Tray
71
Servicing Internal M.2 Flash Ssds
73
Remove a Flash Riser Board
73
Install a Flash Riser Board
74
Identify and Remove an M.2 Flash SSD
75
Install an M.2 Flash SSD
76
Servicing the Air Baffle
78
Remove the Air Baffle
78
Install the Air Baffle
79
Servicing Dimms
81
DIMM and Processor Physical Layout
81
DIMM Population Scenarios
82
DIMM Population Rules
82
Populating Dimms for Optimal System Performance
83
DIMM Memory Slot Population Requirements
84
Using the Server Fault Remind Button
86
Identify and Remove a DIMM
86
Install a DIMM
88
Servicing the Battery
90
Remove the Battery
90
Install the Battery
93
Servicing Pcie Cards
96
Pcie Slot Locations
96
Remove a Half Height Pcie Card
97
Install a Half Height Pcie Card
98
Remove a Full Height Pcie Card
100
Install a Full Height Pcie Card
101
Remove a Pcie Riser
103
Install a Pcie Riser
104
Configure Pcie Electrical Interfaces Using the Pcie Flyover Cable
106
Remove the Pcie Flyover Cable
107
Install the Pcie Flyover Cable
108
Servicing the Motherboard Assembly
110
Remove the Motherboard Assembly
110
Install the Motherboard Assembly
121
Servicing Processors
125
Processor Overview
125
Identify and Remove a Processor
127
Install a Processor
136
Servicing the Disk Backplane
143
Remove the 4-Drive Backplane
143
Install the 4-Drive Backplane
145
Remove the 12-Drive Backplane
147
Install the 12-Drive Backplane
149
Remove the Disk Backplane Signal Cable
151
Install the Disk Backplane Signal Cable
153
Servicing the Front LED Indicator Module
156
Remove the Front LED Indicator Module
156
Install the Front LED Indicator Module
158
Servicing SAS Cables
160
Remove SAS Storage Drive Cables
160
Install SAS Storage Drive Cables
161
Returning the Server to Operation
164
Server Filler Panel Requirements
164
Remove and Install Filler Panels
164
Install the Server Top Cover
165
Remove Antistatic Measures
166
Reinstall the Server into the Rack
166
Return the Server to the Normal Rack Position
167
Reconnect Power and Data Cables
168
Power on the Server
168
Known Service Issues
170
Part I Appendices: Server Reference
171
Server Status Indicator Leds
172
System-Level Status Indicators
172
Power Supply Status Indicators
173
Fan Module Status Indicators
174
Storage Drive Status Indicators
174
Network Management Port Status Indicators
175
Ethernet Port Status Indicators
175
Motherboard Status Indicators
175
Mellanox Connectx-6 DX Smartnic Status Indicators
176
Pensando Ortano DSC Smartnic Status Indicators
177
Boot Process and Normal Operating State Indicators
178
System Specifications
179
Server Physical Specifications
179
Electrical Requirements
179
Physical Specifications
179
Facility Power Guidelines
180
Power Supply Specifications
180
Grounding Guidelines
181
Circuit Breaker and UPS Guidelines
181
Environmental Requirements
181
Humidity Guidelines
182
Environmental Requirements
182
Temperature Guidelines
183
Ventilation and Cooling Requirements
183
Agency Compliance
184
480GB Nvme M.2 Solid State Drive Specification
184
480GB, M.2, Nvme Solid State Drive 8214990 Specification
185
Drive Usage Information
185
Drive Reliability
186
Drive Capacity and Performance
186
Drive Electrical Specifications
186
Drive Physical Characteristics
186
Drive Characteristics
187
22TB Hard Disk Drive Specification
190
Server Installation Information
192
Receiving and Unpacking Requirements
192
Maintenance Space Requirements
192
Rack Space Requirements
192
Rack Compatibility
192
Rack Compatibility
193
Oracle Rack Cabinet 1242 Rack Specifications
193
Sun Rack II Model 1242 and Sun Rack II Model 1042 Rack Specifications
193
Installation Procedure
194
Installation Prerequisites
194
Safety Precautions
195
ESD Precautions
197
Tools and Equipment for Installation
197
Shipping Inventory
197
Rackmounting the Server
197
Rackmount Kit Contents
198
Stabilize the Rack
199
Install Mounting Brackets on the Server
199
Mark the Rackmount Location
200
Install AC Power Cables and Slide-Rails
202
Attach the Slide-Rails
203
Install the Server into the Slide-Rail Assemblies
205
Install the Cable Management Arm (Optional
207
Remove the Cable Management Arm
215
Operating System Installation Process
219
Configure Nvme RAID Using BRU
219
Site Planning Checklists
222
Data Center Room Considerations
222
Data Center Environment Checklist
223
Facility Power Checklist
223
Safety Checklist Considerations
225
Auto Service Request Considerations
225
Logistics Checklist Considerations
225
Server Components
227
System Chassis Components
227
Power Unit Components
228
Cooling Unit Components
229
Disk Backplane Components
230
Drive Components
231
Processor Components
232
Memory Device Components
232
System Motherboard Components
233
System Firmware Components
234
List of Tables
235
Advertisement
Advertisement
Related Products
Oracle Exadata X10M
Oracle X10-2c
Oracle Sun Fire X2270 M2
Oracle Sun Fire X4240
Oracle X5-2L
Oracle Sun Server X4-4
Oracle Database Appliance X6-2S
Oracle Database Appliance X4-2
Oracle X7-2L
Oracle EXADATA X6-8
Oracle Categories
Server
Storage
Network Hardware
Software
Controller
More Oracle Manuals
Login
Sign In
OR
Sign in with Facebook
Sign in with Google
Upload manual
Upload from disk
Upload from URL