Sign In
Upload
Manuals
Brands
NXP Semiconductors Manuals
Microcontrollers
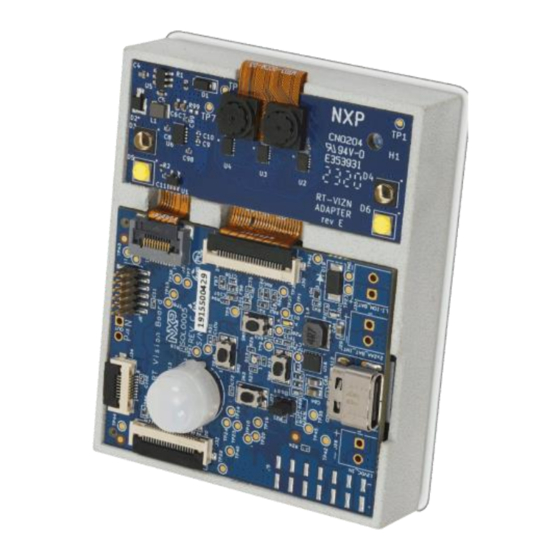
SLN-VIZNAS-IOT
NXP Semiconductors SLN-VIZNAS-IOT Manuals
Manuals and User Guides for NXP Semiconductors SLN-VIZNAS-IOT. We have
2
NXP Semiconductors SLN-VIZNAS-IOT manuals available for free PDF download: User Manual, Developer's Manual
NXP Semiconductors SLN-VIZNAS-IOT User Manual (64 pages)
Brand:
NXP Semiconductors
| Category:
Microcontrollers
| Size: 2 MB
Table of Contents
Table of Contents
1
1 Introduction
6
Rt106F Vision Crossover Processor Overview
6
Additional Peripherals
7
Figure 1: Sln-Viznas-Iot Additional Peripherals
7
Figure 2: Dual Camera Adapter Kit Configuration
7
2 Get Started with Sln-Viznas-Iot
9
Box Contents
9
Running the Demo
9
Figure 3: Sln-Viznas-Iot Box Contents
9
Figure 4: Plugging in Sln-Viznas-Iot Kit
9
Access the Camera
10
Figure 5: Windows Camera App
10
Figure 6: Sln-Viznas-Iot Camera Output in Camera App
11
Figure 7: Change Camera Button in Windows Camera App
11
Figure 8: Sln-Viznas-Iot Manual Registration Button
12
Figure 9: Registration in Progress
12
Register a Face
12
Figure 10: Successful Registration
13
Figure 11: Registration Failed
13
Figure 12: "Welcome Home" Message
14
Figure 13: Phone Display Spoof Attack
14
Liveness Detection and Anti-Spoofing
14
Figure 14: Printed Picture Spoof Attack
15
Figure 15: Fake Face Detected
15
Connect to Serial CLI
16
Figure 16: Serial Connection Settings
16
Figure 17: Serial Commands "Help" Menu
17
Enable Verbose Mode
18
Figure 18: " Verbose 0
18
Figure 19: Example Verbose Mode Debug Message
18
Figure 20: On-Screen Info for Registering Face
19
Figure 21: On-Screen Info for Recognized Face
20
Optional) Enable Low Power Mode
20
Figure 22: "Recognition Timeout" Message
21
Figure 23: Hibernation Wake-Up Trigger (SW3)
21
3 Additional Features
22
Push Buttons
22
SW1 - Toggle GUI
23
Figure 24: Sw1
23
Figure 25: Gui Toggled off
23
SW2 - Manual Deregistration
24
Figure 26: Sw2
24
Figure 27: Deregistration in Progress
24
Figure 28: "USERNAME Removed" Message
25
Figure 29: "Remove Failed
25
SW3 - Toggle IR/RGB Output
26
Figure 30: Sw3
26
Figure 31: Sw3
26
SW4 - Manual Registration
27
Figure 32: Sw4
27
Figure 33: Registration in Progress
27
Figure 34: Successful Registration
28
Figure 35: Registration Failed
28
Serial Commands
29
List Available Commands
29
Figure 36: "Welcome Home" Message
29
List All Registered Users
31
Manually Add Users
31
Figure 37: "List" Command
31
Figure 38: "Add Cooper" Command
31
Manually Delete Users
32
Rename Users
32
Verbose Mode
32
Figure 39: "Add -S" Command
32
Figure 40: "Del Cooper" Command
32
Figure 41: "Del -A" Command
32
Figure 42: "Rename User_0 Cooper" Command
32
Figure 43: " Verbose 0
32
Figure 44: Example Verbose Mode Debug Message
33
Figure 45: On-Screen Info for Registering Face
34
Figure 46: On-Screen Info for Recognized Face
34
Configure IR LED Brightness
35
Configure White LED Brightness
35
Print Version Information
35
Figure 47: "Ir_Pwm 60" Command
35
Figure 48: "Camera IR PWM Not Supported" Message
35
Figure 49: "Ir_Pwm 60" Command
35
Figure 51: " Version " Command
35
Save Users through Resets
36
Enable OTW (Over-The-Wire) Update Mode
36
Reset the SLN-VIZNAS-IOT
36
Figure 52: " Save 3" Command
36
Figure 53: " Save " Command
36
Figure 54: " Reset " Command
36
Configure Emotion Recognition
37
Figure 55: " Emotion 4" Command Success Output
37
Configure Liveness Detection
38
Figure 56: " Emotion 4
38
Figure 57: " Liveness off " Command
38
Figure 58: " Liveness on " Command
38
Configure Detection Resolution
39
Figure 59: Vga Vs . Qvga Detection Resolution Max Range
39
Display IR Output
40
Configure Display Output Device (Requires Riverdi Display)
41
Toggle GUI
41
Toggle Wi-Fi Enablement
42
Reset Wi-Fi
43
Retrieve Wi-Fi Credentials
43
Configure Wi-Fi Credentials
43
Retrieve IP Address
44
Erase Wi-Fi Credentials
44
Configure Application Type
44
Configure Low Power Mode
45
Remote (Wireless) Registration
45
Select Wireless Configuration
45
Connect Kits
46
Manage Users
48
Remote Credential Provisioning
51
App Configurations
52
Light Vs. Heavy
52
E-Lock Vs. Door Access Vs. Userid
53
Low Power Mode
54
Audio Feedback
55
Display Configurations
56
4 Troubleshooting
58
Registering a Face
58
Turn off Liveness Detection
58
Change App Type
58
Debug Using Verbose Mode
58
Ensure Lighting Is Sufficient
59
Adjust Face Proximity and Position
60
5 Document Details
62
References
62
Acronyms, Abbreviations, & Definitions
62
Revision History
63
Advertisement
NXP Semiconductors SLN-VIZNAS-IOT Developer's Manual (51 pages)
MCU VIZNAS Solution
Brand:
NXP Semiconductors
| Category:
Motherboard
| Size: 2 MB
Table of Contents
Table of Contents
1
Introduction
5
Rt106F Vision Crossover Processor Overview
5
Getting to Know the Sln-Viznas-Iot
7
Hardware Overview
7
Figure 1: Sln-Viznas-Iot Base Board + Expansion Board Peripherals
7
Figure 2: Dual Camera Adapter Kit Configuration
7
Software Overview
8
Figure 3: Viznas Hw Block Diagram
8
Figure 4: Viznas Sw Block Diagram
8
Device Memory Map
9
Figure 5: Device Memory Map
9
Security Architecture
10
Application Chain of Trust
10
Figure 6: Boot Security Flow Chart
10
Flash Image Configuration Area (FICA) and Image Verification
11
Image Certificate Authority (CA) and Application Certificates
11
Figure 7: Signing Entities
11
Get Started with Mcuxpresso Tool Suite
13
Mcuxpresso IDE
13
Figure 8: Mcuxpresso IDE Workspace
13
Install the Sdk
14
Figure 9: Select Development Board
14
Figure 10: Choose Embedded Real-Time Operating System
14
Figure 11: Select All Sdk Components
15
Figure 12: Download Sdk
15
Figure 13: Drag and Drop Sdk
16
Figure 14: Import Sdk Confirmation Window
16
Figure 15: Sdk Import Successful
16
Mport Asln-Viznas-Iot Project
17
Figure 16: Import Sdk Examples
17
Figure 17: Import Sln-Viznas-Iot Examples Wizard
17
Figure 18: Import Examples
18
Figure 19: Projects Successfully Imported
18
Optional) Increase Clock Drive Strength
19
Figure 20: Right-Click Project
19
Figure 21: "Properties" Option
19
Figure 22: Properties Window
20
Building and Programming
21
Build Asln-Viznas-Iot Project
21
Figure 23: Project Explorer - Highlight Project
21
Figure 24: Build Project
21
Figure 25: Console 'Build' Output
22
Axf to
22
Flash and Debug Sln-Viznas-Iot Project
23
Figure 27: J-Link Plus and 9-Pinc
23
Figure 28: Sln-Viznas-Iot Jtag H
23
Figure 29: Quickstart Panel - D
24
Figure 30: Probe Discovery Window
24
Figure 31: Flash Download Inp
25
Figure 32: Debug Begin
25
Figure 33: Debug Toolbar - Runb
25
Bootloader
26
Application Flow
26
Figure 34: Bootloader Flow
26
Over-The-Air (Ota)/Over-The-Wire (OTW) Updates
27
Transfers
27
Figure 35: Transfer Format
27
Figure 36: Request/Response Flow
27
Testing OTA/OTW Updates
28
Figure 37: Serial Header Connections
29
Figure 38: " Fwupdate _ Client . Py
29
Mass Storage Device (Msd) Update
30
Figure 39: " Fwupdate _ Client . Py
30
Figure 40: Msd Enablementb
30
Figure 41: Msd Mode Lights
31
Figure 42: Msd Usb Drivee
31
Figure 43: Dragging - and -Dropping
31
Generate Bankb Binary
32
Figure 44: " Version " Commando
32
Figure 45: Create Flash Bankb B
32
Automated Manufacturing Tools
33
About Ivaldi
33
Requirements
33
Creating a Signing Entity
34
Using Ivaldi to Generate Signing Artifacts
34
Figure 46: Virtual Env Prompt
34
Figure 47: Generate
34
Move Boot Jumper
35
Figure 48: Generate
35
Figure 49: Sln-Viznas-Iot Boot
35
Open Boot Programming
36
Figure 50: Required Open
36
Optional) Enabling Encrypted Execute-In-Place (Exip) and High Assurance Boot (HAB)
37
Figure 51: Open _ Prog
37
Preparing the Environment
38
Generating the PKI and Signed Flashloader
38
Figure 52: "Virtualenv" Prompt
38
Figure 53: Setup
39
Optional) Enabling Encrypted Execute in Place (Exip)
40
Figure 54: Checking the Signedf
40
Enabling High Assurance Boot (HAB)
41
Figure 55: Enabling Exip Andl
41
Preparing Bootstrap, Bootloader, and Main Application Images
42
Figure 57: Importing Thea
42
Figure 58: Unsetting the Xip Boot
43
Figure 59: Generating the Srec
43
Generating Secure Binary
44
Figure 60: Changing File Type to Srec
44
Figure 61: "Image _B Inaries " E
44
Figure 62: Secure App File Names
44
Preparing for Programming the Device
45
Figure 63: Secure
45
Enabling and Programming the Signed and Encrypted Binaries
46
Figure 64: "Image _B Inaries " C
46
Figure 65: Using " Cust
47
Filesystem
48
Figure 66: File
48
Document Details
49
References
49
Acronyms, Abbreviations, & Definitions
49
Revision History
50
Advertisement
Related Products
NXP Semiconductors SLN-VIZN3D-IOT
NXP Semiconductors SLN-VIZNLC-IOT-UG
NXP Semiconductors SLN-LOCAL2-IOT
NXP Semiconductors S12 MagniV
NXP Semiconductors S12ZVMAEVB
NXP Semiconductors S32R372141EVB
NXP Semiconductors S12ZVML-MINIBRD
NXP Semiconductors S32R37
NXP Semiconductors S32R27
NXP Semiconductors SF002US
NXP Semiconductors Categories
Motherboard
Microcontrollers
Computer Hardware
Control Unit
Controller
More NXP Semiconductors Manuals
Login
Sign In
OR
Sign in with Facebook
Sign in with Google
Upload manual
Upload from disk
Upload from URL