Sign In
Upload
Manuals
Brands
NGTeco Manuals
Time Clocks
D1 Series
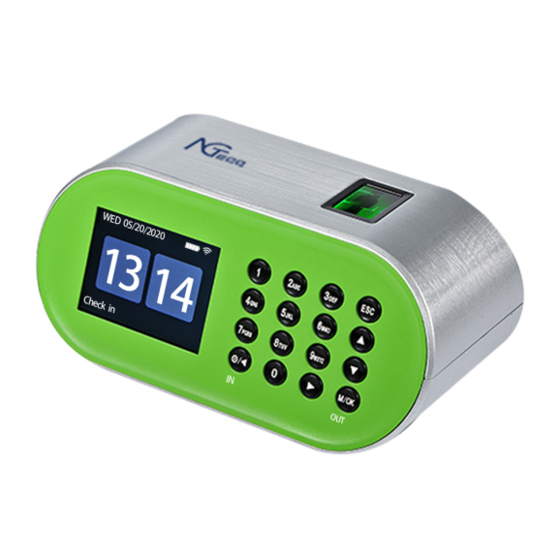
NGTeco D1 Series Manuals
Manuals and User Guides for NGTeco D1 Series. We have
1
NGTeco D1 Series manual available for free PDF download: User Manual
NGTeco D1 Series User Manual (70 pages)
Brand:
NGTeco
| Category:
Time Clocks
| Size: 3 MB
Table of Contents
Table of Contents
4
Overview
11
Operational Procedure
11
Finger Enrollment
11
Finger Selection for Enrollment
11
Enrollment Operation
12
Quality Improvement of Fingerprint Reads
12
Figure 2-1: Fingerprint Registration
12
Verification Modes
13
Fingerprint
13
Figure 2-2: Successful Biometric Verification
13
Figure 2-3: Failed Biometric Verification
14
Figure 2-4: 1:1 Verification Screen
14
Figure 2-5: Successful Biometric Verification
15
Figure 2-6: Failed Biometric Verification
15
Password
16
Figure 2-7: Failed 1:1 Verification
16
Figure 2-8: Successful Password Verification
16
Attendance Status
17
Figure 2-9: Failed Password Verification
17
Figure 2-10: Home Screen
17
T9 Mode
18
Figure 2-11: Changed Attendance Status
18
Figure 2-12: Add User Details
18
Privileges
19
Administrator
19
Figure 2-13: Special Characters
19
Figure 3-1: Locked Screen for Admin Verification
20
Figure 3-2: Admin Verification
20
Users
21
How to Reset Admin Privileges
21
Figure 3-3: Failed Admin Verification
21
Figure 3-4: Clear Permission
21
Figure 3-5: Confirmation Screen
22
Figure 3-6: Success Message after Clearing Permission
22
Main Menu
23
Figure 4-1: Main Menu
23
User Management
24
New User Registration
24
Figure 5-1: User List
24
Figure 5-2: Add a New User
25
Figure 5-3: User Details
25
Figure 5-4: Fingerprint Enrollment
26
Figure 5-5: Successful Enrollment
26
Figure 5-6: Alert to Overwrite Fingerprints
27
Figure 5-7: Enroll Password
27
User Data Management
28
Figure 5-8: Change Password
28
Figure 5-9: User List Menu
28
Edit User Details
29
Figure 5-10: User List
29
Figure 5-11: Edit User Details
29
Enroll the Fingerprint
30
Delete User
30
How to Transfer User Data
30
Figure 5-12: Alert to Delete User
30
Upload User Data from Usb Drive to Clock
31
Figure 5-13: Upload User Data
31
Figure 5-14: Download Template
31
Figure 5-15: Success Message after Downloading Template
32
Figure 5-16: Template File - 1
32
Figure 5-17: Template File -2
33
Figure 5-18: Edit User Details
33
Download User Data from Clock to Usb Drive
34
Figure 5-19: Upload Template
34
Figure 5-20: Success Message after Uploading the Template
34
Figure 5-21: Download User Data -1
35
Figure 5-22: Download User Data - 2
35
Figure 5-23: Success Message after Downloading User Data
35
Pay Period
36
Weekly Pay Period
36
Figure 5-24: Downloaded File
36
Bi-Weekly Pay Period
37
Figure 6-1: Weekly Pay Period
37
Semi-Monthly Pay Period
38
Figure 6-2: Bi-Weekly Pay Period
38
Monthly Pay Period
39
Figure 6-3: Semi-Monthly Pay Period
39
Figure 6-4: Monthly Pay Period
39
Attendance Management
40
Attendance Rules
40
Figure 7-1: Attendance Rule
40
Attendance Tracking
42
Every Day
42
Very Day Ttendance
42
Figure 7-2: Today's Attendance
42
Figure 7-3: Attendance Details
43
Figure 7-4: Time Data
43
Attendance of Individual Users
44
Figure 7-5: Attendance of a User
44
Figure 7-6: Attendance in a Day
44
Figure 7-7: Attendance History
45
Figure 7-8: Selecting a User
45
Figure 7-9: Users List
46
Figure 7-10: Selected Users to View Attendance
46
Add Missing Attendance Punch
47
Figure 7-11: Attendance Details of the Selected Users
47
Figure 7-12: Add Missing Punches
47
Time-Attendance Reports
48
Figure 7-13: Missing Punch Details
48
Report Parameters
49
Download Reports
49
Figure 8-1: Time Report
49
Figure 8-2: Success Message after Generating Time Report
50
Figure 8-3: Downloaded Attendance Report
50
Figure 8-4: Detailed Attendance Report
51
Communication Parameters
52
Manual Wi-Fi Configuration
52
Connection to an Existing Wi-Fi
52
Figure 9-1: Manual Wi-Fi Connection
52
Figure 9-2: Available Wi-Fi Networks
52
New Wi-Fi Connection
53
Figure 9-3: Wi-Fi Connection Interface
53
Figure 9-4: Connected Wi-Fi
53
Enable/Disable DHCP
54
Figure 9-5: Ssid and Password
54
Figure 9-6: Dhcp Interface
54
Wi-Fi Configuration through Usb
55
Figure 9-7 Dhcp Connectivity
55
Figure 9-8: Wi-Fi Setup by Usb
55
Figure 9-9: Wi-Fi Setup Template Download
56
Figure 9-10: Success Message after Download
56
Figure 9-11: Downloaded Template
56
App Connection
57
Figure 9-12: Connectivity Interface
57
Figure 9-13: App Connection
58
Figure 9-14: App Operation
58
Data Management
59
Attendance Log Management
59
Download Attendance Logs
59
Figure 10-1: Data Management
59
Figure 10-2: Download Attendance Log
59
Delete Attendance Logs
60
Figure 10-3: Success Message after Downloading Attendance Logs
60
Figure 10-4: Downloaded Attendance Logs
60
Clock Reset
61
Figure 10-5: Delete Attendance Logs
61
Figure 10-6: Confirmation to Delete Attendance Logs
61
Figure 10-7: Success Message after Deleting Attendance Logs
61
Figure 10-8: Clock Reset
62
Figure 10-9: Confirmation to Reset the Clock
62
Figure 10-10: Success Message after Reset
62
Delete All Data
63
Figure 10-11: Delete All Data
63
Figure 10-12: Confirmation to Delete All Data
63
Figure 10-13: Success Message after Deleting All Data
63
Firmware Update
64
Figure 10-14: Update Firmware
64
Figure 10-15: Confirmation to Update Firmware
64
Figure 10-16: Success Message after Updating Firmware
64
System Settings
65
Clock Date and Time
65
Figure 11-1: Date and Time Settings -1
65
Figure 11-2: Date and Time Settings -2
65
Clock Information
66
Figure 11-3: System Information -1
66
Figure 11-4: System Information - 2
67
Troubleshooting
68
Contact Us
68
Figure 13-1: System Help
68
Figure 13-2: Support Screen
69
Advertisement
Advertisement
Related Products
NGTeco D2 Series
NGTeco DL30 Series
NGTeco K4
NGTeco KF460
NGTeco W1 Series
NGTeco W2 Series
NGTeco Categories
Time Clocks
Security Camera
Door locks
Camcorder
Battery Charger
More NGTeco Manuals
Login
Sign In
OR
Sign in with Facebook
Sign in with Google
Upload manual
Upload from disk
Upload from URL