Sign In
Upload
Manuals
Brands
Molbio Manuals
Measuring Instruments
TRUELAB Quattro
Molbio TRUELAB Quattro Manuals
Manuals and User Guides for Molbio TRUELAB Quattro. We have
1
Molbio TRUELAB Quattro manual available for free PDF download: User Manual
Molbio TRUELAB Quattro User Manual (89 pages)
Real Time Quantitative micro PCR Analyzer
Brand:
Molbio
| Category:
Measuring Instruments
| Size: 4 MB
Table of Contents
Table of Contents
3
Table of Figures
5
Preface
11
Introduction
13
Polymerase Chain Reaction (PCR)
13
1.2 Real-Time PCR
13
1.3 Understanding Cycle Threshold (Ct) Value
13
Setting up the Truelab Quattro Real Time Quantitative Micro PCR Analyzer
14
Contents
14
2.2 Materials Required but Not Provided with the Analyzer
14
Figure 1: Model of a Real-Time PCR Amplification Plot
14
Installation Requirements
15
2.3.1 Installation Precautions
15
2.3.2 Environmental Requirements
15
2.3.3 Limitations of Use
15
Installing the Truelab Quattro
15
2.4.1 Power Users
15
2.4.2 Regular Users
16
Specifications of the Truelab Quattro Real Time Quantitative Micro PCR Analyzer
16
General Specifications
16
Shipping
17
Using the Truelab Quattro Real Time Quantitative Micro PCR Analyzer
17
Introduction
17
Interacting with the Truelab Quattro
17
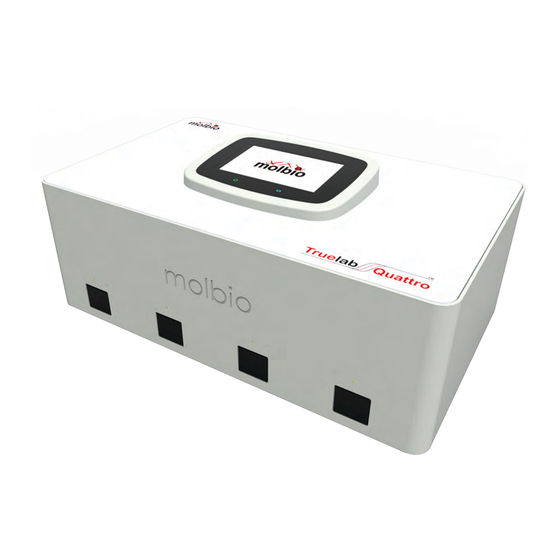
Figure 2: Illustration of Truelab Quattro
17
4.1.2 Checking Battery Status before Use
20
Figure 5: the Boot-Up Screen
20
Figure 6: Home Screen with Low Battery Alert System Message
20
Charging/Using the Truelab Quattro with the AC Adaptor
21
Starting the Truelab Quattro
21
Figure 7: Home Screen with Low Battery Icon in Left Corner
21
Figure 8: Login Screen
22
Figure 9: User ID Selection
22
Figure 10: the Login Screen, with the On-Screen Keyboard
22
Figure 11: Status Screen
22
Figure 12: the Profiles Screen
23
Figure 13: Profile Confirmation Prompt
23
Figure 15: Filling-In the Sample Details from
24
Figure 16: Sample Type Selection
24
Figure 17: Sample Menu Expanded
25
Loading the Truenat ® Chip
26
Figure 20: the Truenat Chip
26
Figure 21: the Truenat Chip Being Placed Correctly Onto the Chip Tray
26
Figure 22: an Example of Incorrect Chip Placement
27
Figure 23: Loading the Sample Onto the Chip
27
4.4 Starting the Test
29
Figure 25: Incorrect Sample Loading, Showing Spillage of the Elute Around the Reaction Well
29
Figure 26 A: Prompting the User to Load the Sample
29
Figure 26 B: Initialization Screen
29
System Messages
30
4.5 During the Test
31
Figure 30: the Test Status Screen
31
Viewing the Thermal Graph
32
Viewing the Optical Graph
32
Stopping the Test
32
Figure 31: the Temperature Graph
32
Figure 32: the Optical Graph
32
Figure 33: Test Stop Confirmation
32
System Messages
33
Test Completion
33
Figure 34: the Test Status Screen after Stopping the Test
33
Figure 35: Incorrect Thermal Cycling Error
33
Figure 36: Probe Check Failed Error
33
4.6 after the Test
34
Viewing the Test Results
34
Printing the Results
34
Figure 37: the Test Results Screen
34
Figure 39: the Truelab Micro PCR Printer
34
4.6.3 Sharing the Results Via Bluetooth
35
Figure 41: Message Displayed before the System Begins Printing
35
Figure 42: the Test Results Screen
35
Figure 43: Choose Bluetooth Device Screen
35
Figure 44: Export Option for Result Transfer
35
Figure 45: Settings Screen in Truelab Device
35
Figure 46: SMTP Configuration Screen
35
Figure 47 A: the Test Results Screen
36
Figure 47 B: Email Pop-Up on Results
36
Figure 49: the Test Results Screen
36
Figure 50: Pop-Up to Send SMS
36
Figure 51: Language Selection Screen
37
Figure 52: the Profiles Screen
37
Viewing Saved Test Results
38
Figure 53: the Status Screen
38
Figure 54 A: the Results List
39
Figure 54 B: the Graph Screen
39
Figure 56: Selecting the Parameter to Search by
40
Figure 57: Searching by Name
40
Figure 58: Options Available after Search Feature Is Used
41
Figure 60: Pop-Up to Enter the Date into each Text Box
42
Figure 61: the from and to Fields Filled-In
42
Power User Features
43
Figure 63: Test Results Sorting Options
43
Figure 64: Tests Sorted by Name in Ascending Order
43
Figure 65: the Status Screen
44
Figure 66: the Settings Screen
44
Figure 67: the User Settings Screen
45
Figure 68: Add User Form
45
Figure 69: the Status Screen
46
Figure 70: the Settings Screen
46
Figure 71: the User Settings Screen
46
Figure 73: the Status Screen
47
Figure 74: the Settings Screen
47
Figure 75: the User Settings Screen
47
Figure 76: Password Reset Form
48
Figure 77: the Status Screen
48
Figure 78: the Settings Screen
48
Figure 80: Confirmation of Saved Changes to App Settings
50
Figure 81: the Status Screen
50
Figure 82: the Settings Screen
50
Figure 83: about Screen
51
Figure 86: the Status Screen
52
Figure 87: the Settings Screen
52
Figure 88: about Screen
52
Generating and Transmitting Log Files
53
Figure 89: the System Message When Checking for Updates
53
Figure 90: the Status Screen
54
Figure 92: about Screen
54
Figure 93: Log File Creation Confirmation
54
Figure 94: the Status Screen
55
Figure 95: the Settings Screen
55
Figure 96: about Screen
55
Figure 97: Pop-Up for Selection of Log File or Data File
56
Figure 98: Log File Selection
56
Figure 99: Pop-Up for Selecting Send or Share
56
Figure 100: Log File Upload Status
57
Figure 101: the Status Screen
57
Figure 102: the Settings Screen
57
Figure 103: about Screen
58
Figure 104: Pop-Up for Selection of Log File or Data File
58
Figure 105: Log File Selection
58
Figure 106: Pop-Up for Selection of Send or Share Option
58
Figure 107 A: Bluetooth Devices List for Transmitting Log Files
59
Figure 107 B: Log File Sent Confirmation
59
Sending the Data Files
60
Figure 109: the Settings Screen
60
Figure 110: about Screen
60
Figure 111: Pop-Up for Selection of Log File or Data File
61
Figure 112: Data File Upload Progress
61
Figure 113: Upload Status of Data File
61
System Settings
62
Figure 114: the Settings Screen
62
Figure 115: the System Settings Screen
62
Figure 116: Wi-Fi Settings Screen
62
Figure 117: Connecting to Desired Wi-Fi Network
63
Figure 120: Display Screen for Static Network
64
Figure 121: Enter the Password
64
Figure 122: Sim Slot for SIM Card and Direction for SIM Insertion
64
Figure 128: Screen with Available Network Displayed for Selection
66
Figure 130: Access Point Names Screen
67
Figure 131: Edit Access Point Screen
68
Figure 132: Network Status Screen
69
Figure 134: List of Bluetooth Connection for Available Devices
69
Pairing Instructions
70
Figure 135: Pop-Up for Bluetooth Pairing Request
70
Figure 136: Paired Devices List
70
Figure 137: Pop-Up for Paired Device
70
Figure 138: the Settings Screen
70
Figure 139: Date & Time Selection under Settings Screen
71
Figure 140: Date & Time Screen
71
Figure 141: Manual Settings of Date & Time
71
Figure 142: Pop-Up to Set Date
72
Figure 143: Pop-Up to Set Time
72
Display Settings
72
Figure 144: Device Settings Screen to Select Display
72
Figure 145: Display Screen
73
Figure 146: Settings Screen to Select Storage
73
Figure 147: Screen to Show Storage Status/Storage Screen
73
Switching off the Analyzer
74
Figure 149: Battery Status Screen
74
Figure 151: the Settings Screen
74
Maintaining the Truelab ® Quattro
75
Safety
75
System Messages and Troubleshooting
77
Figure 152: about Screen
77
Figure 153: the System Status Screen
77
Figure 154: the System Status Screen with Sub-Systems
78
Figure 155: Status Screen for SIM Status Option
78
Figure 156: SIM Status Screen
78
Figure 157: Login Invalid Prompt
79
Figure 158: Sample Details Screen
79
Figure 159: Chip Information Read Error
79
Figure 160: Initialization Error
80
Figure 161: Used Chip Alert
80
Figure 162: Expired Chip Alert
80
Figure 163: Internet Connection Status
80
Figure 164: Molbio Support Server Status
81
Figure 165: Printer Connection Status
81
Figure 166: Update Available Alert
81
Figure 167: Error 1 Screen Status
82
Figure 169: Error 3 Screen Status
83
Figure 170: Error 4 Screen Status
83
Figure 171: Error 5 Screen Status
84
Glossary
85
References
86
Advertisement
Advertisement
Related Products
Molbio Truelab Duo
Molbio Trueprep AUTO
Molbio 603023001
Molbio Categories
Printer
Measuring Instruments
Laboratory Equipment
More Molbio Manuals
Login
Sign In
OR
Sign in with Facebook
Sign in with Google
Upload manual
Upload from disk
Upload from URL