
Related Manuals for Molbio TRUELAB Quattro

Summary of Contents for Molbio TRUELAB Quattro
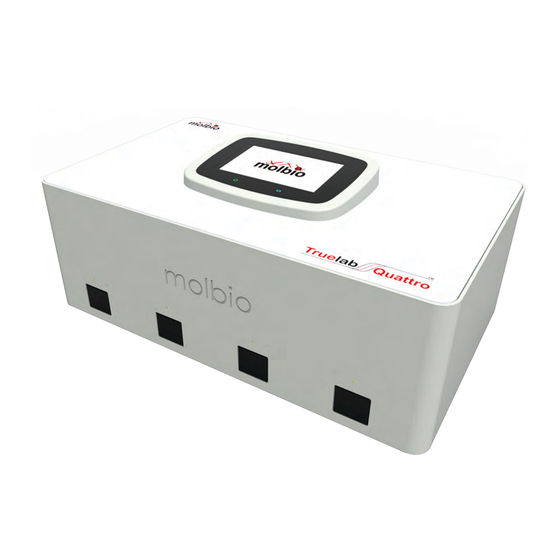
- Page 1 ® True Quattro ® Quattro Real Time Quantitative micro PCR Analyzer 603023001 User Manual 8908007989965 ®...
-
Page 3: Table Of Contents
1. Introduction Polymerase Chain Reaction (PCR) Real-time PCR Understanding Cycle Threshold (Ct Value) ® 2. Setting up the Truelab Quattro Real Time Quantitative micro PCR Analyzer Contents Materials required but not provided with the analyzer Installation requirements 2.3.1 Installation precautions 2.3.2 Environmental requirements... - Page 4 ® True Quattro ® 4.2 Starting the Truelab Quattro ® 4.3 Loading the Truenat Chip Starting the test 4.4.1 Starting the test 4.4.2 System messages 4.5 During the test 4.5.1 Viewing the thermal graph 4.5.2 Viewing the optical graph 4.5.3 Stopping the test 4.5.4 System messages...
-
Page 5: Table Of Figures
® True Quattro TABLE OF FIGURES Figure 1: Model of a real-time PCR amplification plot ® Figure 2: Illustration of Truelab Quattro Figure 3: GSM Antenna insert direction Figure 4: GSM Antenna Position Figure 5: The Boot-up Screen Figure 6: Home Screen with Low Battery Alert System Message Figure 7: Home Screen with Low battery icon in left corner Figure 8: Login Screen Figure 9: User ID Selection... - Page 6 ® True Quattro ® Figure 29: Error in matching inserted Truenat Chip to chosen Test Profile Figure 30: The Test Status Screen Figure 31: The Temperature Graph Figure 32: The Optical Graph Figure 33: Test Stop Confirmation Figure 34: The Test Status Screen after Stopping the Test Figure 35: Incorrect thermal cycling error Figure 36: Probe check failed error Figure 37: The Test Results Screen...
- Page 7 ® True Quattro Figure 57: Searching By Name Figure 58: Options available after search feature is used Figure 59: Sort feature for results that appear after a search Figure 60: Pop-up to enter the Date into each Text Box Figure 61: The From and To Fields filled-in Figure 62: The Profiles Screen Figure 63: Test Results Sorting Options Figure 64: Tests Sorted by Name in Ascending Order...
- Page 8 ® True Quattro Figure 87: The Settings Screen Figure 88: About Screen Figure 89: The System Message when Checking for Updates Figure 90: The Status Screen Figure 91: Settings Screen Figure 92: About Screen Figure 93: Log File creation confirmation Figure 94: The Status Screen Figure 95: The Settings Screen Figure 96: About Screen...
- Page 9 ® True Quattro Figure 116: Wi-Fi Settings Screen Figure 117: Connecting to desired Wi-Fi network Figure 118: Enter the Password Figure 119: Wi-Fi advanced setting option for dynamic or static Figure 120: Display screen for static network Figure 121: Enter the password Figure 122: Sim slot for SIM card and direction for SIM insertion Figure 123: Selection of user name Figure 124: Enter the password Screen...
- Page 10 Figure 160: Initialization error Figure 161: Used chip alert Figure 162: Expired Chip Alert Figure 163: Internet connection status Figure 164: Molbio Support Server Status Figure 165: Printer connection status Figure 166: Update available alert Figure 167: Error 1 Screen Status...
-
Page 11: Preface
Note for customers: Any serious incident that has occurred in relation to the device shall be reported to the Molbio Diagnostics Private Limited and the competent authority of the Member State in which the user and/or the patient is established. - Page 12 ® True Quattro Text Conventions: Text Convention Usage Numbered lists Numbered lists indicate that the steps need to be performed according to the numbering. Bold text When found within a numbered list or explanatory section, Bold Text is used to indicate an object that the user interacts with, which can be a physical object or an object on the software interface.
-
Page 13: Introduction
It is easy to use and requires minimal training. ® This is the User Guide for the Truelab Quattro Real Time Quantitative micro PCR Analyzer. It ® provides detailed instructions for the use of all the Truelab Quattro's available functions, as well as additional information about its technical specifications, a brief introduction to the concept of PCR and a glossary. -
Page 14: Setting Up The Truelab Quattro Real Time Quantitative Micro Pcr Analyzer
PCR reactions run under different conditions or obtained using different PCR machines and/or reagents cannot and should not be compared. ® 2 Setting p the Truelab Quattro Real Time Quantitative micro PCR Analyzer 2.1 Contents ® The standard... -
Page 15: Installation Requirements
Attempting to do so may interfere with its functioning and compromise test results. At the time of installation, service personnel from Molbio will set up a user profile for the ®... -
Page 16: 2.4.2 Regular Users
3 Specifications of the Truelab Quattro Real Time Quantitative micro PCR Analyzer ® The Truelab Quattro is a portable, battery-operated Real time PCR Analyzer. It houses a ® touchscreen for user interaction, a sliding chip tray for the Truenat microchip, optical detection systems and electronic components that control all aspects of the system. -
Page 17: Shipping
Shipping ® ® The Truelab Quattro is shipped as part of the Truelab Real Time micro PCR Workstation (Cat no. 633010001/653010001) or as a standalone system (Cat no. 603023001). ® 4.Using the Truelab Quattro Real Time Quantitative micro PCR Analyzer Introduction ®... - Page 18 ® True Quattro 4.1.1.1 Connecting the antenna before Use ® Before using the Truelab Quattro you should check if the Analyzer’s antennas are attached.One antenna (black) is required for cellular connectivity using SIM card and another antenna (green) is required for WiFi connectivity. To do this, 4.1.1.1.1 Straighten the antenna.
- Page 19 ® True Quattro 4.1.1.1.3 Slowly rotate clockwise till resistance is felt as shown in Figure 3 4.1.1.1.4 Twist the antenna 90 degrees as shown in Figure 4 and avoid placing objects in three to four centimetres around the antenna for better reception. Figure 4: Antenna Position To remove the antenna for transportation or storage straighten it first and then slowly rotate anti clock wise till it come loose.
-
Page 20: 4.1.2 Checking Battery Status Before Use
True Quattro ® The Truelab Quattro is operated using the touch-sensitive Screen. You can use your fingers to operate ® it. The Chip Tray holds the disposable, disease-specific Truenat chips You can either run the Analyzer using battery power or use it with the power cable plugged in. -
Page 21: Charging/Using The Truelab Quattro With The Ac Adaptor
4.1.2.3 If the Low Battery LED Indicator and/or the Battery Status Icon indicate low battery charge, ® you can either use the Truelab Quattro with the AC Adaptor or you can charge it and wait for it to finish before using it on battery power. (See the next section, 4.1.3, “Charging/Using the ®... -
Page 22: Figure 8: Login Screen
Name Figure 9: User ID Selection 4.2.2.2 Select the user name from the list displayed. Note: The user name “Molbio” is just used here as an example. The user name is definable by the customer. 4.2.2.3 Tap the Password text box You will be prompted with an on-Screen keyboard. -
Page 23: Figure 12: The Profiles Screen
® True Quattro 4.2.3 Profiles and Sample Details The Profiles Screen will list out all available disease profiles that you can choose from. A profile contains preset PCR parameters for that particular test. Figure 12: The Profiles Screen To choose a profile, 4.2.3.1 Tap on the profile of your choice from the list. -
Page 24: Figure 15: Filling-In The Sample Details From
® True Quattro 4.2.3.4 Fill in the Sample Details Form with the details of the test using the on-Screen keyboard. 4.2.3.5 O n l y p a t i e n t I D f i e l d i s mandatory, patient name will be automatically captured same as patient ID. -
Page 25: Figure 17: Sample Menu Expanded
® True Quattro Note: This data will be saved along with test results when the test has finished and can be viewed whenever you like. (See section 4.7 “Viewing Saved Test Results”) Figure 17: Sample menu expanded 4.2.3.6 When you have completed the Sample Details Form, Press the “Start Test”... -
Page 26: Loading The Truenat ® Chip
® True Quattro ® Truenat 4.3 Loading the chip 4.3.1 Placing the Chip on the Chip Tray ® Truenat 4.3.1.1 Place a new chip on to the Chip Tray by lowering the chip onto the chip tray. Reaction Well Registration Important: holes Make sure you have placed the chip... -
Page 27: Figure 22: An Example Of Incorrect Chip Placement
® True Quattro Figure 22: An Example of Incorrect Chip Placement Note: The Tray Pins in the figures above are colored red only for the purpose of illustration. 4.3.3 Loading the Sample onto the Chip 4.3.3.1 After the chip has been properly placed onto the Chip Tray, ®... - Page 28 ® True Quattro ® 4.3.3.2 Figure 24 (below) shows a summary of the Truenat loading procedure. When the chip has been loaded correctly, proceed to section 4.4. ® Truenat Figure 24: A Summary of the Chip Loading Procedure ®...
-
Page 29: 4.4 Starting The Test
Figure 26 A: Prompting the User to load the Sample 4.4.1.2 When it has finished initializing, the In-use LED Indicator on the ® Truelab Quattro micro PCR Analyzer will glow Green and the Test Status Screen will appear. This indicates that the test has Figure 26 B: Initialization screen started. -
Page 30: System Messages
® True Quattro 4.4.2 System Messages Before the test begins, the Analyzer will check all system parameters, ® Truenat including the chip. If there are any errors, the Analyzer will alert you with a pop-up message. The alerts you may receive are as follows: ®... -
Page 31: 4.5 During The Test
® True Quattro 4.5 During the Test Test completion Cycle Progress bar Indicator Test Progress bar Test details bar Plot Button Stop button Main Button enables viewing to manually to go back to of Optical and stop the test status Screen thermal Graphs Figure 30: The Test Status Screen The Test Status Screen lets you monitor the progress of your current test. -
Page 32: Viewing The Thermal Graph
® True Quattro 4.5.1 Viewing the Thermal Graph 4.5.1.1 Tap the Plot Button on the Test Screen. 4.5.1.2 Select Temperature to view the thermal graph. Note: The number in the right corner, here “92.94”, indicates what temperature the reaction well is at. Figure 31: The Temperature Graph The graph changes as the cycles progress. -
Page 33: System Messages
When it Occurs: Solution: During the test Please repeat the test using a fresh chip. If the problem persists, please contact Molbio Figure 35: Incorrect thermal cycling error support. System message Reason: “Probe Check Low/high volume loaded in Failed”... -
Page 34: 4.6 After The Test
For further details ® Truelab Figure 39: The micro PCR Printer or activation of this feature, contact Molbio Support. 4.6.2.1 To print the results of the test, Click the Printer Power Button on the ® Truelab micro PCR Printer... -
Page 35: 4.6.3 Sharing The Results Via Bluetooth
System begins Printing 4.6.3 Sharing the results via Bluetooth 4.6.3.1 Tap the Share Button in the Results ® Truelab Quattro. Screen of your 4.6.3.2 A pop-up will appear list of available Figure 42: The Test Results screen Bluetooth devices will appear. Select the device which you want to transfer the result to. -
Page 36: Figure 47 A: The Test Results Screen
True Quattro 4.6.4.1 Tap on Email button on the result screen ® of your Truelab Quattro 4.6.4.2 A pop-up will appear which will ask you to enter the email ID you want to send the result to. Figure 47 A: The Test results screen... -
Page 37: Figure 51: Language Selection Screen
® True Quattro 4.6.6 Language translation If you want to share the results in other language, English, Czech, French & Russian options are available. Go to Home page > Settings > Tap on LAN & Select the required language. Log off the device & Log in again & repeat procedure as per 4.6.4 and 4.6.5 Thermal printing &... -
Page 38: Viewing Saved Test Results
® True Quattro Viewing Saved Test Results Results and details of previously performed tests can be viewed at any time. You cannot browse saved test results when a test is currently in progress. Note: ® = Unless you are a Power User (see Section 2.3, “Installation of the Truelab Quattro”, for details) you will only be able to view tests that were performed using your designated user ID. -
Page 39: Figure 54 A: The Results List
® True Quattro Note : · T h e r e s u l t s a r e n a m e d automatically by the Analyzer in the format “profile-date-time-patient:ID”. For example, in figure 54 A, the last result in the list named “MTB-RIF on 2016-11-18 09-34-22 Patient: GARC107”, indicates it was a test... -
Page 40: Figure 56: Selecting The Parameter To Search By
® True Quattro 4.7.2 Search Saved Results Saved results can also be searched based on the following fields: · Test Name · Patient Name · Referred By · Date & Time (YYYY-year, MM-month, DD-day and HH-hour, MM-minutes, SS-seconds.) To search for saved results, 4.7.2.1 Double tap the touchscreen and login (See section 4.2) This will open the Status... -
Page 41: Figure 58: Options Available After Search Feature Is Used
® True Quattro 4.7.2.6 Tap the Search button on the pop-up to initiate the search. When the search is complete, a list of previous test results will be displayed. Figure 58 : Options available after search feature is used 4.7.2.7 Tap the result you want to view to open the Test Results Screen. -
Page 42: Figure 60: Pop-Up To Enter The Date Into Each Text Box
® True Quattro Note: In this section, the parameter used to search by is “Test Name”. The pop-up textbox is similar for the “Referred by” and “Patient Name” searches. However, if you search by date, the pop-up will be a text box with “From” and “To”... -
Page 43: Power User Features
The features detailed in this section can only be accessed by power users (see · ® Section 2.3, “Installing the Truelab Quattro” for details on power users and regular users). If you attempt to access these features as a regular user, you will simply receive an error message. -
Page 44: Figure 65: The Status Screen
5.1.5 Tap the Login Button. Note: If you have forgotten the password for your power user account, please contact Molbio support. 5.2 Creating a New User Note: You cannot create another Power User. New users will only be regular users. -
Page 45: Figure 67: The User Settings Screen
® Truelab Login Screen. 5.3 Deleting an User Deleting a particular user name will remove that user name from: ® · The drop-down menu in the Truelab Quattro Login Screen · The user list in the User Settings Page ®... -
Page 46: Figure 69: The Status Screen
® True Quattro 5.3.1 Login as the power user (refer to previous section, 5.1, “Logging In as the Power User”, for details) This will open the Status Screen. Figure 69: The Status Screen 5.3.2 Tap Settings in the Status Screen. This will open the Settings Screen. -
Page 47: Figure 73: The Status Screen
® True Quattro Resetting the Password 5.4.1 Login as the Power User This will open the Status Screen. Figure 73: The Status Screen 5.4.2 Tap Settings in the Status Screen. This will open the Settings Screen. Figure 74: The Settings Screen 5.4.3 Tap the User Settings Icon This will open the User... -
Page 48: Figure 76: Password Reset Form
Figure 76: Password Reset Form Changing Lab Details ® The Truelab Quattro allows a power user to edit the lab name and location that has been recorded on the system. To edit the Lab Name and Lab Location, 5.5.1 Login as Power User. - Page 49 Note: Do not change any other details in this page as this will affect some features of ® the Truelab Quattro. Press the "Default" Icon in the Server IP section if accidentally changed. This will restore the settings. ®...
-
Page 50: Figure 80: Confirmation Of Saved Changes To App Settings
Figure 80: Confirmation of saved changes to app settings ® Updating the Truelab Quattro The analyzer will prompt the user with a system message when a new update is available. 5.6.1 Login as Power User. -
Page 51: Figure 83: About Screen
Screen. Figure 83 : About Screen 5.6.4 Tap Update. ® Truelab Quattro will connect to the server and check for new versions of the software. If it finds a new version, the Analyzer will automatically download and install the new version. -
Page 52: Figure 86: The Status Screen
® True Quattro ® Truelab Quattro also checks 5.6.5 periodically for new updates and if found will automatically download in background. It will then prompt the user on the next login for installation of the new update. Note: If login Screen does not appear after 10 seconds, please press Home button. -
Page 53: Generating And Transmitting Log Files
Note: These features are configured during installation. · Via Bluetooth to the nearest computer/mobile phone ® The log file should be sent to Molbio support with the Truelab Quattro micro PCR Analyzer ID (in use) and nature of incident. ®... -
Page 54: Figure 90: The Status Screen
Figure 92 : About Screen 6.1.4 Tap the Log icon in the About Screen. ® Truelab Quattro will now create a log file and prompt you with a success message when it has finished. Note: If the log file creation fails, please ·... -
Page 55: Figure 94: The Status Screen
Note: ® If the Truelab Quattro is not configured to work with Wi-Fi / 4G or if a Wi-Fi / 4G network is unavailable, see section 6.3 “Sending Log Files to other devices (Mobile / PC) equipped with Bluetooth”. To send log files using 4G / Wi-Fi, 6.2.1... -
Page 56: Figure 97: Pop-Up For Selection Of Log File Or Data File
® True Quattro 6.2.4 Tap the Send/Share Button. This will display a pop-up with the options “Log File” and “Data File”. Figure 97: Pop-up for selection of Log File or Data file 6.2.5 Tap Log File A list of available log files will be displayed. -
Page 57: Figure 100: Log File Upload Status
Sending Log Files to other devices (Mobile / PC) equipped with bluetooth ® If the Truelab Quattro is not connected to a Wi-Fi Network, you can use the Bluetooth functionality to send the log file to the nearest computer or mobile phone. -
Page 58: Figure 103: About Screen
® True Quattro 6.3.3 Tap the About Icon in the Settings Screen. This will open the About Screen. Figure 103 : About Screen 6.3.4 Tap the Send/Share Button. This will display a pop-up with the options “Log File” and “Data File”. Figure 104 : Pop-up for selection of Log file or Data file 6.3.5 Tap Log File. -
Page 59: Figure 107 A: Bluetooth Devices List For Transmitting Log Files
Figure 107 B: Log file sent confirmation on re-trying the procedure, or if ® Truelab Quattro alerts you with a Bluetooth Error message, please contact Molbio Support. 6.3.10 On completion, please send it to customer support via e-mail. -
Page 60: Sending The Data Files
® True Quattro 7 Sending the Data File You can send data files (test data) to an external agency or server using a 4G or Wi-Fi connection, if this feature was configured during installation. To send the Data File, Login as Power User. This will open the Status Screen. -
Page 61: Figure 111: Pop-Up For Selection Of Log File Or Data File
If the problem does not resolve itself on re-trying ® Truelab the procedure, or if the Quattro alerts you with a Bluetooth Error message, please Figure 112: Data file upload progress contact Molbio Support. Figure 113: Upload status of data file ®... -
Page 62: System Settings
® True Quattro 8 System Settings This section provides information about the connectivity (Wi-Fi, Cellular, Bluetooth), date & time settings, etc. Connectivity helps to facilitated over the air updates, results sharing and remote diagnosis. 8.1 Connecting the Analyzer to Wi- Fi Networks 8.1.1 Switching ON Wi-Fi... -
Page 63: Figure 117: Connecting To Desired Wi-Fi Network
® True Quattro 8.1.2 Configuring chosen Wi-Fi network 8.1.2.1 Once you tap on the network name, a pop-up will appear where you can configure and set up the connection. Scroll down and select advanced options to configure the IP settings. Figure 117 : Connecting to desired Wi-Fi network 8.1.2.2 Check with your network and router administrators if your... -
Page 64: Figure 120: Display Screen For Static Network
® True Quattro 8.1.2.3 Enter the password for the chosen Wi-Fi network and press 'Connect'. Figure 120 : Display Screen for Static network Figure 121 : Enter the Password Cellular connectivity ® Tr u e l a b Q u a t t r o i s equipped with a cellular m o d e m f o r 2 G / 3 G / 4 G connectivity. - Page 65 Typically this happens at the same time as the registration completion. ® Truelab Quattro will be auto configured for data connection Figure 124 : Enter the password on first boot after a SIM change. If a different operator is chosen...
-
Page 66: Figure 128: Screen With Available Network Displayed For Selection
® True Quattro or G) symbol may not appear. Please refer 8.2.5 for manual data connection configuration. 8.2.3. Choosing operators: If you are using a roaming SIM and would like to select a preferred operator, it can be done so. 8.2.3.1. -
Page 67: Figure 130: Access Point Names Screen
8.2.5. A c c e s s p o i n t n a m e s configuration. Access point names(or APN in short) are the pointers which allow ® Truelab Quattro to initiate a data connection once a network is registered. The APN will be different for every service provider. APNs are... -
Page 68: Figure 131: Edit Access Point Screen
® True Quattro H o w e v e r , a m a n u a l configuration may be required at times when a roaming sim is used and provider is choose manually. Go to APNs Screen by tapping 'Access Point Names' on Cellular network settings. -
Page 69: Figure 132: Network Status Screen
ON Bluetooth. The list of available devices will appear. Choose the device you want to pair with. Truelab Quattro is visible to nearby devices while Bluetooth settings is open. Figure 134 : List of Bluetooth connection for available devices ®... -
Page 70: Pairing Instructions
'Forget' on the pop-up that appears. Truelab Quattro is visible to nearby devices while Bluetooth settings is open. Figure 136 : Paired devices list Figure 137 : Pop-up for paired device Date and Time settings 8.4.1... -
Page 71: Figure 139: Date & Time Selection Under Settings Screen
® True Quattro 8.4.3 Scroll down to bottom to the 'Device' section. Tap on 'Date & time'. Figure 139 : Date & Time selection under Settings Screen 8.4.4 If the Analyzer has 4G / Wi-Fi functioning, it can get the date and time from the internet or from the cellular network. -
Page 72: Figure 142: Pop-Up To Set Date
® True Quattro Note: If the Analyzer is switched off and un- used for 30 days or more, please set the date and time before use. The Analyzer will not allow the user to start a test if the date and time are incorrect. Figure 142 : Pop-up to Set Date Figure 143 : Pop-up to Set Time Display settings... -
Page 73: Figure 145: Display Screen
If the available space is 50MB or less, please contact Molbio Support for backup of your test results. Figure 147 : Screen to show Storage Status/Storage Screen... -
Page 74: Switching Off The Analyzer
® True Quattro Battery status 8.7.1 Tap the Settings button in the Status Screen. This will open the Settings Screen. 8.7.2 Tap the ' System' button. Figure 148 : Settings Screen to select Battery option 8.7.3 Scroll down to bottom to the 'Device' section. -
Page 75: Maintaining The Truelab ® Quattro
Cleaning instructions ® ● If required, wipe the exterior of the Truelab Quattro micro PCR Analyzer with a dry, lint-free cloth ensuring that no fibrous material adheres to the surface of the Analyzer. ● Do not spill water or any other solution on the surface of the Analyzer. - Page 76 The battery cell case will be breached at the extreme, hazardous materials may be released. Moreover, if heated strongly by the surrounding fire, acid gas may be emitted. ® 11.6 Truelab Quattro complies to below list of standards Sr.No Standard/Reference ID Title of Standard/Regulation ISO 14644-5:2004...
-
Page 77: System Messages And Troubleshooting
12. System Messages and Troubleshooting ® The following section details some errors you may encounter while using the Truelab Quattro Real Time Quantitative micro PCR Analyzer, and provides you with the reason for the error and possible solutions to it. -
Page 78: Figure 154: The System Status Screen With Sub-Systems
Figure 154 : The System Status Screen with sub-systems If there are issues with connectivity that you are reporting to Molbio Support, tap on 'SIM Status' tab. This takes you to the SIM Status Screen where details on the cellular network and signal strength are available. -
Page 79: Figure 157: Login Invalid Prompt
3. Load a different chip or the same chip in case not loaded before. If the same message r e a p p e a r s , p l e a s e contact Molbio support team. ®... -
Page 80: Figure 160: Initialization Error
Solution: Please attempt the test again. Contact Molbio support team Figure 160: Initialization error if the problem persists. System Message Reason: “Chip is already used”,... -
Page 81: Figure 164: Molbio Support Server Status
The Analyzer could not timed out.” connect to the Molbio Support Server. Solution: Contact Molbio Support. Figure 164: Molbio Support Server Status System Message: Reason: “Could not connect The Analyzer was unable to to printer.” s u c c e s s f u l l y i n i t i a t e Bluetooth pairing with the printer. -
Page 82: Figure 167: Error 1 Screen Status
Solution: Please attempt the test Again Figure 167: Error 1 Screen Status without entering patient data by pressing Repeat button. Contact Molbio’s support team if the problem persists. Error 2- Test stopped Reason: Manually. This error is displayed when... -
Page 83: Figure 169: Error 3 Screen Status
Solution: Please attempt the test again without entering patient data by pressing Repeat button. Figure 169: Error 3 Screen Status Contact Molbio’s support team if the problem persists. Error 4- Runtime Error Reason: This error is displayed when run data capture/analysis is incomplete. -
Page 84: Figure 171: Error 5 Screen Status
Control Probe T (melting temperature) is not detected or out of specified range Solution: Repeat the run with same elute using another chip. Contact Molbio Figure 172: Error 8 Screen Status support team if the problem persists. Temperature Calibration Reason:... -
Page 85: Glossary
® True Quattro 13 Glossary Absolute quantification: An assay used to quantitate unknown samples by interpolating their quantity from a standard curve (as in the determination of the viral copy number). Amplicon: The amplified sequence of DNA obtained by the PCR process. This is also called the “PCR product”. Amplification Plot: The plot of cycle number versus fluorescence signals which correlates with the initial amount of nucleic acid during the exponential phase of the PCR. -
Page 86: References
® True Quattro curve. It should be above the highest baseline signal level. It is assigned for each run to calculate the Ct or Cp value for each amplification. It may be necessary to have separate different Ct thresholds for each dye used in the reaction. - Page 87 ® True Quattro Keep away from sunlight Catalogue number Caution CE mark Electrostatic Sensitive Device Non-sterile Device for near-patient testing Unique Device Identifier ®...
- Page 88 ® True Quattro This Way Up THIS WAY UP MEDICAL Medical Electronic Rush ELECTRONIC RUSH Fragile, handle with care Keep Dry Fully automatic operation Portable Rapid sample prepping Mains / rechargeable battery powered ® True nat microchip based Real Time PCR Techonology GPS compatible Cellular compatible Wi-Fi compatible...
- Page 89 ® Molbio Diagnostics Private Limited Registered Office & Manufacturing Unit: Plot No. L-46, Phase II D, Verna Industrial Estate, Verna, Goa - 403 722, INDIA www.molbiodiagnostics.com Email: sales@molbiodiagnostics.com (Sales Enquiries) customersupport@molbiodiagnostics.com (Feedback and Customer Support) Qarad EC-REP BV, Pas 257, 2440 Geel, Belgium...
Need help?
Do you have a question about the TRUELAB Quattro and is the answer not in the manual?
Questions and answers